 by
by We all use Excel, and it’s a great way to store information, so today, we’ll explore how to fetch data from an Excel file by using the “list rows present in a table” action.
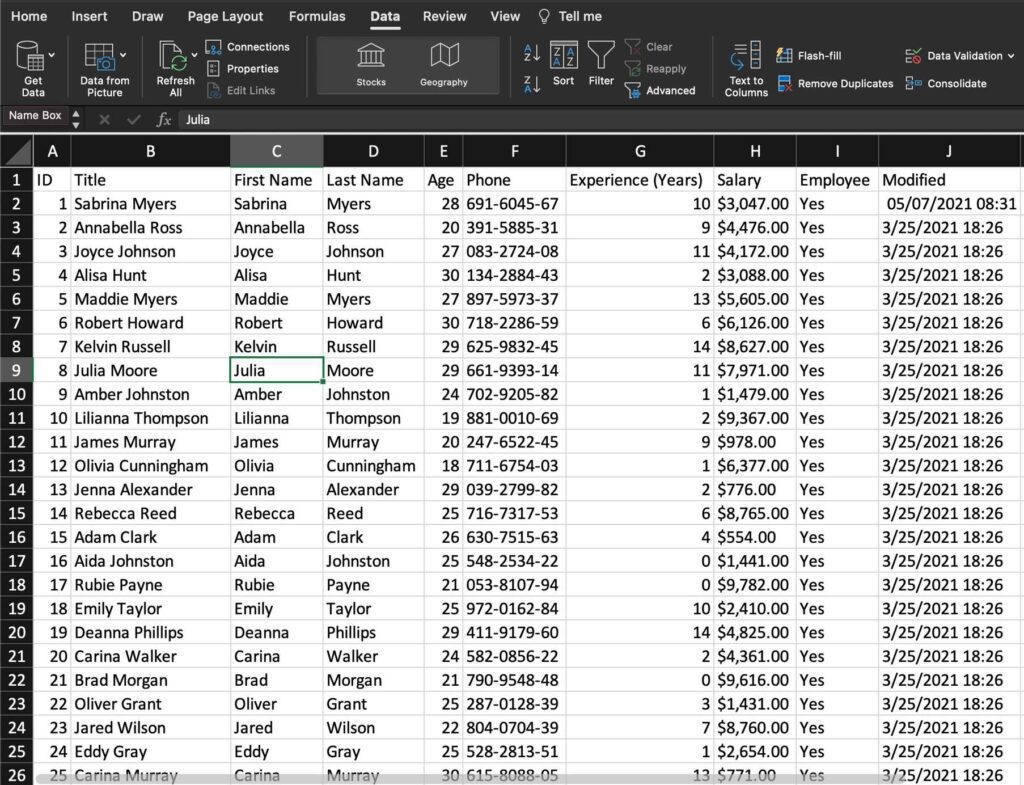
Before we start, it’s important to note that Power Automate requires that the information is inside a table in Excel. There are multiple reasons why Microsoft did this, but the most important is that Excel files are a “sandbox” for us to play, and Power Automate needs an identifier to understand what data we want. Also, it makes it easier to insert, update and delete columns.
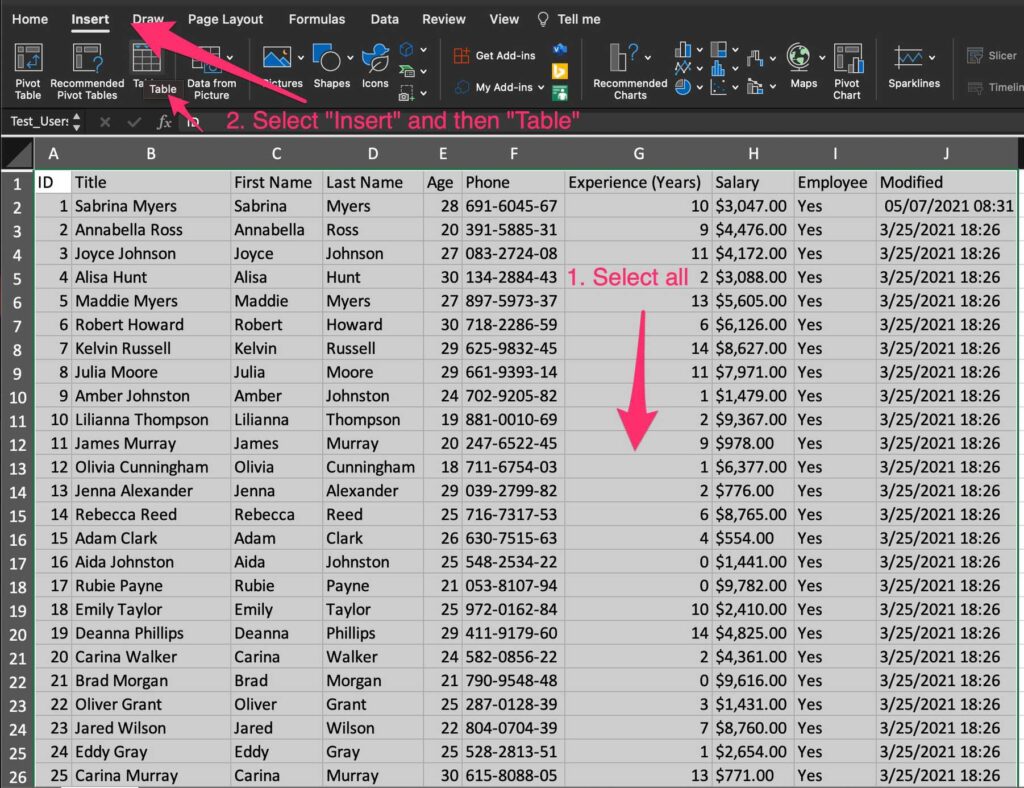
Here’s how to do it. I’m using Excel for macOS, but it works the same way in the Windows version. So first, select the data.
Then press “Insert” and then “Table.”
Don’t forget to select “headers” if your data has headers.
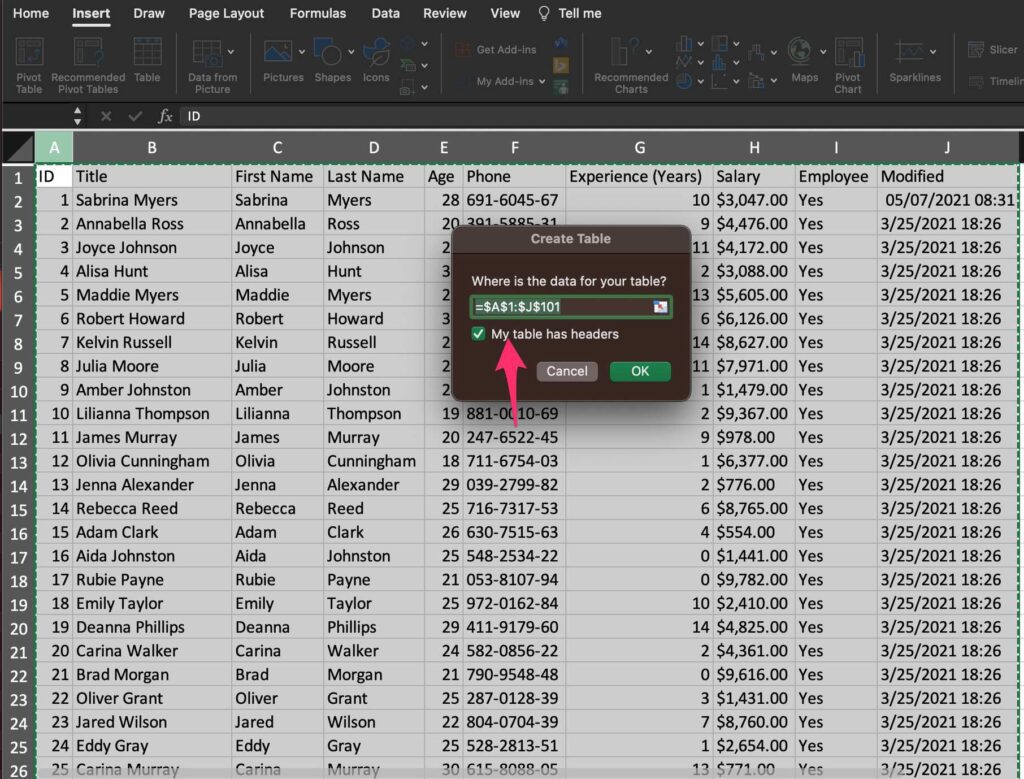
Here’s what it looks like.

Let’s look at how to use it with that out of the way.
Where to find it?
To find it, you can search for the “List rows present in a table” action or by going to “Standard,” “Excel Online.”
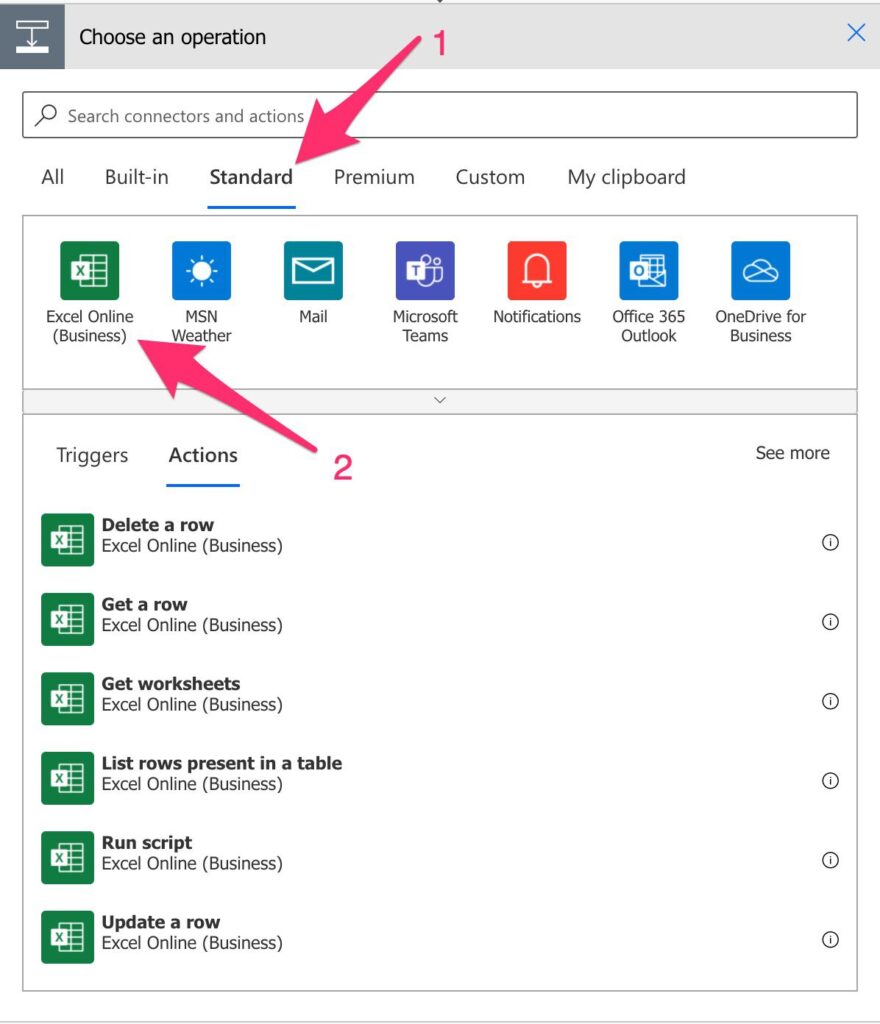
Then select “List rows present in a table. “
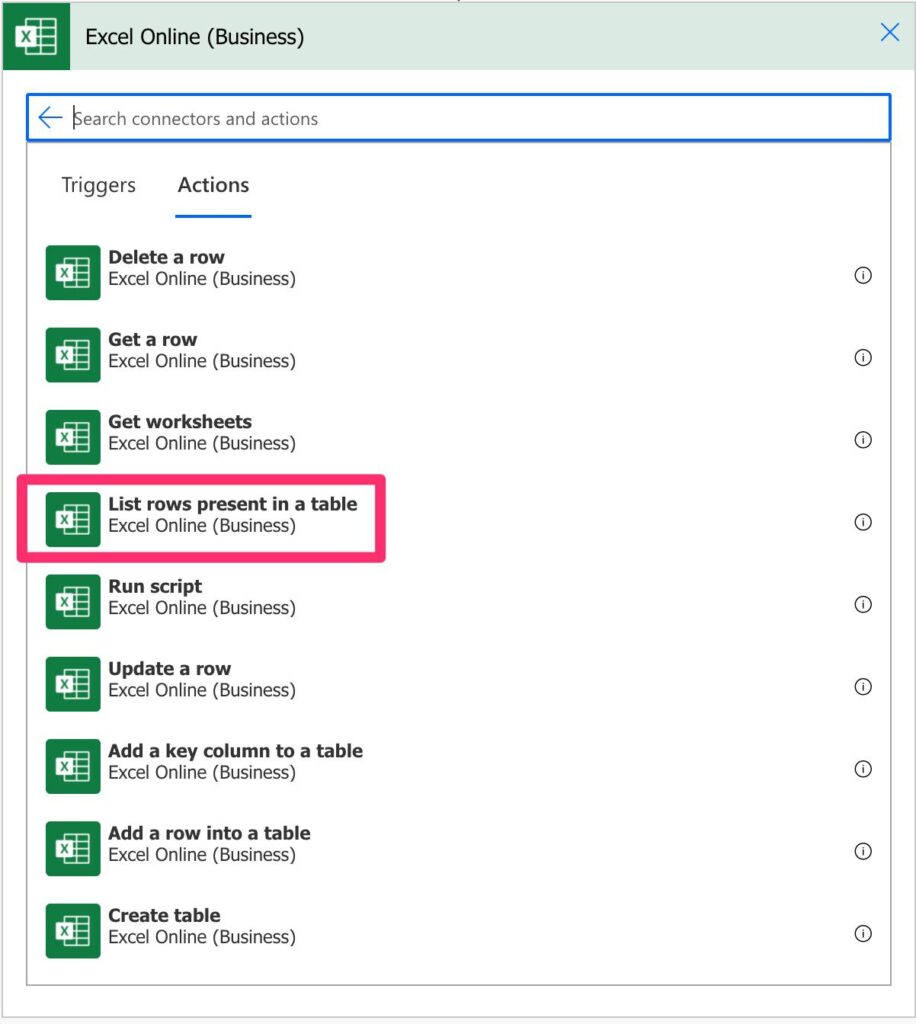
Here’s what it looks like:

Power Automate tends to save the most common actions on the main screen, so check there before going through the full hierarchy. Also, you can use the search to find it quickly.
The files you can use here can be in a document library in a SharePoint site, OneDrive, Teams, and more. That’s why in the “Location,” you’ll see groups, sites, and your OneDrive.
Usage
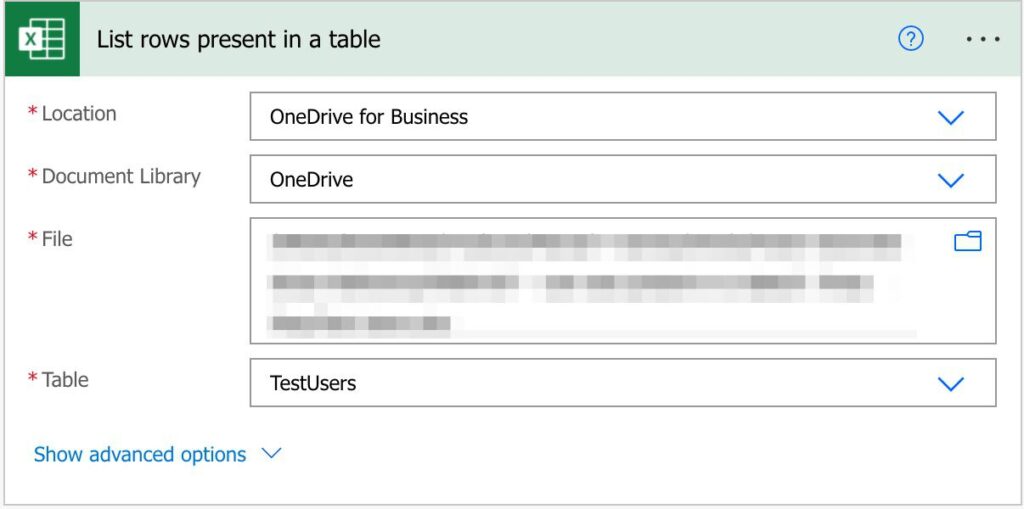
To fetch the Excel data, we need first to tell Power Automate where it is. To do that, we need the Location (SharePoint Site, OneDrive, etc.), the Document Library (most of the locations will only have one, but it will display all that you created), and finally, the file. After that, you’ll be able to select what table you want to fetch the data inside the file.
Let’s look at an example:
Now, what if you don’t want to get all data? If the Excel file is enormous, it’s much better and faster to get only the information we need. So to do that, we can expand and get additional parameters.
The way that Excel Online and Power Automate are integrated is quite impressive. We can do a lot with the actions that we have available, but focusing on this one, we can:
- Filter the records by any rule that we want.
- Order the results before they come to us. Ordering doesn’t affect the Excel file; only the data is returned to you.
- Limit the number of records to be fetched. For example, if we only need the first ten, why fetch 10 000?
- Limit the columns that we want. We can also fetch only a set of columns, making the information easier to parse and the overall Flow faster to run.
Filter query
Let’s look at an example. Let’s say that we want to fetch people in the Excel file that are 25. Of course, we could bring the whole dataset and filter it, but it’s a lot faster to build the OData query like this:
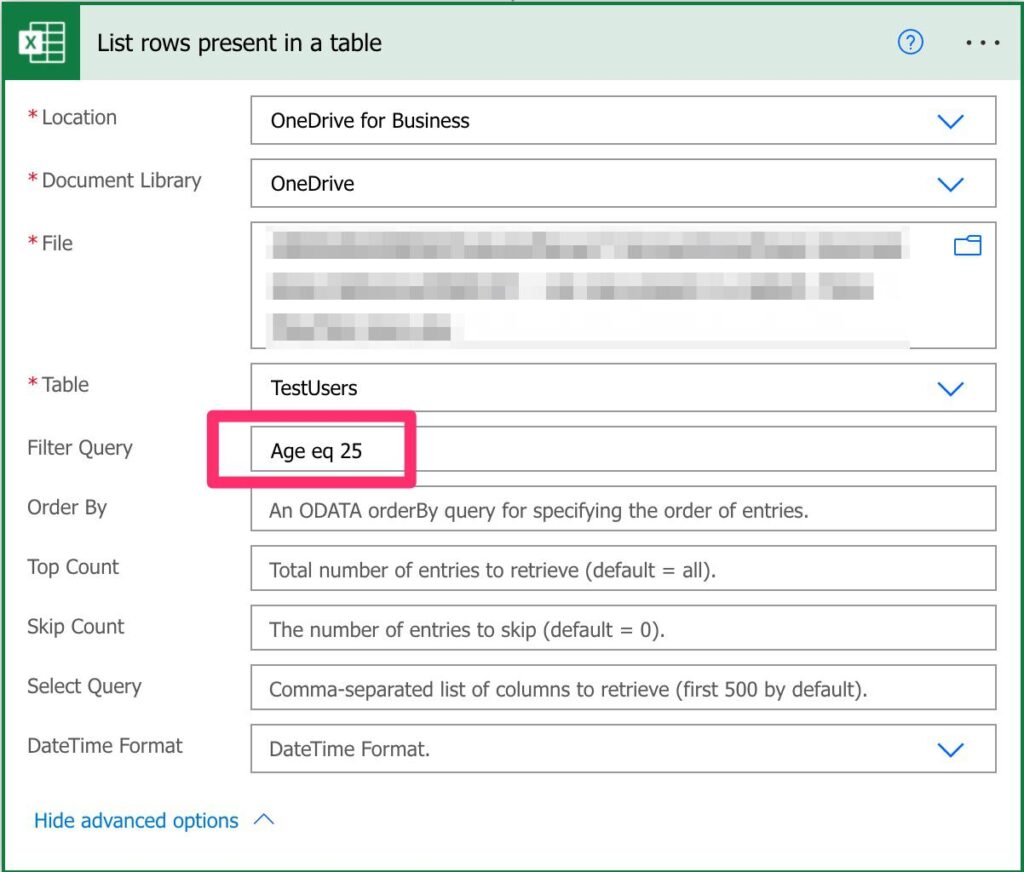
So instead of the entire dataset, we only need to look at a small part.
There are a lot of limitations to the OData operators supported. Currently only:
- eq
- ne
- contains
- startswith
- endswith
It limits a lot that we can do, and it burthens the processing a lot since we need to fetch massive datasets when we could easily restrict the data, but I’m sure Microsoft will solve this quite soon.
Order by
Having the elements ordered is a blessing since it’s a time-consuming operation that is done for us. For example, if we want to order by title.
Title asc
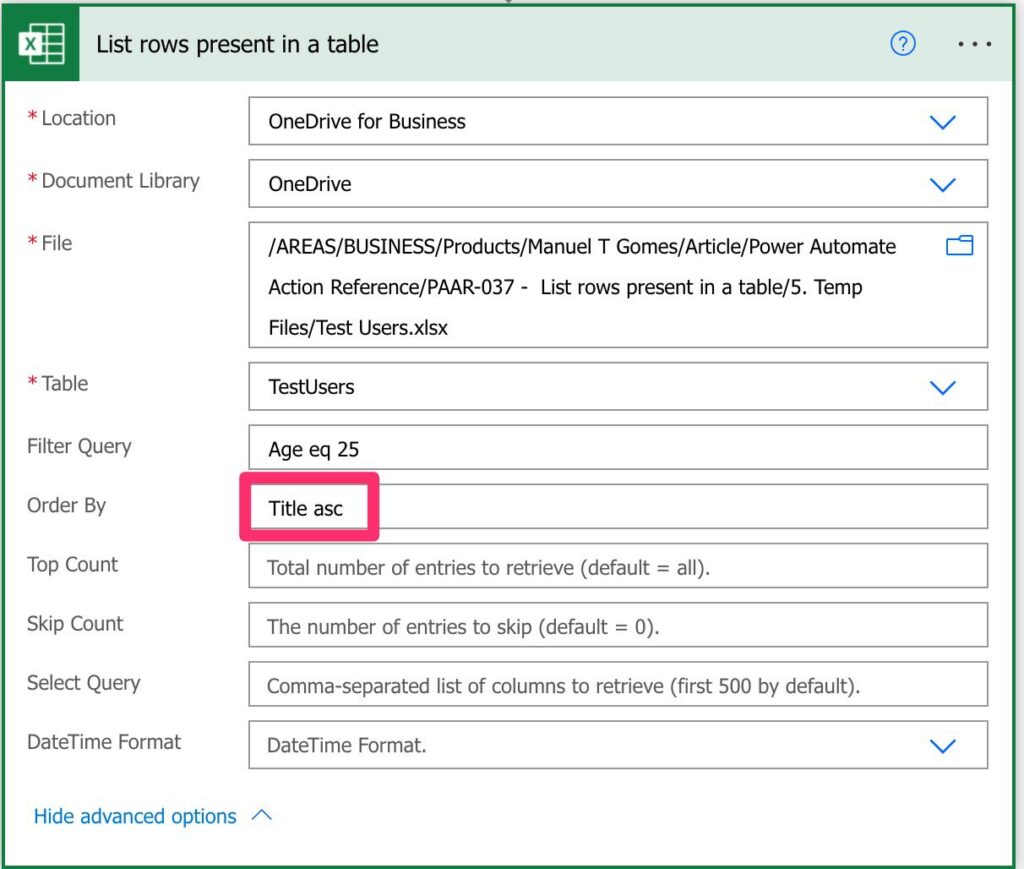
You can order ascending (asc) or descending (desc).
Top count
The top count may not be the most helpful operation, but the ordering enables us to do advanced things with only a few lines. So, for example, if you want to get the top 10 best-paid people in the company, you only need to do the following:
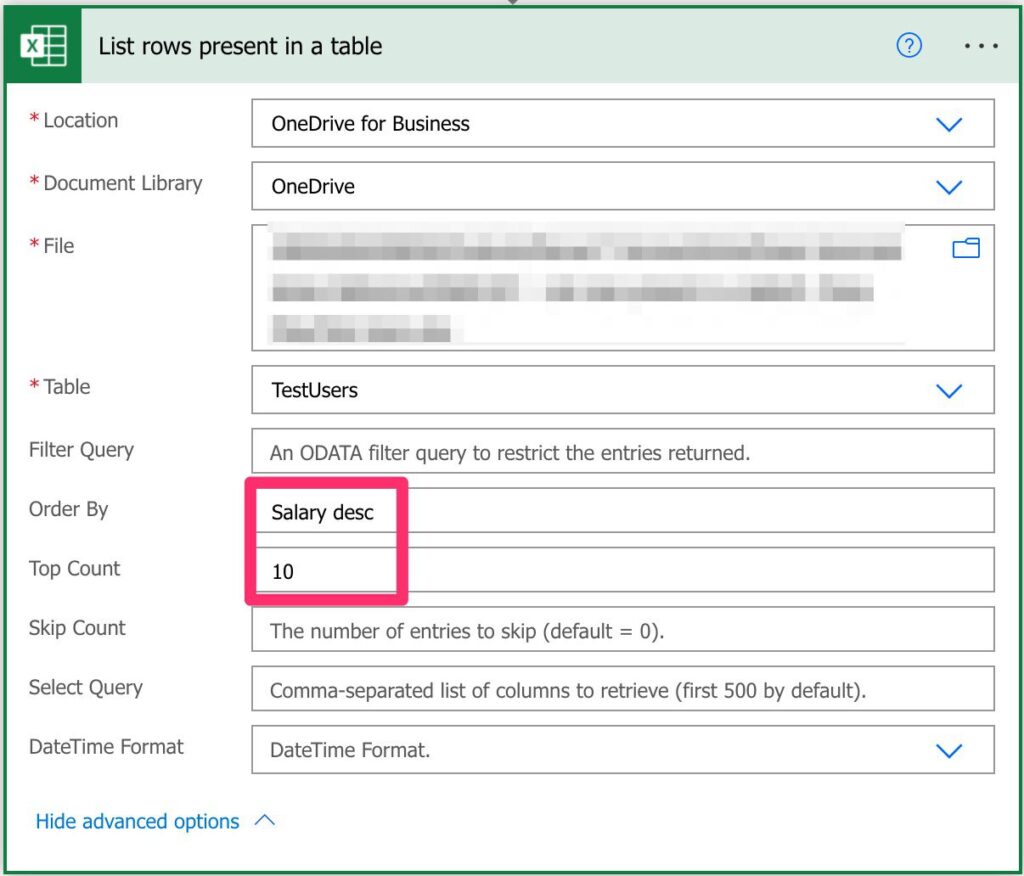
It’s simple and efficient. Notice that the limitation by the number of records is done after the ordering.
Skip count
It does what it says. After all, filtering and ordering it will skip X number of elements. It’s not quite common to use, but you have the option.
Select query
I have to say that having the “limit columns” or something similar would be a lot easier to understand. What it does is limit the columns that are returned. So, for example, if we want to know the top 10 best-paid people in the company but only the name, we can do the following:
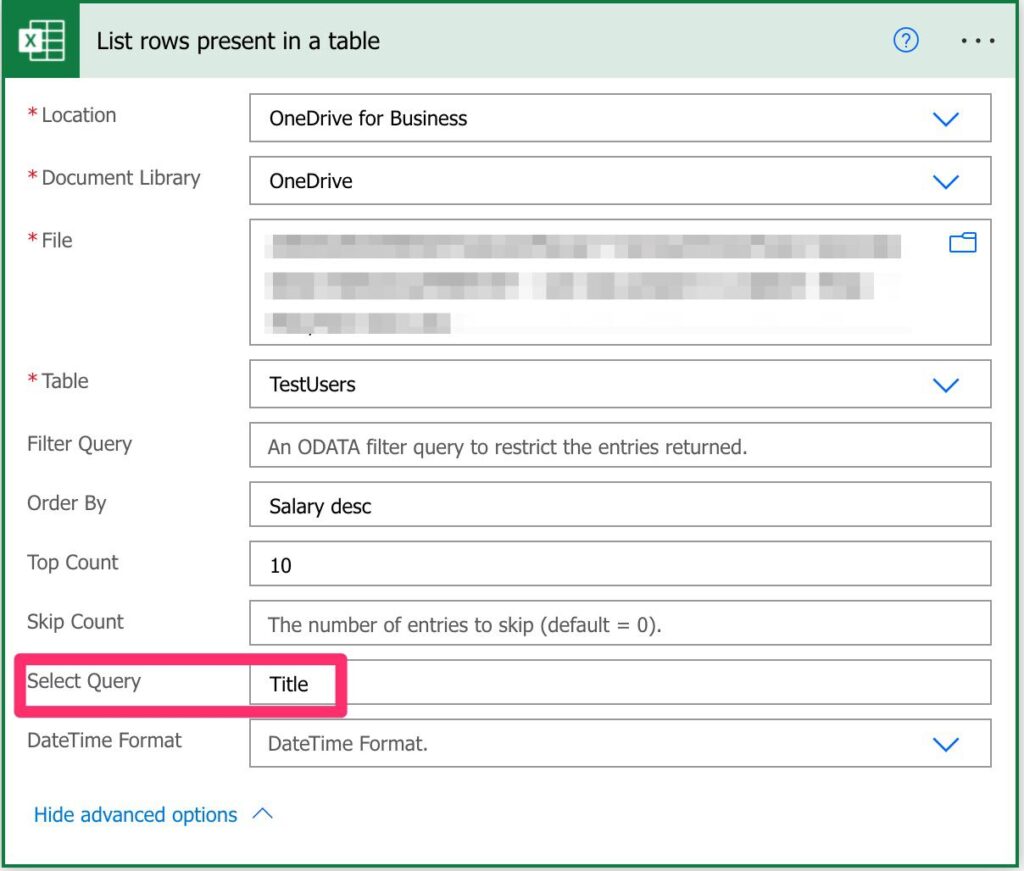
As you can see, we can do complex actions with only a few configurations and save time.
Datetime Format
The “date-time format” option doesn’t do quite what you expect it. One would expect that we could define the format we prefer, and it would convert it for us. But, in this case, we can only select from those two options.
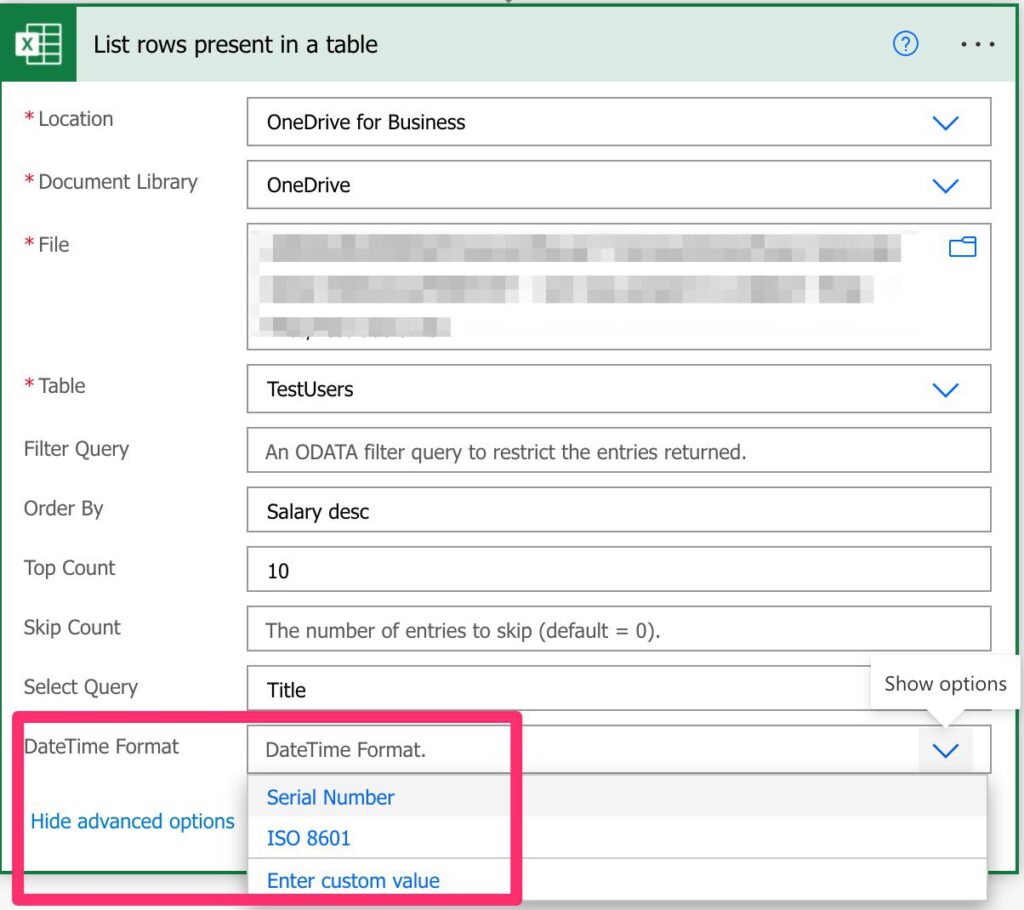
One thing I need to warn you is that I think it can be a bug. Even if I select ISO 8601 (year-month-day), if the dates in Excel are in another format, that will be kept. I think that’s something to do with interpreting the field as “Date” or “String”, but I wanted to warn you about this. So please test the return of the data and see if it’s correct.
Limitations
You can only fetch information that is in a Document Library. So, for example, attached items in SharePoint list items need to be fetched, saved, and only then can we access them.
Also, we can only parse one table simultaneously, even if the Excel file has multiple.
You can also only import data from Excel Workbook (xlsx) file. This limitation is a bit nasty because it’s not clear, but if you’re getting the following error, that’s probably the issue:
Could not obtain a WAC access tokenYou can’t also define the date-time that you want. You either get the serial number or in ISO 8601 (nice name right 😀) that is something like this “2021-01-01” (first of January 2021). Here are the details on Wikipedia.
Finally, not all OData operators are supported. For example, if you get the following error:
Invalid filter clause: unsupported operation. Only single 'eq', 'ne', 'contains', 'startswith' or 'endswith' is currently supported.
clientRequestId: 2af60493-9adb-419b-b60e-3ee443cd7524
serviceRequestId: eb76f042-302d-4f46-b82a-de2b653c3e6a;258f1495-a336-4799-9f68-f43f04ddf9df;09555ac5-b350-44a0-b788-76bf77572efd;476b7c6b-1082-4f87-b6fa-5e515e6048e0
So you need to fetch the whole dataset and filter it in Power Automate. It’s trivial but wasteful.
Recommendations
Here are some things to keep in mind.
Limit as much as you can
Since we can limit the information, the number of rows and columns, we should take advantage of it. Less data means faster Flows and easier Flows to debug if something goes wrong.
Use ordering
Never sort on your Flow when you can have it “for free” with a couple of words. Only do it if you’re changing the dataset after you fetch it, but take full advantage of this fantastic feature.
Check if the locations are the same.
If you’re updating the data, please make sure that both actions have the exact “Location”, “Document Library,” and “Table”. These errors are pretty silent, especially if the files are the same. However, I see this happening often, so be aware of it.
The order matters
Microsoft ordered the fields in the UI like this for a reason. The “Filter Query” will be done before the “Order by” and the “Order by” before the “Top Count”. Be aware of the order since your interpretation of the data may differ from the one returned in action.
Name it correctly
The name is super important in this case since we’re getting the data from a file “somewhere” in the organization. Always build the word so that other people can understand what you are using without opening the action and checking the details.
Always add a comment.
Adding a comment will also help to avoid mistakes. Indicate where the path comes from, for example, if it’s calculated and how. Also, what’s the intention of getting this information? It’s essential to enable faster debugging when something goes wrong.
Always deal with errors.
Have your Flow fail graciously when performing a “List rows present in a table” action and notify someone that something failed. It’s horrible to have failing Flows in Power Automate since they may go unlooked-for a while or generate even worse errors. I have a template that you can use to help you make your Flow resistant to issues. You can check all details here.
Back to the Power Automate Action Reference.
Photo by Ricardo Gomez Angel on Unsplash


Hi @Gomes, thank you for the article.
I am trying to read file as soon as it has been uploaded in the sharepoint folder. Is there a way to get the content of file first.
I have used the above mentioned filter but how can i provide the file name since it has to fetch each new file when it is uploaded in to Sharepoint, in the Table field I have used the File content.
Hi, Thank you for this.
An important note that is missing – I just found out the hard way, running x failed tests, getting back syntax errors, and trying all kinds of adding ” or ” or brackets: the name of the Excel column name cannot have empty spaces in the name but should be one string, so not:
“Name Name2” but only “Name” or Namename2″.
Devil is in the details.
I’m still having syntax errors
Syntax error at position 3 in ‘2wk’.
inner exception: Syntax error at position 3 in ‘2wk’.
clientRequestId: 19065dc3-2dd3-40fb-933a-1de7e2e7e5e3
the name of the column is 2wk, and i cannot get it to good thru
I’m having the same issue with mine. The filter is TaskID eq {planner value id} from dynamic content.
Every time i test run, i get a syntax error in the taskid position xx (it’s different everytime)
Another important limitation of the List Rows action is that it “respects” any autofilters set in the Excel file. This is often problematic when you have shared files where other users are setting filters on your source tables using the default view instead of their personal views (which most people seem to do). The action really needs an option to be able to ignore any filters set in the file (essentially using its own personal view and clearing filters). As far as I can tell, the only solution right now is to create a script that clears filters on the table and call that script from the flow before listing rows. But, I believe that will clear filters for all users which may not be desireable…