The integrations between Power Automate and Power Apps are exceptional, and you can easily trigger Flows from Power Apps. You can even provide information from and to Power Apps. All of this is thanks to the "PowerApps" trigger.
Before we start, let me say that It’s probably my OCD, and I admit it, but I wished that Microsoft’s team would change to add a space in the title. The official name is "Power Apps" and not "PowerApps". You can complain in the comments if you want 😀.
Let's check how to use it.
Where to find it?
To find it, you can search for the "PowerApps" trigger.
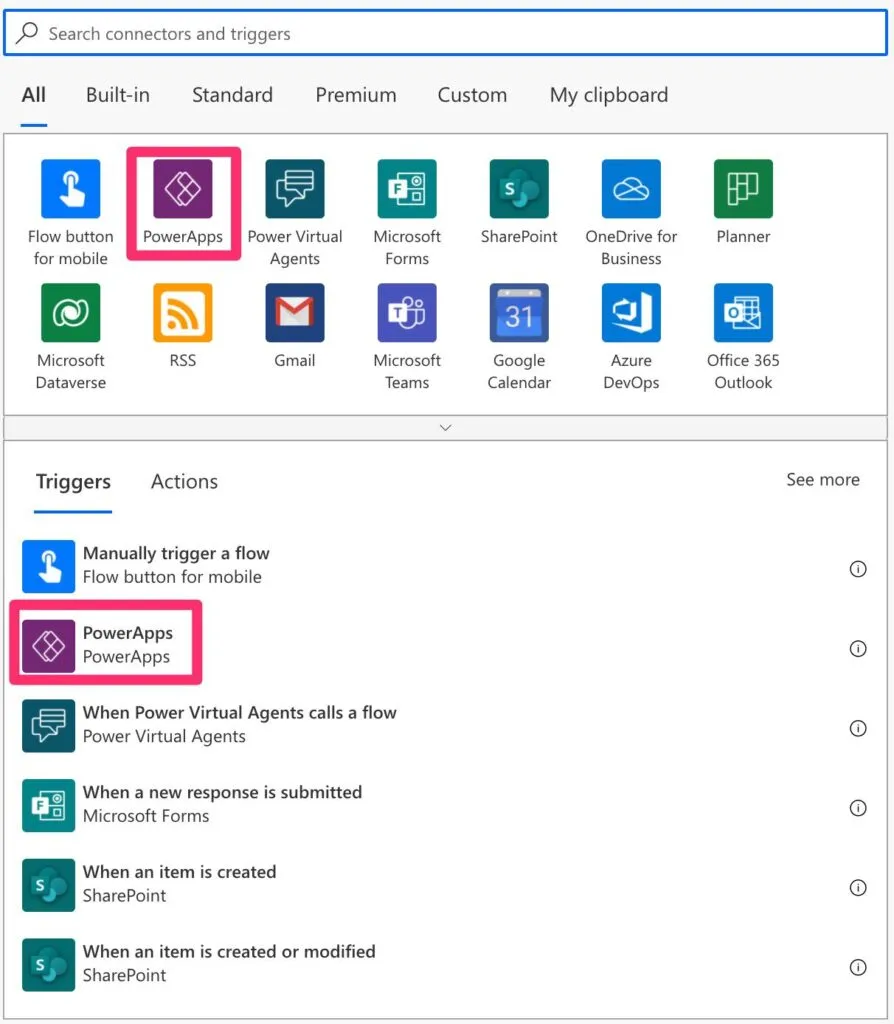
Here's what it looks like.

Power Automate tends to save the most common triggers on the main screen, so check there before going through the full hierarchy. Also, you can use the search to find it quickly.
The "PowerApps" trigger is so simple that there's nothing necessary to configure.
Usage
Let's check a real example to make things clear. I have a Power App to control the ideas and state of the articles I publish here. I have a button on my Power App that creates the folder structure to edit the images and store the information related to the article.
Let's break things into two parts:
- The Power App and how to call it.
- The Power Automate and what we get.
How to trigger it on Power Apps
I recommend creating a simple Flow with the "PowerApps" trigger and any other action to make things easier. Then, the idea is to save it and have a name to give it. In my case, I call it "Create folder structure".

Now on Power Apps you can call the Flow like this:
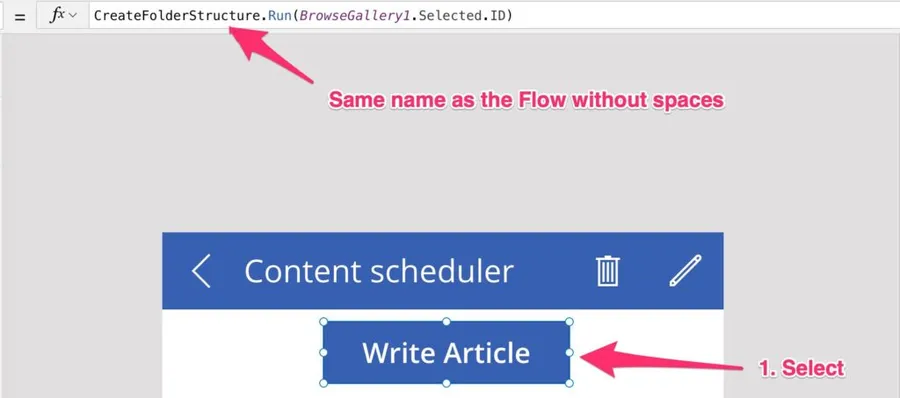
Here are a few things to keep in mind:
- The Flow name may contain spaces, but Power Apps will show it without spaces.
- You can provide parameters that you want to send to your Flow.
- You don't need to define them before on your Flow. Notice that the "PowerApp" trigger doesn't have configuration, so the Power Platform deals with all this complexity for you.
- Remember to select the button. You're editing the "OnSelect" action by setting it, so what happens when you click it?
If you get an error, don't stress. It means that you need to tell Power Apps where your is Flow. To do that, select the button > "Action"> "Power Automate".

Power App will show you a list of the available Flows.

After you pick the one you want, you'll see Power App working its magic.

When all the pipes are connected, you'll see the following:

How can you provide the parameters you need? To do that, let's create a new "Compose" action called "New Parameter" and then select the "Ask in PowerApps."
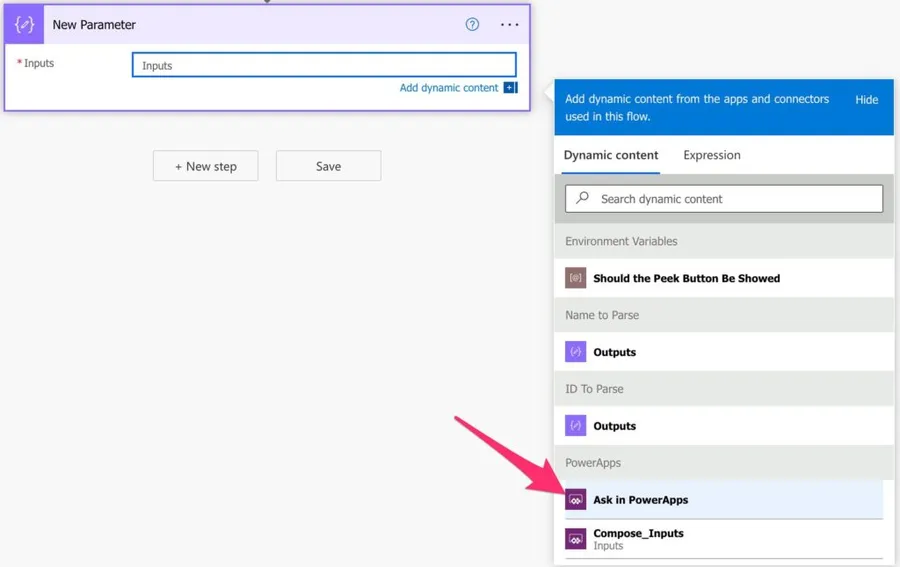
Here's what the list looks like.
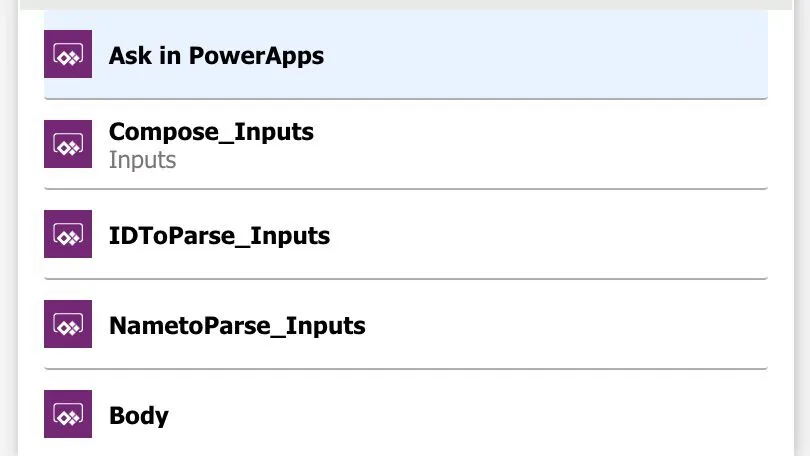
Here's what the list looks after.
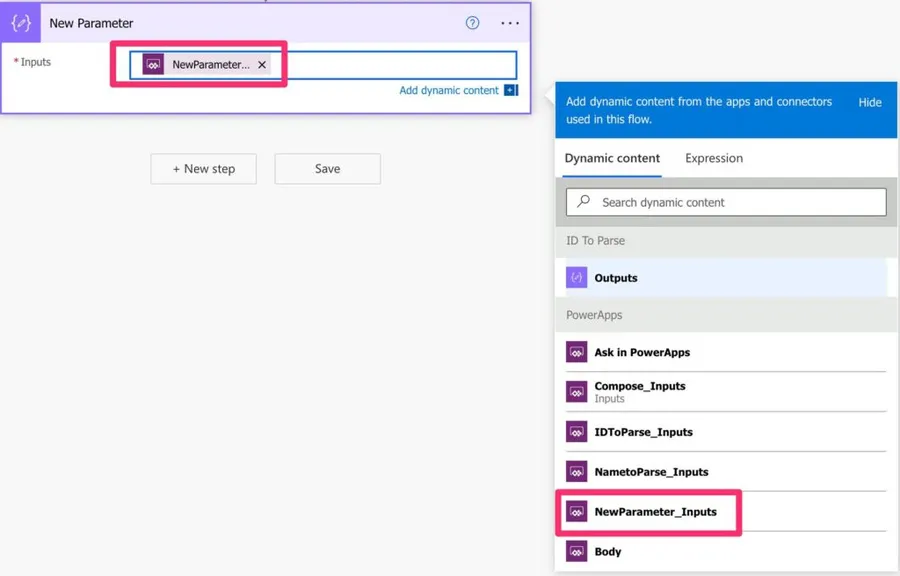
As you can see, Power Automate added the parameter, and it even inherited the name of the "Compose" action. It's a great way to "declare" new input parameters and name them as you want. I've added a few before using the same strategy.
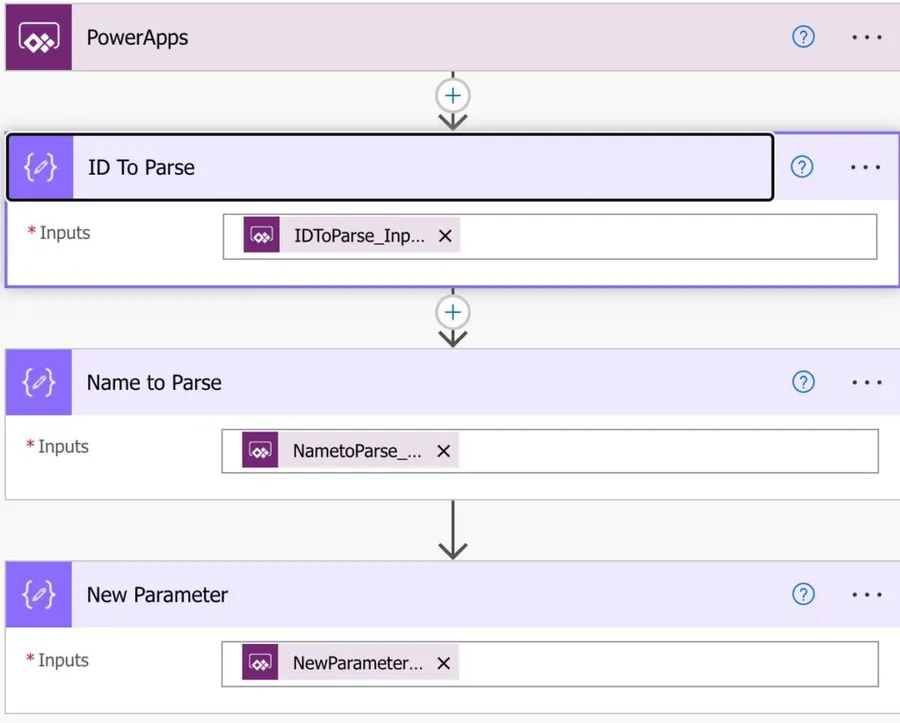
Now let's look at the Power App. If the "Run" still returns an error in the number of parameters, repeat the steps above to add the same Flow. After that, you'll see something like this.

Simple right? I like the way Microsoft implemented this making all the complexities simple.
How to get the information in Power Automate
Now that we have our Power App configured, we need to get the information on your Flow. Again, Microsoft did a fantastic job removing the complexity, and all is automatic. If you add a "Compose" action after your trigger, you can see the parameters you defined in the previous step.
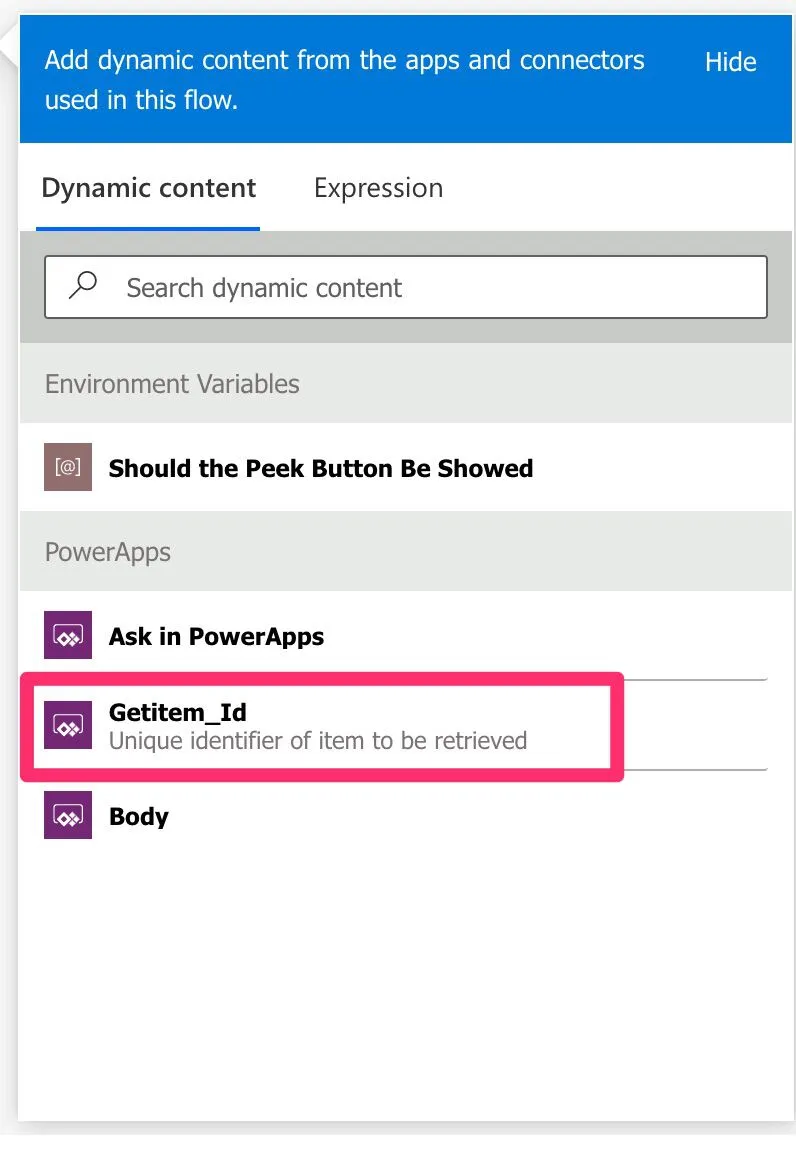
You'll see more here if we define more parameters in the previous step. All of it is automatic.
Outputs
The trigger returns a lot of information in a JSON format, although the conversion from JSON is done automatically for you. Here's an example:
{
    "headers": {
        <redacted>
    },
    "body": {
        "Getitem_Id": 716
    }
}
I'm removing the headers part since it's not very interesting to us. The body is simple and contains the information we provide in the Power App.
Limitations
There aren't any documented limitations for this trigger, but if you have one, please let me know.
Recommendations
Here are some things to keep in mind.
Use solutions
Solutions made things a lot easier and organized, especially where you have integration between platforms. For example, suppose you keep all Flows in your "My Flows" section. In that case, things will become unmanageable quickly, so start organizing things earlier than later to avoid getting lost in the middle of test and production Flows.
Name it correctly
The name is super important since we can get the trigger from anywhere and with anything. Always build the word so others can understand your use without opening the action and checking the details.
Always add a comment.
Adding a comment will also help to avoid mistakes. Indicate what you expect, why Power Automate should trigger the Flow, and the data used. It's essential to enable faster debugging when something goes wrong.
Back to the Power Automate Trigger Reference.
Photo by Alora Griffiths on Unsplash


No comments yet
Be the first to share your thoughts on this article!