
If you've been building SharePoint lists for a while, you've probably hit that moment where a Choice column just doesn't cut it anymore. Maybe your dropdown options keep growing, or you need the same set of values across multiple lists. That's exactly where lookup columns come in, and once you understand them, they change how you think about organizing data in SharePoint.
Another way that these are useful is in case you want to link something to multiple items. For example, if you have a class and want to link all students to that class. Then you would have a list with all the classes and for each item, you could link to multiple students.
Looks complex but it's not. Let's explore more deeply what lookup columns are and how you can take advantage of them.
What Is a Lookup Column
A lookup column connects two SharePoint lists by pulling values from a source list into your current list. Think of it as a reference link. Instead of typing the same values over and over, you point to a single source of truth.
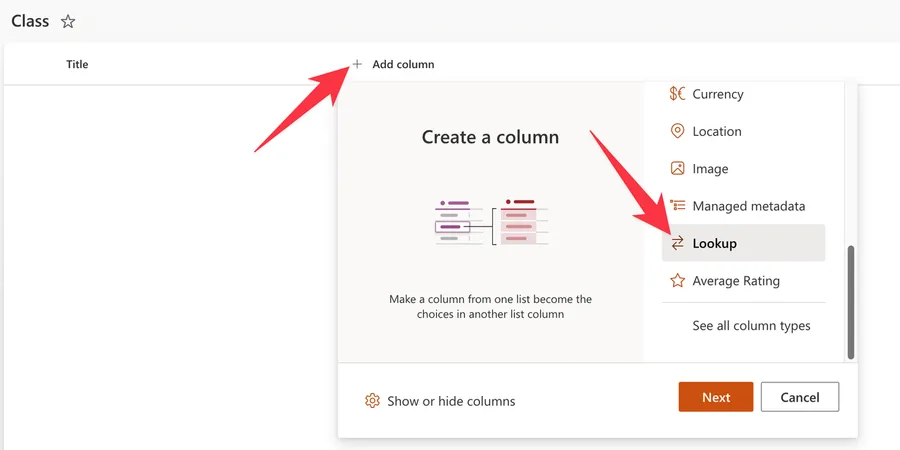
To create one, go to your list, select Add column > Lookup, and then choose which list and column to pull data from. The source list must be on the same site - cross-site lookups are not supported.
In forms, the lookup appears as a dropdown populated with values from the source list.
For some unknown reason Microsoft decided to show the list of lists unsorted, so you need to check the list and try to find it among the other lists. This is not a big deal if you have 2 to 3 lists, but if you start having more, things get messy fast.
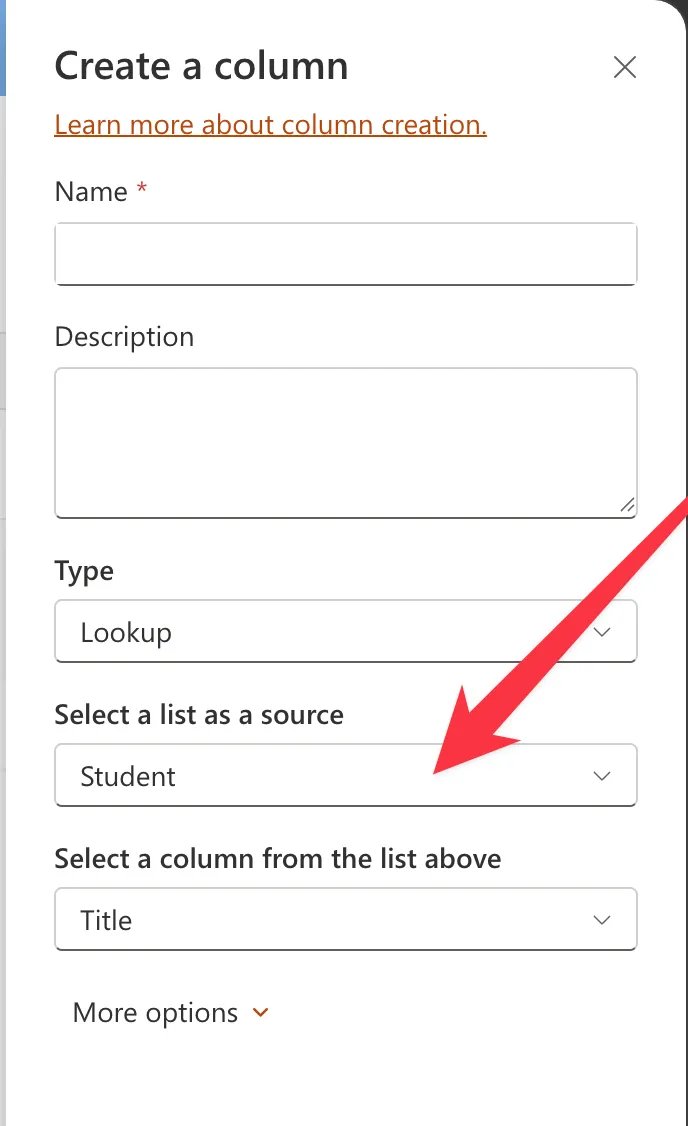
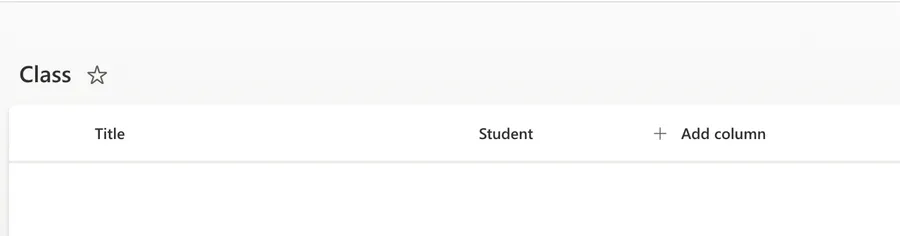
Notice the "Title" column. This maps to the column on the "Student" side, but you can pick any column that makes sense to you. It will be displayed in the list like this:
Notice that you will see the name of the column with the name that you gave it, not with the name of the column on the "other side". So you will see "Student" because you selected it when you created the column, but you can map it to "Title".
Additional Columns
Here's where lookups get really powerful. When creating a lookup, click "More options" and you'll see checkboxes for other columns from the source list. Check them, and they appear as read-only columns in your target list, automatically populated with the matching data.
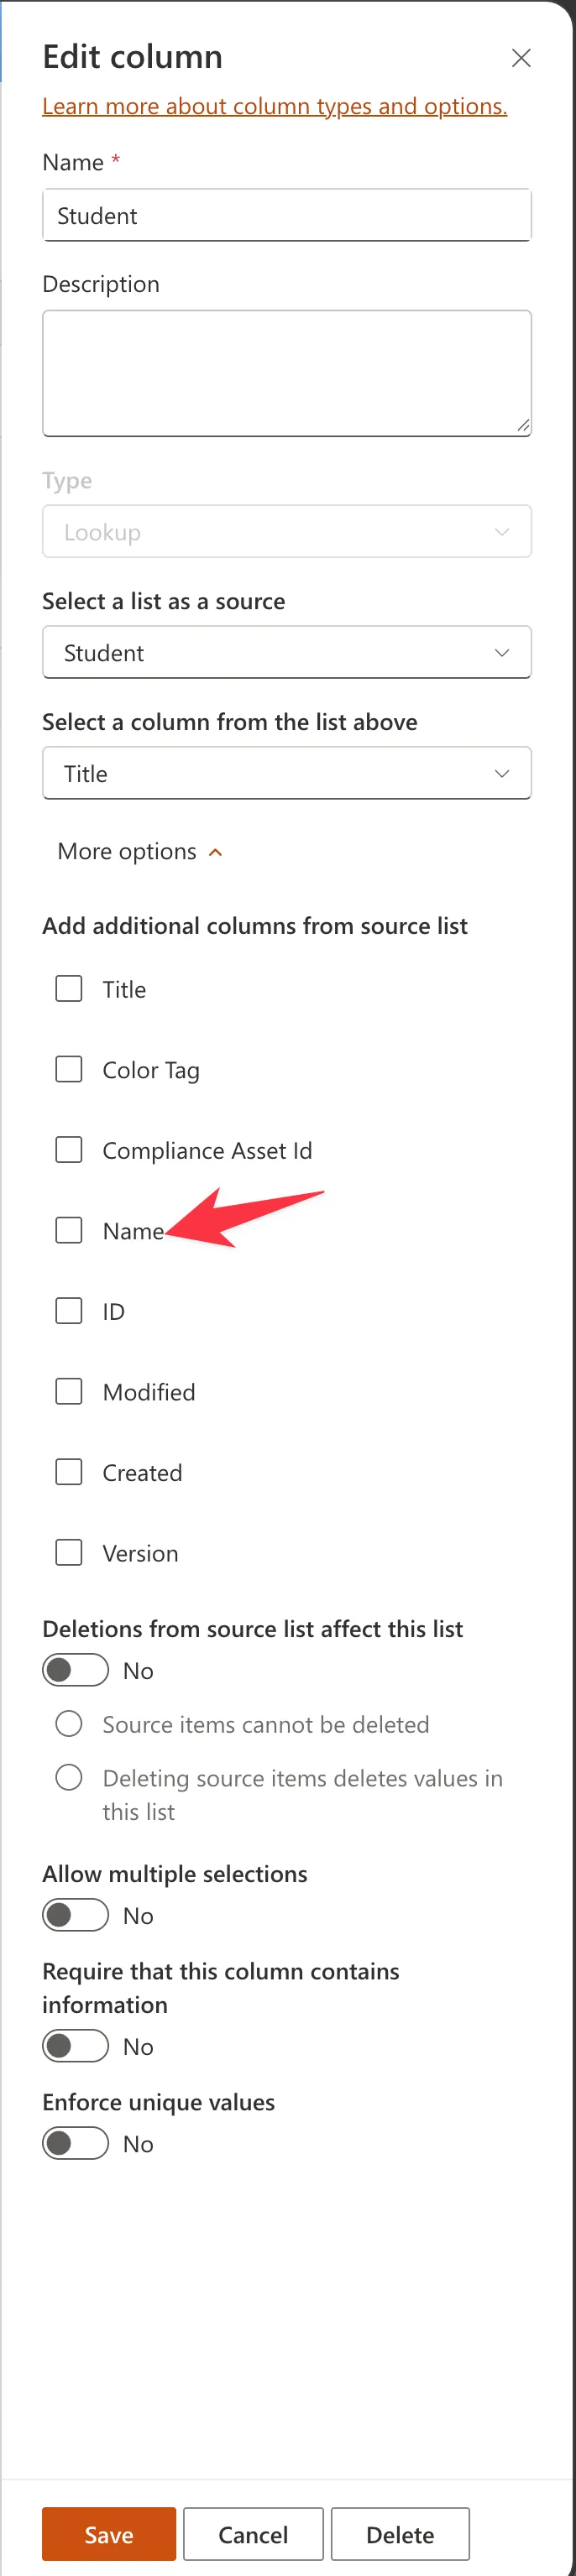
Let's select the full name. Here's the result.

One critical gotcha: each additional column counts as a separate lookup column toward the 12-lookup threshold per view. Pulling 4 additional columns from one lookup uses 5 of your 12 slots, not 1.
Lookup Column Options
Under "More options" you'll also find a few important settings that control how the lookup column behaves.
Deletions from source list affect this list controls what happens when someone deletes an item from the source list that is referenced in your list. When turned on, you get two choices:
- Source items cannot be deleted - This blocks deletion of any source item that is still referenced. You'll get an error until all references are removed first.
- Deleting source items deletes values in this list - This removes the lookup value from your list items when the source item is deleted. The items in your list stay, but the lookup field becomes empty.
Allow multiple selections lets you pick more than one value from the source list in a single item. This is useful when an item relates to multiple source items, like a class that has multiple students assigned.
Require that this column contains information makes the lookup field mandatory. Users won't be able to save a new item without selecting a value from the dropdown.
Enforce unique values ensures that no two items in your list can reference the same source item. This is useful for one-to-one relationships, like assigning a unique advisor to each student.
What Is a Reverse Lookup
A reverse lookup flips the perspective. Instead of asking "which class is this student in?", it asks "what are the students enrolled in this class?"
To achieve this, you can do exactly the same as before. One important thing to keep in mind: if you add a link on "one side" it doesn't get updated on the other side automatically. You need to work on both links since they operate independently.
This is quite useful for bi-directional links where you need to have information linked between lists in multiple directions and for multiple objectives.
Limitations
Lookup columns are powerful, but they come with constraints you should plan around:
- 12-lookup threshold per view: A view can only contain 12 lookup-type columns. This includes Person/Group columns, Managed Metadata, and even the built-in Created By and Modified By columns, which already take 2 of your 12 slots.
- Same-site only: Lookups can only reference lists within the same SharePoint site.
- Dropdown performance: Source lists with thousands of items make the dropdown slow and hard to use. Keep source lists under a few hundred items for the best experience.
- Recreating a source list breaks lookups: Even if the new list has the same name, the internal ID is different. All lookup columns referencing the old list become broken.
- No cascading dropdowns natively: SharePoint doesn't support dependent dropdowns where one lookup filters another. You'll need Power Apps or custom development for that.
To work around the 12-column threshold, distribute lookup columns across multiple views or replace Managed Metadata with Choice columns where possible.
Final Thoughts
Lookup columns are one of SharePoint's most useful features for organizing data across lists. They keep your information consistent, reduce duplicate data entry, and open the door to relationship-based designs that make your lists far more powerful. Add reverse lookups and you have a solid relational structure right inside SharePoint. Just keep the 12-lookup threshold in mind and plan your columns accordingly.
Photo by Bryson Hammer on Unsplash


No comments yet
Be the first to share your thoughts on this article!