Microsoft Planner continues to evolve and surprise us all with its amazing features. There’s a lot, and I’ll cover them in the next few weeks, but I want to focus today on the schedule view.
Most of us have many tasks, either created by us or assigned by others, and we want to organize our time. Therefore it’s hard to check what tasks we’ll do each day, and it can become scary looking at a huge list of tasks. Don’t panic; do the following:
If you want to eat the frog don’t start with the legs and if you want to eat two don’t start with the small one.
Jokes aside, the expression is quite valid, so let’s explore it a little bit more.
Planning
There are a lot of theories on how to plan stuff, but if you want to get anything done, you have to, at least, have an idea of what you’re going to do on a certain day. Being grouping by topic so that you can tackle all the related topics at once, or save the most boring tasks for Friday afternoon where the motivation is high to go and enjoy your weekend, you tackle them as fast as possible.
Microsoft Planner’s schedule view can help with this. It displays the list of tasks that you have to do to drag them to your calendar and have a “bird's eye view” of what you need to do each day and what the tasks are that you need to do. It also allows you to understand if any day is too busy and shift the tasks around.
Let’s see that in action.
All your tasks in one place
The essential part of all of this to work is to have all your tasks in the same place. I know it sounds tricky, but trust me, worse than having a huge to-do list is having multiple places where you have to check for your work. Keeping one organized is tricky enough, so stick to one.
Scheduling your tasks
Let’s look at a simple example. I have to plan my week to have the articles for this website ready to publish. I have them as tasks but no real notion on when to do them.
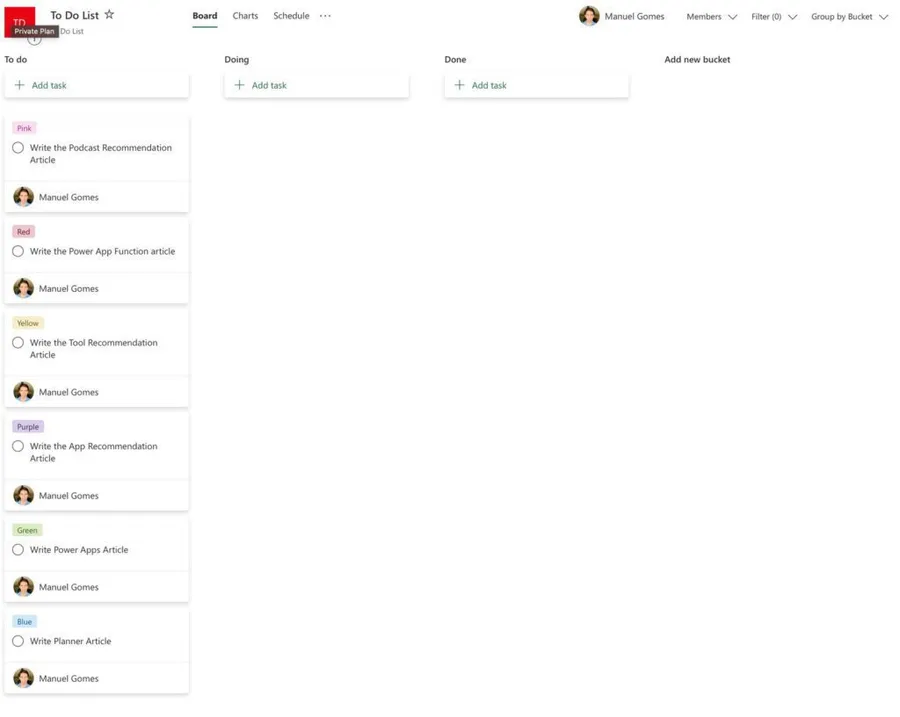
The board view is great when there are not many items, but it can get quite daunting when the list keeps growing with no new progress. So let’s break down things.
Note: This is a demo list. Your list will have a lot more stuff to do
First, let’s change to the “schedule view.”
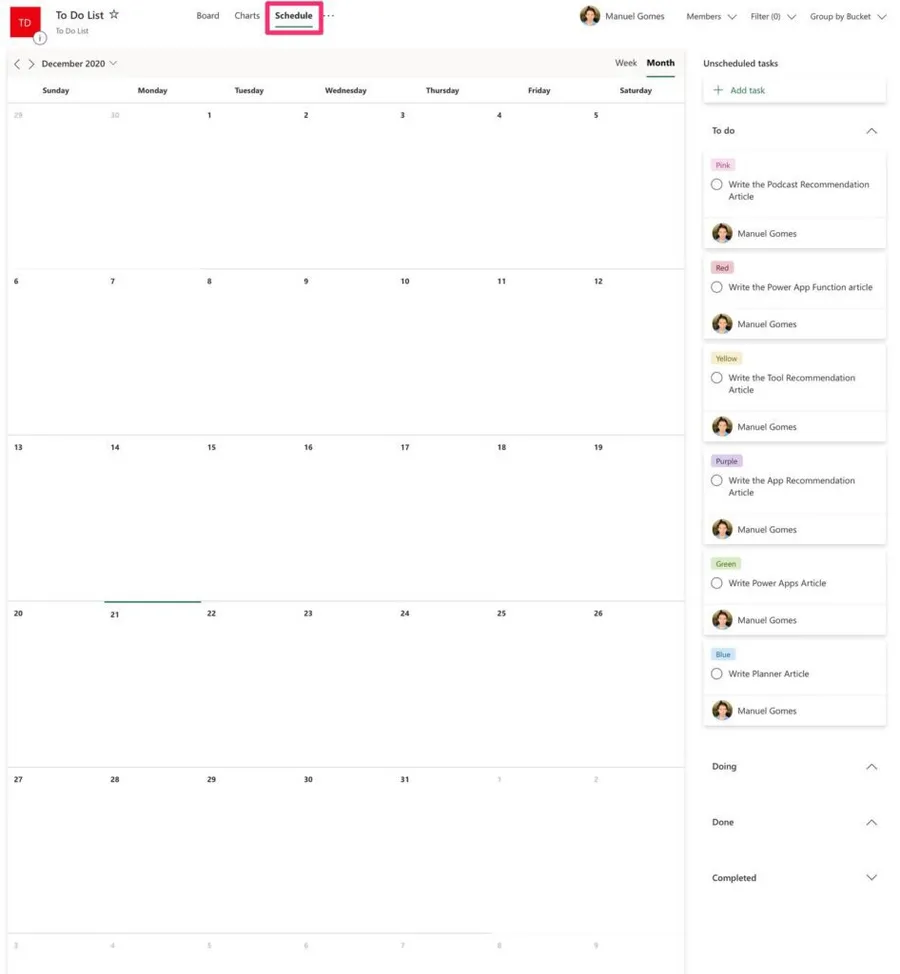
On the right side, you’ll see your tasks, and in the middle, you can see the days of the week. Fortunately, there’s still time so let’s drag the actions for each weekday and distribute work.
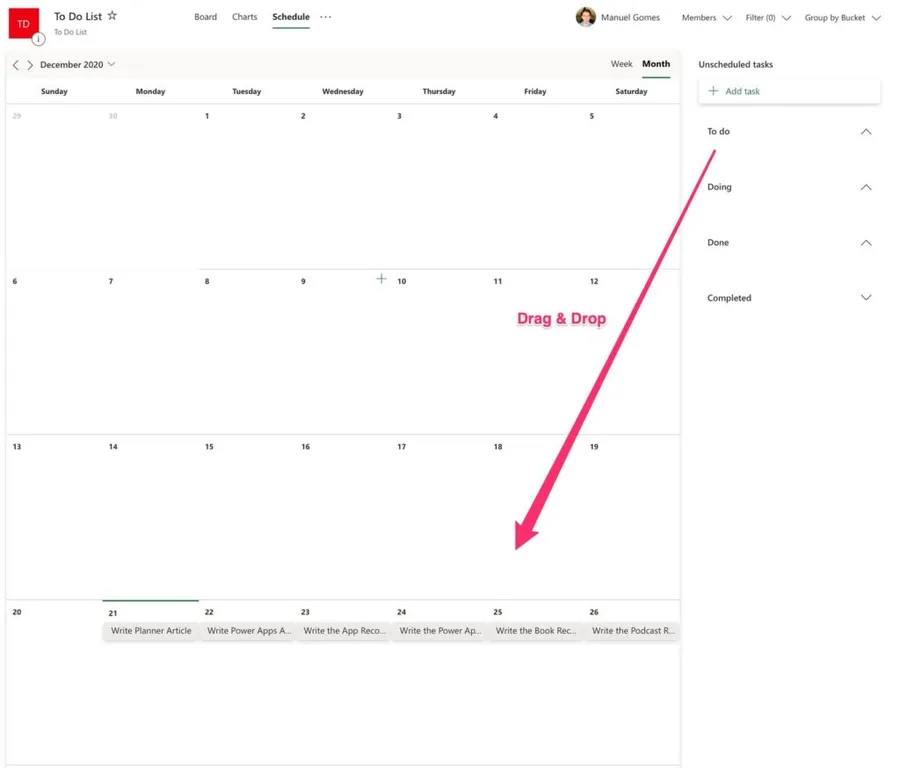
Now that the tasks are scheduled let’s work on them.
Working on your tasks
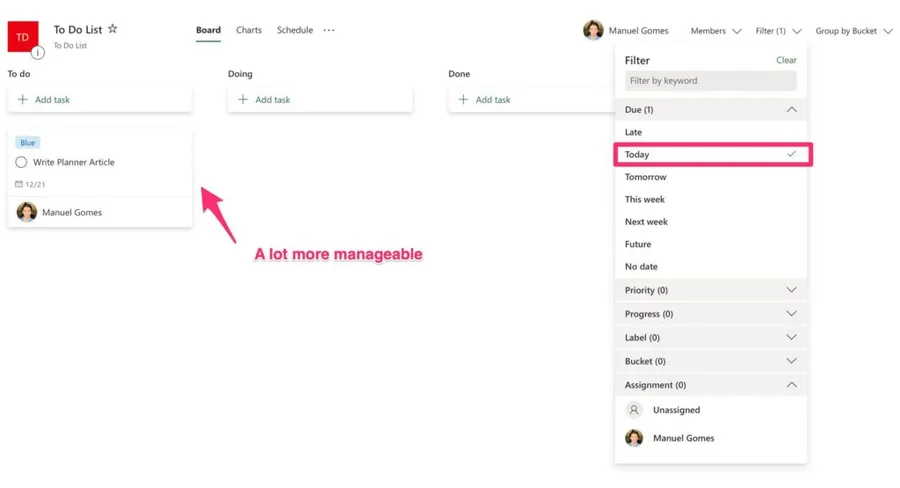
Now the best part. You can open just the things you have to do today and “ignore” the remaining ones. It’s a great way to have a smaller list that looks manageable and doesn't scare you in the morning when you start working. To do this, we’ll use the filter to select the ones that we previously planned for “today.”
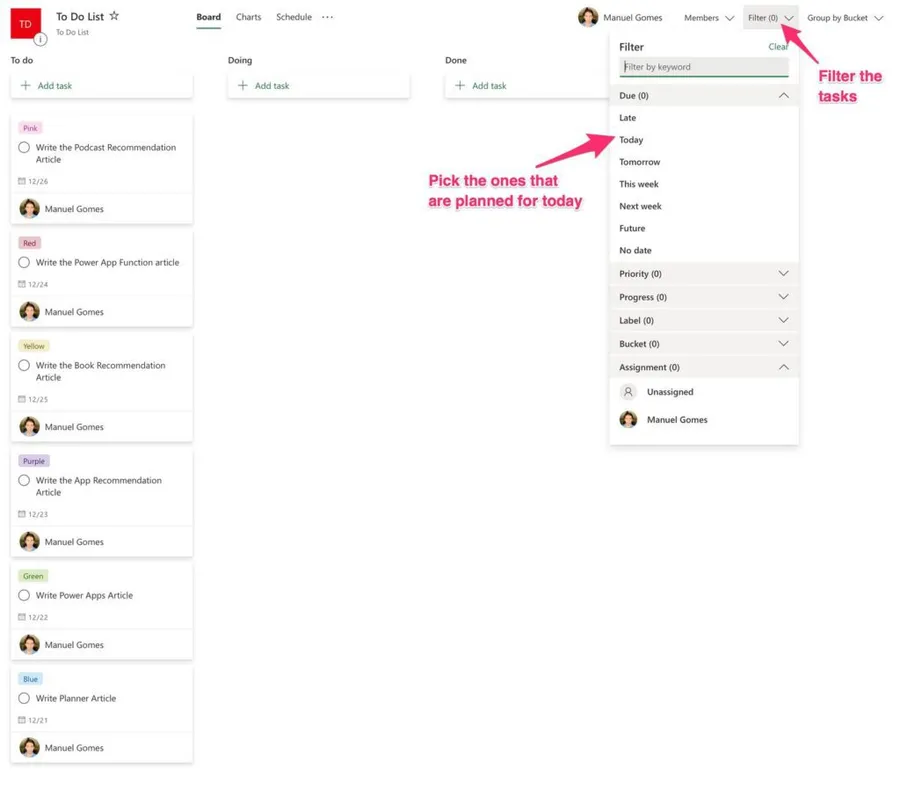
After this, you’ll get a nice view with a lot fewer items. If, for some reason, you can’t finish all your tasks today, don’t stress. Go back to the schedule view when you’re planning and adjusting according to the urgency and the time you have for that week.
Final thoughts
Planning is hard. No way around it. All of us have more tasks than time, and doing them sometimes can feel like a losing battle. But it doesn’t have to be. You can plan for the time you have, adjust when other things “pop up,” and keep things organized with only a few minutes of planning. It will reduce your stress levels a lot, thinking that you have 3-4 tasks to do instead of looking at a list of 200 and not knowing where to start.
My advice is to use Microsoft Planner, store everything you need to do, take 5 minutes to schedule the week, and adjust accordingly. You’ll see that you’ll have a lot more done with a lot less effort or stress.
Have a suggestion of your own or disagree with something I said? Leave a comment or interact on Twitter and be sure to check out other Microsoft Planner-related articles here.



No comments yet
Be the first to share your thoughts on this article!