
There’s no feature in Microsoft Planner to send an email and create a task, but that doesn’t mean that it’s impossible.
The solution is to use Power Automate with a simple trigger → parse → create task Flow.
I'll show you how to do it with Power Automate, but I hope Microsoft renders this article deprecated as quickly as possible. This feature is amazing and supported by other apps (we don't say the T name here), and it's been asked a lot and for a while.
The Flow itself is not complex, but I want to define, as always, the strategy first, since there are a lot of ways to do this, depending on what you want to achieve or the tools that you have at your disposal.
Strategy
We need two things:
- A place to send the email
- A Flow that parses that email.
If you can, the best thing to do is to create a shared mailbox. Shared mailboxes are independent of your own, and they are handy for when you want to do actions like automation or notifications of systems. Of course, you need your administrator to create one, but there are many advantages to having one.
The second strategy is to use your own email address. It’s possible for you to email yourself and, with some tricks, you can have it so that the email doesn’t clutter your email box, either by removing it when parsed or archiving it.
Both strategies only differ with the start trigger. After that, all the rest will be the same, so that’s why I’m laying out both right from the start.
One last consideration. Regardless of the strategy, both will have emails that we don’t want to import. So we need a way to differentiate the emails that we want to import as tasks. Fortunately, a field will filter the emails based on the subject to insert something like “[task]” and trigger the Flow only for these emails. You can use other strings; the important thing is to have one that is fast to write and is unique enough so that other emails don’t get imported by accident. For this demo, let’s use “[task].”
The Flow
So let’s look at the Flow. Depending on your strategy you’ll need:
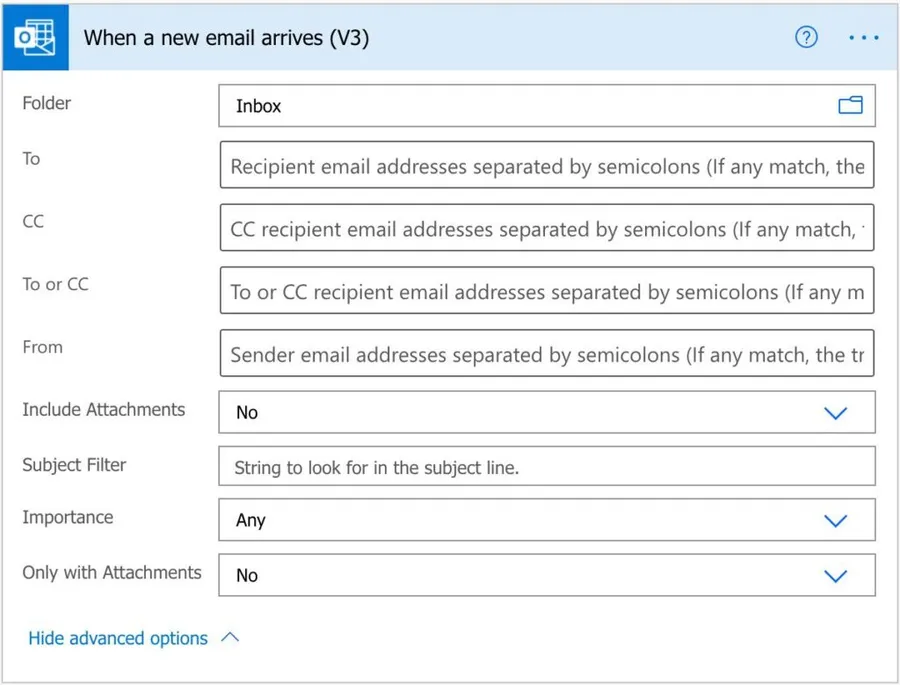
- “When a new email arrives” trigger - for your own mailbox.
- “When a new email arrives in a shared mailbox” - for when you have a shared mailbox that you can use.
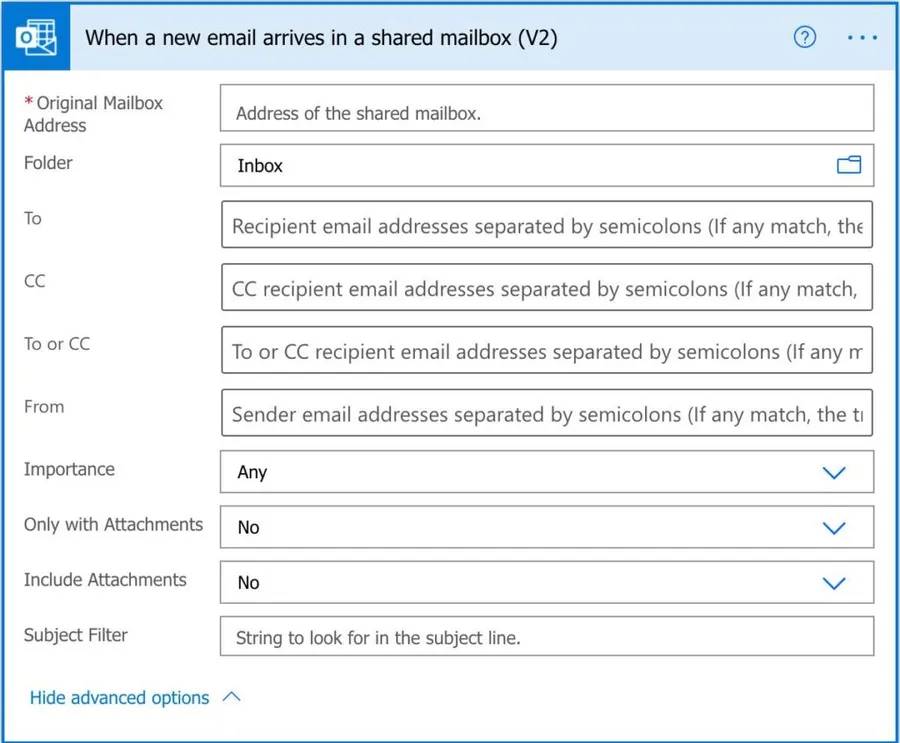
Both have similar features, but we’ll look at the “Subject filter.” Since we only want to import emails that have “[task]” in the subject, we’ll need to use the “Subject Filter” field.
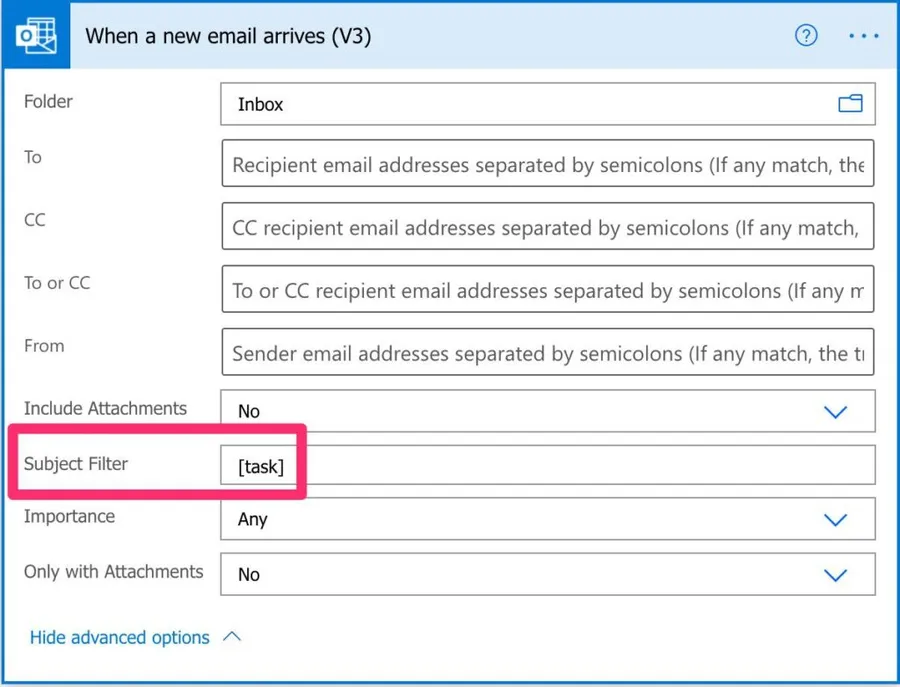
With the “Subject Filter” filled-in the Flow won’t trigger for all other emails. It’s a good idea to use this or other filter fields frequently, especially if you hit limits on how many Flows you can run
The Flow will trigger all emails containing this string in the subject, regardless of where it is. After this, we’ll do some cleanup to have a nice title to add.
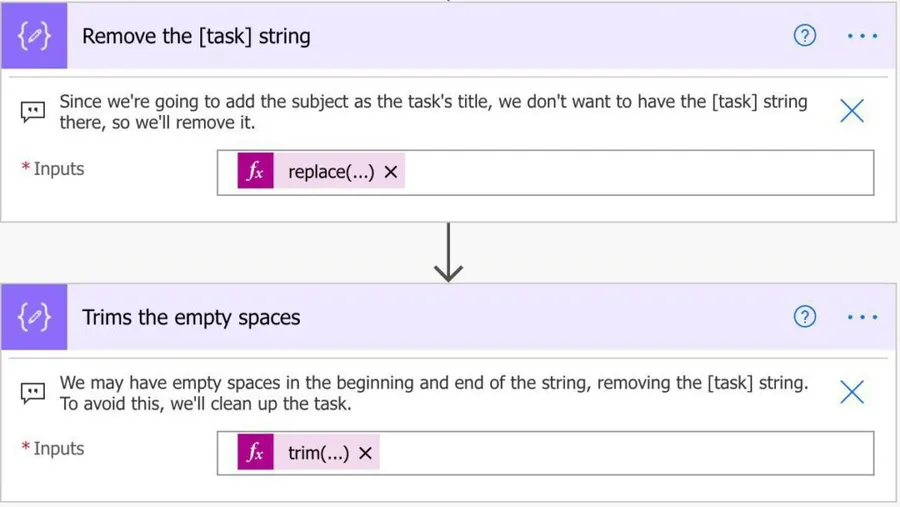
The first "Compose" action will contain a simple "replace" function.
replace(triggerOutputs()?['body/subject'],'[task]','')
We may have some empty spaces by removing the task, so let's remove them using the "trim" function.
trim(outputs('Remove_the_[task]_string'))
Now that we have the subject, let's create the task using the "Create a task" action. It’s a bit scary, but here it is:

I’ve talked in the past about this, and I’m sure that Microsoft will improve this action. However, it’s not user-friendly, and there are other areas in Power Automate where similar fields are displayed differently.
Now you only need to send an email to yourself, and a task is added as a task.
Improvements
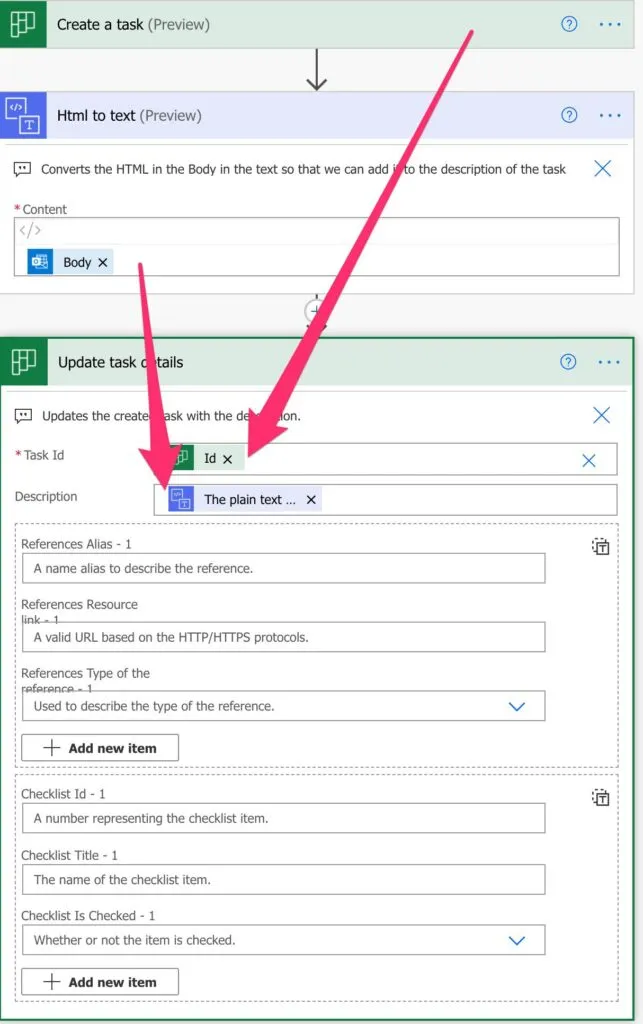
There’s more that we can do to improve this Flow. For example, we can use the body of the email as the description of the task. We only need to be careful because the body of the emails is HTML and not text, so we need to convert the text before we can add it. To do that, we need the “Html to text” action.
Finally, another consideration. To add the description, you need to use the "Update task details" action.
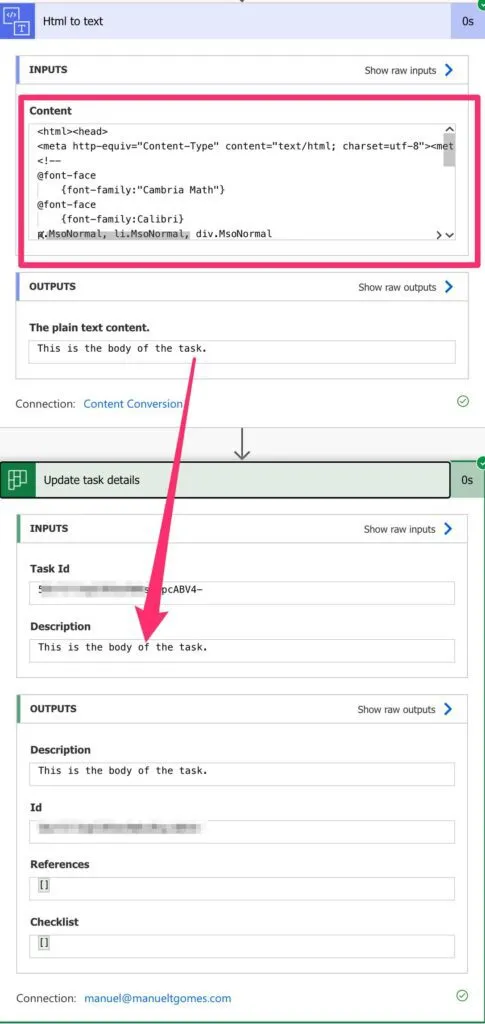
I’ve sent another email with the body in bold to test if the conversion is correct, but as you can see below, Outlook adds a lot of "stuff" to your email.
Let’s go to Microsoft Planner and see what we get:
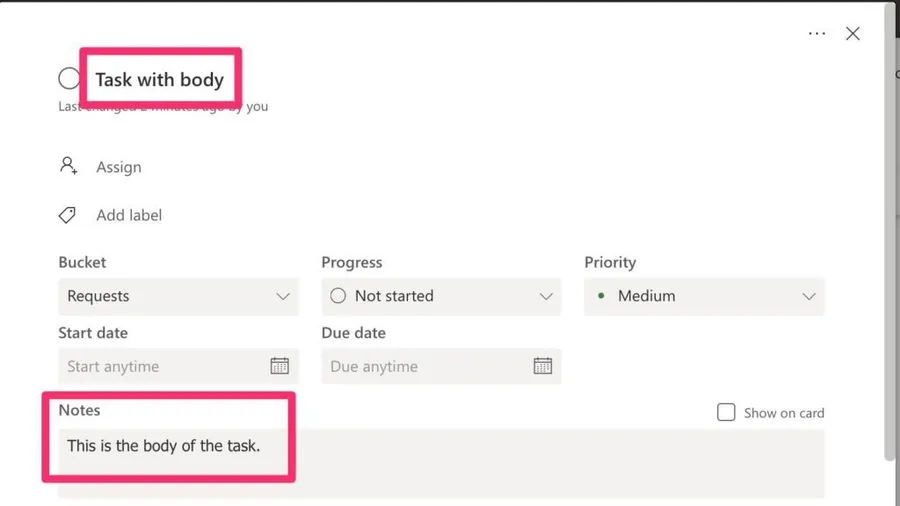
Looking good.
Final thoughts
We can do more, but I wanted to keep this article simple and to the point. For example, we could parse the body to fetch any tasks and parse the email’s attachments as attachments to the task.
But my main point stands. With a simple Flow and your email, you can have features that don’t exist, for now, in Microsoft Planner.
Photo by Alesia Kazantceva on Unsplash


Hi, I have a flow to create a task in planner when an email arrives to a shared inbox. That is working fine. I want to have a link to the email in the task. I was able to set this up with an individual mailbox. I dug around on Google and found this: https://powerusers.microsoft.com/t5/Building-Flows/Generate-hyperlink-to-Shared-Mailbox-Email-and-reference-in/m-p/807891/highlight/false#M112482 But when I follow the instructions, it just links to the mailbox instead of the email. Any help would be much appreciated.
Hi Kristen, Sorry for taking some time to reply. Your comment was flagged as SPAM... Akismet (my SPAM bot) will be punished for this :). Regarding your question, the solution in the forum is bright, but the function doesn't thoroughly prepare the URL to open the message. Please try this one: concat('https://outlook.office.com/mail/inbox/id/',replace(encodeUriComponent(triggerOutputs()?['body/conversationId']),'_','%2B')) We need to use the "conversationId" and not the "messageId" and encode the "_" as well. It will open the inbox with the message highlighted. Can you please try and let me know if it works?
Hi Manuel, your screenshot showing the Flow setup is blurry, might you please re-link?
Is it better now?
Do you know how to get a planner task to then mark as complete once the email is deflagged or deleted?
The issue is that no trigger fires when an email is deleted or you remove the flag :(. It exists for events but not for emails. I hope Microsoft adds that soon because it's pretty helpful. If you have another way of getting this, you can use the <a href="https://manueltgomes.com/reference/power-automate-action-reference/planner-update-a-task-action/">Update Task Action</a> to mark the task as completed. Cheers Manuel
Hi Manuel, Fantastic tutorial. Very grateful. I followed along and have set up a flow. It's working well. You said: We can do more, but I wanted to keep this article simple and to the point. For example, we could parse the body to fetch any tasks and parse the email’s attachments as attachments to the task. I would really like to parse the email's attachments as attachments to the task. Could you please explain how I could go about doing that? Kind regards, Nick
Hi Nick, That's a great idea for an article. I'll have to write it soon. I have two articles that take care of half the problem. One is <a href="https://manueltgomes.com/microsoft/powerautomate/save-all-attachments-when-an-email-arrives/">"Save all attachments when an email arrives"</a>, and the other is <a href="https://manueltgomes.com/microsoft/powerautomate/add-attachments-to-planner-from-teams/">"Add Attachments to Microsoft Planner from Teams"</a>. I'll work on it and let you know once it's finished :). Cheers Manuel