Power Automate has a lot of functions that are incredibly useful to us, and I cover a lot of them, but today I want to focus on Power Automate's special values. I bet you already used some of these special values and never noticed them. I’m talking about the “null”, “true” and “false” values. We can find them at the same place as the functions but they are not functions.
Let's check how they work and how we can take advantage of them.
Where to find them
You can find them in any action where you can find the “Expression” tab, like the“Compose action,” for example:
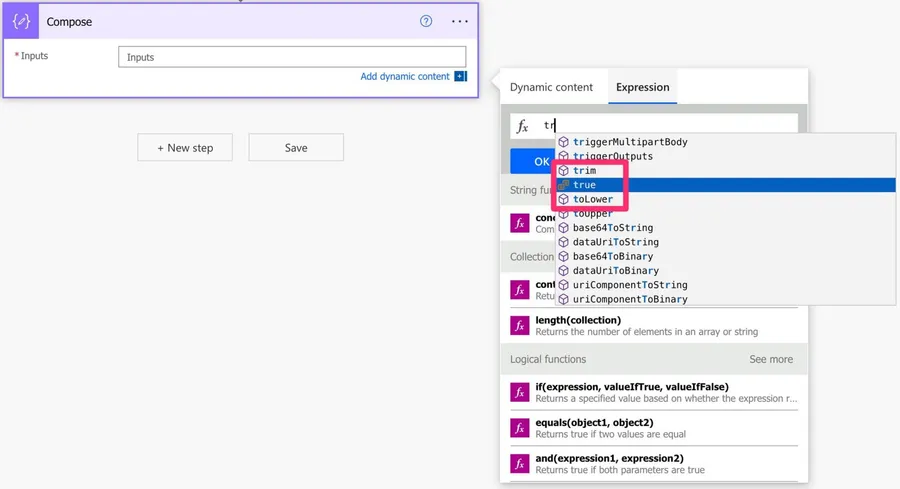
You can find “false” the same way:

And the “null”.
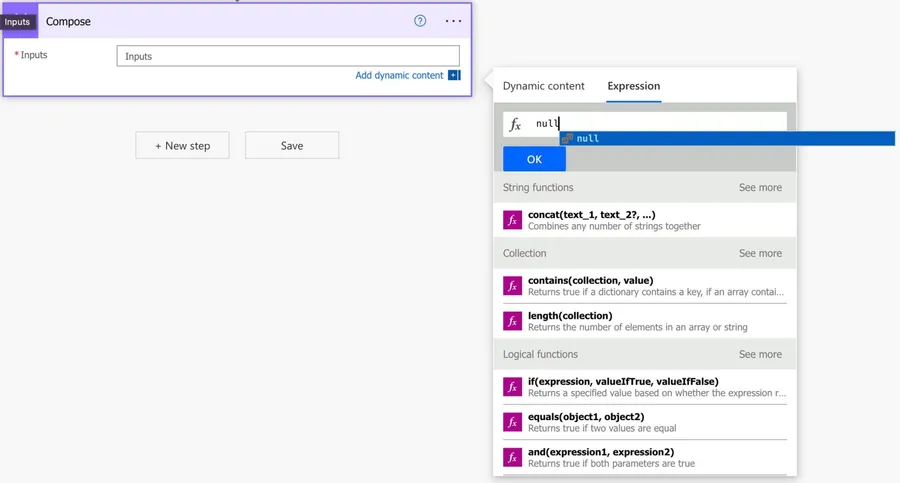
Notice that the symbol is different from the functions.
Why are they so important
Let’s look at why they are so important.
Power Automate compares apples to apples.
Some functions, like the “contains function” for example, validate if a string exists in a collection. Since there are only two choices, it returns a boolean value, meaning we can either get “yes” or “no”. But in reality, it returns “true” or “false”. So we can use the “true” value and compare it with the value from the function, and we would have two equal things to compare.
Think about if this wasn’t the case. Would we compare it with “yes”, “Yes”, “True”, “Correct” or something else? We would never know. That’s the advantage of all the conventions. They help us define what to expect to understand how to compare the results.
Signal that something is empty
For the case of the “null” value, it’s the only way of indicating to Power Automate that a field doesn't contain data as opposed to being empty. It's a subtle but significant difference, so let’s look at an example to understand better how it works.
When you want to update data in SharePoint, you use the “Update item” action to do it, like:
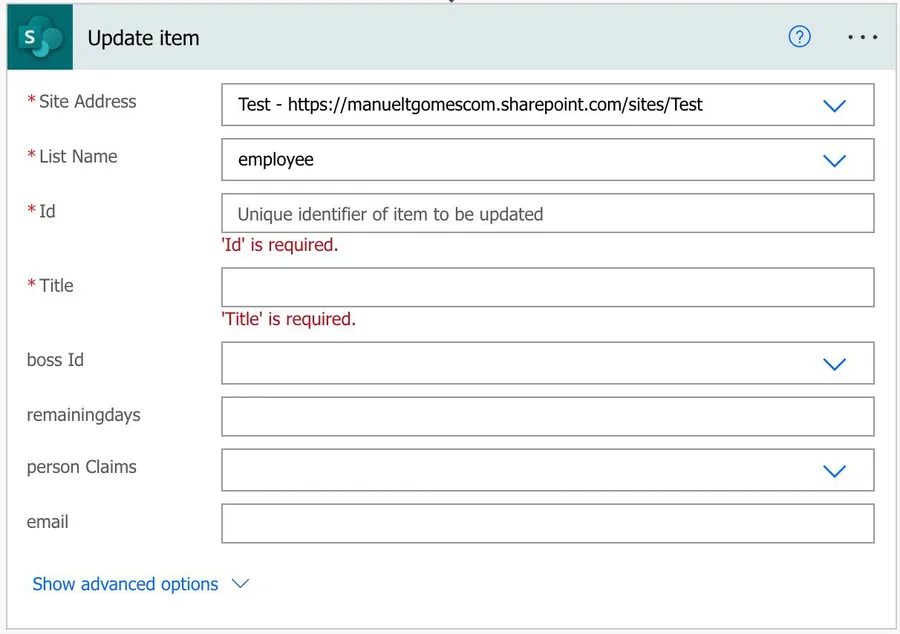
It’s not essential now what the fields look like, but if you want to update only the email, you will do something like this:

But since the remaining values are not filled in, will they be put as empty when the update is performed?
No, it means that SharePoint will ignore the fields and don’t touch them. But what about if you want to delete the value in a field. What would you do?
Some people would put a text value with space, for example, but that would be introducing invalid data. And it would only work on text files. Numbers could be 0, for example, but we would be introducing errors in the system.
So the best way to do it is to use the “null” value.
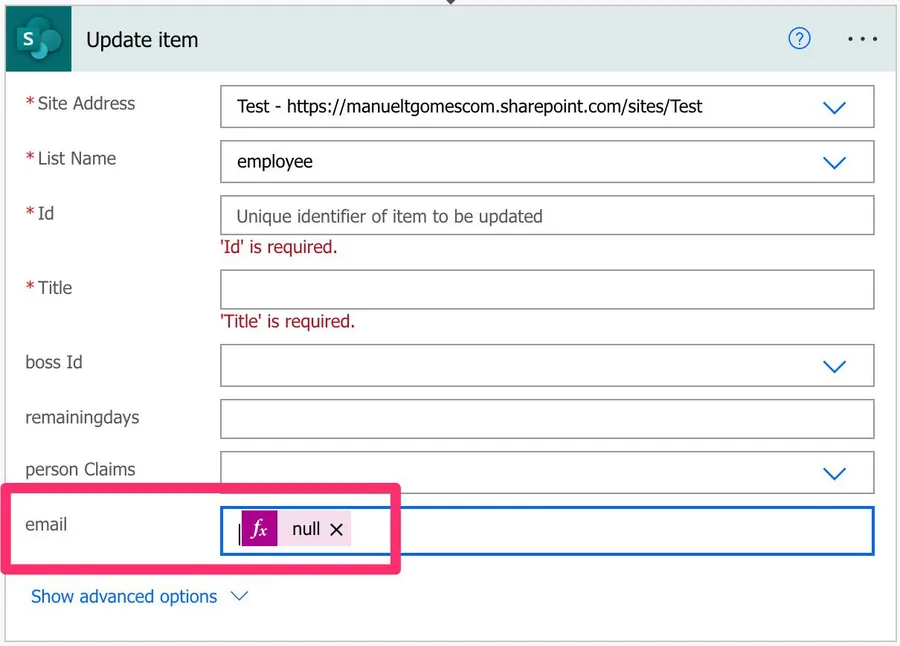
If we add it to the list, SharePoint will look at the field, understand that we want the value to be cleared, and clear any value that it contains. So the "null" value here indicates that the value "doesn't exist".
Using the “null” value, we will flag the system that the field should not contain “anything” instead of having a visually empty value but not really empty. Imagine that someone uses a space to indicate empty and another uses something else. Again, visually would be the same, but if you try to filter the data, you'll get only part of the results. Please be very careful with this small but significant difference.
Careful how you insert them
Notice that I’ve always used the “Expression” tab to add the “true,” “false,” or “null” values to the actions. Don’t write the text directly, even if the text is correct.
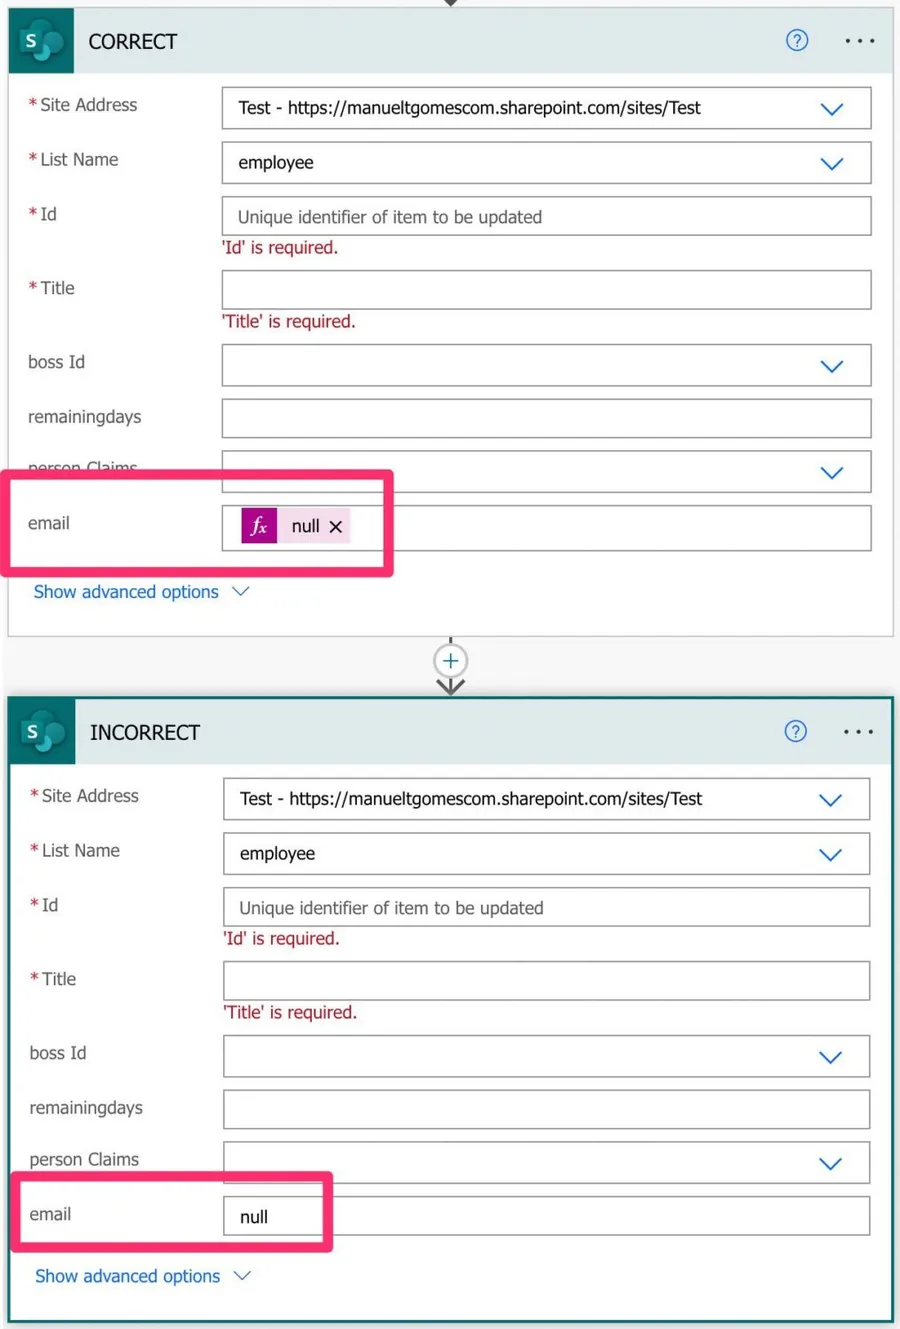
Notice that although both are spelled the same, they are entirely different. The first is the value of “null” while the second is a text that is “null.” So in the first case, SharePoint will replace the value with “nothing,” while in the second case, it will replace the existing value with the text “null.”
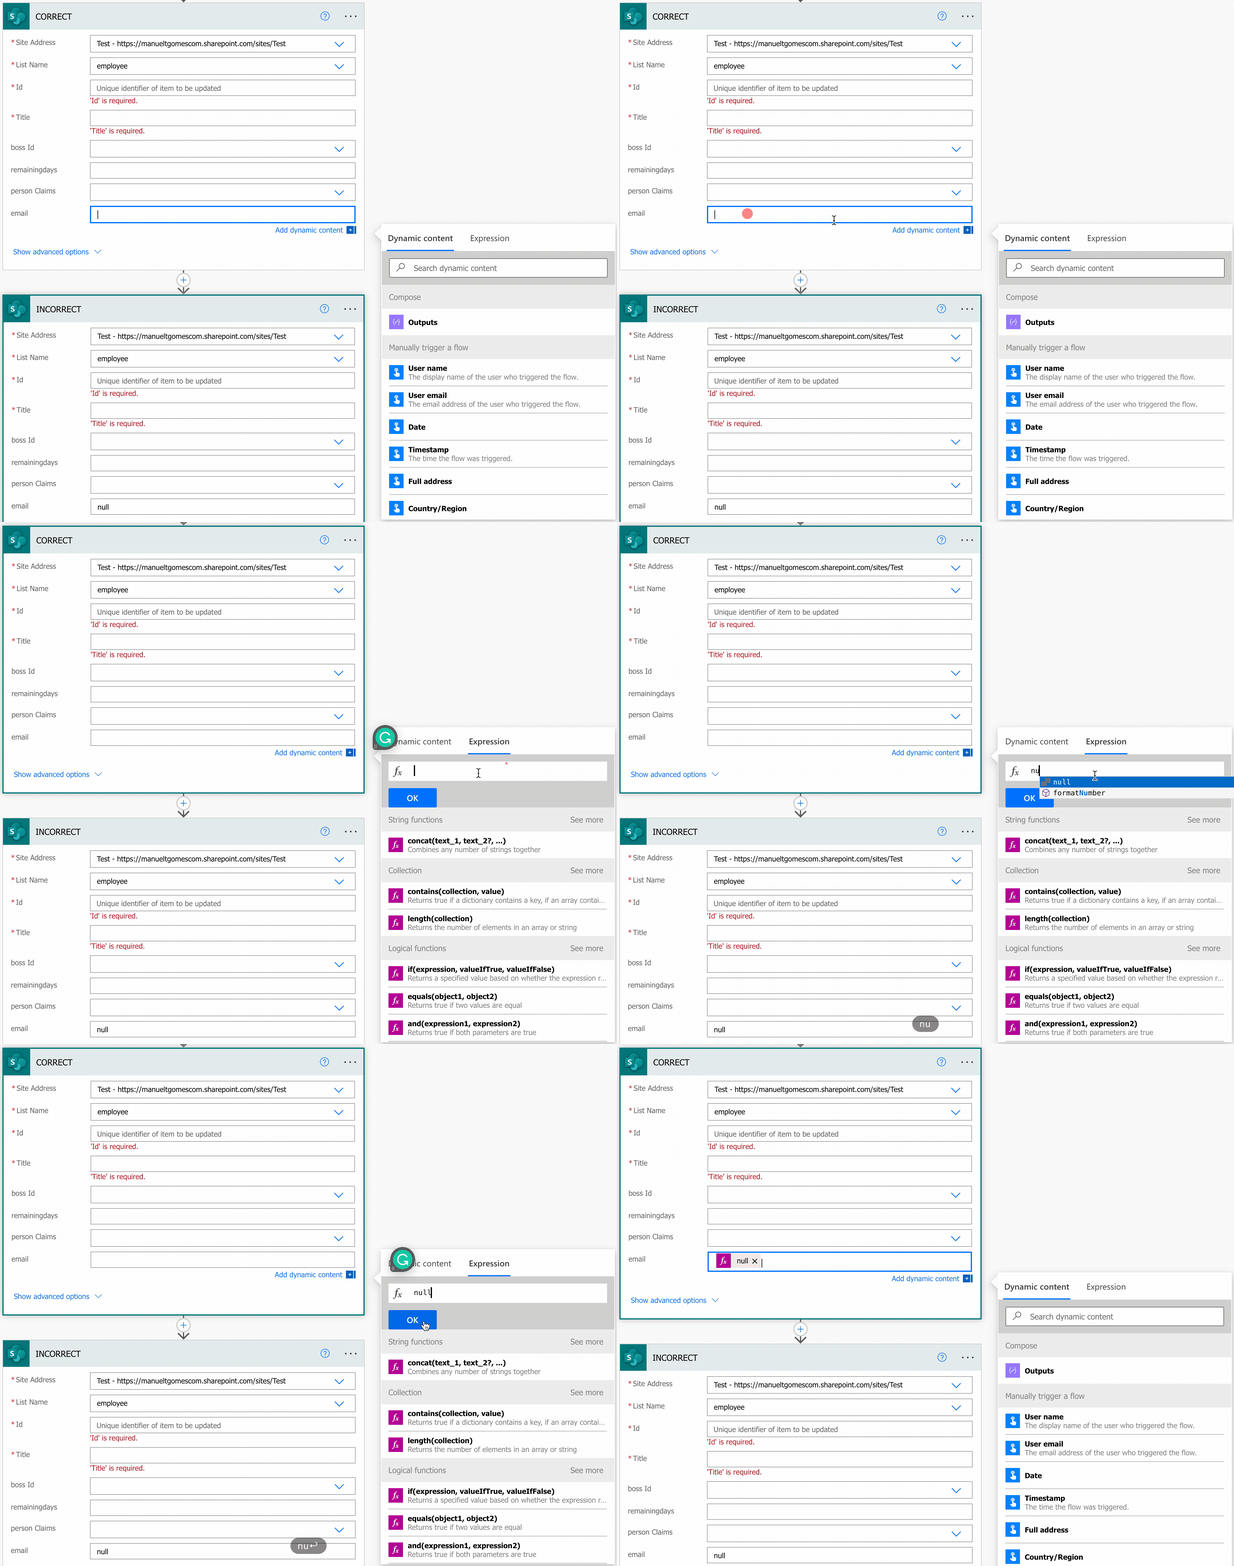
Always do the following:
And not:
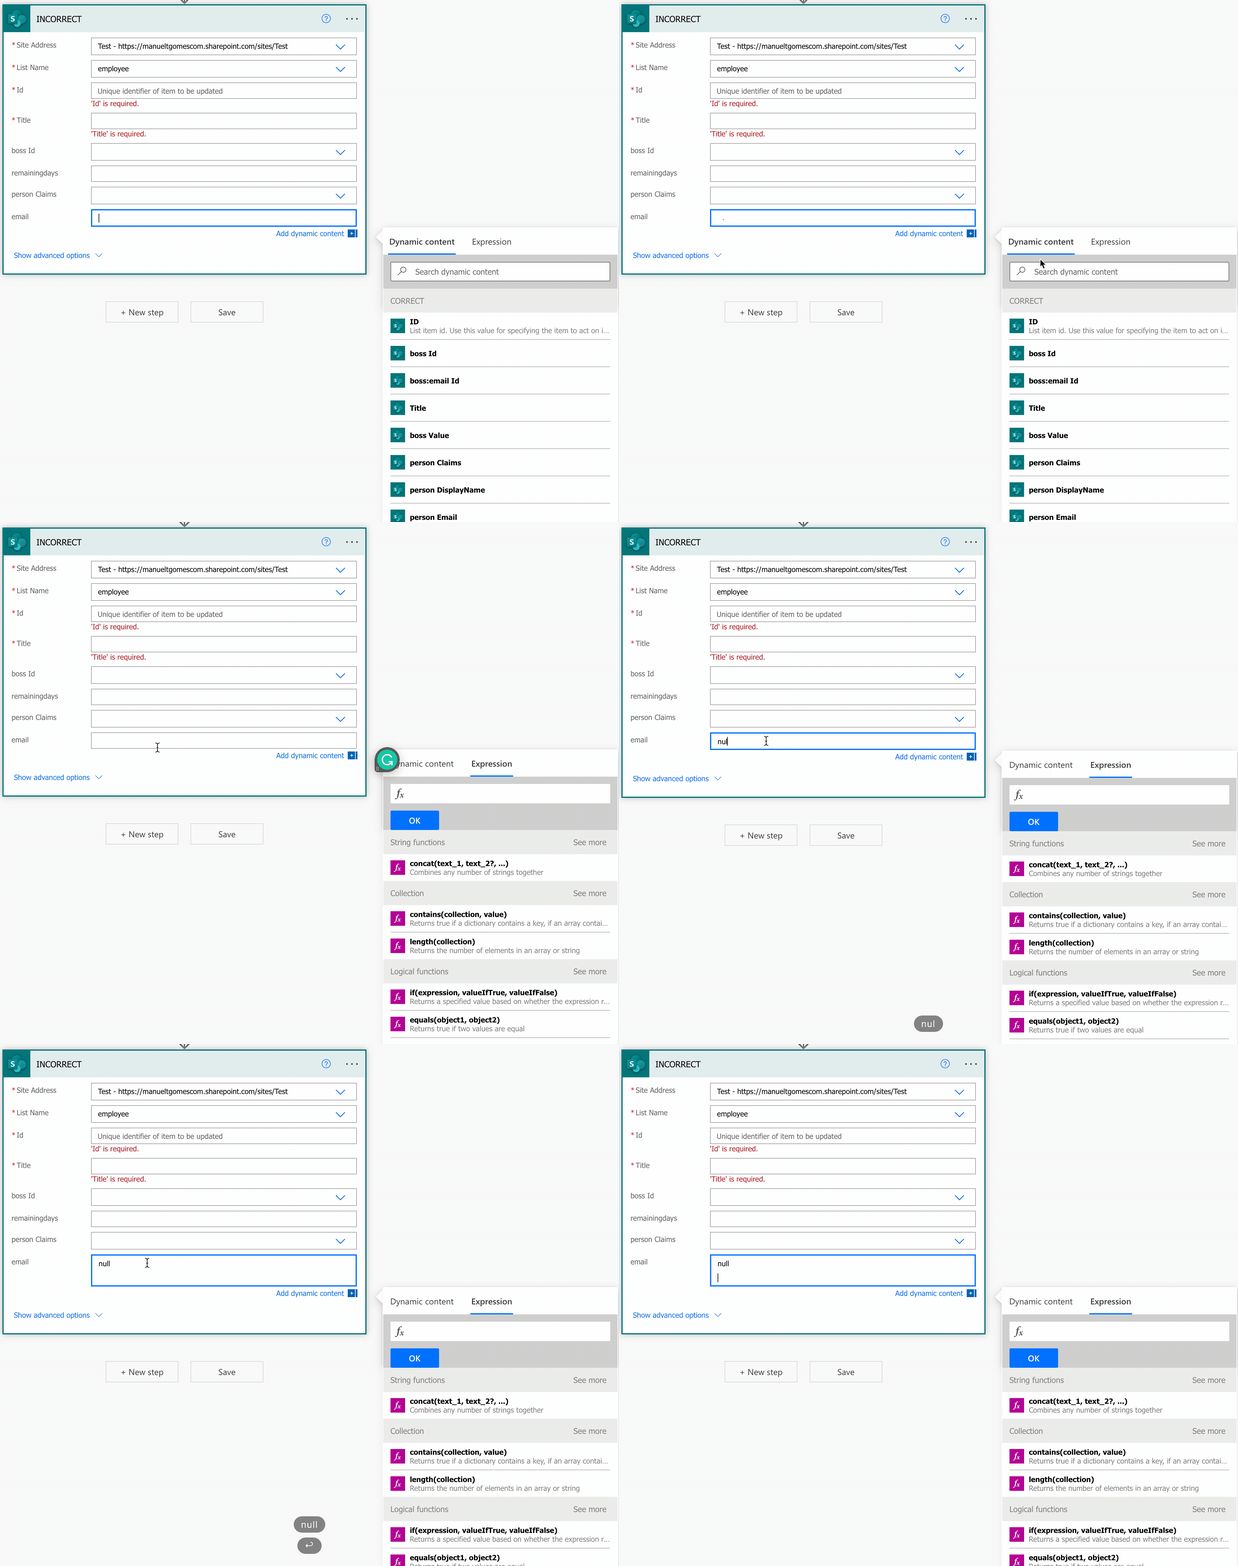
This is a widespread mistake, so be sure to notice it.
Final thoughts
Understanding what we’re doing in Power Automate is essential, especially for comparisons and types. Our Flow will work differently if we use the wrong kind of comparison.
Photo by Ben Hershey on Unsplash


No comments yet
Be the first to share your thoughts on this article!