Although Microsoft Planner has an amazing UI to update tasks, there's a lot of added value on updating tasks automatically when things change. The "Update a Task" action opens the door to the basic information, making your life easier, especially when you have a huge backlog of tasks that you need to process.
Let's explore the "Update a task" action and how to use it efficiently.
Where to find it?
To find it, you can search for the "Update a task" action.
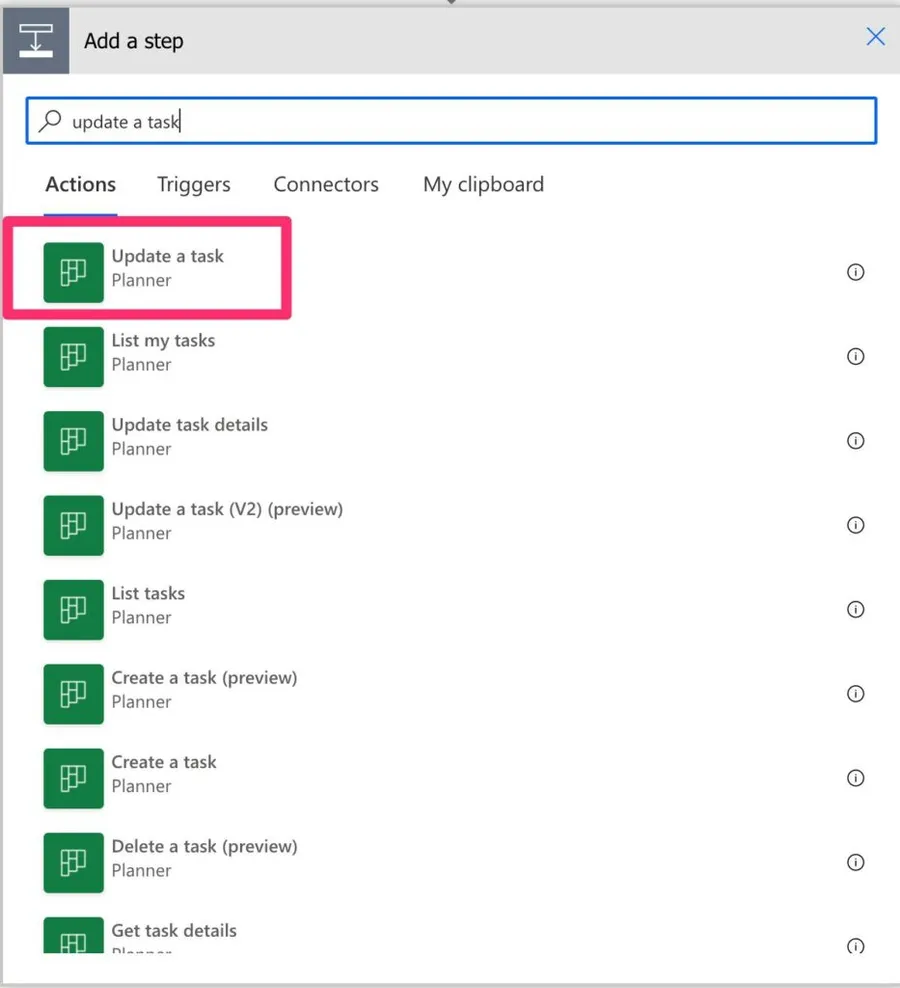
Microsoft changed the way that Power Automate displays the steps. Now you have a huge list of actions that you can search for. It's arguable whether this is simpler or not, but now I'll only provide the search string you have to write to find the action.
It looks like this:
Usage
Let's start with what you can't do. In the "Update a task", you can't:
- Edit the description
- Add references
- Add checklist items.
To do this, you need to use the "Update Task Details" action. Microsoft decided to separate these actions, and for good reason. Having it all in one action would make things complex, so I enjoy this separation of responsibilities.
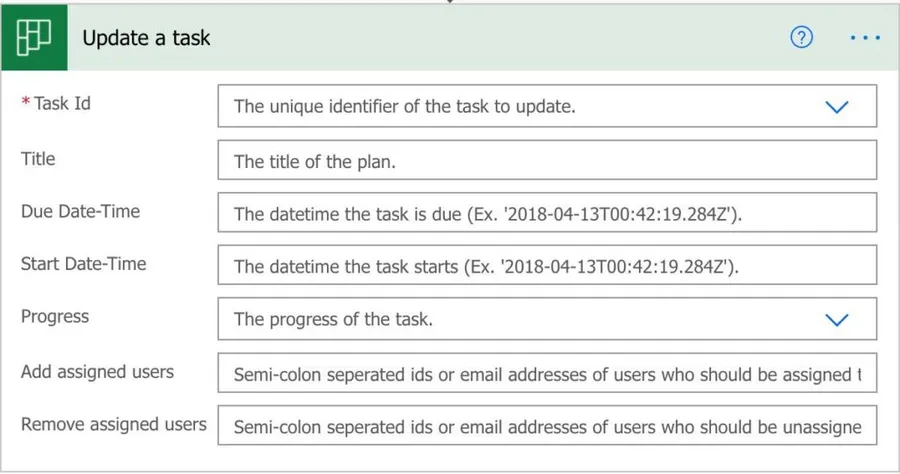
So let's see what you can do. You can edit the:
- Title
- Due Date-Time
- Start Date-Time
- Progress
- Add assigned users
- Remove assigned users
Let's look at them individually since there are some details to explore:
Title
The task title is one of the most important pieces of information since it's the one you'll see on a list. If you have a lot of tasks, finding a task fast is essential, so keep the title as to the point as possible.
You can only insert 255 characters. If you add more, you'll get the following error message:
Schema validation has failed. Validation for field 'Title', on entity 'Task' has failed: The field cannot be longer than 255 characters.
255 is a fair limitation, especially for a title. If you want more, it doesn't make sense to use the title since you won't see all those details in the UI anyway. Instead, I recommend using the "Update Task Details" action and fill in the description.
Due & Start Date-Time
It's a tiny detail, but it's funny that Power Automate presents the Due date before the start date. I think this is because the due date is much more important than the start date for a task, but I digress.
Although there are thousands of variations of dates, we need to use the ISO format in Power Automate to set the correct date; the format is as follows:
- Year (4 digits)
- Month (2 digits)
- Day (2 digits)
- Hour (2 digits)
- Minute (2 digits)
- Second (2 digits)
- Millisecond (3 digits)
Here's an example of a valid date format:
2026-04-09T14:30:00.000Z
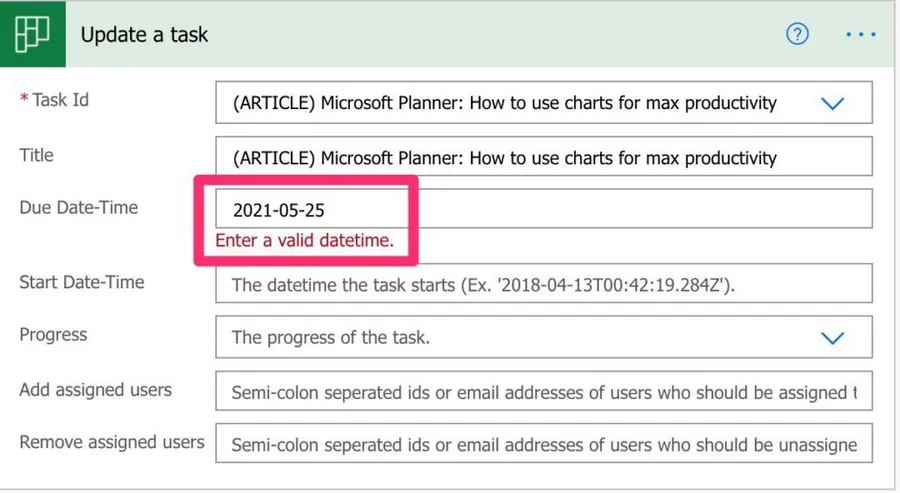
In all cases, we need the full digits. Power Automate will return an error if the date is not correct. For example:
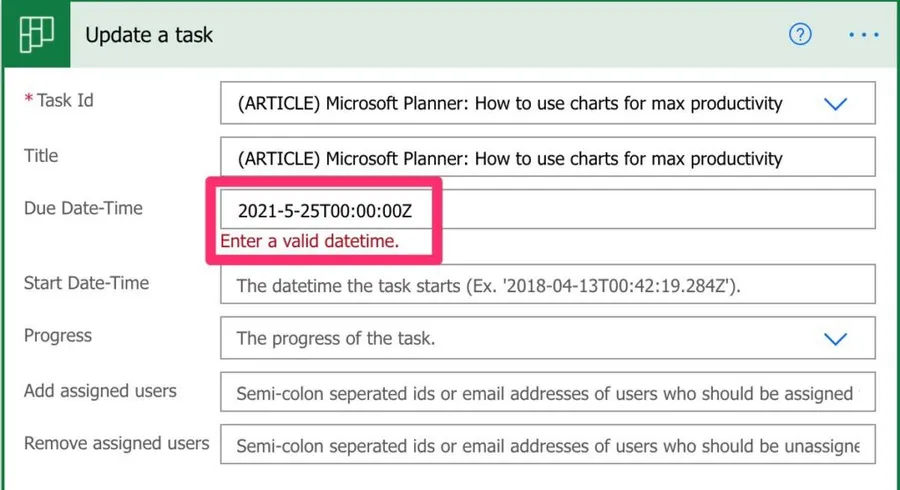
But adding a zero fixes the problem.
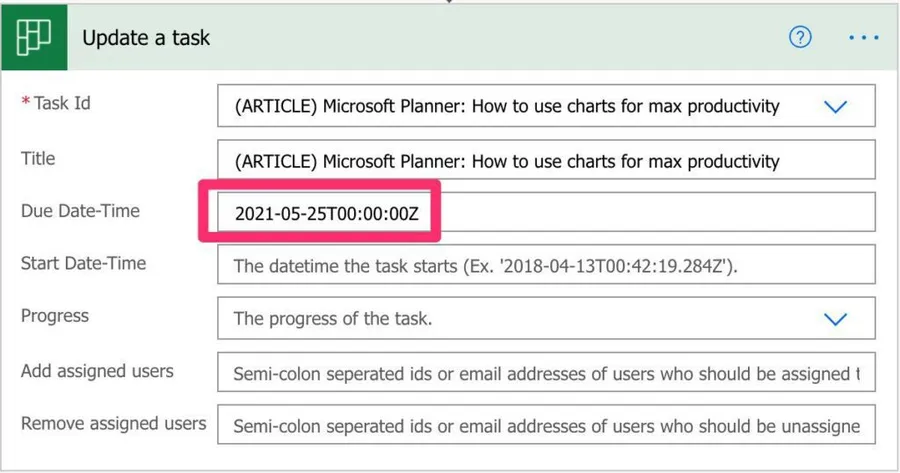
You can't insert only the date. You also need to insert the time, even if it's zeros.
Finally, the milliseconds part is optional, as you've seen above. There's a limit to how much you can plan your tasks 😀.
Dates are always stored in UTC. If you provide a local time without the Z suffix or a timezone offset, your task may appear on the wrong date depending on your timezone. Always use UTC format (ending in Z) or include the timezone offset (e.g., +01:00).
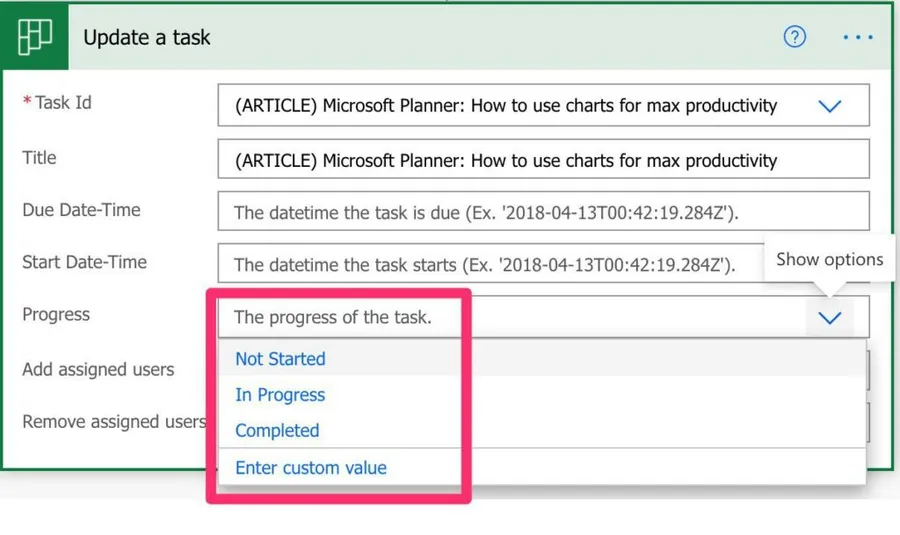
Progress
The options are defined by Microsoft Planner, so you can have:
- Not Started
- In Progress
- Completed
Some people would like more, but Power Automate will return an "OpenApiOperationParameterValidationFailed" error even if you force a new value. This is because Power Automate validates the value that you have against the possible values, and if the value is not found, it won't allow you to proceed.
Assigned users
It's possible to have multiple people in the Planner tasks, and this is an awesome feature. In addition, you can use Power Automate to add and remove people automatically if things change. But there are some limitations.
You can only add Office 365 users that are part of your organization. So, for example, if I try to add another user outside my organization:
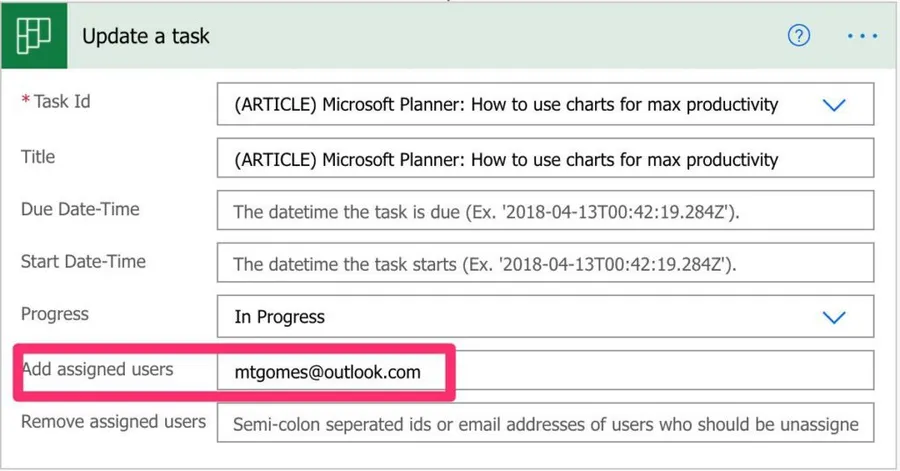
I'll get:
Referenced User or Group (MTGOMES@OUTLOOK.COM) is not found.
If you add or remove users that are already assigned or don't exist in the Task, Power Automate won't return an error. Instead, it will simply ignore the ones that don't make sense.
The "Remove assigned users" field in this action may not work reliably in all scenarios. If you need to remove assignees, consider using the dedicated "Remove assignees from a task" action instead for more consistent results.
Non-intuitive behaviors
Concurrent updates cause conflicts
The Planner API uses ETags for versioning. Every time a task is updated, its ETag changes. If you have parallel branches in your flow that update the same task, the second update will fail with a 409 Conflict or 412 Precondition Failed error because the ETag from the first update is no longer valid.
To avoid this, always use the "Get a task" action immediately before updating to get the latest ETag, and avoid parallel updates to the same task.
Progress values map to percentages
Behind the scenes, the "Not Started", "In Progress", and "Completed" dropdown values map to 0, 50, and 100 respectively. This matters if you're using the value in expressions or passing it to other actions.
Limitations
The Planner connector only supports basic plans. If you're using Premium Planner plans, the tasks won't appear in the dropdown and can't be updated through this connector. For Premium plans, you'll need to use the Dataverse connector instead.
You can only select from the dropdown tasks that are assigned to you. This is for a good reason since there may be thousands of tasks in the combination of multiple planners, so it's a smart move by Microsoft. You can, however, search and provide an ID for any task to change it. It's quite rare that you'll pick a specific task from the dropdown since tasks are rather ephemeral.
| Field | Limit |
|---|---|
| Title | 255 characters |
| Assignees | 20 per task |
| Priority | Only predefined values (Urgent, Important, Medium, Low) |
| API throttling | 100 calls per connection per 60 seconds |
| Update trigger | No "when a task is updated" trigger exists |
Recommendations
Here are some things to keep in mind.
Don't generate the Progress Value
Whenever you can, pick the "progress" from the list and don't create a custom value. Any typo or capitalization error will return an error, and we don't want that. If you can't, please consider the proper capitalization and ensure that the values are correct.
Use retry policies for bulk updates
If you're updating multiple tasks in a loop, you can hit the throttling limit of 100 calls per 60 seconds. Configure an exponential backoff retry policy in the action's settings (Action Settings > Retry Policy > Exponential Interval) to handle 429 errors gracefully.
Name it correctly
It's super important to have a good name for the action, especially where the tasks can be in multiple plans. Always build the name so that other people can understand what you are using without opening the action and checking the details.
Always add a comment
Adding a comment will also help to avoid mistakes. Indicate the plan of the task, for example, and what you're trying to achieve with the action. It's important to enable faster debugging when something goes wrong to know your intent when you created the flow.
Always deal with errors
Have your Flow fail gracefully and notify someone that something failed. It's horrible to have failing Flows in Power Automate since they may go unlooked for a while or generate even worse errors. I have a template that you can use that will help you make your Flow resistant to issues. You can check all details here.
Final Thoughts
The "Update a task" action is a simple but powerful way to keep your Planner tasks up to date automatically. Combine it with the "Update Task Details" action for full control over your tasks, and you'll save a lot of manual work!
Back to the Power Automate Action Reference.
Photo by Hanna Morris on Unsplash


No comments yet
Be the first to share your thoughts on this article!