
I have mixed feelings about the "Do Until" action. In principle I don't like loop operations like Apply to Each because they make the flows a lot slower, and in the case of the "Do Until" action, it's especially bad because we have no forecast on when it will end.
An incorrect configuration can have a huge impact on the Flow because, in a worst-case scenario, it may reach a timeout because the end condition never arrived, or worse yet, we would be burning action runs and racking up potential expenses because we made a mistake in the stop condition.
I also understand that in specific cases, it's the only possibility and of course, you may have different opinions or requirements, and the "Do Until" action may be needed for your specific use-case so let's cover it today.
Let's see how it's used, what are some of the things that we can do to make it fast and some issues that we may find.
Where to find it?
You can find it in the "Control" section of Power Automate, but as always search for it. It's quicker.
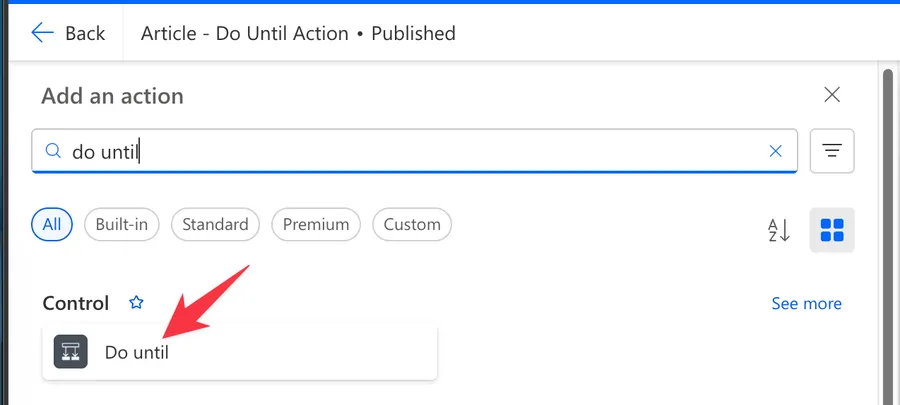
Here's what it looks like.
Power Automate tends to save the most common actions in the main screen, so check there before going through the full hierarchy. Also, you can use the search to find it quickly.
Now that we know how to find it, let's understand how to use it.
Usage
The "Do Until" action has two main parts: the condition that stops the loop and the actions inside it that repeat.
Condition
The condition defines when the loop should stop. You configure it with three parts:
- Value - The left side, usually a variable or dynamic content
- Operator - The comparison (equals, is greater than, is less than, etc.)
- Target value - The right side, what you're comparing against
For example, if you have an integer variable called "Counter" and you want to loop until it reaches 10, you'd set:
- Value: the "Counter" variable
- Operator: "is equal to"
- Target value: 10
You can also switch to Advanced mode to write expressions directly. This is especially useful when you need multiple conditions. In advanced mode, you can use the "and" and "or" functions to combine conditions:
@or(equals(variables('Status'), 'Complete'), equals(variables('Status'), 'Failed'))
This would stop the loop when the "Status" variable equals either "Complete" or "Failed," which is useful when you're polling a service and want to stop on any final state.
Don't forget to increase the counter inside the "Do Until" action so that things won't break or run until the timeout is reached.
Actions inside the loop
Inside the "Do Until" you can add any actions you need. Common patterns include:
- Incrementing a counter - Use the "Increment Variable" action to move toward your exit condition
- Checking a status - Call an API or query a data source to see if something changed
- Adding a delay - Use the "Delay" action between iterations to avoid hammering a service
For example, some services, like file conversion, take a bit of time to process so it's quite common that you will send the request to them and they will respond right away with a file ID. Then we can store it and ping the service with the id that we got to see what's the conversion status until it succeeds or fails. This requires a "Do Until" action since we don't know from the start how long it will take and what will be the result.
A common pattern could be:
- Call the service and get the identifier and status (for example queued)
- Store the status in a variable
- Add a delay of a few minutes
- The "Do Until" checks if the status variable equals "Complete"
Change limits
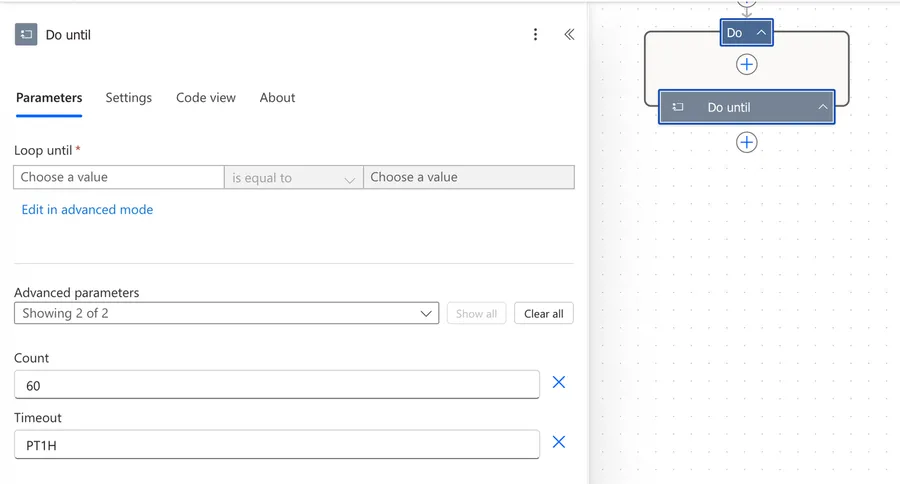
The "Do Until" action has two important limits that prevent it from running forever. You can find these by expanding the Change limits section in the action settings.
| Parameter | Default | Maximum | Description |
|---|---|---|---|
| Count | 60 | 5,000 | Maximum number of iterations |
| Timeout | PT1H | P30D | Maximum duration the loop can run |
The timeout uses ISO 8601 duration format. Here are some common values:
PT1H- 1 hour (default)PT30M- 30 minutesPT2H- 2 hoursP1D- 1 dayP7D- 7 daysP30D- 30 days (maximum)
The format works like this: P stands for "period," T separates date from time, and then H (hours), M (minutes), S (seconds), or D (days) follow the number.
The loop stops when any of these three conditions is met first: the condition becomes true, the count is reached, or the timeout expires.
Non-intuitive behaviors
Here are some behaviors that might not be immediately obvious when using the "Do Until" action.
The loop always runs at least once
This is the most important thing to understand. The "Do Until" checks the condition at the end of each iteration, not at the beginning. This means the actions inside the loop will always execute at least once, even if the condition is already true before the loop starts.
If you need to check the condition before running the actions, add a "Condition" action inside the loop that mirrors your exit condition, or even before the loop starts. That way, even though the loop runs once, your actions will only execute if the condition hasn't been met yet.
The loop succeeds even when limits are reached
By default, if the "Do Until" loop reaches the count limit or the timeout without the condition becoming true, the action is marked as Succeeded. This can be misleading because your condition was never actually met, but the Flow continues as if everything is fine.
If you want the loop to fail when limits are reached without meeting the condition, there's a parameter called operationOptions with the value FailWhenLimitsReached that you can add to the action's JSON definition. This is documented in the official Microsoft Logic Apps documentation since Power Automate cloud flows share the same underlying engine.
However, there's a catch. In Power Automate cloud flows, the code view ("Peek code") is read-only, so you can't edit the JSON directly. Some people work around this by copying the action's JSON from the ellipsis menu, editing it externally, and pasting it back using "My clipboard" - but this only works reliably in the classic designer, and there's no guarantee that properties not already exposed in the UI will stick after saving.
So in practice, this is a feature that exists at the engine level but isn't easily accessible in Power Automate. If you need to detect that the loop ended without meeting its condition, a more reliable approach is to check the condition yourself after the loop ends using a "Condition" action.
Count behavior can be confusing
The count limit represents the maximum number of iterations. If you set it to 60, the loop will run up to 60 times. However, keep in mind that the actual number of runs depends on how quickly the condition is met. If your condition is met on the 3rd iteration, the loop stops there regardless of the count limit.
Control the limits
Even if we can't control when the flow will exit, it's important to understand the limits and use them to our advantage. For example, using the file conversion example before, you can define a short timeout so that even if the system would get a file converted, it won't be accepted because it's not useful anymore.
Delay impacts effective iterations
If you add a "Delay" action inside your loop, the combination of delay and count can significantly affect execution time. For example, a 2-minute delay with the default count of 60 means your loop could run for up to 2 hours, but the 1-hour default timeout would stop it first. Always calculate the relationship between your delay, count, and timeout to avoid unexpected behavior.
Limitations
Here are some limitations to be aware of when using the "Do Until" action.
Maximum count of 5,000
You cannot set the count higher than 5,000. If you try, Power Automate will return an error. If you need more iterations, consider redesigning your approach or breaking the work into smaller chunks.
Maximum timeout of 30 days
The timeout cannot exceed P30D (30 days). This is also the maximum duration for a Flow run itself, so keep this in mind when designing long-running processes.
No "break" or "continue" equivalent
Unlike traditional programming languages, there's no way to break out of the loop early (other than the condition) or skip to the next iteration. If you need to skip certain iterations, you'll have to use a "Condition" action inside the loop to control which actions execute.
Troubleshooting Common Errors
Here are common errors you might encounter and how to resolve them.
"An action failed. No dependent actions succeeded."
This error typically appears when an action inside the loop fails. Check the run history to see which specific action failed and on which iteration. A common cause is that the data you're working with changes between iterations in a way you didn't expect.
Loop runs only once
If your loop is running only once and stopping, check the condition. Remember that the condition defines when the loop stops, not when it continues. If your condition is already true when the loop starts, it will run the actions once and then stop because the condition is met at the end of that first iteration.
Loop runs until the limit is reached
If your loop keeps running until it hits the count or timeout limit, the condition never becomes true. Verify that:
- The variable or value you're checking is actually being updated inside the loop
- The comparison operator is correct
- You're comparing the right data types (a string "10" is not equal to an integer 10)
Throttling errors
If you're calling external services inside the loop without a delay, you might hit API rate limits. Add a "Delay" action inside the loop to space out your requests.
Recommendations
Here are some things to keep in mind.
Always configure your limits
Don't rely on the defaults. Think about how many iterations you actually expect and set the count and timeout accordingly. If you're polling a service every 5 minutes and expect a response within an hour, set your count to 12 and your timeout to PT1H15M (a little extra buffer). This prevents unnecessary iterations and makes your Flow more predictable.
Use a delay for polling scenarios
If you're using "Do Until" to poll a service or wait for a status change, always include a "Delay" action inside the loop. Without it, the loop will execute as fast as possible, which wastes resources and can trigger throttling or rate limits on the services you're calling. Also, sometimes the service could be busy and send a "try again later" error. We don't want the Flow to fail, but it doesn't make sense to try to query it right away since we will get the same answer. Having a delay will allow us to wait a bit and then query the system when it's not busy.
Initialize your variables before the loop
Make sure any variables you use in the condition or inside the loop are initialized with the "Initialize Variable" action before the "Do Until" starts. This ensures the first iteration has the correct starting values and the condition evaluates properly.
Name it correctly
The name is super important in this case since the "Do Until" action can be used for many different purposes. Always rename it to describe what you're waiting for. For example, instead of "Do Until," use something like "Wait until approval is complete" or "Retry until file is available." Always build the name so others can understand your use without opening the action and checking the details.
Always add a comment
Adding a comment will also help avoid mistakes. Indicate what condition you're checking, how many iterations you expect, and what the timeout is set to. It's essential to enable faster debugging when something goes wrong.
Always deal with errors
Have your Flow fail graciously and notify someone that something failed. It's horrible to have failing Flows in Power Automate since they may go unlooked-for a while or generate even worse errors. I have a template that you can use to help you make your Flow resistant to issues. You can check all details here.
Final Thoughts
The "Do Until" action is one of the most versatile tools in Power Automate for handling repetitive tasks, polling, and retry logic. The key things to remember are that it always runs at least once, it succeeds by default even when limits are reached, and you should always configure your count and timeout intentionally rather than relying on defaults.
Back to the Power Automate Action Reference.
Photo by Tine Ivanič on Unsplash


This is a great article. It would be nice if you include some screenshots of at least two examples of this action being used in a flow(s). I think so additional visuals would really help to drive home this information.