
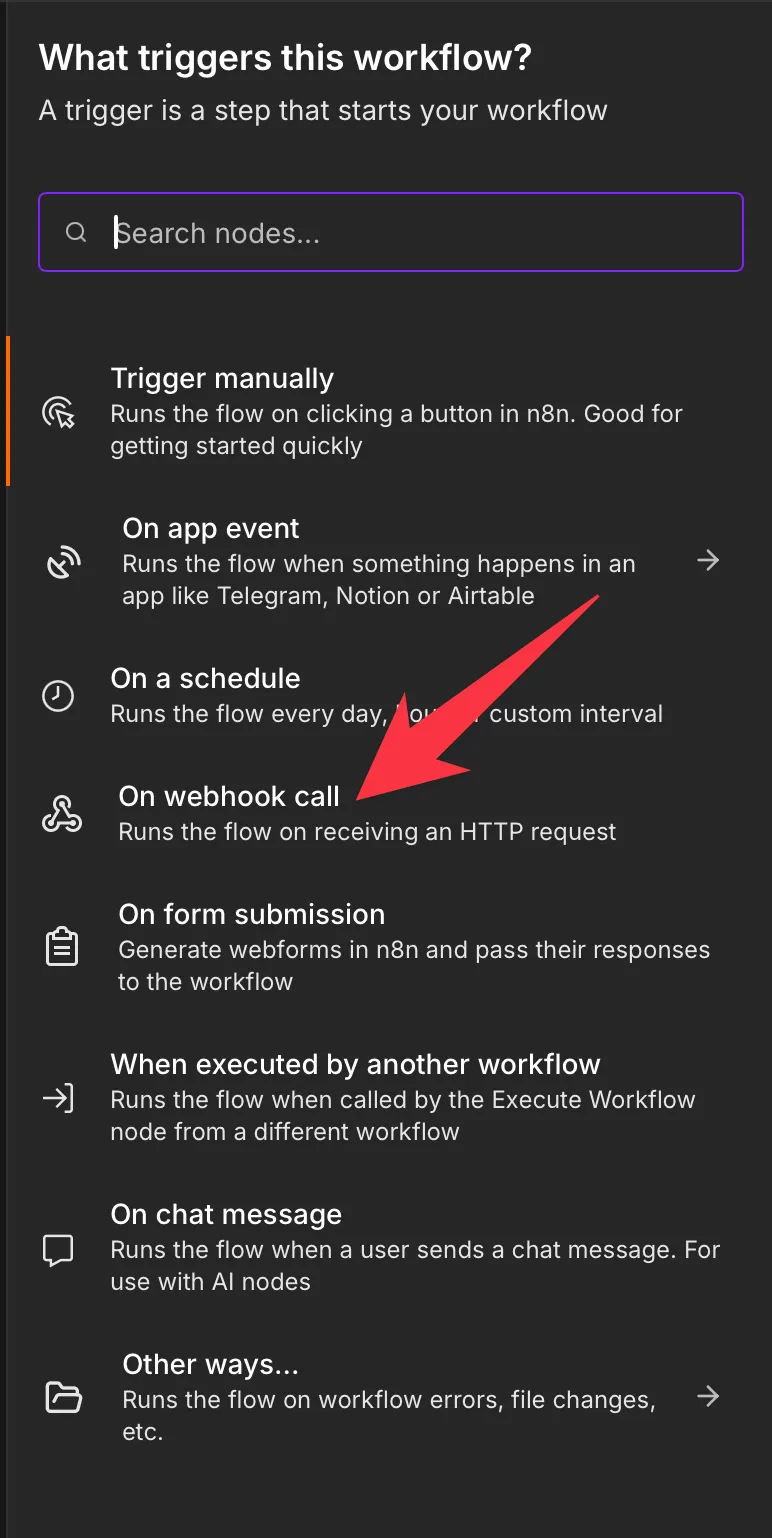
Sometimes you want a workflow to start the instant something happens somewhere else. A form gets submitted, a payment clears, another app finishes a job, and you want N8N to react right away. That is exactly what the "Webhook" node is for. In the add-trigger panel it shows up as "On a webhook call", and it gives your workflow a public URL that other services can send an HTTP request to. Because it reacts to an incoming request rather than checking on a timer, it is an instant trigger: the moment a request lands on that URL, N8N runs the workflow and hands it whatever data came along. Let's walk through how to set it up and the quirks worth knowing before you point a live service at it.
Where to find it?
Open your N8N workflow, select the "+" to add a node, and search for "Webhook" in the nodes panel. It also appears when you add the first trigger, listed as "On a webhook call". It sits in the trigger group, so it can be the very first node that starts your workflow.
Do not confuse the "Webhook" node with the "Respond to Webhook" node. The "Webhook" node starts a workflow when a request arrives. The "Respond to Webhook" node sits later in the same workflow and decides what to send back to the caller. You often use them together, but they are two different nodes with two different jobs.
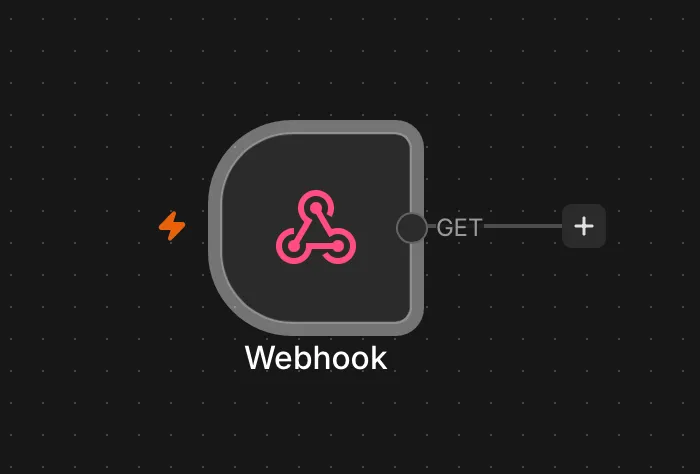
Here's what it looks like:
Now that we know how to find it, let's understand how to use it.
Usage
The "Webhook" node is configured entirely around the request you expect to receive: which method it uses, which path it listens on, how callers prove they are allowed, and what N8N sends back.
Credentials
Credentials here are optional and depend on how you secure the endpoint. If you set Authentication to "None", the node needs no credentials at all and anyone with the URL can trigger it. The other choices each use their own credential type: "Basic Auth" stores a username and password, "Header Auth" stores a header name and its expected value, and "JWT Auth" stores the secret used to validate a signed token. You create the matching credential once and reuse it across nodes.
HTTP Method
This sets which HTTP verb the endpoint accepts, such as GET, POST, PUT, PATCH, DELETE, or HEAD. By default the node accepts a single method, so if a caller uses POST while your node listens for GET, the request is rejected. To accept more than one, open the node Settings and enable "Allow Multiple HTTP Methods", which turns the single dropdown into a multi-select.
Path
The "Path" is the last part of the webhook URL, the piece that makes this endpoint unique. You can leave the generated value or type your own, like new-order. The path also supports route parameters written as /:variable, so a path of customer/:id would capture the id straight from the URL and expose it to the workflow.
Authentication
This dropdown decides how callers prove they are allowed to trigger the workflow. "None" leaves the endpoint open, "Basic Auth" expects a username and password, "Header Auth" expects a specific header to be present with the right value, and "JWT Auth" expects a signed token. Pick anything other than "None" for an endpoint that touches real data, since an open webhook URL is effectively a public button anyone can press.
Respond
The "Respond" option controls when and how N8N answers the caller:
- Immediately: replies as soon as the workflow starts, sending back a simple "Workflow got started" message. Use this when the caller does not need a result, only confirmation that the request was received.
- When Last Node Finishes: waits for the whole workflow to run, then returns the data from the last node. Pair this with the "Response Data" field to choose "All Entries", "First Entry JSON", "First Entry Binary", or "No Response Body".
- Using 'Respond to Webhook' Node: hands control to a "Respond to Webhook" node placed later in the workflow, so you decide the exact status code, headers, and body at that point.
- Streaming response: streams data back as the workflow produces it, which only works with nodes that support streaming.
Options
The "Options" section holds the extras you reach for less often but are glad to have:
- Allowed Origins (CORS): a comma-separated list of origins allowed to call the endpoint from a browser, or
*for any. - Binary Property: receive uploaded files (images, audio, PDFs) and store them under the property name you give.
- Ignore Bots: reject requests that look like they come from bots or link previewers.
- IP(s) Whitelist: a comma-separated list of allowed IP addresses. Anything not on the list gets a 403.
- Raw Body: pass the body through untouched instead of parsing it, useful for JSON or XML you want to handle yourself.
- Response Headers: add custom headers to the response.
- Property Name: return the value of one specific JSON key rather than the whole object.
Outputs
The "Webhook" node emits a single item that represents the incoming request, already split into readable parts. Instead of raw text, you get the headers, the URL parameters, the query string, and the parsed body as separate fields you can reach into.
{
  "headers": {
    "host": "<your-n8n-host>",
    "user-agent": "curl/8.4.0",
    "content-type": "application/json"
  },
  "params": {},
  "query": {
    "source": "signup-form"
  },
  "body": {
    "name": "Maria",
    "email": "maria@example.com",
    "plan": "pro"
  },
  "webhookUrl": "https://<your-n8n-host>/webhook/new-order",
  "executionMode": "production"
}
headers: every HTTP header the caller sent, including content type and user agent.params: the route parameters captured from the path, so a path ofcustomer/:idputs the id here.query: anything after the?in the URL, parsed into keyfield pairs.body: the parsed request body, which is where most incoming data lives for a POST or PUT.webhookUrl: the exact URL that was called.executionMode: whether this run came from the test URL or the production URL.
A downstream node reads any of these with an expression. To grab a value from the body, you would use:
{{ $json.body.email }}
Here $json refers to the current item coming out of the trigger, .body selects the parsed body, and .email picks that one field. When a key has a character that breaks dot notation, like the hyphen in a header name, reach for it with bracket notation instead:
{{ $json.headers["content-type"] }}
Real-world examples
Catch a form submission
Point a website contact form at the production webhook URL with the method set to POST. Every submission starts the workflow, and you read the visitor's details straight from {{ $json.body.name }} and {{ $json.body.email }} to file a record, send a confirmation, or notify your team.
Receive events from another app
Many services (payment providers, ticketing tools, form builders) can send a webhook when something happens. Give them the production URL, set Authentication to "Header Auth" so only they can trigger it, and let the workflow act on each event as it arrives instead of polling for changes.
Reply with a custom answer
Set "Respond" to "Using 'Respond to Webhook' Node", do your lookup or calculation in the middle of the workflow, then use a "Respond to Webhook" node to return a tailored JSON body and status code. This turns the workflow into a small API endpoint that answers the caller directly.
Non-intuitive behaviors
There are two URLs, and they behave differently
Every "Webhook" node gives you a test URL and a production URL. The test URL only listens after you select "Listen for test event", and even then only for about 120 seconds, but it shows the incoming data live in the editor so you can see exactly what arrived. The production URL listens all the time once the workflow is active, but its data only appears in the Executions tab, not in the editor. Build with the test URL, then switch callers to the production URL when you go live.
The workflow must be active for the production URL to work
The production URL only responds while the workflow is saved and active. If you build everything with the test URL and forget to activate the workflow, the production URL returns a "not registered" style error and nothing runs. Flip the workflow to active before you hand the production URL to a real service.
One method at a time by default
The node listens for a single HTTP method unless you turn on "Allow Multiple HTTP Methods" in Settings. This trips people up when a caller sends POST to a node configured for GET, because the request is simply refused with no run to inspect. Match the method to what the caller actually sends, or enable multiple methods.
Limitations
Payload size is capped
The default maximum request payload is 16MB. Anything larger is rejected. On a self-hosted N8N instance you can raise this with the N8N_PAYLOAD_SIZE_MAX environment variable, but on managed plans you are stuck with the platform limit, so large uploads need a different approach such as sending a link to the file rather than the file itself.
Long responses can time out on Cloud
On N8N Cloud, a webhook that waits for the workflow to finish will fail with a 524 error if the response takes longer than about 100 seconds. For slow work, respond "Immediately" to acknowledge the request, keep processing in the background, and let the caller check status separately rather than holding the connection open.
The test URL is not meant for real traffic
The test URL exists for building and debugging. It only listens for a short window after you press "Listen for test event", so it is not something a live service can rely on. Once the workflow works, always move real callers to the production URL.
Troubleshooting Common Errors
The webhook is not registered
Cause: The workflow is not active, or you are sending to the production URL while only the test listener was running. The production URL needs the workflow saved and active.
Solution: Activate the workflow, then use the production URL. For a quick manual test, press "Listen for test event" first and send your request to the test URL within the 120-second window.
The caller gets a 404 on the URL
Cause: The path or method does not match the node. A different path, a trailing slash, or the wrong HTTP verb all produce a not-found response.
Solution: Copy the URL straight from the node, confirm the "HTTP Method" matches what the caller sends, and enable "Allow Multiple HTTP Methods" if you need to accept more than one.
A whitelisted IP still cannot connect
Cause: N8N is running behind a reverse proxy, so it sees the proxy's IP address instead of the caller's, and the whitelist never matches.
Solution: Set the N8N_PROXY_HOPS environment variable to the number of proxies in front of your instance so N8N reads the real client IP.
A path and method combination already in use
Cause: Two active workflows are trying to register the same path with the same HTTP method, which is not allowed.
Solution: Change the path or method on one of them, or deactivate the workflow you are not using.
Recommendations
Always secure a live endpoint
An open webhook URL is a public trigger anyone can hit if they learn the address. For anything that touches real data, set Authentication to "Header Auth", "Basic Auth", or "JWT Auth", and consider the "IP(s) Whitelist" option when only known systems should call it.
Decide how you respond on purpose
Match the "Respond" mode to the caller's needs. Use "Immediately" for fire-and-forget events, "When Last Node Finishes" when the caller wants the result, and a "Respond to Webhook" node when you need full control over the status code and body. Guessing here leads to timeouts or empty responses.
Name it correctly
Rename the node so others can understand what starts the workflow without opening it and checking the details. Double-click the node title and give it a clear, descriptive name like "New order received".
Always add a note
Add a note to the node or drop a sticky note on the canvas explaining what calls this webhook, which method it expects, and how it is secured. It's essential to enable faster debugging when something goes wrong.
Final Thoughts
The "Webhook" node turns a workflow into a live endpoint that other systems can call the instant something happens, which is what makes N8N feel connected to the rest of your stack. Build with the test URL, secure the endpoint before it goes live, and choose your response mode deliberately, and this node will handle real traffic without surprises.
Sources
- Webhook node documentation
- Webhook node common issues
- Webhook node workflow development
- Respond to Webhook node documentation
Back to the N8N Trigger Reference
Photo by Miguel Ángel Padriñán Alba on Unsplash


No comments yet
Be the first to share your thoughts on this article!