
Many things can be done in Power Automate or using Microsoft Graph, but not everything. For certain things, Microsoft requires us to use PowerShell scripts. If you're not aware of what they are, that's ok. In a nutshell,
PowerShell is a powerful scripting language that can help you automate complex tasks, manage systems, and handle data transformations. When combined with Power Automate, you can create workflows that bridge the gap between cloud automation and traditional system administration.
But if you reached this article, you know what PowerShell is and probably have a few scripts you're using and want to trigger them automatically.
PowerShell 7.4 reaches end of support on the 10th of November 2026, and Azure Automation follows the language's own lifecycle. At the time of writing, 7.4 is still the only generally available 7.x version there, so it's what I recommend below, but keep an eye on this before you build something you'll depend on for years.
Let's see how to do this.
Where to find the PowerShell action in Power Automate
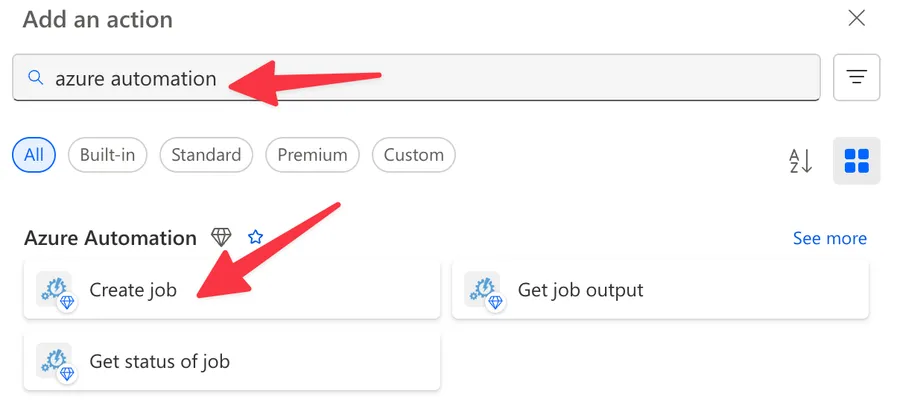
To find the PowerShell action in Power Automate, you must look for the Azure Automation connector. Here's how:
- In your Flow, select "New step"
- In the search box, type "Azure Automation"
- Select "Azure Automation" from the results
- Choose "Create job" action
We're using Azure Automation because it's a good compromise between usability and scalability. Also, you have 500 minutes of runtime for free (at the time of writing this article), so if you have sporadic scripts running, it's a good service to use. Two details are worth knowing before you count on that free tier: those 500 minutes are per subscription and not per Automation account, and they cover every job you run, including the ones you kick off from the portal while testing. There are a few alternatives, like Azure Functions, that you can use if it's easier.
One more thing before we start. The Azure Automation connector is a premium connector in Power Automate, so you'll need the right license to use it. If you're building in Logic Apps instead, the same connector is a standard one.
Now that we know how to find it let's understand how to set up the prerequisites.
Setting up prerequisites
Before you can run PowerShell scripts in Power Automate, you need to have a few things set up:
If you followed an older guide that set up a "Run As account" with certificates, that approach was retired back in 2023. New Automation accounts now get a system-assigned managed identity automatically, so inside your PowerShell script you just call Connect-AzAccount -Identity to authenticate. There's nothing to renew and no secrets to manage.
Two details that trip people up. Creating the identity is not the same as giving it permissions, so you still need to grant it a role on whatever resources your script touches. And if you go for a user-assigned identity instead of the system-assigned one, know that it only works for cloud jobs, while the system-assigned one works for both cloud and Hybrid Worker jobs.
1. Azure Automation Account
You'll need an Azure Automation account, where your PowerShell "runbooks" will live. To create one:
- Go to the Azure Portal (portal.azure.com)
- Search for "Automation Accounts"
- Click "Create" to create a new Automation Account

- Fill in the required details (Name, Subscription, Resource Group, Region)
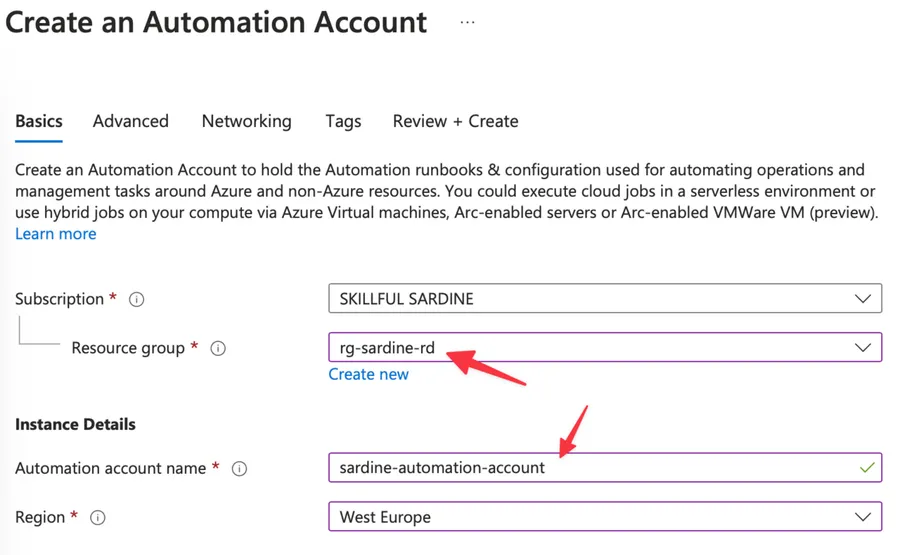
- Click "Review + Create" and then "Create"
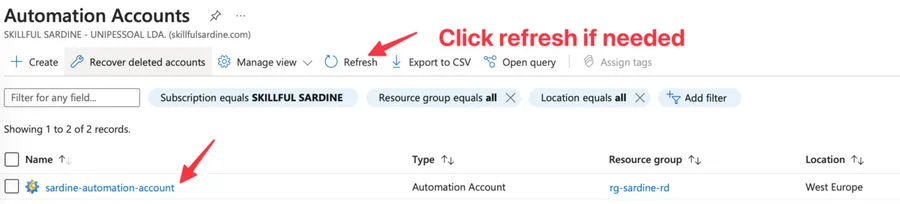
It can take a few minutes but you'll see it in the list once created.
2. Create a Runtime Environment
You will need a runtime environment. You can use a default one in your "runbook", but if you want to reuse some of the packages, it's good to create one. It's also how you get a modern PowerShell: versions 7.1 and 7.2 have been retired, and 7.4 (the version I'd pick today) is only available through a Runtime Environment. To do it:
- Go to "Create a Runtime Environment"
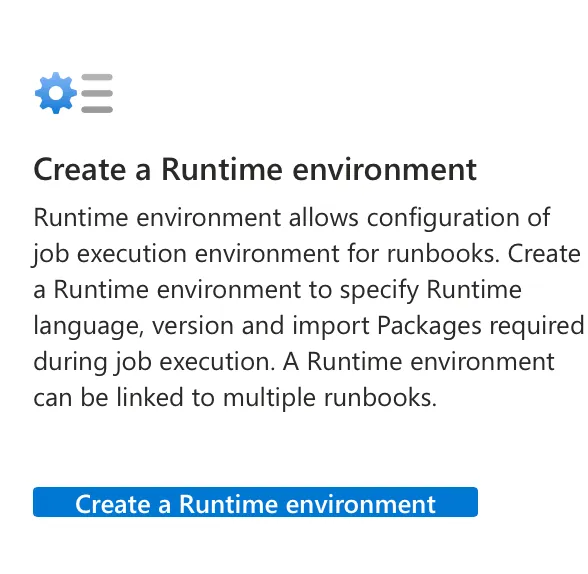
- Give it a name, language, and corresponding "runtime version"
- The description is optional, but it's always good to add one to indicate why we created it and why we're using it.

It can take a few minutes, but once it's provisioned, you can start building your "runbook."
3. Create a PowerShell "Runbook"
Once your Automation Account is set up, you need to create a "runbook":
- In your Automation Account, go to "Runbooks" under Process Automation
- Click "Create a runbook"
- Give it a name, set the type to "PowerShell", and click "Create"
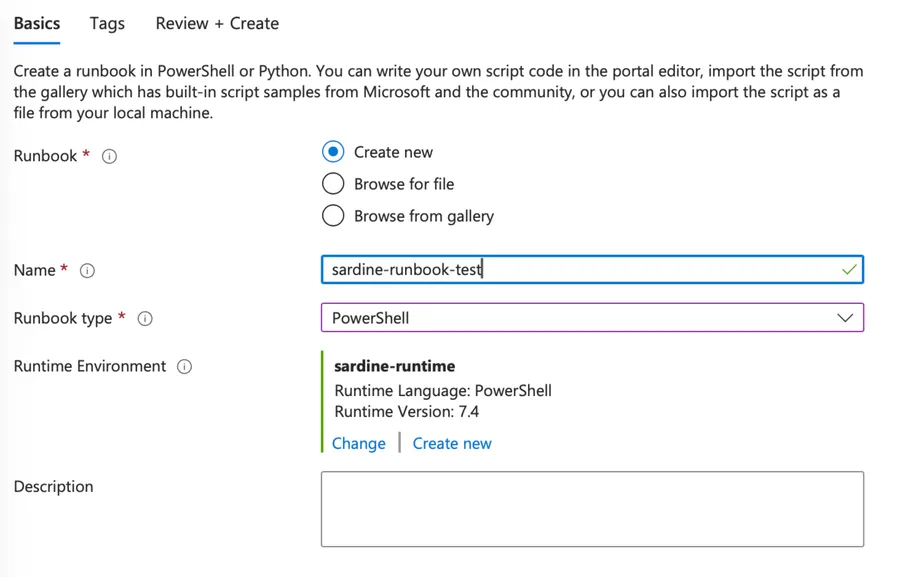
Notice that we're re-using the "Runtime Environment". Once created, you'll see it under the "runbook" list.
4. Write Your PowerShell Script
After creating the "runbook", you'll be taken to the editor where you can write your PowerShell script.
If not, you can:
- Click your "runbook".
- Select "Edit".
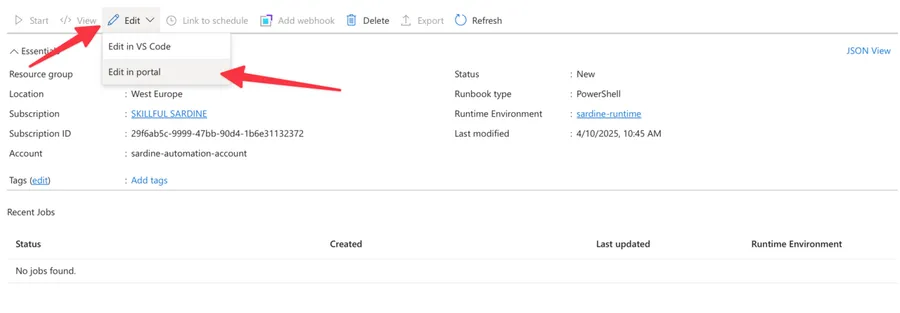
The portal will show you the code editor where you can paste your code. For demonstration purposes, here's a simple code example:
param(
    [Parameter(Mandatory=$true)]
    [string] $Name
)

$output = "Hello, $Name! The current time is: $(Get-Date)"
Write-Output $output
This script takes a parameter called "Name" and outputs a greeting with the current time.
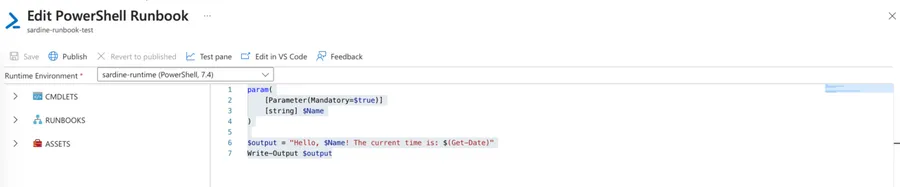
Let's test it before we can publish it. Click "Test Pane". You can add then your parameter and click "Run".

The parameter is an essential detail so we can be sure we can provide things in and out of the PowerShell script.
5. Publish the Runbook
After writing your script, you need to publish it:
- Click "Save" to save your script
- Click "Publish" to make it available for execution

Notice that the "Run" button is now enabled.
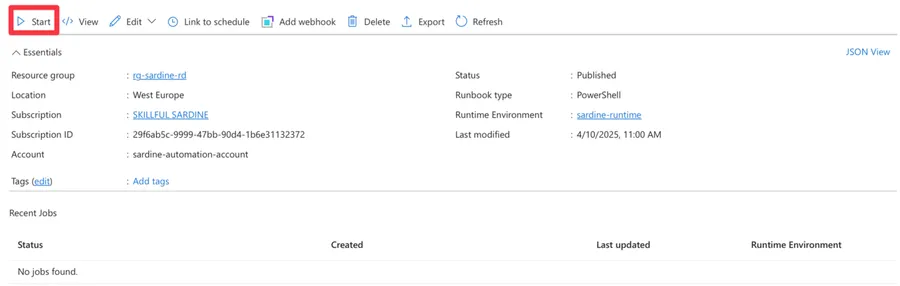
Notice that there's also a "schedule" section. If you need it to run periodically, you don't need Power Automate to trigger it. You can define everything here and let it run.
Now, let's look at how to use it in Power Automate.
Basic usage of PowerShell in Power Automate
Using PowerShell in Power Automate is pretty straightforward once you set up the prerequisites. Here's how:
Creating a Simple PowerShell Action
- Add the "Azure Automation - Create job" action to your Flow
- If you don't have the connection yet, you'll be prompted to name it and authenticate.
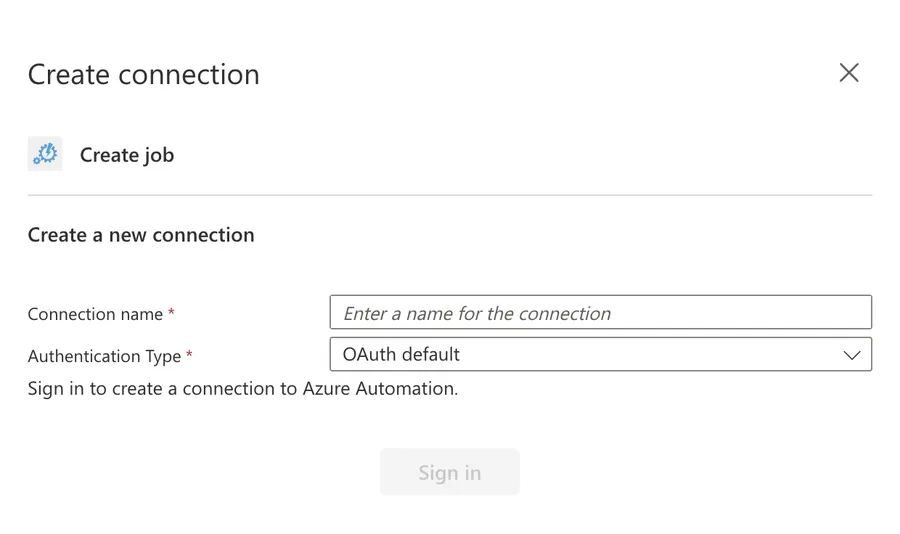
The connection only sees subscriptions in your own default tenant, and guest users aren't supported. If either of those describes you, authenticate with a service principal instead.
- Select your Automation Account and Runbook. Since we defined them before, all the parameters should look familiar, but don't forget to adjust to the ones that make sense to you.
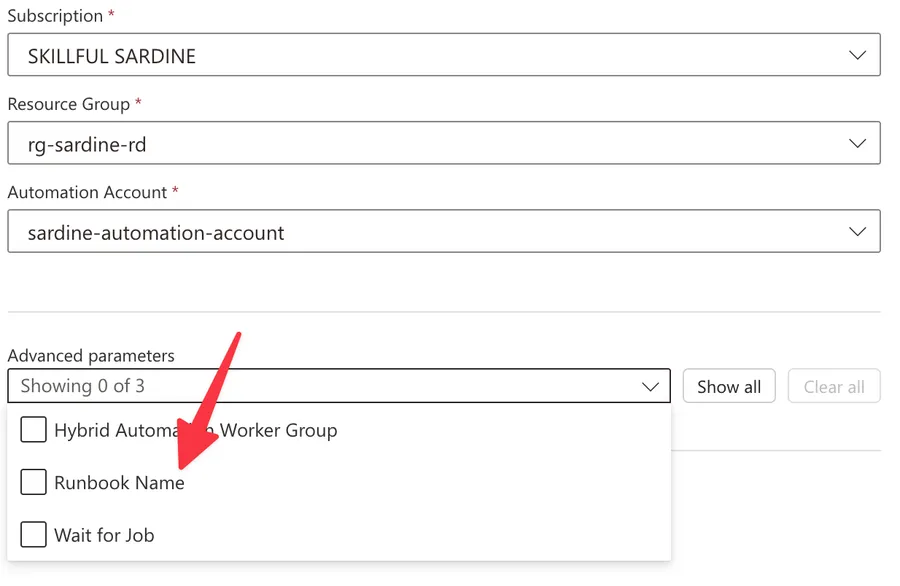
- You'll see the "runbook" we created before.
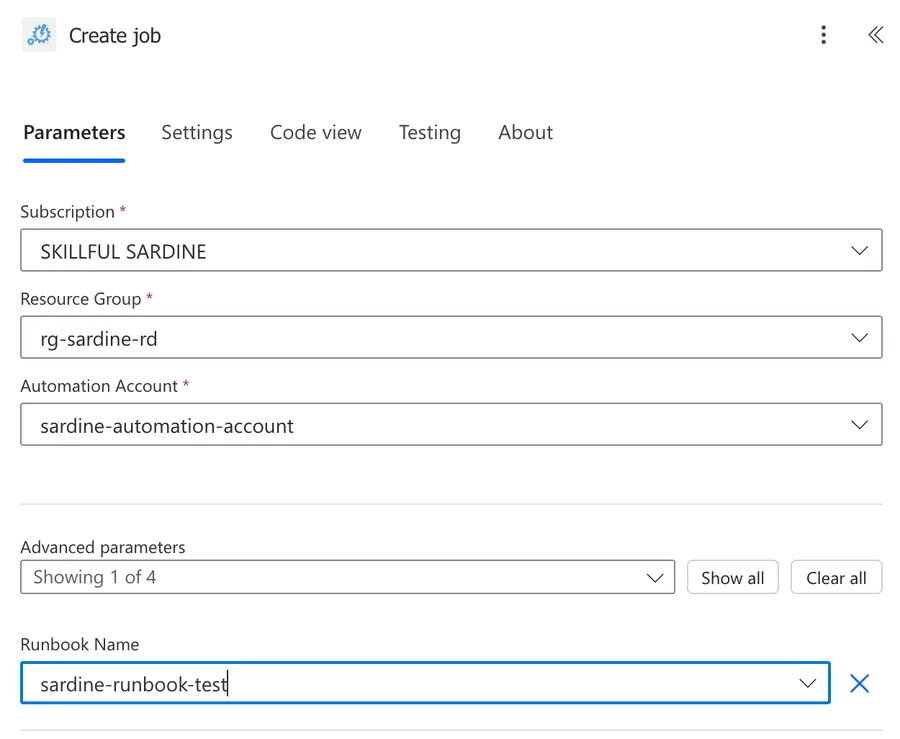
- Notice that our "runbook" requires a name, so we must also configure that. Since this is specific to that "runbook", it will only show after you select it.

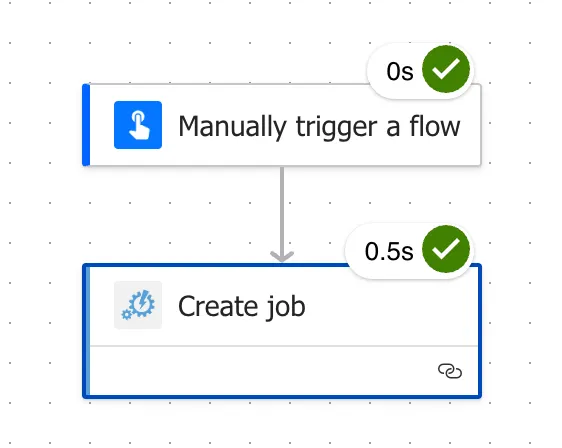
Let's test our Flow and see how it behaves.
Getting the output back
By default, the "Create job" action just kicks the runbook off and moves on, so your Flow won't see the result. If you need the output, set "Wait for Job" to true so the action waits for the run to finish, then add the "Get job output" action and feed it the Job ID that "Create job" returns. One thing to note: the output comes back as binary, so a quick "Compose" action helps you read it as text.
It's worth knowing that the connector gives you very little to work with here. There are only three actions, "Create job", "Get job output", and "Get status of job", and there are no triggers at all. So if you leave "Wait for Job" off, nothing will call you back when the job ends. You'd have to poll "Get status of job" yourself.
Alternative approaches to running PowerShell scripts
While Azure Automation is a great way to run PowerShell scripts from Power Automate, several other approaches are worth considering if they make sense in your use case or are easier to set up and maintain.
Azure Functions
Azure Functions provide another way to run PowerShell scripts in the cloud:
Advantages:
- Faster execution startup time than Azure Automation
- More flexible trigger options (HTTP, timer, blob storage, etc.)
- Pay-per-execution pricing model
Setup:
- Create an Azure Function App
- Create a new function with PowerShell template
- Write your script that accepts HTTP requests
- Use the HTTP trigger in Power Automate to call the function
Power Automate Desktop
For on-premises scripts that need to interact with local resources:
Advantages:
- Run scripts on local machines without cloud connectivity
- Interact with desktop applications
- Access local files and systems
Setup:
- Install Power Automate Desktop
- Create a Desktop flow with the "Run PowerShell script" action
- Call the Desktop flow from your cloud flow using the "Run a flow built with Power Automate Desktop" action
Non-intuitive behaviors
A few things about Azure Automation can catch you off guard. Here are the ones worth knowing before you build something important.
The three-hour limit stops your job for good
Cloud runbook jobs run in a shared sandbox with a "fair share" limit of three hours. When a job hits it, Azure stops the job and does not restart it, so anything long-running needs a Hybrid Runbook Worker instead, which has no time limit. If you go that way, use the extension-based worker: the older agent-based one was retired, and jobs stopped running on it in April 2025.
A stopped job won't pick up where it left off. Design long tasks so they can be resumed, or move them to a Hybrid Worker.
The sandbox is smaller than your laptop
This is usually what's behind "but it worked on my machine". A cloud sandbox gives your script 400 MB of memory, 1 GB of disk, and 1,000 network sockets, and it cannot call executables or subprocesses, so no launching a .exe from your script, and no WMI or COM either. Up to ten jobs can share one sandbox, which also means they can step on each other. A script that calls Disconnect-AzAccount will disconnect every job sharing that sandbox, not just itself.
A Hybrid Worker escapes all of these, not just the three-hour limit, so it's the usual fix when a script is too heavy for the sandbox.
Job output is capped at 1 MB
A single job stream cannot go past 1 MB. In the cloud you'll get an error when you cross it, but on a Hybrid Worker the output is quietly truncated with nothing to tell you. If your "Get job output" comes back looking incomplete, this is usually why.
Modules are pinned to a runtime version
A module you import is tied to the runtime version it was imported into. A module added to a 5.1 environment is invisible to a 7.4 runbook, and the other way around, so import into the version your "runbook" actually uses.
Output comes back as binary
The "Get job output" action returns binary content, and only what you send to the output stream comes back. Return real data with "Write-Output" (JSON works well), not console formatting, and add a "Compose" action to read it as text in your Flow.
Parameters arrive as strings
Values you pass into a runbook are handled as strings, and not every PowerShell parameter type is supported. Keep inputs simple and convert inside the script if you need a richer type.
If you want the full details on any of these, Microsoft documents them in Runbook execution and Runbook input parameters.
Limitations
Be aware of these limitations when using PowerShell in Power Automate through Azure Automation:
Size and Complexity Limitations
- Maximum Runtime: Azure Automation "runbooks" have a maximum runtime of 3 hours
- Maximum Input Size: Job parameters are capped at 512 KB total, across a maximum of 50 parameters
- Maximum Parameter Length: Separately from the 512 KB cap, the parameter names and values together cannot go past 30,000 characters. This is the one you're most likely to hit if you pipe a JSON blob in from your Flow, and the way around it is to pass the value through an Automation Variable instead
- Maximum Output Size: A single job stream cannot exceed 1 MB
Concurrency
- Concurrent Jobs: How many jobs you can run at once depends on your subscription. Enterprise and CSP subscriptions get 50 per Automation account per region, pay-as-you-go gets 10, and free trial gets 5. Once you're at the cap, "Create job" simply fails, which is easy to hit if your Flow starts jobs inside an "Apply to each"
- Connector Throttling: On the Power Automate side, the Azure Automation connector allows up to 1,200 calls per connection every 60 seconds, which matters if you trigger jobs in a loop
Runtime Constraints
- Startup Time: Jobs don't start instantly. Expect to wait a little while the sandbox is prepared, and don't build a Flow that assumes the result is available straight away
- Module Availability: Not all PowerShell modules are available in Azure Automation
- Network Connectivity: Azure Automation "runbooks" run in Microsoft's cloud environment, which may not have access to certain resources. Storage accounts, Key Vaults, and SQL databases behind a firewall are the classic example, since Automation isn't on the trusted services list and gets a 403 even with the "trusted Microsoft services" exception switched on. A Hybrid Worker is the way around it
Execution Environment Considerations
- PowerShell Version: PowerShell 7.4 is the current recommended version, and it's only available through a Runtime Environment. Versions 7.1 and 7.2 have been retired, while 5.1 is still supported if you need it. Do keep the November 2026 end of support for 7.4 in mind
- Environment Persistence: Don't rely on files or state between executions
- Parallelism: Be cautious with parallel job execution if your scripts modify shared resources
Troubleshooting
A handful of errors show up again and again when people wire this up for the first time. Here are the ones worth recognizing on sight.
"'this.Client.SubscriptionId' cannot be null"
Cause: your Connect-AzAccount -Identity call worked, but the managed identity has no role on the subscription. Creating the identity and giving it permissions are two separate steps, and it's very easy to assume that -Identity handles both.
Solution: go to the subscription (or the specific resources your script touches), and assign the Automation account's identity a role that covers what the script does. Then run it again.
"The term 'Connect-AzAccount' is not recognized"
Cause: the module isn't there, or more likely, it's there but was imported into a different runtime version. Modules are pinned to the runtime they were imported into, so an Az module sitting in your 5.1 environment is invisible to a 7.4 "runbook".
Solution: import the module into the same runtime version your "runbook" actually uses. It's also worth knowing that modules imported into a 7.4 Runtime Environment are only validated when the job runs, not when you upload them, so a missing dependency won't surface until the first execution.
"The job was tried three times but it failed"
Cause: this is almost always the sandbox pushing back. The usual suspects are the 400 MB memory cap, the 1,000 socket cap, or a module that doesn't play well with the runtime version.
Solution: trim what the script loads into memory, or move the job to a Hybrid Worker, which doesn't have those caps.
The job sits in "Queued" and never starts
Cause: the region is busy. Microsoft has documented this for West Europe in particular, and the reason is a simple one. Almost everyone schedules their jobs on the hour and on the half hour.
Solution: move your schedules a few minutes off the hour. If the job comes from a Flow rather than a schedule, adding a small delay before "Create job" achieves the same thing.
Recommendations
Here are some best practices to follow when using PowerShell in Power Automate:
Name it correctly
The name of your actions is super important for maintainability. Always give descriptive names that indicate what the PowerShell script is doing:
- Instead of "Azure Automation", use "Get User Information with PowerShell", for example. Something that makes sense and describes its usage without you having to inspect it.
- Instead of "Create job", use "Process SharePoint Data with PowerShell", for example.
Always add a comment
Adding a comment will help avoid mistakes and make your flow easier to understand:
- Indicate what the script does and why it's needed
- Document the parameters and expected outputs
- Note any dependencies or prerequisites
Always handle errors
Have your Flow fail graciously and notify someone when something goes wrong:
- Add a "Run after" configuration to handle errors from the PowerShell action
- Use a condition to check for successful execution
- Implement notification mechanisms for failures
try {
    # Your script logic here

    $result = @{
        Status = "Success"
        Data = $processedData
    }
}
catch {
    $result = @{
        Status = "Error"
        ErrorMessage = $_.Exception.Message
        StackTrace = $_.ScriptStackTrace
    }
}

# Always return a result with consistent structure
Write-Output ($result | ConvertTo-Json -Depth 10)
Consider alternatives for very complex scripts
If your PowerShell script is becoming very complex or requires significant resources:
- Consider refactoring it into an Azure Function
- Break it down into smaller, more manageable pieces
- Evaluate if some logic can be implemented directly in Power Automate
Test scripts independently before using in Power Automate
Always develop and test your PowerShell scripts outside of Power Automate first:
- Test in PowerShell ISE or VS Code
- Test manually in Azure Automation
- Only then integrate with Power Automate
This approach makes debugging much easier and ensures your script works correctly before adding the complexity of Power Automate integration.
Final Thoughts
Running PowerShell scripts in Power Automate through Azure Automation opens up a lot of possibilities that go beyond the native capabilities of Power Automate. By combining these technologies, you can:
- Automate complex system administration tasks
- Process data in ways that would be difficult or impossible with standard actions
- Integrate with systems that don't have native connectors
- Implement sophisticated business logic
Remember that security should always be a priority when running PowerShell scripts, especially those that manage resources or handle sensitive data. Follow the principle of least privilege, use managed identities when possible, and validate all inputs.
Start with simple scripts and gradually build up to more complex scenarios as you become comfortable with the integration. The combination of PowerShell's flexibility and Power Automate's workflow capabilities creates a powerful automation platform that can handle almost any task you need.
Photo by Artem Sapegin on Unsplash


I just discovered this blog, and wish I'd found it so much sooner. I've been learning Power Automate from scratch to help clean up my workplace, and I've learned there are so few good Power Automate references out there for people who don't already know what they're looking for. This blog is by far the most comprehensive resource I've seen, and I just wanted to say thank you for the amazing work you're doing. Thank you!!!
Thank! :) Appreciate it :).