
The "Manually trigger a flow" trigger is, without question, one of my most used triggers ever. Although it's super valuable to have Flows triggering automatically, it's also super helpful to have a Flow that you can activate manually and does something for us.
I will write an article about this, but you've seen by now that I like to create a lot of "sub-flows" or "aux-flows," as I call them, where I put common tasks. So, for example, if you go to my cookbook, you'll find some Flows that you can import triggered by a "Manually trigger a flow" trigger.
So let's explore it a bit further.
Where to find it?
The "Manually trigger a flow" is part of the default set of triggers in Power Automate. The other ones are automated (all that react to some changes) and scheduled (trigger periodically regardless of the changes).
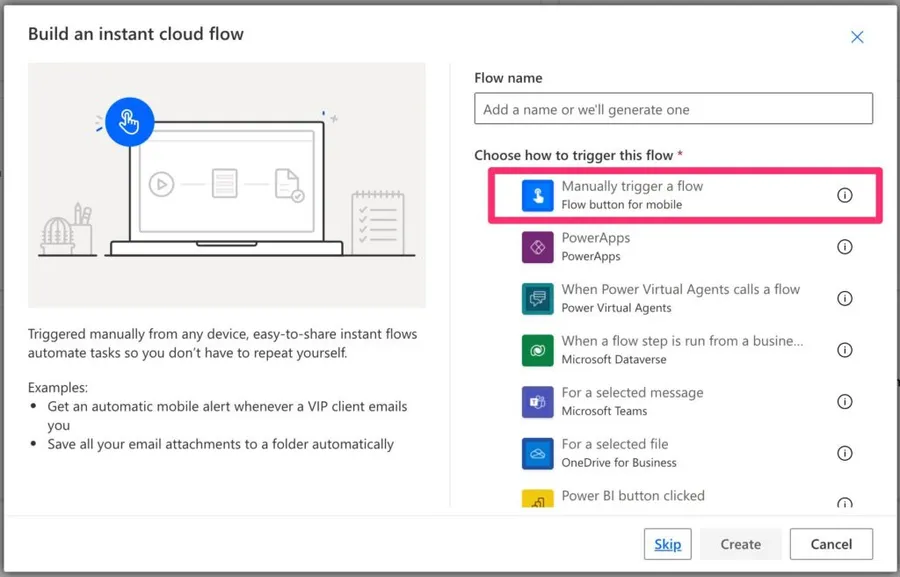
If you're creating a Flow from scratch, it's usually the first recommendation on the list.
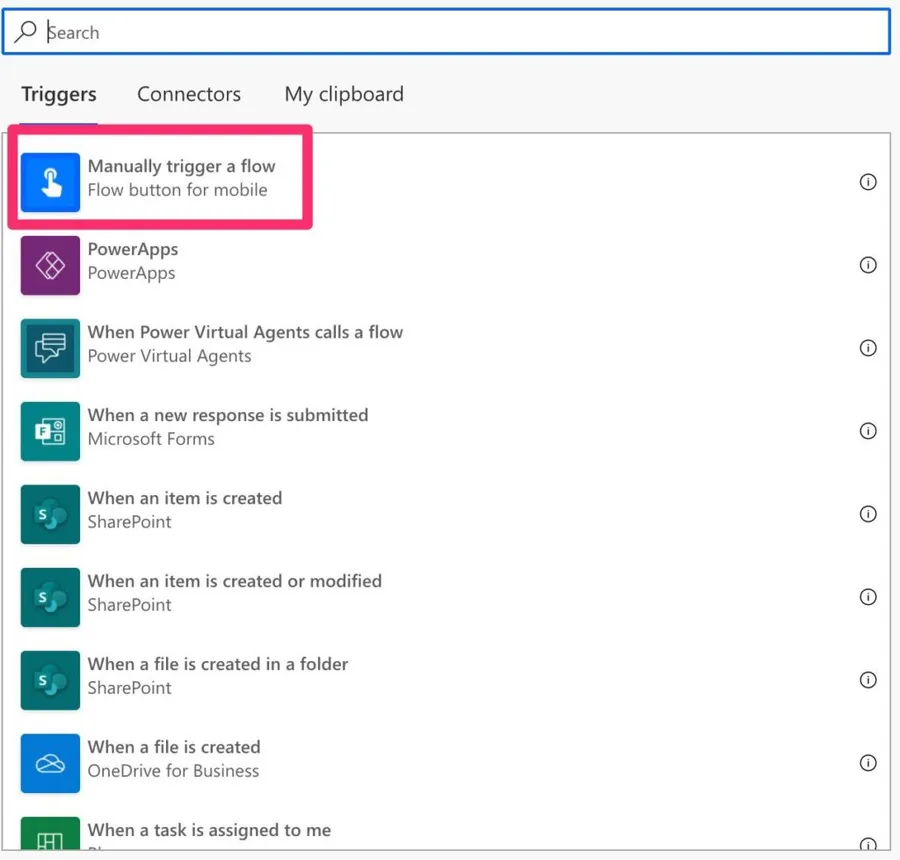
Here's what it looks like.
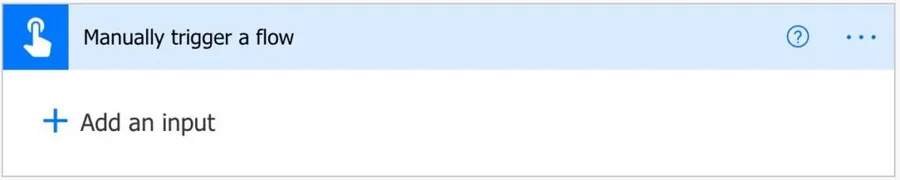
Usage
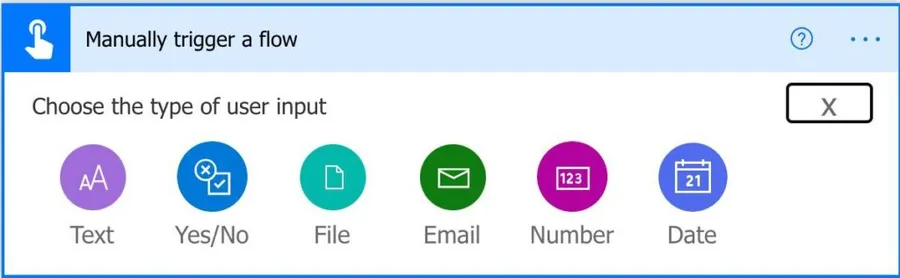
Once you add the "Manually trigger a flow" trigger, you can add input parameters. These are super useful when your Flow does something that needs outside information. Think, for example, a Flow that parses a CSV file. You would want to provide to the Flow at least the CSV file location to process. To do it, press the input, and you'll have many types to choose from.
To start, let's pick the "Text". This is what it looks like.
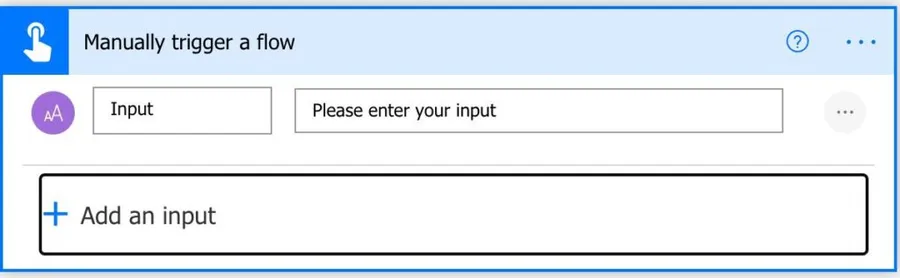
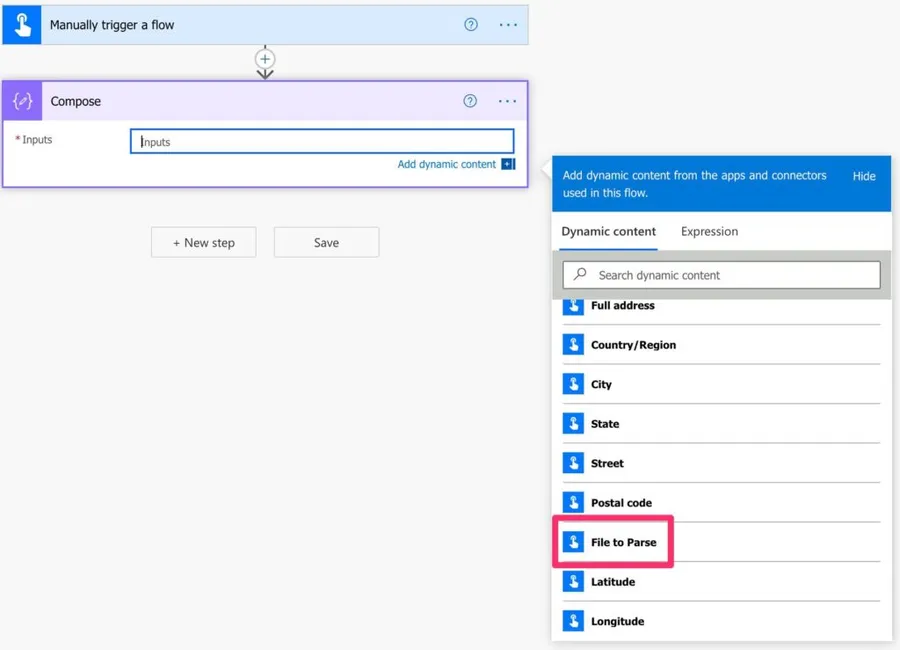
We have the "Input" and the "Text" in all input parameters. The "Input" is the name that you'll find in the dropdown list on any Flow action. For example, let's change the "Input" to "File to Parse". Here's what it looks like inside a "Compose" action.
The available input types
When you add an input, Power Automate gives you six types to pick from: Text, Yes/No, File, Email, Number, and Date. Most are self-explanatory, but the File type is worth a note: it doesn't hand you the file directly, it returns an object with the filename and the content (more on that in the Outputs section).
Pick options
Let's say you have many values that you want someone who calls this Flow to pick. For example, let's say you're adding data to a list but only want to add it to existing lists. So you can "Add a drop-down list of options" like this.
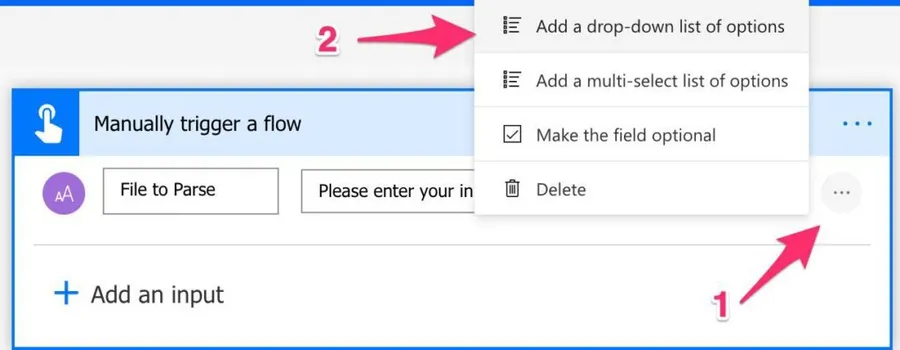
Now, instead of allowing people to insert random strings, you can define the range of acceptable values.
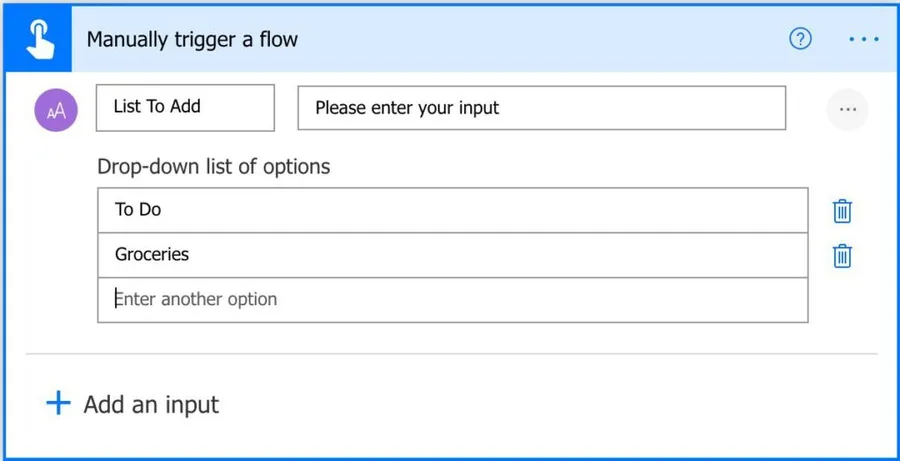
Let's test it.
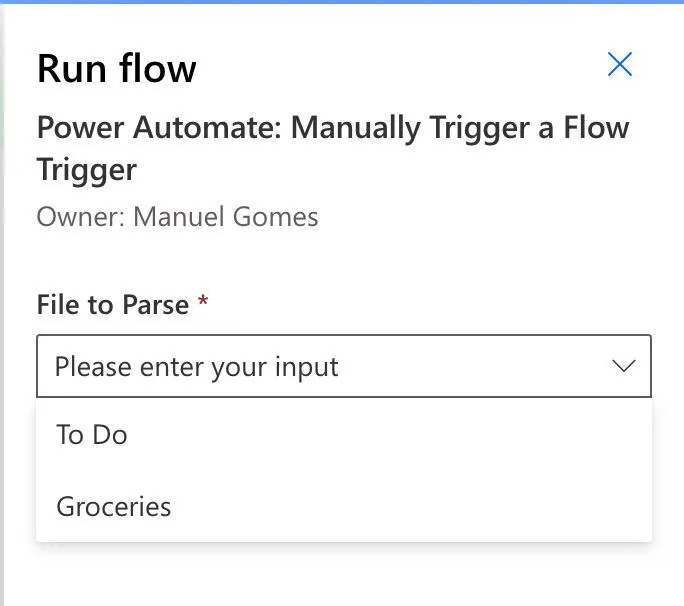
As you can see above, there's a defined list of values that you can pick. You can also have the same above, allowing your users to select more than one value.
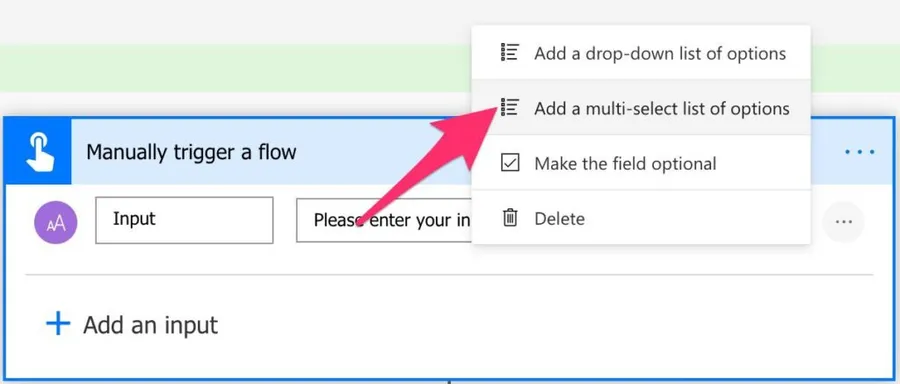
Here's what it looks like:
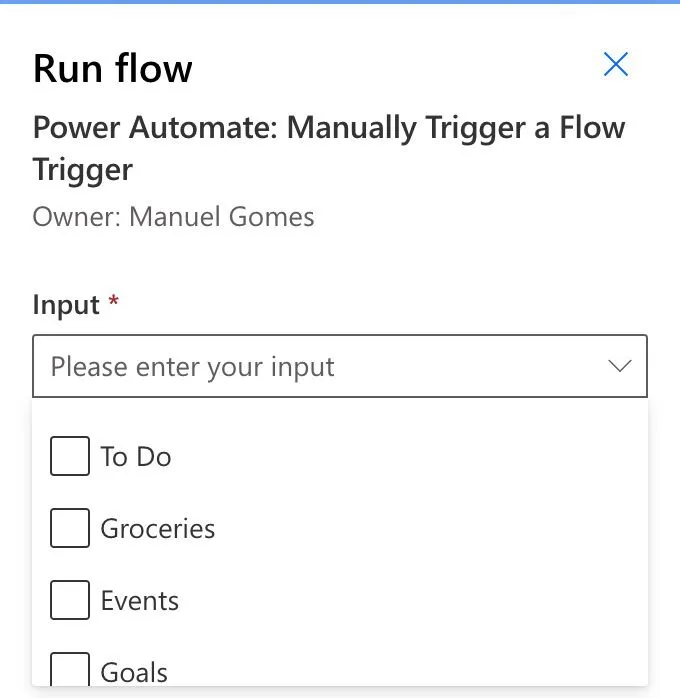
We have the same dropdown as before but now with checkboxes to select the items you want.
Trigger the Flow
Since we're using "Manually trigger a flow," we need to do something for it to run. There are three ways to do it:
- First, call it directly in Flow.
- Use the mobile app and trigger it
- Call it from another Flow.
To call from Flow, you can use the top button to Run or the dots next to the Flow's name. You'll be prompted if you need any parameters. In the mobile app, you can use the "Button" tab to display all the triggers.
I want to explore further how to call it from another Flow. Using the "Run Child Flow" action, you can call a Flow inside another if you use solutions. Let's have a simple trigger with a "Compose" action.
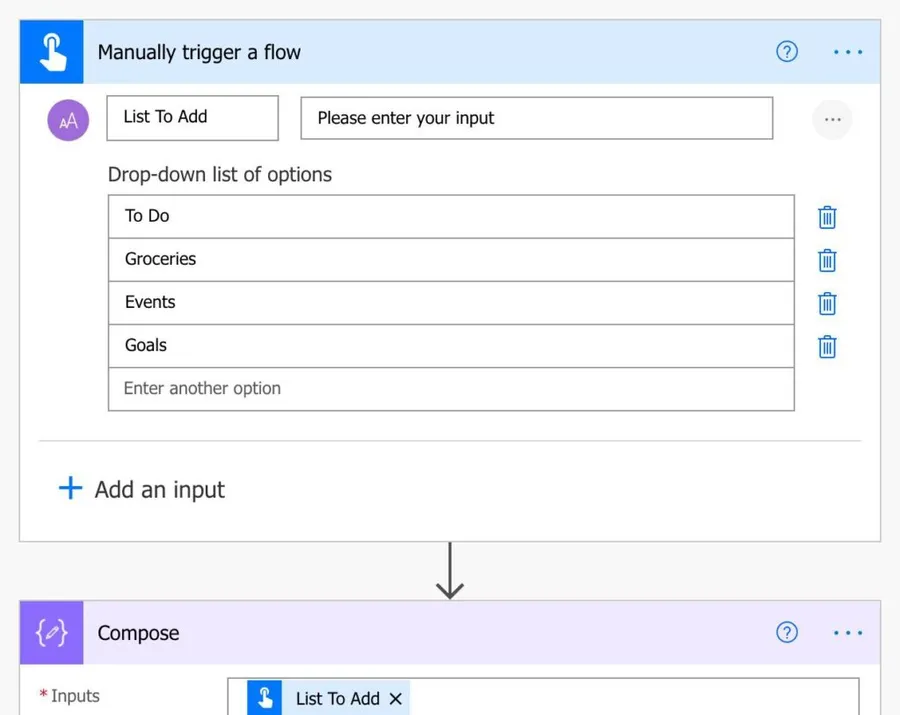
And now, let's create another Flow and call this one.
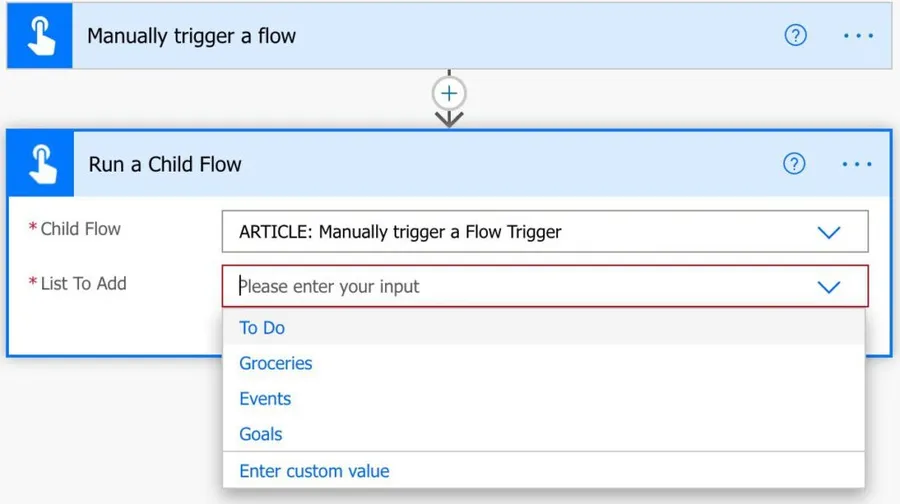
As you can see, Power Automate is smart enough to understand the parameters that the child Flow expects and display them to you. There are a lot of advantages to doing this:
- First, you always know what Flow you're calling.
- Second, the parameters are always defined, so there's a lower chance of incorrect values being provided.
- They are reusable. Child Flows can be called multiple times, and in multiple Flows, so it's always good to keep common actions in child Flows.
Outputs
The trigger returns everything through the "triggerBody()" object. Each input parameter you defined becomes a property inside it, ready to use in the next actions.
One thing that trips people up is that the internal property names are generated from the type, not from the friendly name you typed. The first text input is text, the second is text_1, the third text_2, and so on. Numbers land in number, dates in date, the Yes/No input in boolean, and email in email. The label you set (like "File to Parse") is only a display alias, so when you write your own expressions you need to use the internal key.
A File input is a little different. It doesn't return the file directly, it returns an object with two properties: name (the filename) and contentBytes (the content, base64 encoded). So to get the content you'd write:
triggerBody()?['file']?['contentBytes']
A common mistake is passing the whole file object to an action that only wants the content, which gives you a "The provided workflow action input is not valid" error.
Non-intuitive behaviors
Making things optional
Not all fields are always required, so Power Automate gives us the possibility to make them optional.
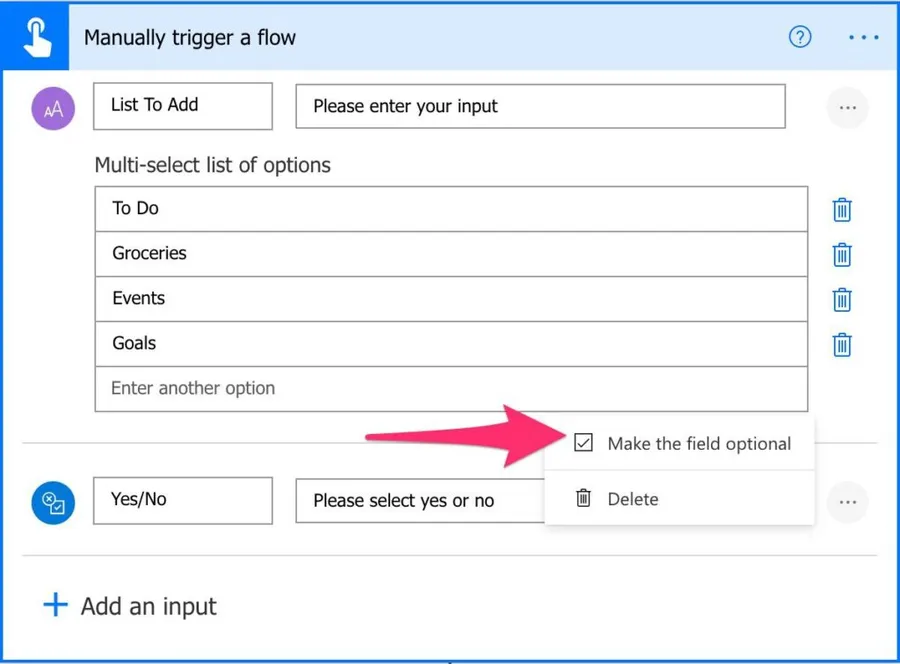
Making fields optional is tricky because Power Automate won't return the field if it's not filled in. So, to make things more visible, let's create a new date field and make it optional. Also, let's add a "Compose" action to see the value provided.
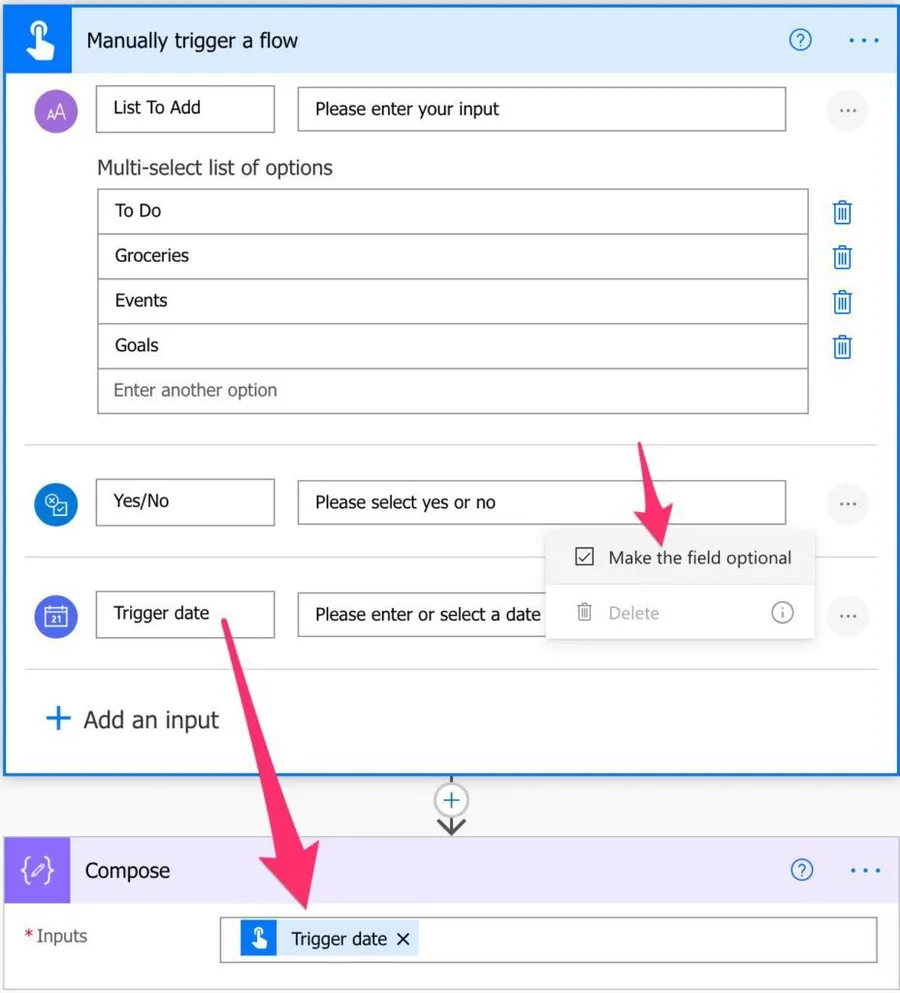
We would expect two things:
- To have a value if the "Trigger date" is filled-in
- Empty if the "Trigger date" is not filled in
This is not what happens. If the value is filled in, we get a value.
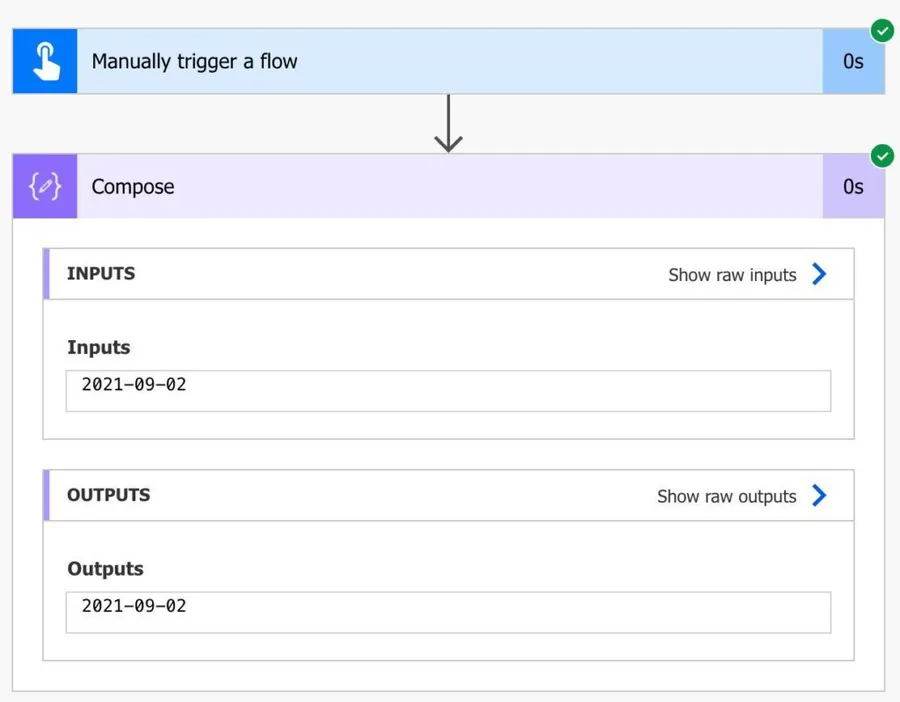
But if the value is not filled in, we will get an error.
Unable to process template language expressions in action 'Compose' inputs at line '1' and column '6037': 'The template language expression 'triggerBody()['date']' cannot be evaluated because property 'date' doesn't exist, available properties are 'text, boolean'. Please see https://aka.ms/logicexpressions for usage details.'.
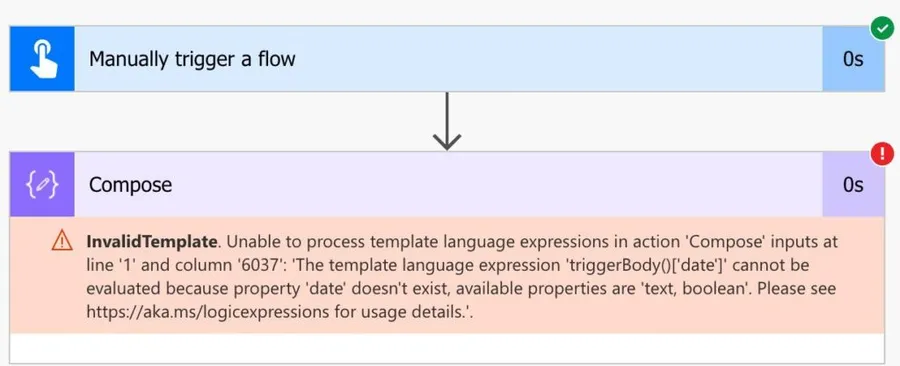
Why? Because the value is not filled in, Power Automate won't create the "Trigger date" object. So if we try to access it to get the value, we will get an error because it doesn't exist. This behavior is counter-intuitive, but I wanted to show you if you get the same error.
How to check optional values?
I'll go over this in more detail in another article, but for now, you need to understand that the triggerBody() contains all the parameters with values. Since the default behavior is for the parameters to be mandatory, we're always used to having values, but that is not true for the optional values.
When we pick the element from the "Dynamic Content" list, we're doing the following:
triggerBody()['date']
We're telling Flow that we will get a value for sure. If the object date doesn't exist, Flow will return an error since it can't find anything. To solve this issue, you need to tell Power Automate that the element you're trying to fetch is optional. To do that, here's the new code:
triggerBody()?['date']
The difference is all in the question mark. It indicates that we'll try to find a value, but that's ok since it's optional if we don't.
You can't do this by picking the element in the "Dynamic Content" list, so you must write it yourself. Since we have the value from the error, we only need to add the question mark, and we're good to go.
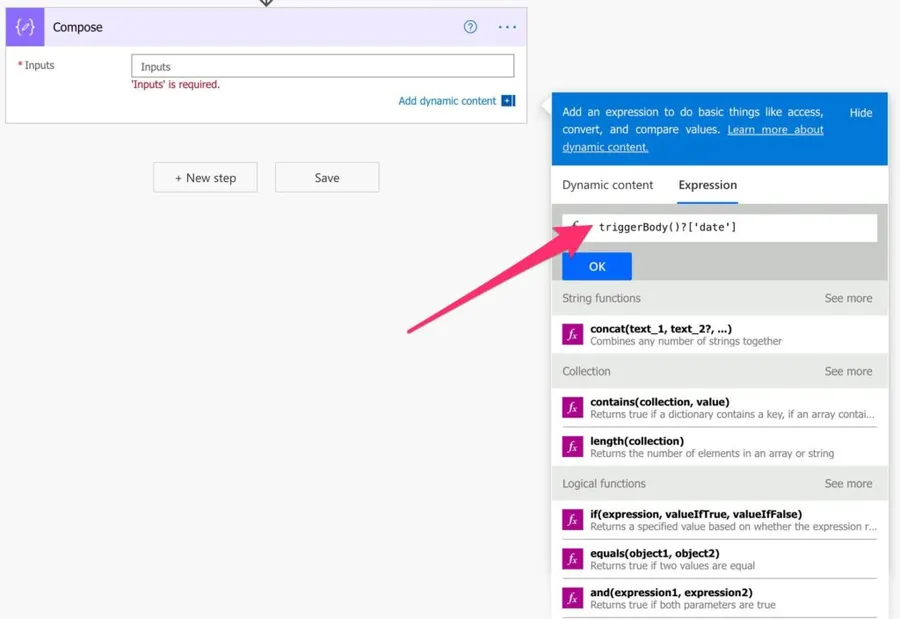
Here's what the Compose action looks like:

And here's after we run the Flow.
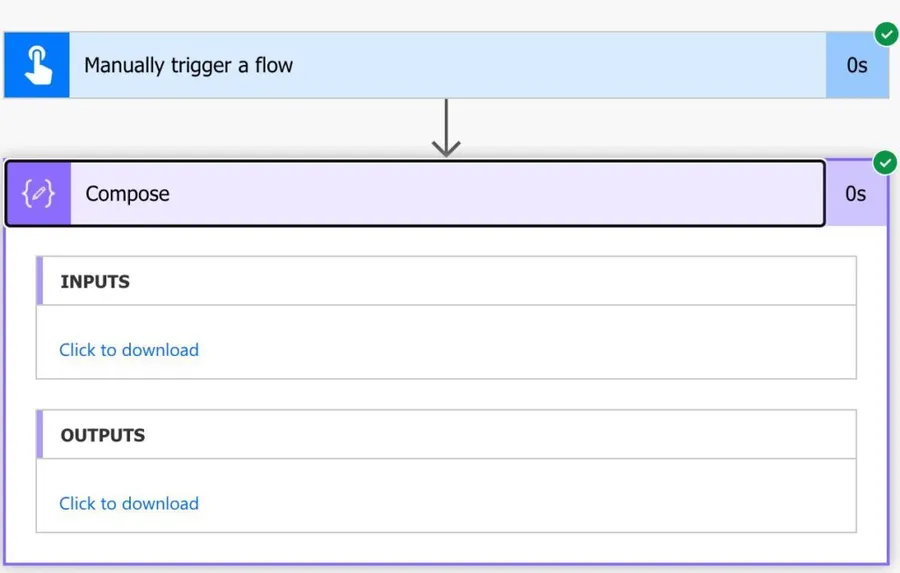
No more errors.
Deleting or reordering inputs can break your Flow
Because the internal property names are positional (text, text_1, text_2...), the order of your inputs matters more than you'd expect. If you delete the first text input, everything that used to be text_1 shifts up, and your expressions can quietly point at the wrong value. My advice is to add new inputs at the end and avoid removing ones in the middle.
Deleting an input removes its dynamic content references across the Flow, and you won't always get a clear warning. Double-check your expressions after changing the inputs.
"Manually trigger a flow" is not "For a selected item"
This one causes a lot of confusion. "Manually trigger a flow" runs from the portal, the mobile app, or a button, and it only passes the inputs you define. It carries no SharePoint or Teams context, so it won't know which list, item, or file you were looking at. If you want a Flow that runs against the row you clicked in a list, that's the "For a selected item" trigger, not this one.
Limitations
It must live in a solution to be reused
The major limitation is that you can only call this trigger from other Flows if it's inside a solution. You can also only add a Flow with this trigger to a solution if it was created there in the first place, so if you build a Flow outside a solution with the "Manually trigger a flow" trigger, you can't add it to a solution later.
Calling it as a child Flow has extra rules
If you're using it as a child Flow through the "Run a Child Flow" action, a few things need to line up. The parent and child must be in the same solution, the child needs to return its data with the "Respond to a Power App or flow" action, and the child has to use embedded connections, otherwise you'll hit a "child workflows only support embedded connections" error. The parent also waits for the child to finish, up to 30 days for most Flows.
The caller only waits two minutes for a response
If something is waiting on your Flow to respond (a Power App or a parent Flow), you need to reach your response action within 120 seconds. Anything after that keeps running in the background, but the caller won't wait for it.
File inputs share the 100 MB payload limit
A File input sends its content base64 encoded inside the trigger payload, and the whole payload has to stay under 100 MB. Base64 inflates the size by roughly a third, so the practical file ceiling is quite a bit lower.
Recommendations
Here are some things to keep in mind.
Name it correctly
The name may not look important since it's a trigger, but I would advise naming it as descriptive as possible. There's a lot of information that the name can provide, like, generally, what information we're expecting if the Flow is to be used as a button, for example. Always build the name so that other people can understand what you are using without opening the action and checking the details.
Always add a comment.
Adding a comment will also help to avoid mistakes and fix issues in the future. Having a note with the desired types of values and why some of them are optional, for example, is essential information to define before you start building your Flow. In addition, it's important to enable faster debugging when something goes wrong.
Final Thoughts
The "Manually trigger a flow" trigger is one of those simple pieces that becomes really powerful once you start building reusable sub-flows. Get comfortable with the input types, keep the optional-value quirk in mind, and you'll have a flexible way to run and reuse your Flows on demand.
Back to the Power Automate Trigger Reference.
Photo by Brands&People on Unsplash



Disqualifying the use of other flows to trigger a flow, from what you say it seems that the only way to manually trigger a flow is by using a button on the mobile app? Is there really no other way? We need a button inside Outlook (or inside a PDF reader) to trigger a flow manually after we checked to see the details are correct, so the flow can then take the info from the file and file the document accordingly. The latter part is doable it seems, but not to trigger the flow in a convenient way from an email or PDF reader. What we want to avoid at all cost is the current way of having to save documents somewhere, just to upload and finding it again (while making sure the correct file is selected) into our CRM system. It wastes time and risk not doing it when there are more pressing matters at hand than feeding a system.
Hum, I get it. You want Power Automate to trigger by getting the file's information where it was triggered to process it (archiving, uploading it somewhere, etc.). Smart. The issue is that the file can be anywhere, sometimes in places where Power Automate can't access it. We could use the "When an HTTP request is received Trigger" trigger to get Power Automate to trigger anywhere, but we would need the path to parse the file. For example, in the case of the PDF reader, it would need to have something (add-on, for example) that would get the current file's path and provide it to Power Automate (in a parameter, for example). When you mention Outlook, do you receive the files by email? Does your CRM system has a Flow connector? We could look at all incoming emails and, based on rules, upload the files to the CRM system. Another solution could be to have Flow looking at folders at your OneDrive, and when you want to upload something, save it to that folder. All of these are workarounds, but we can try to figure this out if you give me a bit more detail. Cheers Manuel
Hello, i am new to all of this. this article was very interesting, infact i have used the manual trigger to create a copy of an excel file in the shared area into an archive folder, in sharepoint. since this is report that is modified every 8 hours, i wanted the operators to be able to archive the file through a button on the excel sheet they use. i have tried with http method but it always gives me an error related to authentication and such...thank you if you could help me