The “Apply to each” Action is one of Power Automate’s most used and useful actions. Since many actions return arrays, it’s useful to have an action where you can parse each item. You can add any number of actions inside the “Apply to each,” but as always, keep them to a minimum to avoid slow-running Flows.
Where to find it?
The “apple to each” is in the “Built-in” section under the “Control” section.
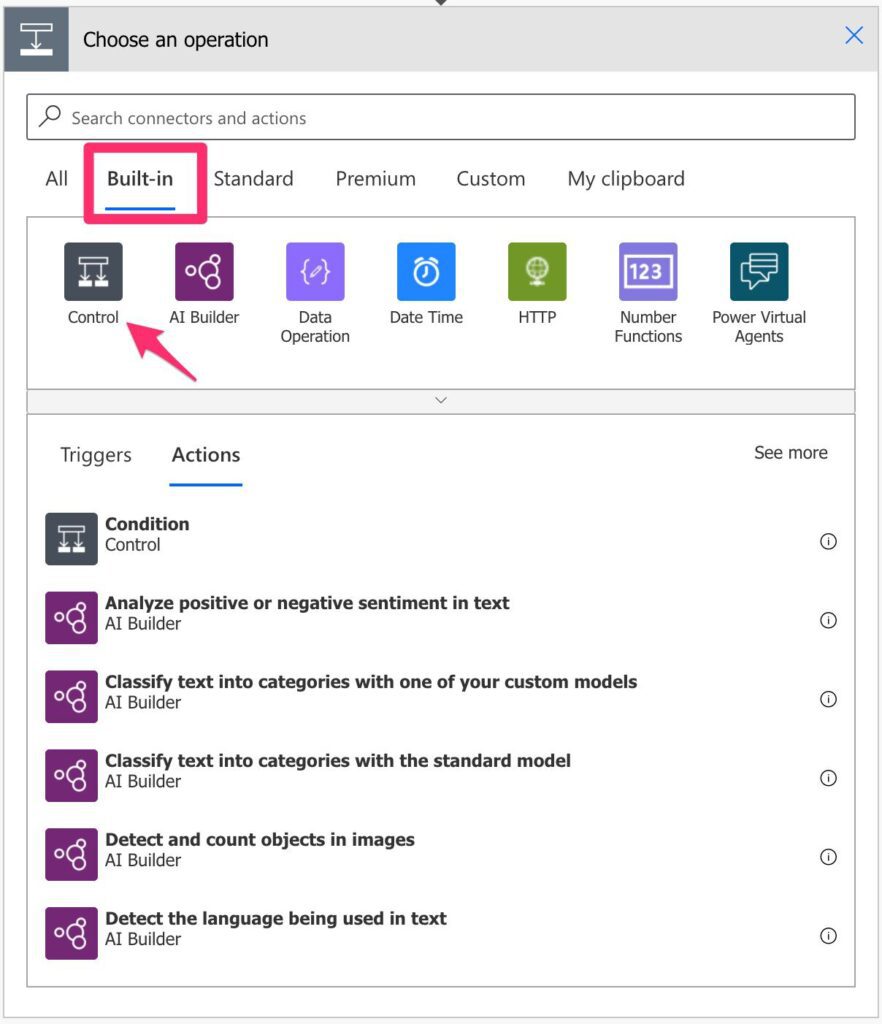
You can find it here.

Usage
Here’s how it looks like:
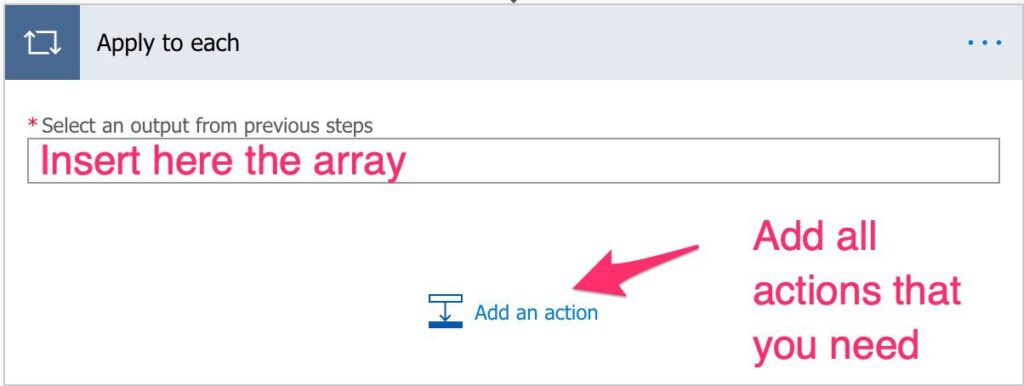
You can add any array but always be sure it’s an array. Your Flow will fail, but we don’t want failing Flows.
Referring to each element
Let’s say that you have an array of names and want to add them to a new array in uppercase. To do this, you need to go through all array elements, run a formula in each element, and add them to the other array. To do that, you use the “item()” function.
Let’s see that in action:
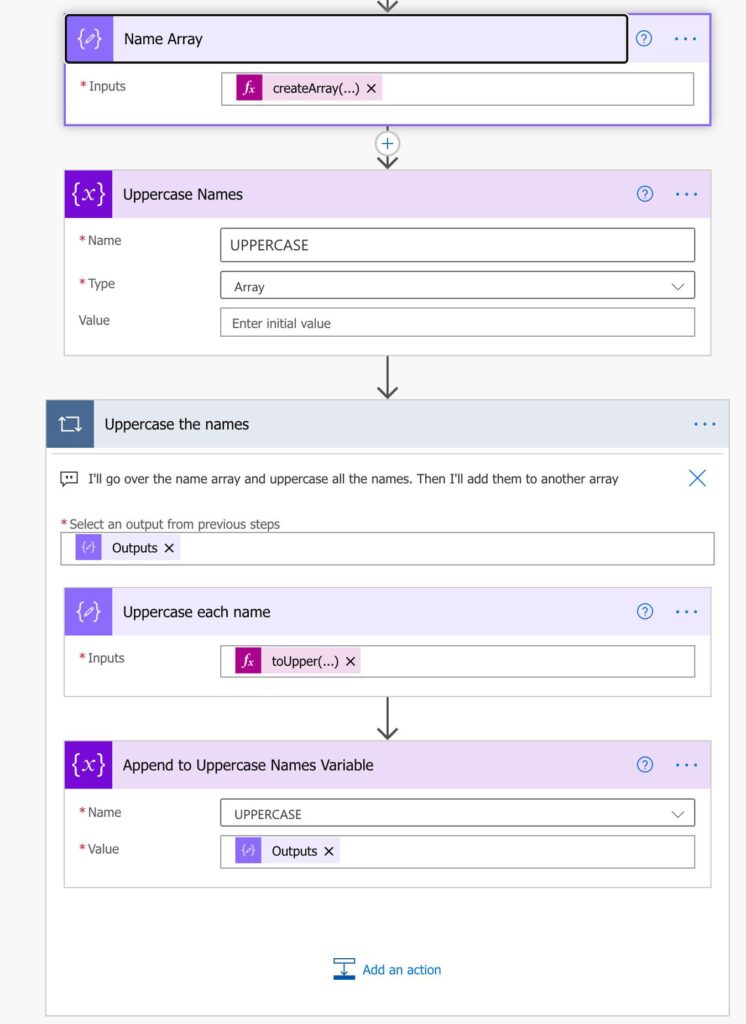
Here’s what we’re doing:
- Create the array. To do this we’ll use the createArray function.
- Create an empty variable that will contain all names
- For each name
- Uppercase it.
- Append to the variable
Here’s the uppercase formula:
toUpper(item())
As you can see, you only need to reference the item, and Power Automate will take care of the rest.
Limitations
There are limitations based on your licensing model. I would recommend checking them in Microsoft’s Documentation since they may change over time.
Recommendations
Here are some things to keep in mind.
Name it correctly
Power Automate uses the names of the actions to reference them in other parts of your Flow. If you have a “Apply to each” name, you’ll reference it with that name, and that’s not useful. Always define the name, indicating the purpose. Then, regardless of what you’re doing, you always know where the data comes from.
Always add a comment.
Having only a “good name” is not enough. It’s important to have a description of what you’re doing inside the “apply to each.” For complex Flows, you’ll have an easier time debugging it if you know your initial purpose.
Add the comment before you start adding tasks. This will force you to think ahead of time. In the future, when you’re searching for an error, you’ll know “why” you added the “Apply to each.”
Here’s how to do it:
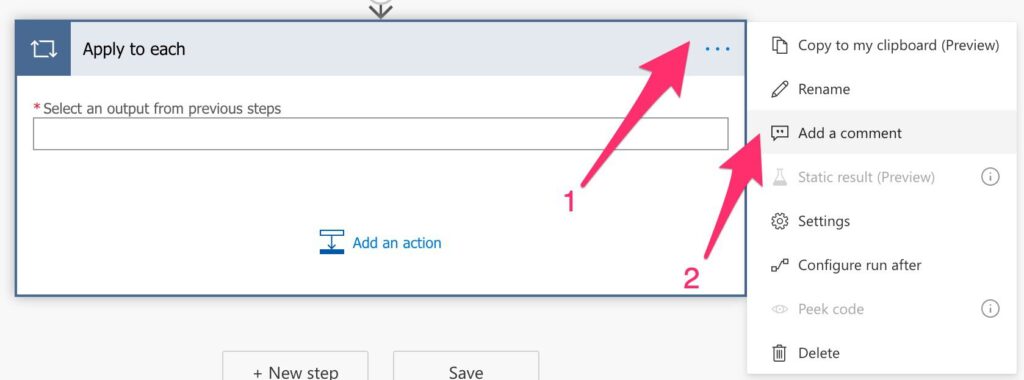
Activate Concurrency if you can
If you can parse elements in parallel, your Flow will run a lot faster, so if you can make them parallel. To do that:

Activate the “concurrency control.”
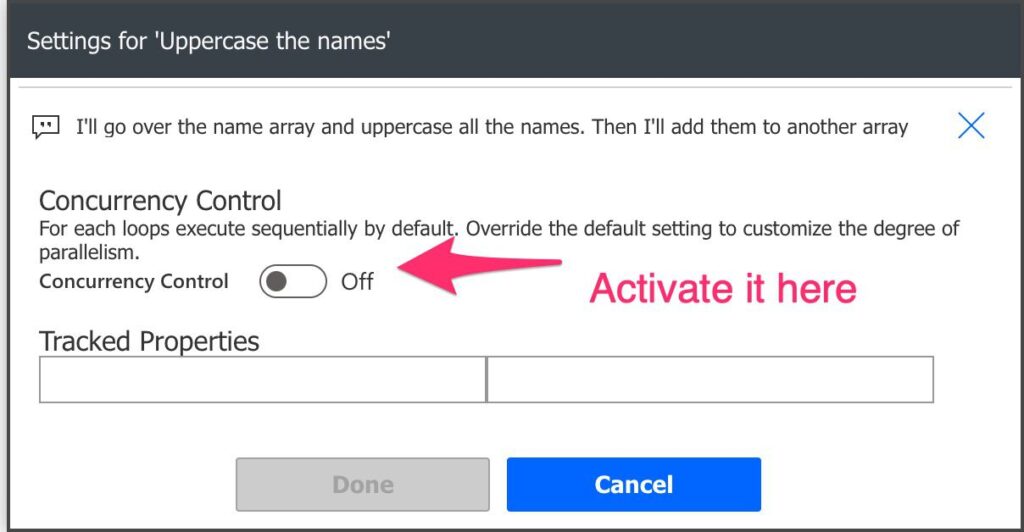
Be aware that you should only do this if you’re sure that parallelization won’t impact your data negatively.
Parse multiple elements in the same step
Let’s say that you have an array with multiple objects per row, like Name and Address, for example. Sometimes there’s the temptation to parse the names first and then use another “Apply to each” for the addresses. If you can, don’t do it. It’s quite inefficient to do it since your iterating all elements of the array twice. Bulking actions will make your Flows run faster.
Use it instead of the “Do until.”
I see a lot of people doing this. Always use the “Apply to each” action instead of the “Do until” action. I can assure you that almost 100% of the time you can use it avoids many problems. With the “Apply to each,” you’re always in control of how many times it will run. You can check the array you have, and that’s the number of times it will run. That doesn’t happen in the “Do until” action. You need an “exit condition,” and if that condition is not met, you’ll have a LONG running Flow until it timeouts or fails. The idea is always in control, so if you have a “Do until,” think about removing it.
Back to the Power Automate Action Reference.
Photo by Pierre Bamin on Unsplash


