Many things can be done in Power Automate or using Microsoft Graph, but not everything. For certain things, Microsoft requires us to use PowerShell scripts. If you’re not aware of what they are, that’s ok. In a nutshell,
PowerShell is a powerful scripting language that can help you automate complex tasks, manage systems, and handle data transformations. When combined with Power Automate, you can create workflows that bridge the gap between cloud automation and traditional system administration.
But if you reached this article, you know what PowerShell is and probably have a few scripts you’re using and want to trigger them automatically.
Let’s see how to do this.
Where to find the PowerShell action in Power Automate
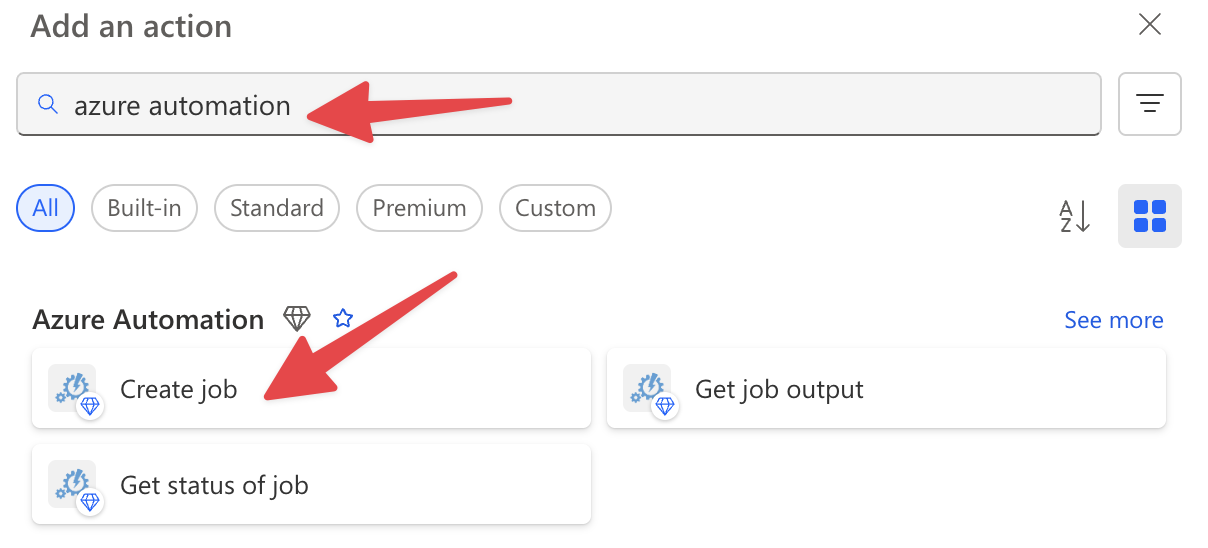
To find the PowerShell action in Power Automate, you must look for the Azure Automation connector. Here’s how:
- In your Flow, select “New step”
- In the search box, type “Azure Automation”
- Select “Azure Automation” from the results
- Choose “Create job” action
We’re using Azure Automation because it’s a good compromise between usability and scalability. Also, you have 500 minutes of runtime for free (at the time of writing this article), so if you have sporadic scripts running, it’s a good service to use. There are a few alternatives, like Azure Functions, that you can use if it’s easier.
Now that we know how to find it let’s understand how to set up the prerequisites.
Setting up prerequisites
Before you can run PowerShell scripts in Power Automate, you need to have a few things set up:
Azure Automation Account
You’ll need an Azure Automation account, where your PowerShell “runbooks” will live. To create one:
- Go to the Azure Portal (portal.azure.com)
- Search for “Automation Accounts”
- Click “Create” to create a new Automation Account

- Fill in the required details (Name, Subscription, Resource Group, Region)
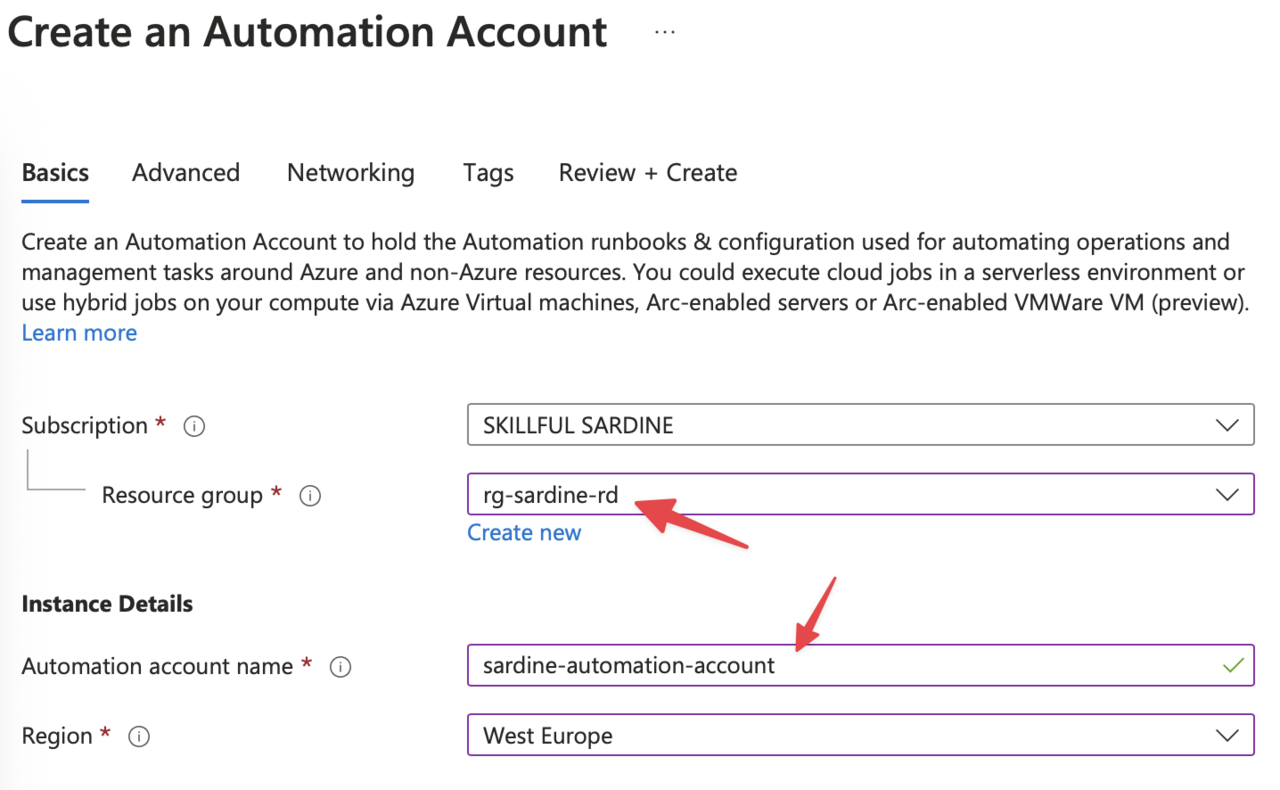
- Click “Review + Create” and then “Create”
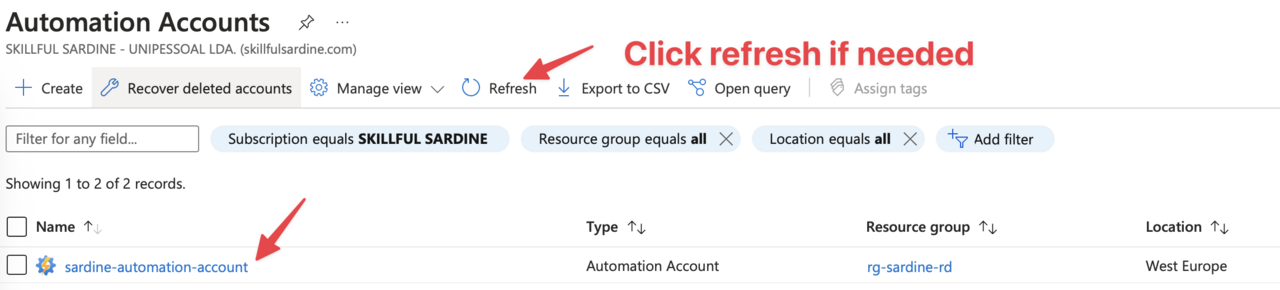
It can take a few minutes but you’ll see it in the list once created.
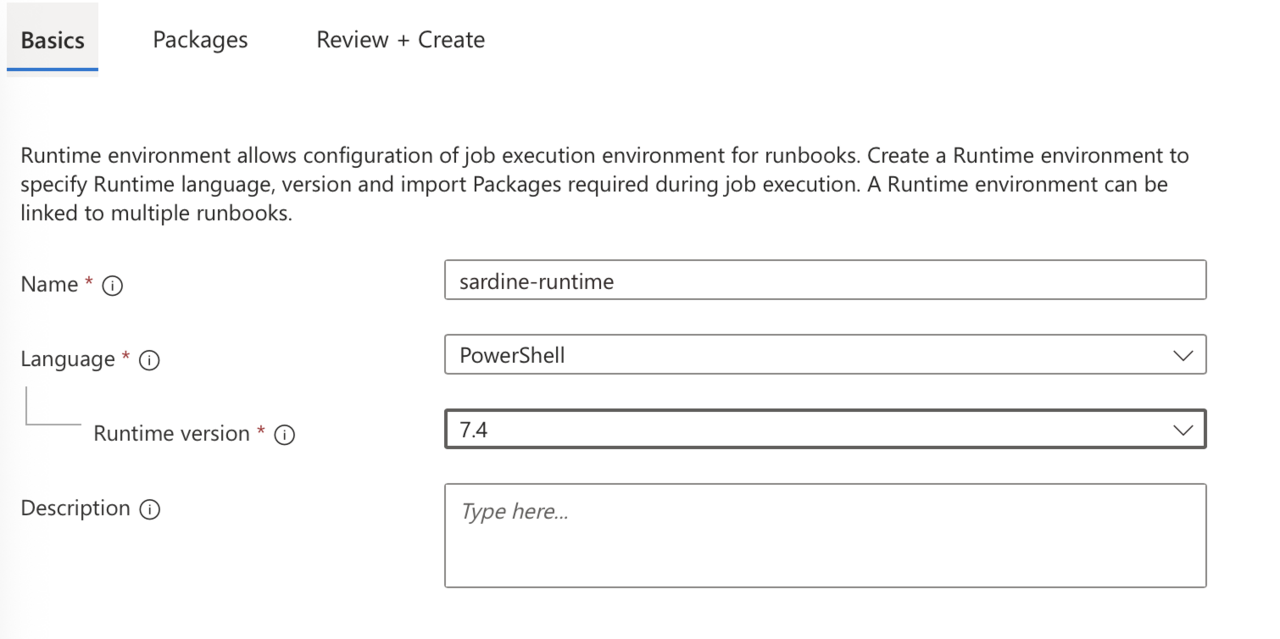
2. Create a Runtime Environment
You will need a runtime environment. You can use a default one in your “runbook”, but if you want to reuse some of the packages, it’s good to create one. To do it:
- Go to “Create a Runtime Environment”
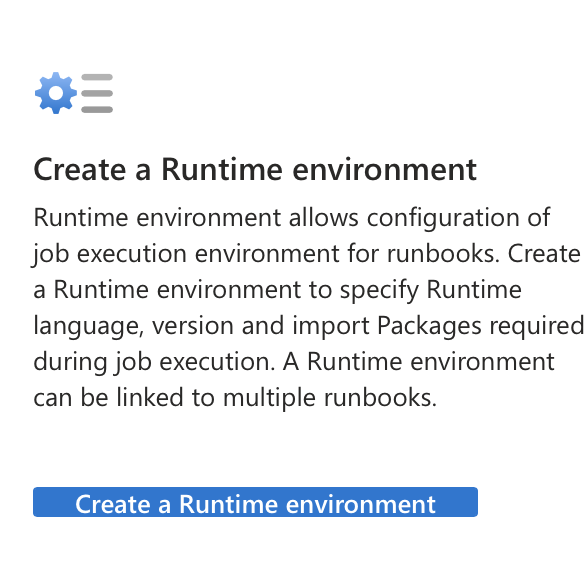
- Give it a name, language, and corresponding “runtime version”
- The description is optional, but it’s always good to add one to indicate why we created it and why we’re using it.
It can take a few minutes, but once it’s provisioned, you can start building your “runbook.”
3. Create a PowerShell “Runbook”
Once your Automation Account is set up, you need to create a “runbook”:
- In your Automation Account, go to “Runbooks” under Process Automation
- Click “Create a runbook”
- Give it a name, set the type to “PowerShell”, and click “Create”
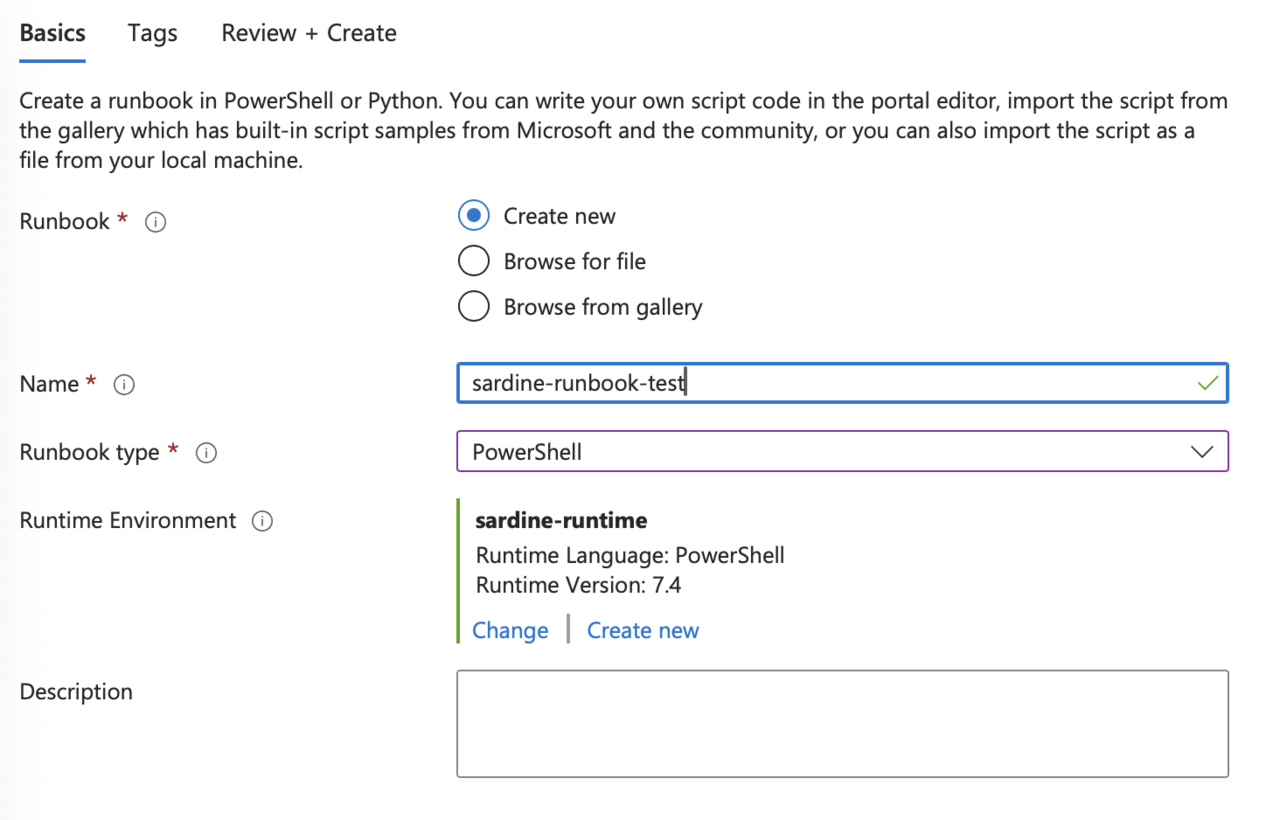
Notice that we’re re-using the “Runtime Environment” . Once created, you’ll see it under the “runbook” list.
4. Write Your PowerShell Script
After creating the “runbook”, you’ll be taken to the editor where you can write your PowerShell script.
If not, you can:
- Click your “runbook”.
- Select “Edit”.
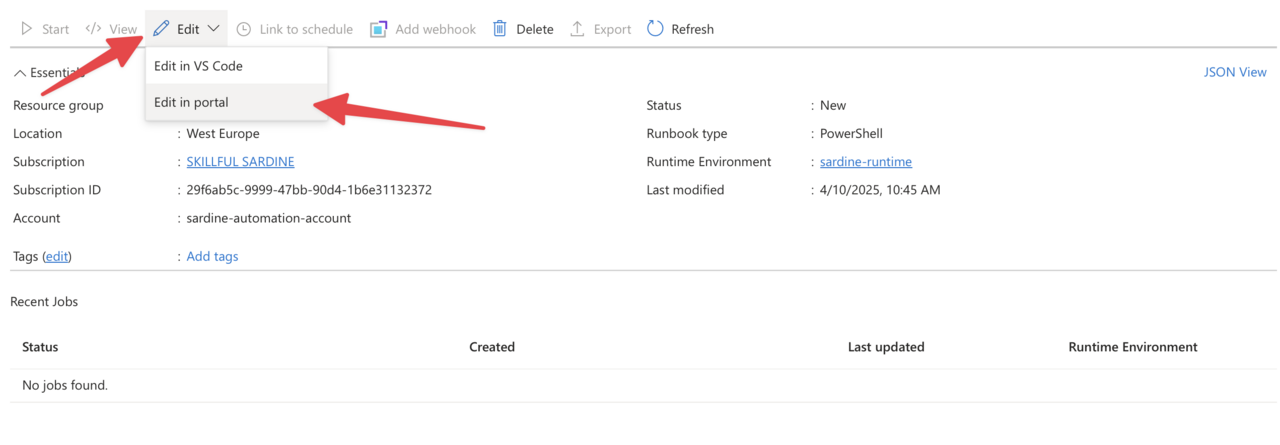
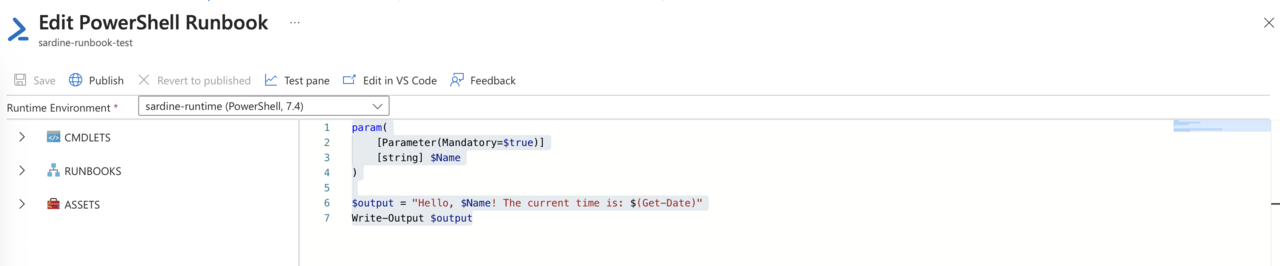
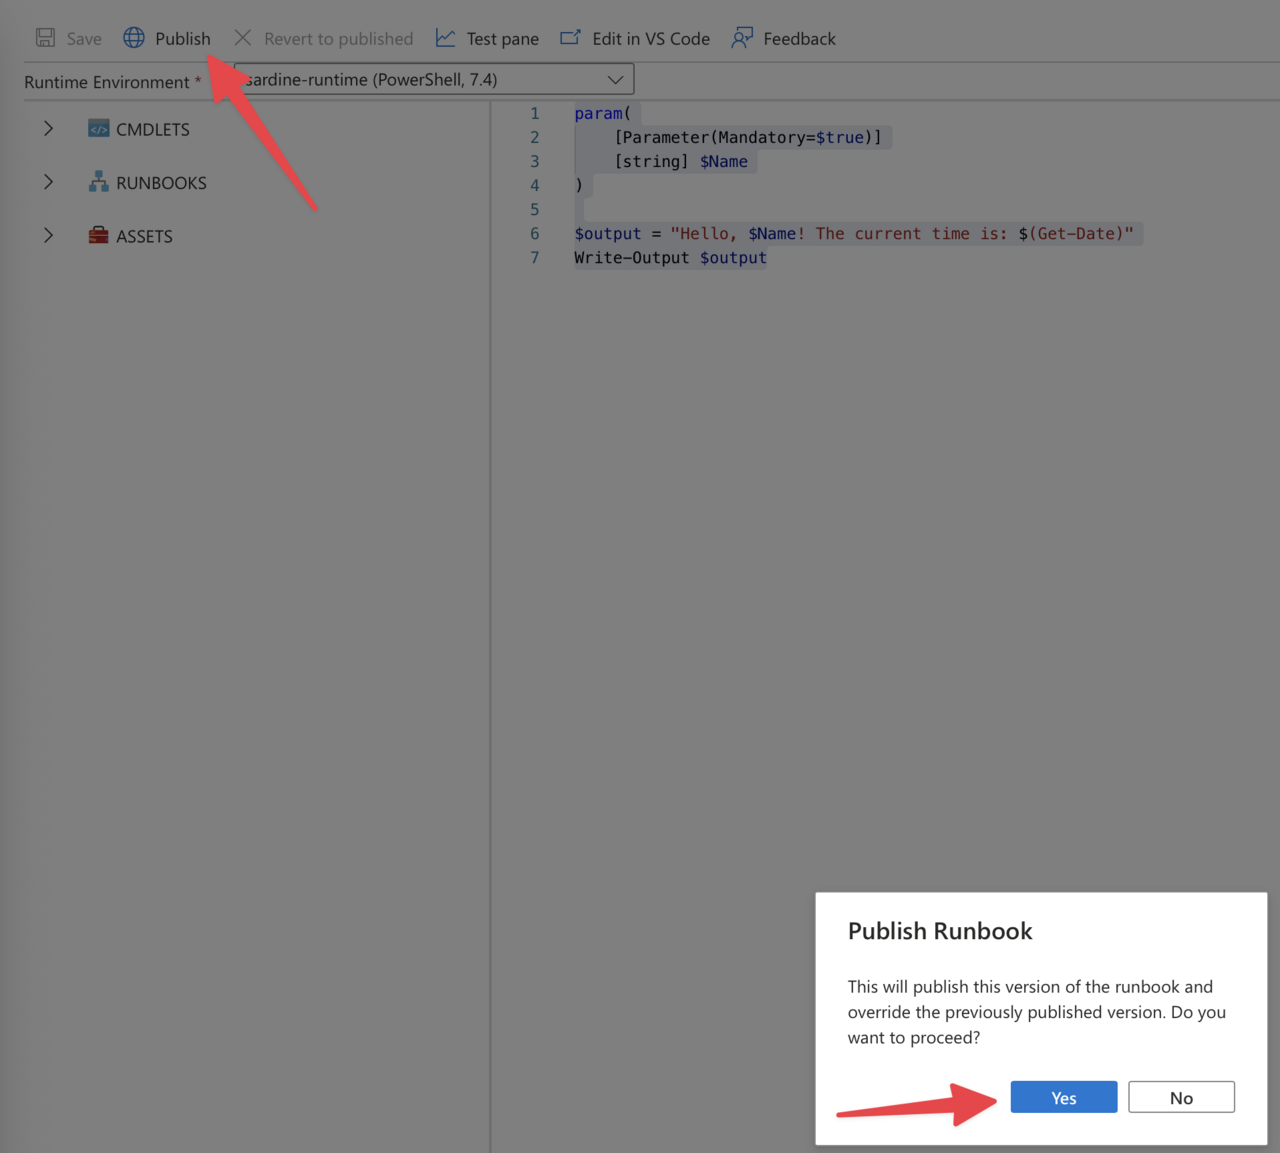
The portal will show you the code editor where you can paste your code. For demonstration purposes, here’s a simple code example:
param(
    [Parameter(Mandatory=$true)]
    [string] $Name
)

$output = "Hello, $Name! The current time is: $(Get-Date)"
Write-Output $output
This script takes a parameter called “Name” and outputs a greeting with the current time.
Let’s test it before we can publish it. Click “Test Pane”. You can add then your parameter and click “Run”.
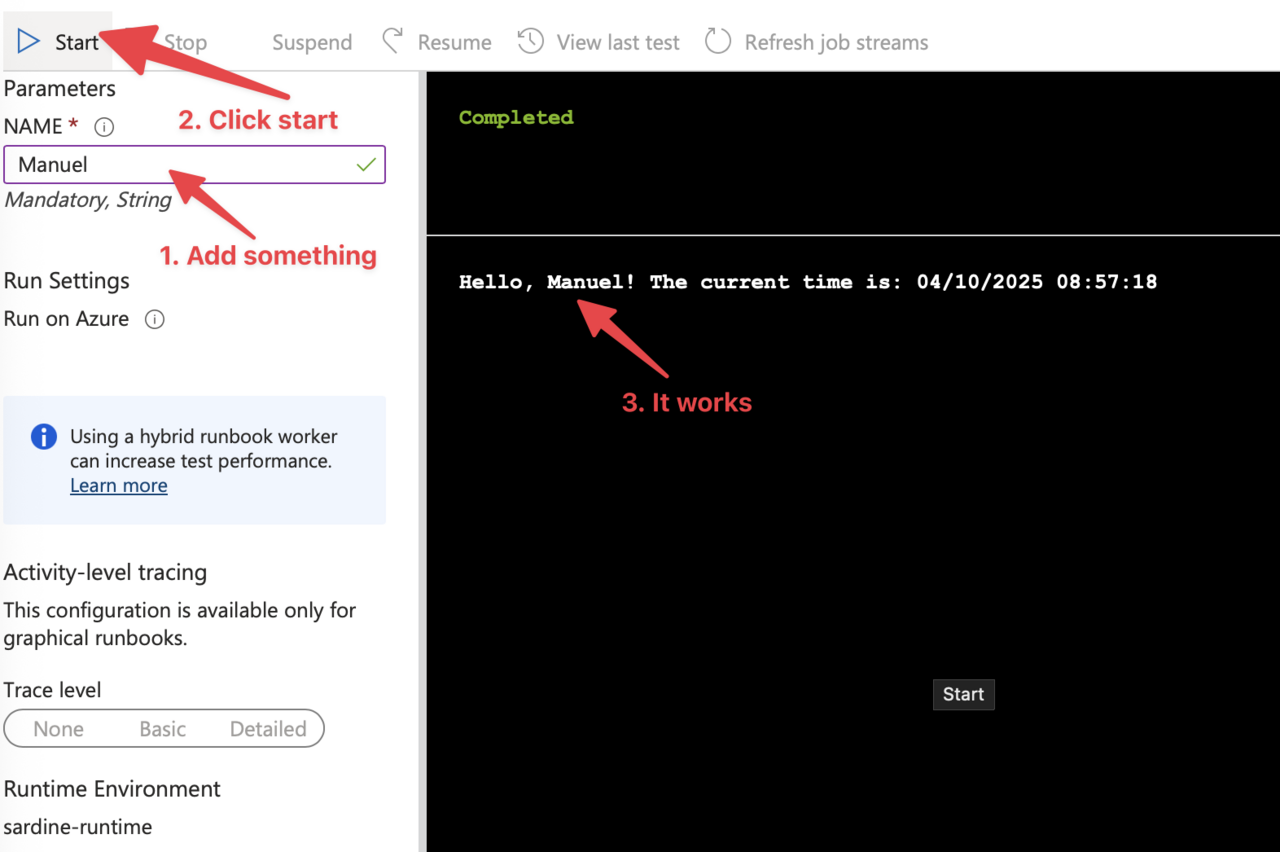
The parameter is an essential detail so we can be sure we can provide things in and out of the PowerShell script.
5. Publish the Runbook
After writing your script, you need to publish it:
- Click “Save” to save your script
- Click “Publish” to make it available for execution
Notice that the “Run” button is now enabled.
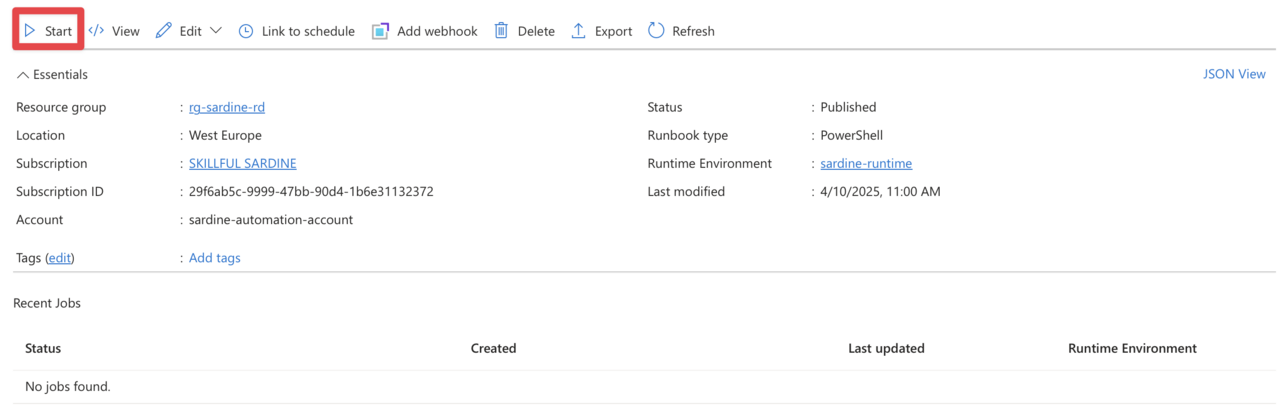
Notice that there’s also a “schedule” section.
If you need it to run periodically, you don’t need Power Automate to trigger it. You can define everything here and let it run.
Now, let’s look at how to use it in Power Automate.
Basic usage of PowerShell in Power Automate
Using PowerShell in Power Automate is pretty straightforward once you set up the prerequisites. Here’s how:
Creating a Simple PowerShell Action
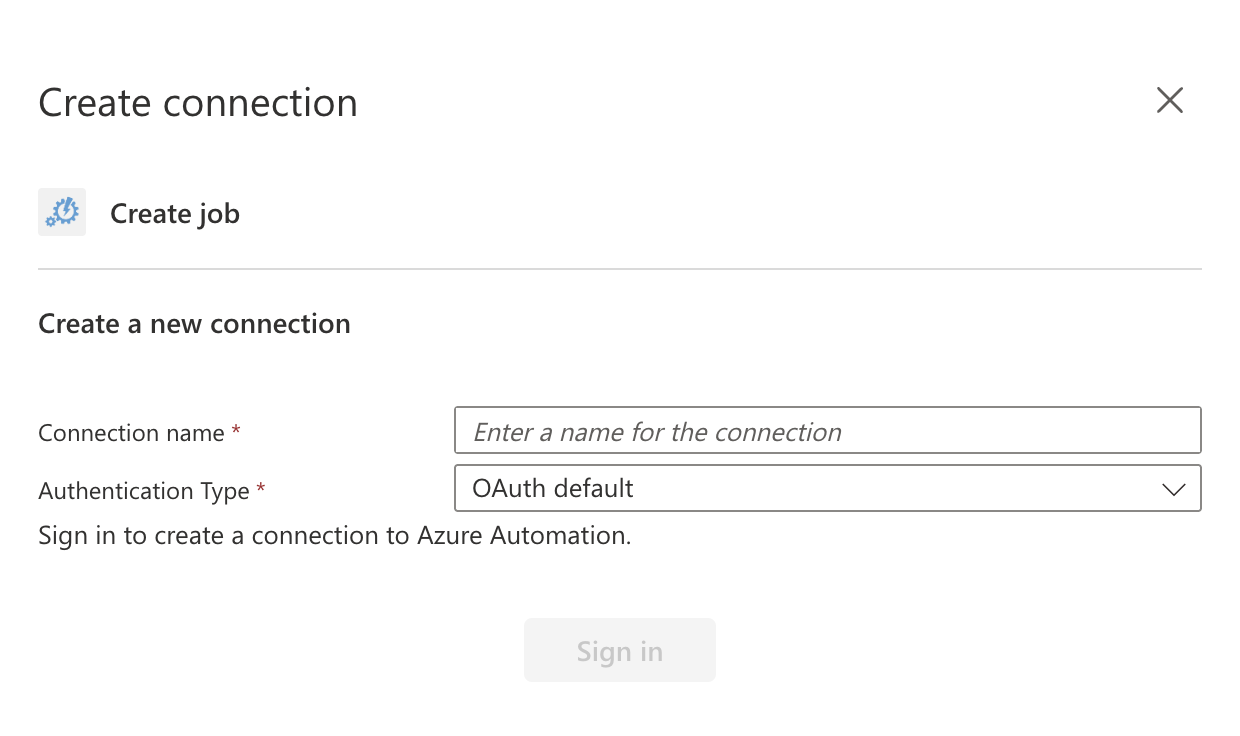
- Add the “Azure Automation – Create job” action to your Flow
- If you don’t have the connection yet, you’ll be prompted to name it and authenticate.
- Select your Automation Account and Runbook. Since we defined them before, all the parameters should look familiar, but don’t forget to adjust to the ones that make sense to you.
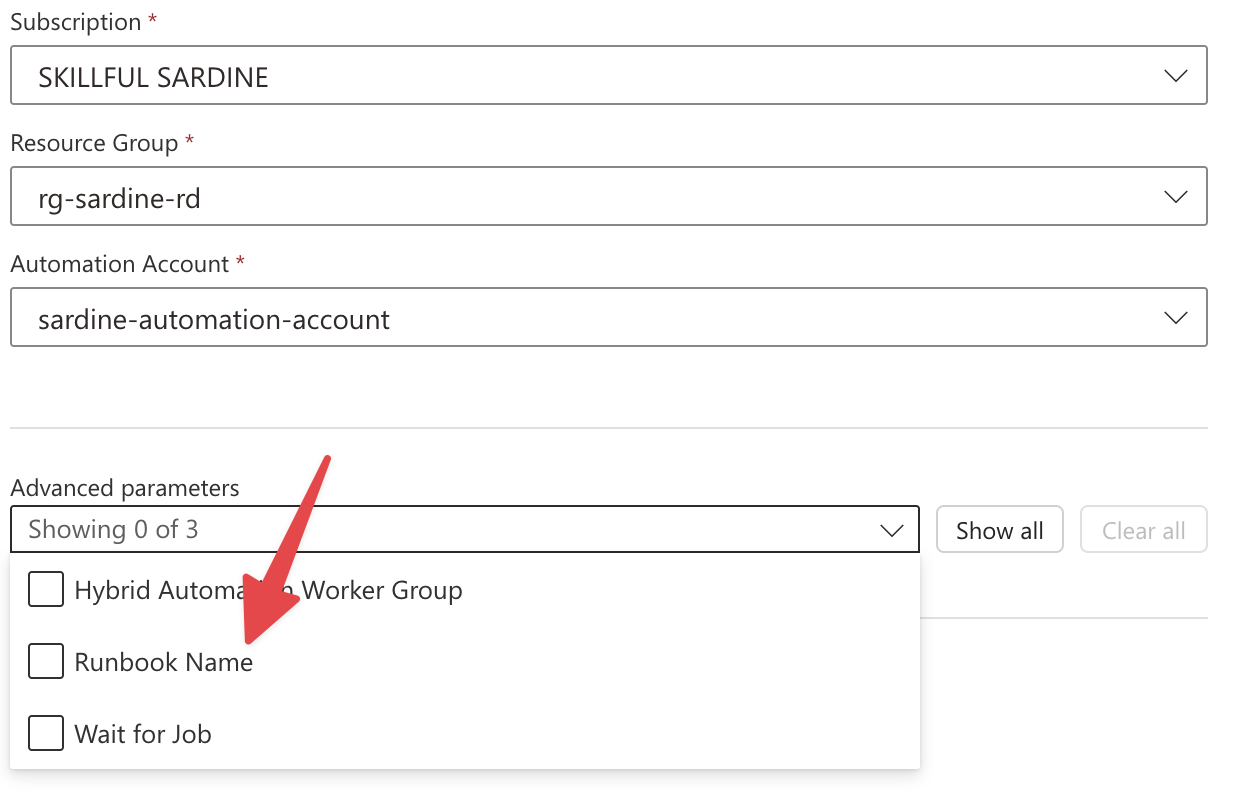
- You’ll see the “runbook” we created before.
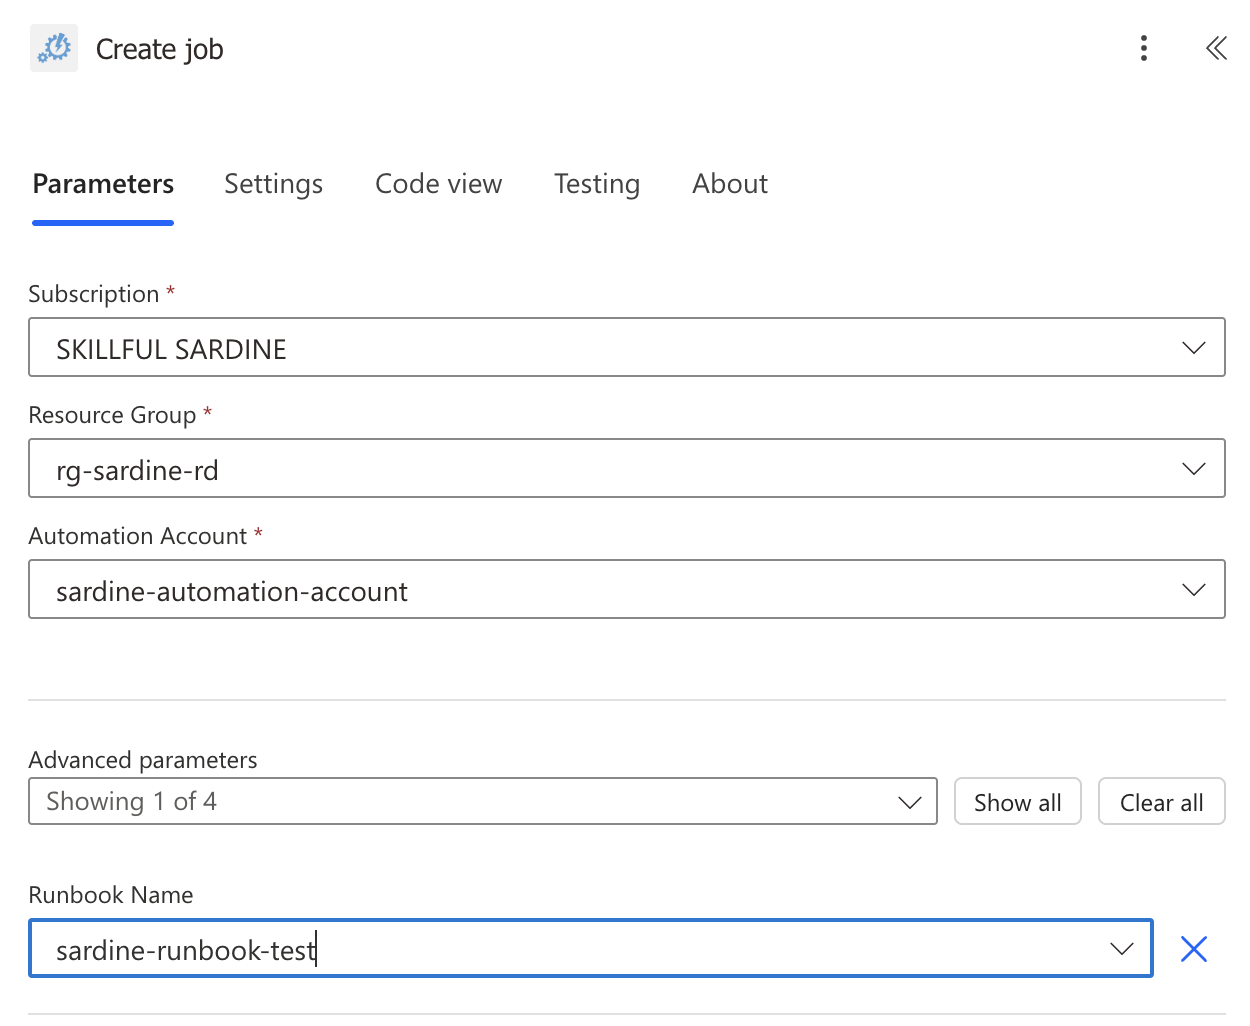
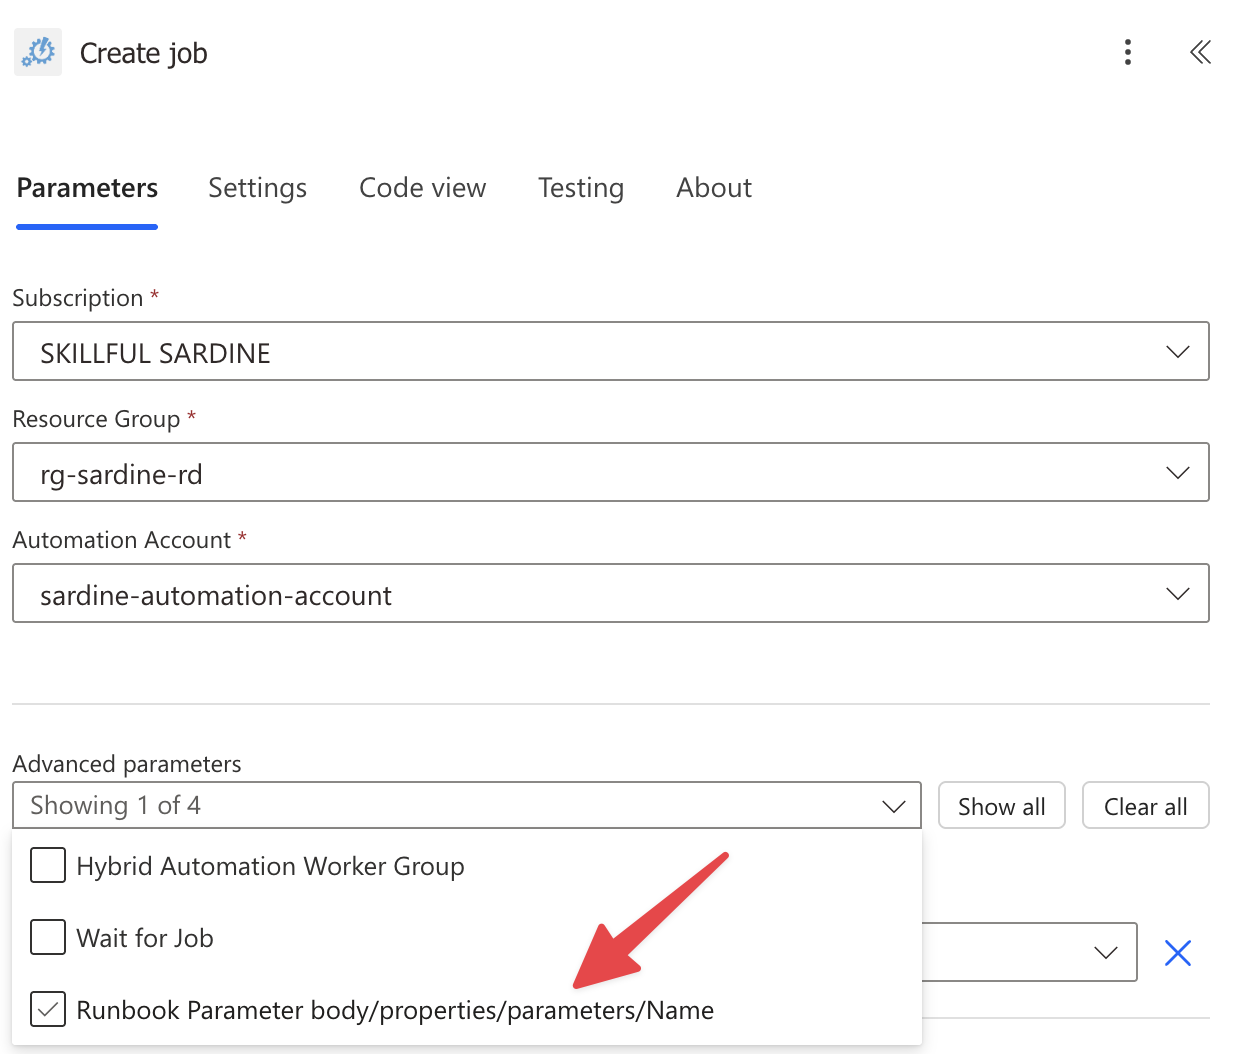
- Notice that our “runbook” requires a name, so we must also configure that. Since this is specific to that “runbook”, it will only show after you select it.
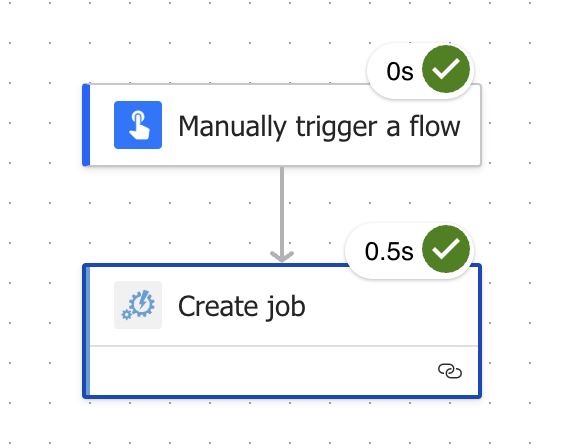
Let’s test our Flow and see how it behaves.
Alternative approaches to running PowerShell scripts
While Azure Automation is a great way to run PowerShell scripts from Power Automate, several other approaches are worth considering if they make sense in your use case or are easier to set up and maintain.
Azure Functions
Azure Functions provide another way to run PowerShell scripts in the cloud:
Advantages:
- Faster execution startup time than Azure Automation
- More flexible trigger options (HTTP, timer, blob storage, etc.)
- Pay-per-execution pricing model
Setup:
- Create an Azure Function App
- Create a new function with PowerShell template
- Write your script that accepts HTTP requests
- Use the HTTP trigger in Power Automate to call the function
Power Automate Desktop
For on-premises scripts that need to interact with local resources:
Advantages:
- Run scripts on local machines without cloud connectivity
- Interact with desktop applications
- Access local files and systems
Setup:
- Install Power Automate Desktop
- Create a Desktop flow with the “Run PowerShell script” action
- Call the Desktop flow from your cloud flow using the “Run a flow built with Power Automate Desktop” action
Limitations
Be aware of these limitations when using PowerShell in Power Automate:
Size and Complexity Limitations
- Maximum Runtime: Azure Automation “runbooks” have a maximum runtime of 3 hours
- Maximum Input Size: There’s a limit to how much data you can pass as parameters (typically around 5MB)
- Maximum Output Size: Large outputs may be truncated or cause errors
Runtime Constraints
- Startup Time: Azure Automation jobs can take 30-60 seconds to start
- Module Availability: Not all PowerShell modules are available in Azure Automation
- Network Connectivity: Azure Automation “runbooks” run in Microsoft’s cloud environment, which may not have access to certain resources
Execution Environment Considerations
- PowerShell Version: Azure Automation can use a different version of PowerShell by default; other PowerShell versions could be available but requires configuration
- Environment Persistence: Don’t rely on files or state between executions
- Parallelism: Be cautious with parallel job execution if your scripts modify shared resources
Recommendations
Here are some best practices to follow when using PowerShell in Power Automate:
Name it correctly
The name of your actions is super important for maintainability. Always give descriptive names that indicate what the PowerShell script is doing:
- Instead of “Azure Automation”, use “Get User Information with PowerShell”, for example. Something that makes sense and describes its usage without you having to inspect it.
- Instead of “Create job”, use “Process SharePoint Data with PowerShell”, for example.
Always add a comment
Adding a comment will help avoid mistakes and make your flow easier to understand:
- Indicate what the script does and why it’s needed
- Document the parameters and expected outputs
- Note any dependencies or prerequisites
Always handle errors
Have your Flow fail graciously and notify someone when something goes wrong:
- Add a “Run after” configuration to handle errors from the PowerShell action
- Use a condition to check for successful execution
- Implement notification mechanisms for failures
try {
    # Your script logic here

    $result = @{
        Status = "Success"
        Data = $processedData
    }
}
catch {
    $result = @{
        Status = "Error"
        ErrorMessage = $_.Exception.Message
        StackTrace = $_.ScriptStackTrace
    }
}

# Always return a result with consistent structure
Write-Output ($result | ConvertTo-Json -Depth 10)
Consider alternatives for very complex scripts
If your PowerShell script is becoming very complex or requires significant resources:
- Consider refactoring it into an Azure Function
- Break it down into smaller, more manageable pieces
- Evaluate if some logic can be implemented directly in Power Automate
Test scripts independently before using in Power Automate
Always develop and test your PowerShell scripts outside of Power Automate first:
- Test in PowerShell ISE or VS Code
- Test manually in Azure Automation
- Only then integrate with Power Automate
This approach makes debugging much easier and ensures your script works correctly before adding the complexity of Power Automate integration.
Final Thoughts
Running PowerShell scripts in Power Automate through Azure Automation opens up a world of possibilities that go beyond the native capabilities of Power Automate. By combining these technologies, you can:
- Automate complex system administration tasks
- Process data in ways that would be difficult or impossible with standard actions
- Integrate with systems that don’t have native connectors
- Implement sophisticated business logic
Remember that security should always be a priority when running PowerShell scripts, especially those that manage resources or handle sensitive data. Follow the principle of least privilege, use managed identities when possible, and validate all inputs.
Start with simple scripts and gradually build up to more complex scenarios as you become comfortable with the integration. The combination of PowerShell’s flexibility and Power Automate’s workflow capabilities creates a powerful automation platform that can handle almost any task you throw at it.
You can follow me on Mastodon (new account), Twitter (I’m getting out, but there are still a few people who are worth following) or LinkedIn. Or email works fine as well 🙂
Photo by Artem Sapegin on Unsplash


I just discovered this blog, and wish I’d found it so much sooner. I’ve been learning Power Automate from scratch to help clean up my workplace, and I’ve learned there are so few good Power Automate references out there for people who don’t already know what they’re looking for. This blog is by far the most comprehensive resource I’ve seen, and I just wanted to say thank you for the amazing work you’re doing. Thank you!!!
Thank! 🙂 Appreciate it :).