User-friendly apps make all the difference, and displaying large amounts of data is one of the most complex things to do correctly. For those of us used to Excel, one of the tricks is to alternate row colors to easier scan the data. Let’s see the difference for a simple application.
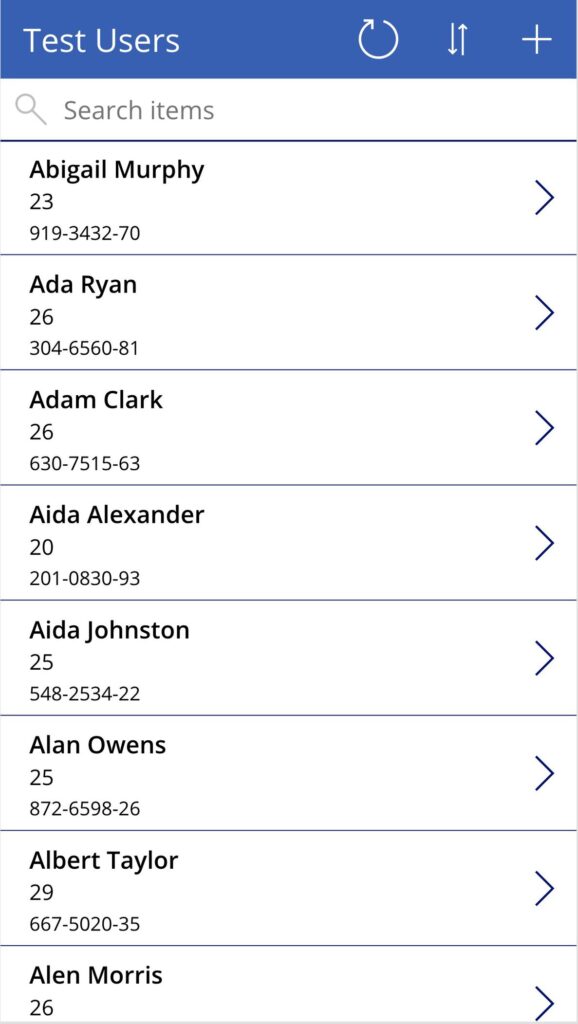
I’m not a designer as you will see in the next examples 😀.
Now with alternate row colors:
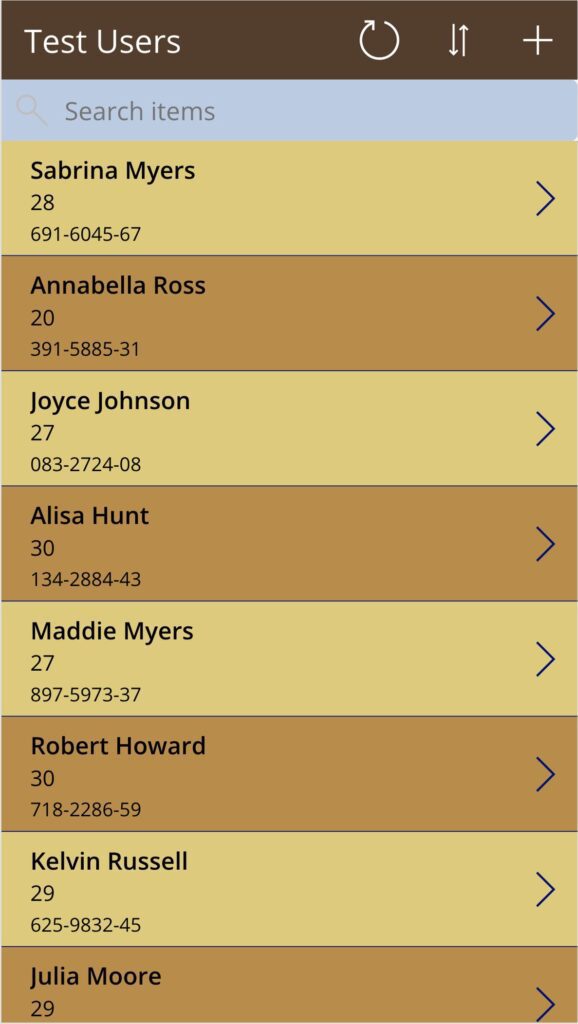
Looks good, right? There’s an easy solution for this. Select the first cell. Ensure that the whole cell is selected like this:
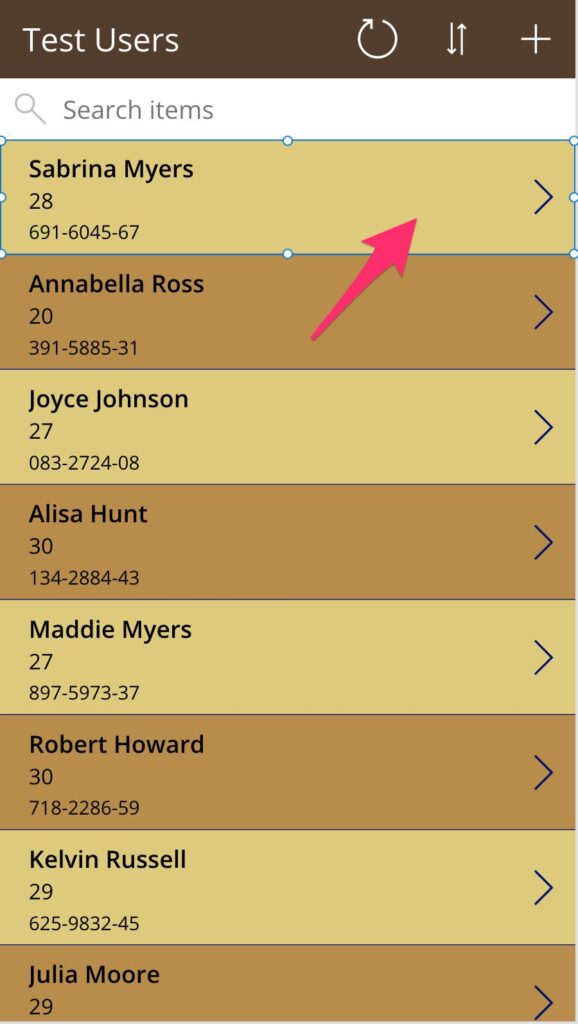
Search for “TemplateFill.” This property will define the background color of each cell.
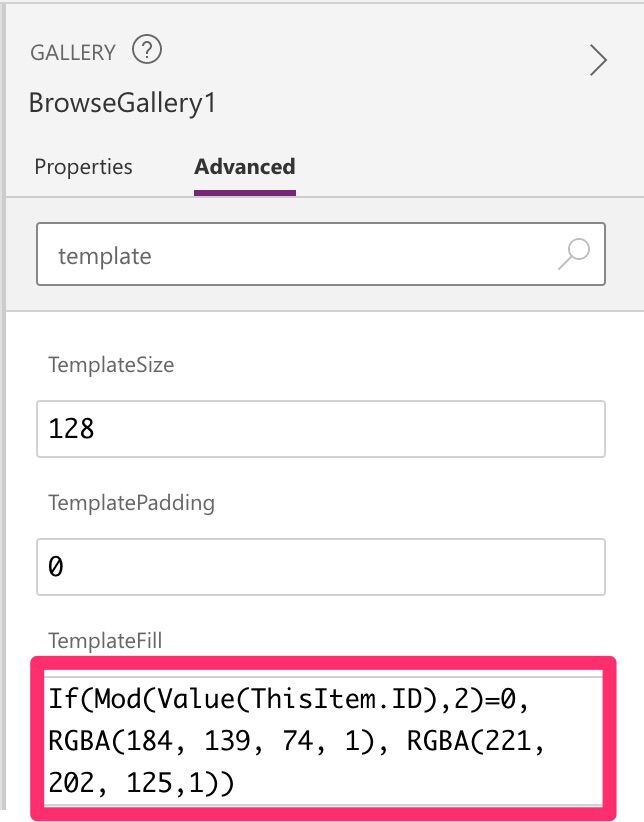
The formula is the following:
If(
    Mod(Value(ThisItem.ID),2)=0,
    RGBA(184, 139, 74, 1),
    RGBA(221, 202, 125,1)
)
Notice that I’m using the ID. If the ID is odd, then I’ll use one color. If it’s even, I’ll use another.
The solution works as long as you:
- I don’t need it sorted alphabetically
- I don’t have a filter
- Don’t change the data in any way.
So it’s not quite a solution. We can do better, so let’s figure this out.
We want all the features as before, like sorting and filtering the data. Additionally, we want alternate row colors. So we can’t use the solution above.
The solution
To solve the issue, we need a rowid that is updated when:
- We click on the sort button
- We type on the search box
- We click the update button (refresh the data and get the changes)
We have collections that can use us in this. All the operations that we want to perform can be done in collections, plus we can generate them with additional data. We’ll call our collection collectionTestUsers that has the data from our Test Users data source.
Let’s first change the sort and filter code:
SortByColumns(Filter(collectionTestUsers, StartsWith(Title, TextSearchBox1.Text)), "Title", If(SortDescending1, Descending, Ascending))
The only thing that changes is the collection instead of the data source. So far, so good. Let’s change the color template as before with the collection:
If(
    Mod(Value(ThisItem.rowid),2)=0,
    RGBA(184, 139, 74, 1),
    RGBA(221, 202, 125,1)
)
The same as above. Now let’s look at the other sections
When the app starts
Since we’re building our own collection, we need to generate it when the app starts. Otherwise, we would not have data because the collection that we’re referring to above in the filter is empty. To do that:
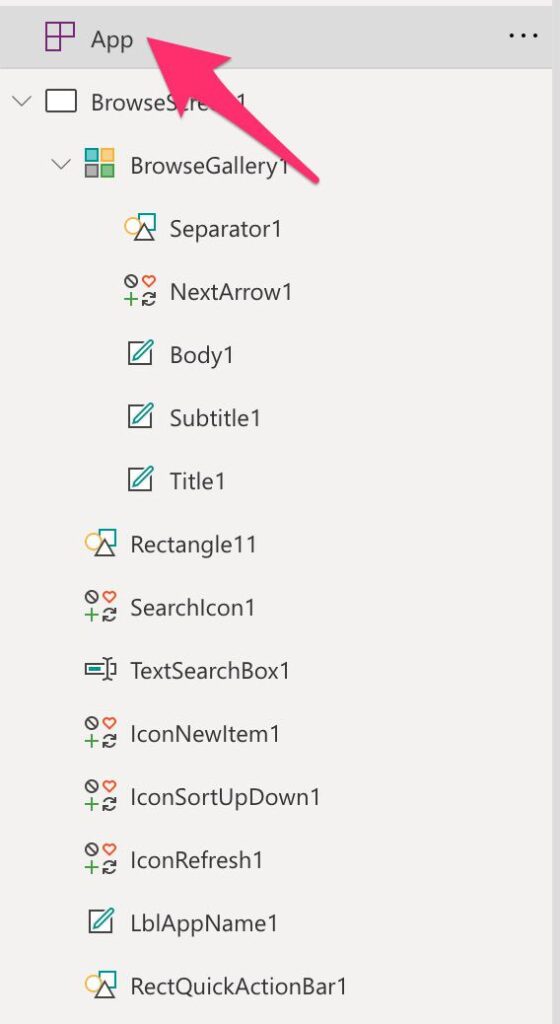
Then select “OnStart.”
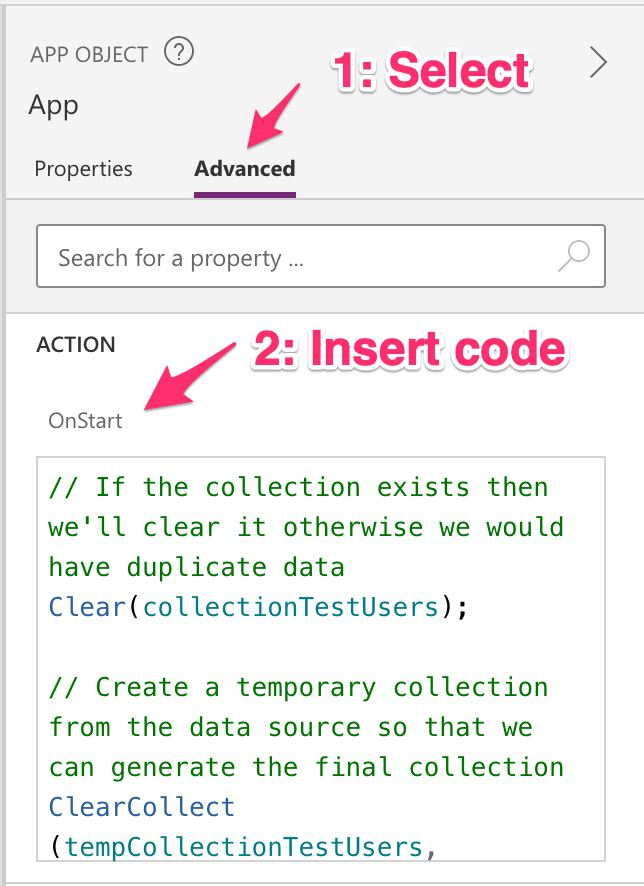
Here’s the code:
// If the collection exists then we'll clear it otherwise we would have duplicate data
Clear(collectionTestUsers);

// Create a temporary collection from the data source so that we can generate the final collection
ClearCollect(tempCollectionTestUsers, SortByColumns([@'Test Users'], "Title", Descending));

// We will iterate all items, fetch the data from the temporary collection and then add the rowid
ForAll(tempCollectionTestUsers,
    Collect(collectionTestUsers, {
        rowid: CountRows(collectionTestUsers),
        //Other columns. We only need these 3 but add all of the ones you need
        ID: ID,
        Title: Title,
        Age: Age,
        Phone: Phone
    })
)
So what’s happening here? First, we clean the collection; otherwise, we’ll have duplicate data each time we add data to it. After that, we clear the temporary collection and initialize it with the sorted columns by title. This is the default state of the data before we make any changes. When you open the application, the sort would be descending.
Finally, we’ll iterate all items of the collection and add the rowid in each row.
Notice the trick that we use to generate the rowid. It will count the rows of the collection. So if we add one, then the count will be 0 (id 0); when we add the second, the count will be 1 (id 1), and so on. Sweet right?
The refresh button
When we refresh the data, we want two things. First, to keep the filters and sorting direction and get the new data. We can use the code above with a small change. Instead of initializing the collectionTestUsers that has the data from our Test Users data source with the default values, we will add the same filter as in the Gallery. This way, we’ll ensure that the data is correct. Here’s the code:
Refresh([@'Test Users']);

//Clear final collection to ensure no redundant data
Clear(collectionTestUsers);

// Create a temporary collection from the data source so that we can generate the final collection
ClearCollect(tempCollectionTestUsers, SortByColumns(Filter([@'Test Users'], StartsWith(Title, TextSearchBox1.Text)), "Title", If(SortDescending1, Descending, Ascending)));

// We will iterate all items, fetch the data from the temporary collection and then add the rowid
ForAll(tempCollectionTestUsers,
    Collect(collectionTestUsers, {
        rowid: CountRows(collectionTestUsers),
        //Add your other columns here
        ID: ID,
        Title: Title,
        Age: Age,
        Phone: Phone
    })
)
You can insert it in the “OnSelect” of the button:
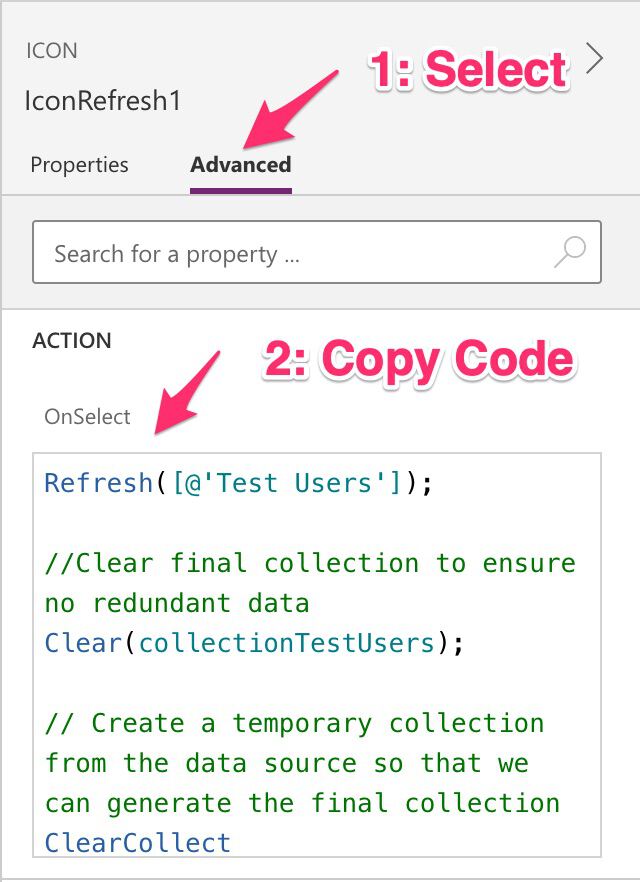
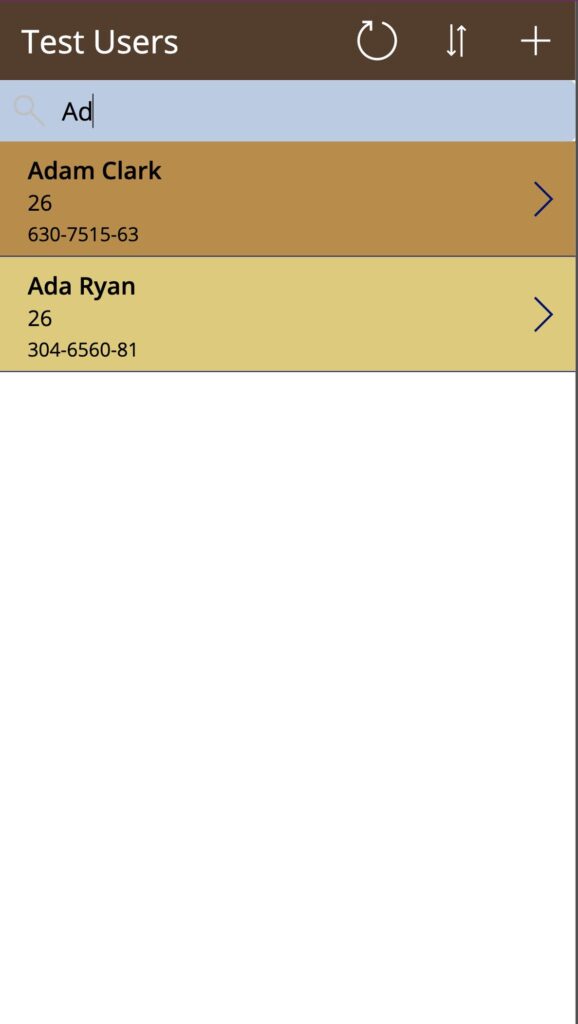
So let’s explore the code. First, we refresh the data. Nothing special there. After that, we clear the collection as before. After that, notice that the filter is done on the data source with the constraints. For example, if we have “Ad” in the TextSearchBox, the data will be filtered. Finally, we do the same as before. Build the collection with the new data.
The Sort button
As for the sort button, we’ll use the same strategy as before. When there’s a change (characters inserted or removed), we’ll refresh the collection.
//Clear final collection to ensure no redundant data
Clear(collectionTestUsers);

// Create a temporary collection from the data source so that we can generate the final collection
ClearCollect(tempCollectionTestUsers, SortByColumns(Filter([@'Test Users'], StartsWith(Title, TextSearchBox1.Text)), "Title", If(SortDescending1, Descending, Ascending)));

// We will iterate all items, fetch the data from the temporary collection and then add the rowid
ForAll(tempCollectionTestUsers,
    Collect(collectionTestUsers, {
        rowid: CountRows(collectionTestUsers),
        //Add your other columns here
        ID: ID,
        Title: Title,
        Age: Age,
        Phone: Phone
    })
)
As you can see, the same as above.
Testing
So let’s test everything to see if it works. Let’s start by launching the app:
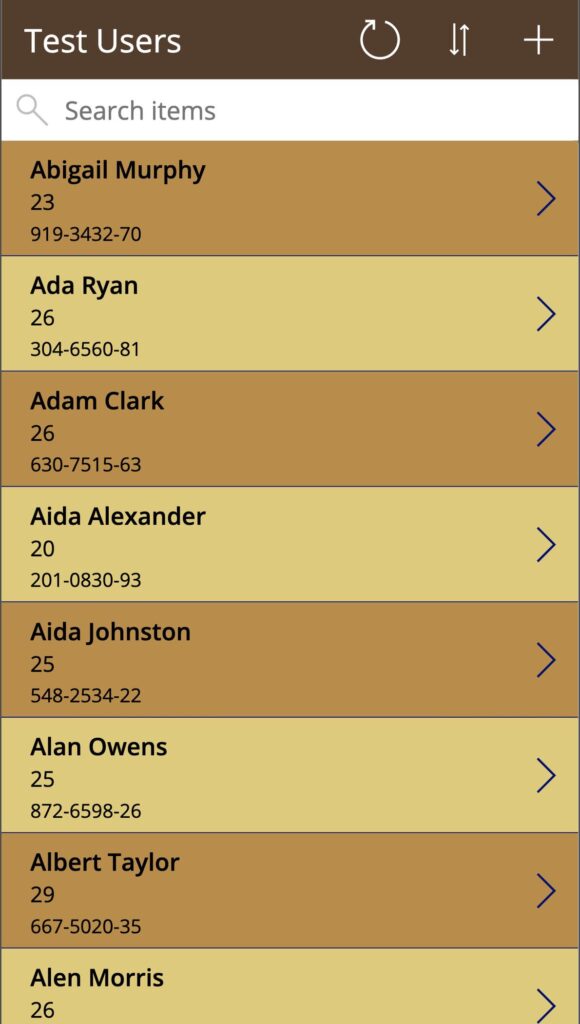
Now let’s change the order:
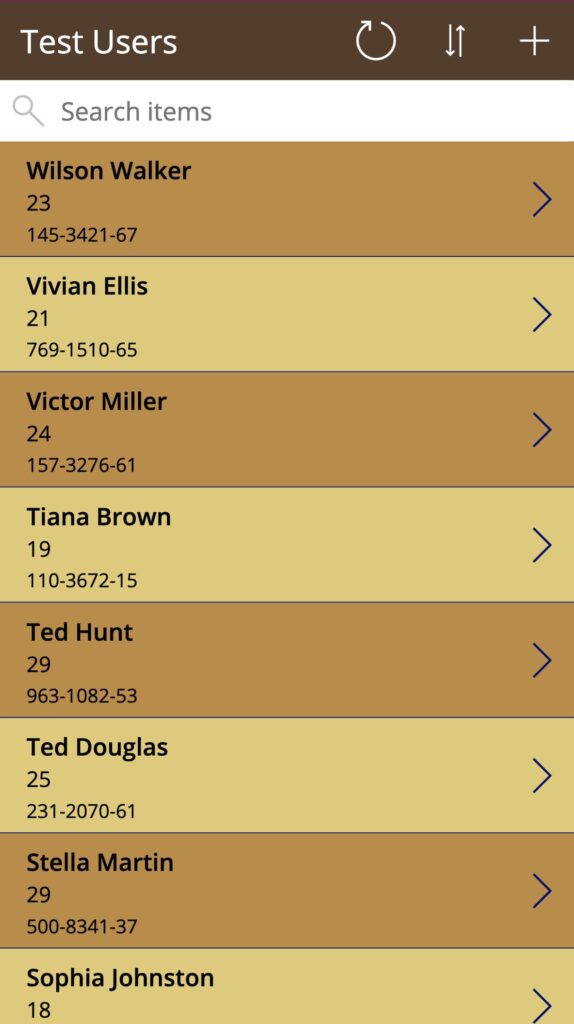
Now let’s filter. We only type “Ad” and the UI refreshes automatically:
Finally, let’s reverse the order again:
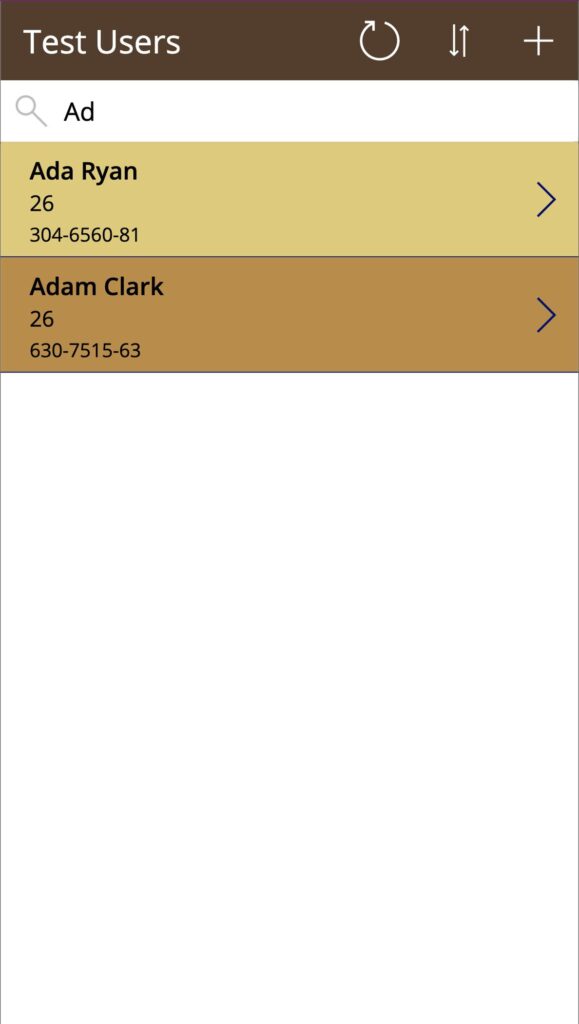
Looking good!
Final thoughts
I chose this example because it brings a lot of concepts together. The code can be a bit more complex than I usually post, but I tried to explain where each concept fits. The important part that I want to show is that we don’t always need to use the data source directly. Instead, we can parse the data, add more rows, and use that data in our galleries.


Manuel,
Thanks for the description. I have been able to get my app to have alternate colours using your code. At the point where you have the // Add your other columns here – is there any quick way to add all columns? – my app has 30 columns
Hum. I don’t know on the top of my head, but I’ll try to figure something out for you.