There are times when HTML is not helpful, being for parsing the text or saving it. Removing HTML tags is a pain; that’s why the “HTML to Text” action is a god-send. It removes the HTML tags and presents us with the “raw” text that we can use to do whatever we want. Let’s explore it.
Where to find it?
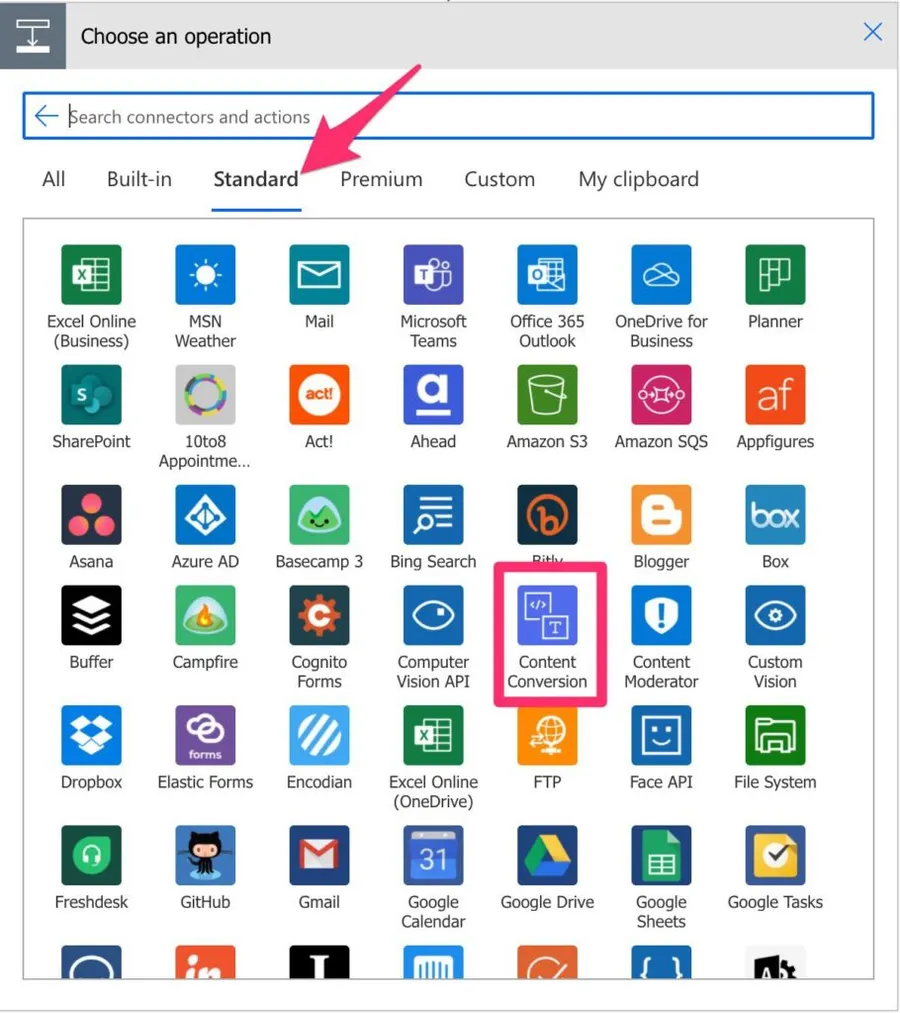
You can find it under Standard.

“Content Conversion”

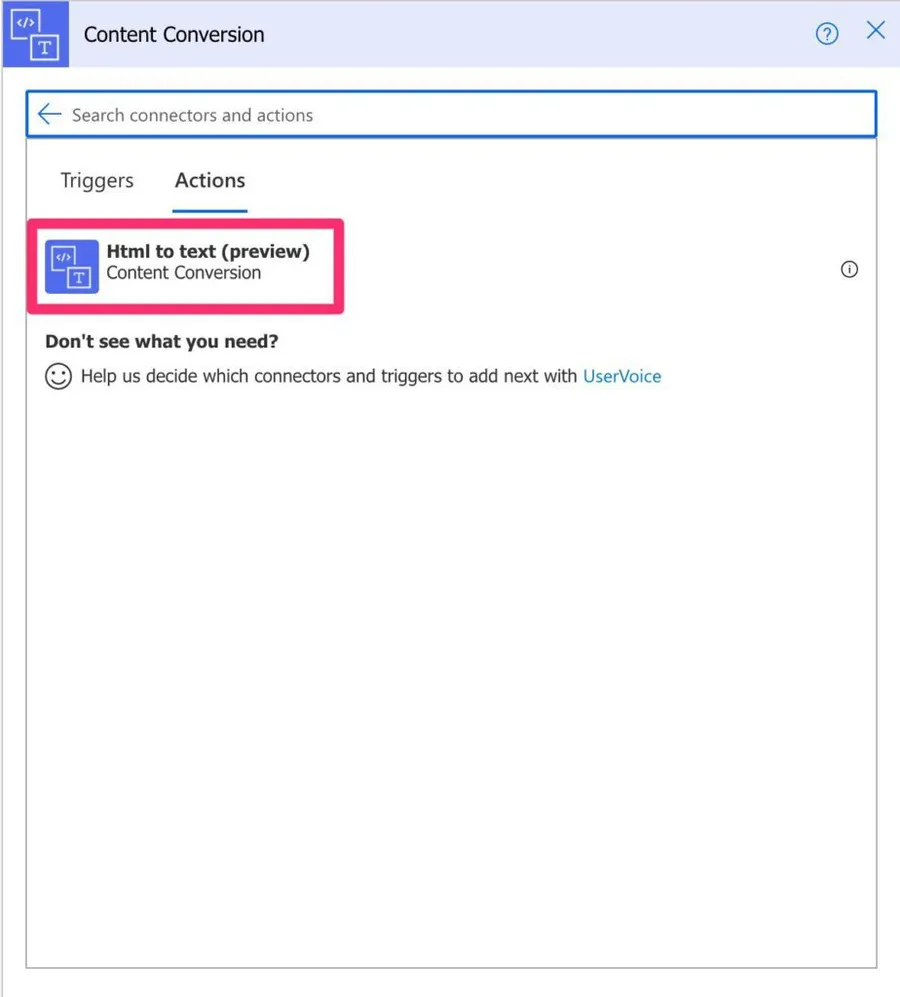
Here’s what it looks like.

Usage
You can use any element to add to the “HTML to text” action. For example, a trigger parameter, variable, compose or even provide yourself the raw HTML in the field.

Limitations
There are a few things to keep in mind. First in the conversion and then in the size of the HTML.
Conversion limitations
I’ll list them as they are in Microsoft’s Reference and then provide some context:
- The max line length is 80 characters; afterward, a line break will follow.
- For link elements that follow the structure,
<a href='link'>text</a>the result becomes texttext[link]. If text and link are the same, only text will be present. - Headers (
<h1>,<h2>Etc) are uppercased. - Heading cells (
<th>) are uppercased. - Empty lines will be trimmed as a space-saving measure.
- Unordered lists will use * as a prefix.
- There will be three spaces between data table columns.
- There will be 0 empty lines between data table rows.
- Links
href='#...'will be ignored. - New lines
\nfrom the input, HTML will be collapsed into space as any other HTML whitespace characters.
These are not limitations per se but notice a pattern in the conversion. For example, the links will be converted to text[link] the markdown reference (some “flavors” of markdown will represent it differently, but this is how Microsoft represents it). The same with the * that represents in markdown an unordered list. This does not mean that the “HTML to text” is converting HTML to markdown, but since you’re aware of what will be converted, you can use them to your advantage.
Size limitations
Since HTML files can be pretty significant, Microsoft imposes a 5Mb size in the file and a 250 HTML DOM Tree. DOM stands for “Document Object Model,” and you can think of it this way. So if you have an HTML file, you’ll have:

As you can see, it’s a tree structure. Inside the text, you can have more links, tables, images, and more. The limitation indicates that you can only have nested up to 250 branches of the tree. It may look enormous, but HTML can get very complex very quickly, so be aware of this limit if you’re not getting all values converted correctly.
Recommendations
Here are some things to keep in mind.
First, convert and then format.
As you can notice, the “HTML to Text” allows for the formatting of the value.

I would recommend, though, that you leave it “as is,” convert the HTML to text, and in the following action, do the necessary formatting.
It’s essential to have the “source” text unchanged. The “HTML to text” action will convert the value that you can refer to in any part of your Flow. This is important because, in the future, you may want to convert the text before you do the formatting, so you have the division of work done already.
Also, it’s essential to have only one “step” per action. We’re converting the text in this action, enabling us to debug to see if the text was correctly converted. If we apply any formatting, we won’t know if the conversion or the formatting made the changes that we see.
Be careful with the limitations.
Both file size and DOM branch number can be a problem in complex HTML. Break it down and parse it in sections if you have to. Find a point where you can safely break your HTML into sections, like <br> for example, and then combines all of them in the end.
Don’t try to do it yourself.
It’s complex to parse HTML, so don’t try to do it yourself. If you have huge files, break them down and use the “HTML to Text” action to parse them. There are many hidden complexities in parsing HTML, so always defer to the actions to do the heavy lifting for you.
Name it correctly
The name is super important in this case since we’re getting information from somewhere. It’s important to know where it comes from and what it is. Always build the name so that other people can understand what you are using without opening the action and checking the details.
Always add a comment.
Adding a comment will also help to avoid mistakes. Indicate where the HTML comes from and what you are expecting to get. It’s essential to enable faster debugging when something goes wrong.
Always deal with errors.
Have your Flow fail graciously when the file doesn’t exist and notify someone that something failed. It’s horrible to have failing Flows in Power Automate since they may go unlooked for a while or generate even worse errors. I have a template that you can use to help you make your Flow resistant to issues. You can check all details here.
Back to the Power Automate Action Reference.
Photo by Pankaj Patel on Unsplash


I am working with power automation. I am dealing with incoming emails and wany to convert email body to excel, I can boy find HTML-To-TEXT in the actions, and my problem is I use body preview, it gives me all lines I expect, when I try to use split first/last cannot get proper values for example the first is the column name and last part after : is the value for that column, and also with last part get the remaining lines, the last line is correct. I think the split is giving me problem here is the example for bodypreview I see: column1:test1 column2:test2 column1:test1 column2:test2 Any suggestion please
So funktioniert es: split(outputs('HTML_to_text'), decodeUriComponent('%0A'))
Note that the "HTML to Text" is a "Preview" action and should not be used for production, as per Microsoft. Would you have another production-ready recommendation to do the same thing? Thanks!