
Have you found a site with a lot of data and want to parse it in Excel? Simple enough, we can copy and paste it, right? The answer is “maybe.” Sometimes it works perfectly, but other times, you want to get the data a bit more clean in your Excel file, so let's look at how to import data from a website.
We’ll use the worldometers website with the list of countries to test the concepts with accurate data.
The wrong way
If you copy and paste, it would look in Excel for macOS.

The destination will be:
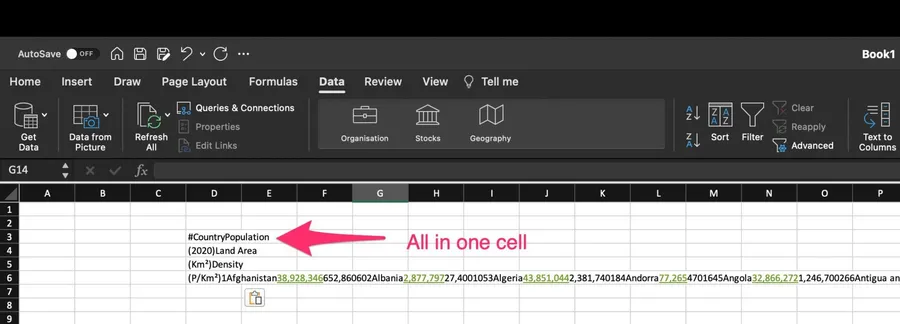
Ugly right?
There’s an easier (or correct) way to do it, and I’ll show you how. I’ll show you both Windows and macOS versions with different strategies.
Excel for Windows
Excel for Windows has a feature called “Import from Web”. It makes import simpler since you only have to:
First, selecting where we want the data to start is essential. Select the cell and go to “Data” and the “From Web”.

You’ll be presented with this. Excel needs the website where you want to extract the data.

Copy and paste the website.

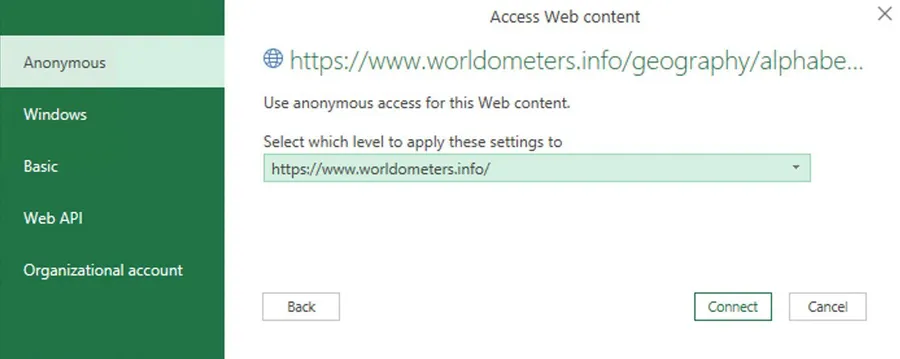
Excel will then ask you a few questions. You’ll often select “Anonymous”, but if the website is inside an organization or protected, you may need to use the other options to enable Excel to reach it.
Depending on the website, it can take a few seconds.

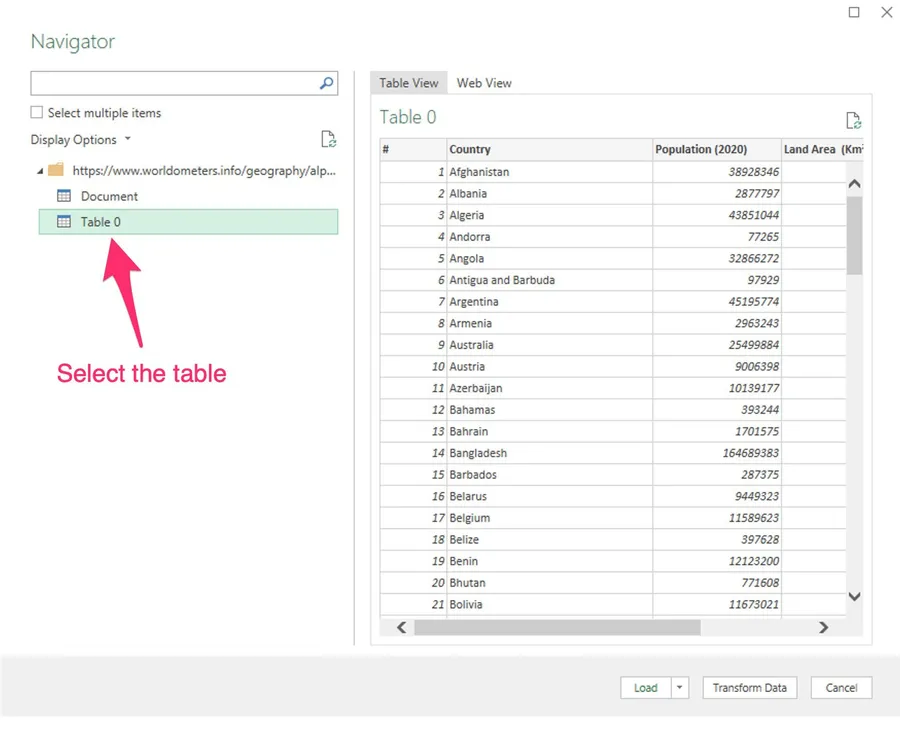
After Excel looks at the website, it will display multiple tables since you may have various data tables. Select the one that you want to import and press “Load”.
Here’s what the data looks like in Excel.
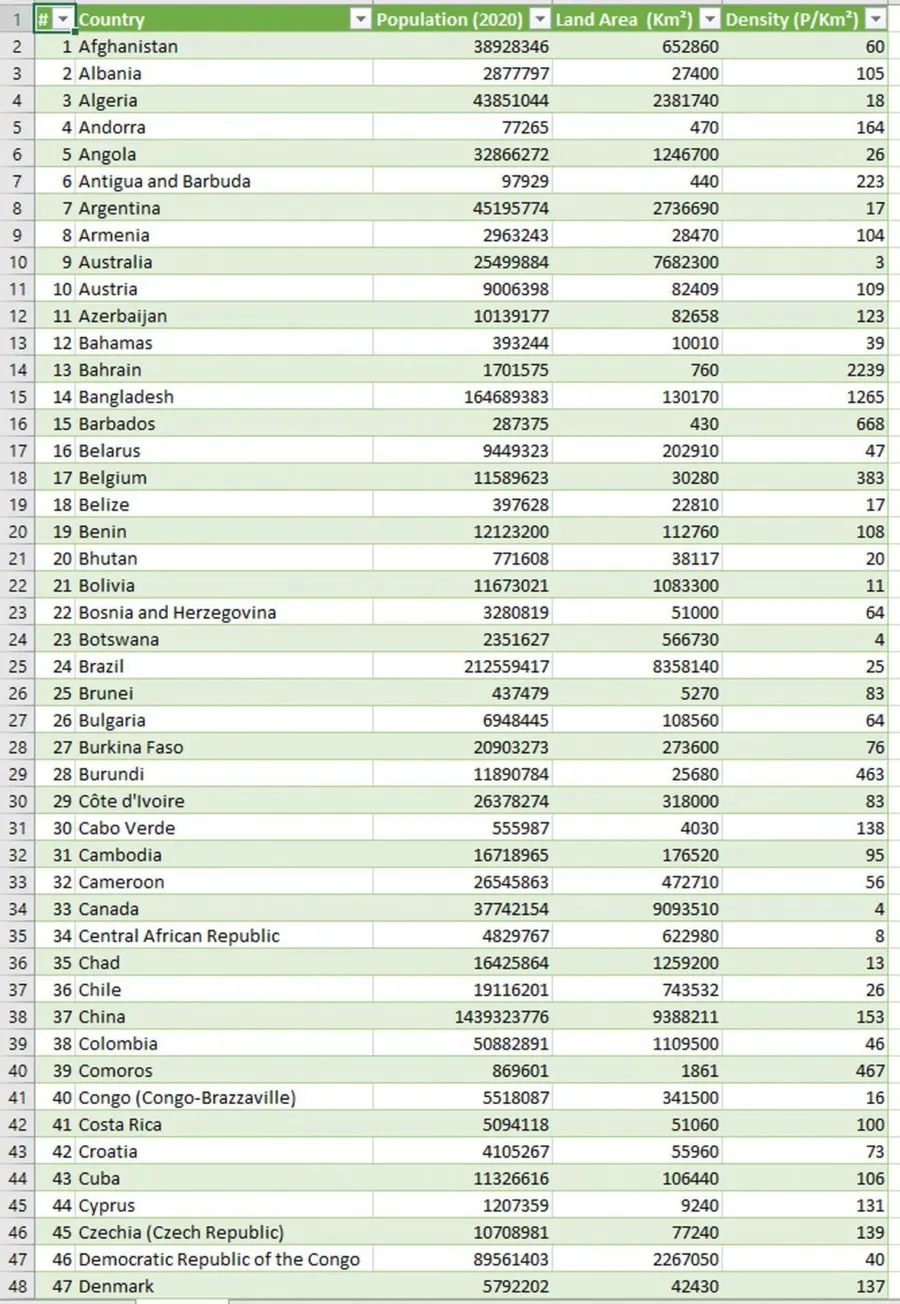
It’s pretty simple.
Excel for macOS
Excel for macOS will enable you to import HTML. If you don’t know what that is, don’t worry. Just think of it as the code that displays your page. We need to get that information and provide it to Excel so that it can perform its magic and import the data.
First, save the website (right-click on the page):
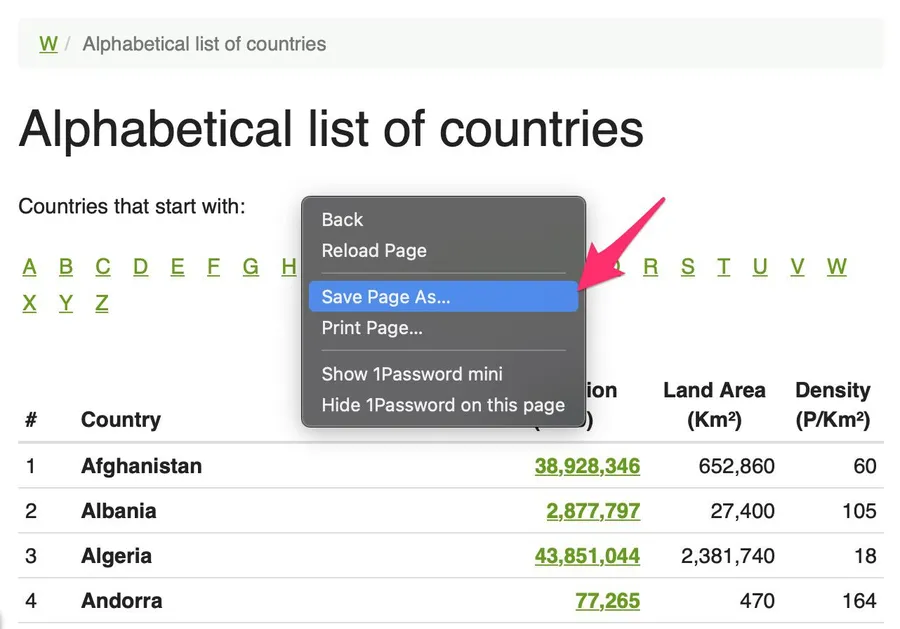
Save it somewhere. It doesn’t matter where as long as you can access it later.

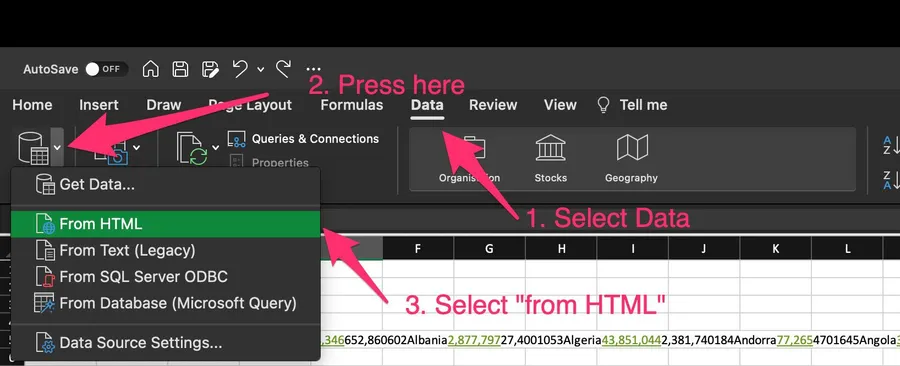
Now in Excel, let’s select “Data”, pull the dropdown, and select “From HTML”
After that, you’ll be asked to locate the file. Choose the file you saved before:
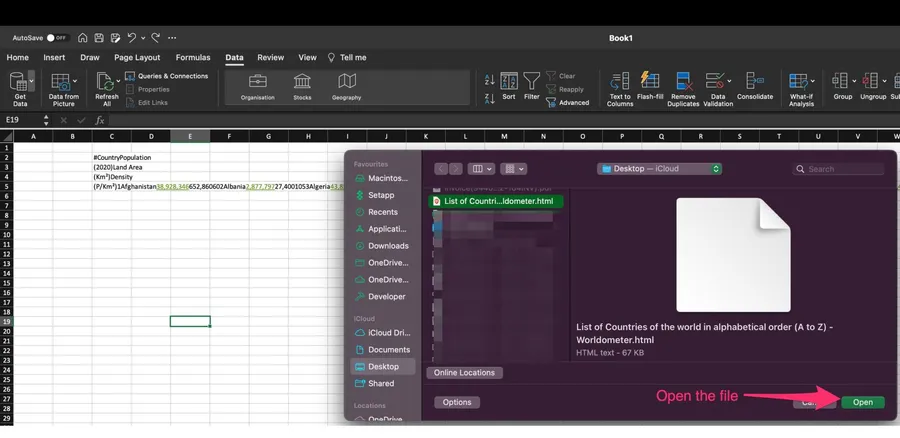
Notice that you’re “opening” the file, not importing it into your Excel sheet. It will open a new window with the data.

Now copy the data you need, and you can safely close this window and delete the HTML file.
It takes a few steps, but it beats transferring the data manually.
Final thoughts
If you know this trick, extracting data from the website is pretty straightforward. Excel is super powerful, and it has many features that, although not prominent, can save us a lot of time.
So if you end up copying and pasting a lot of data, consider it a sign that you should be using another strategy.
Photo by Meagan Carsience on Unsplash
No comments yet
Be the first to share your thoughts on this article!