For a big team, it’s essential to have control over the time-off or holidays that each takes. Each person has his/her allowances, and some need approval. In most cases, this process is manual by sending an email to a manager or registering the intention in an Excel file. It’s time-consuming, and our friends Flow, and SharePoint can automate most of this for us.
You can check my YouTube video and article that I wrote a few weeks ago approaching this topic.
For this demo we’ll do the following:
Create a SharePoint list with people, time that they can take off and a manager
Create a SharePoint list with requests
Have flow fetch them and send an approval request to their manager
Register the manager’s answer in the requests list
Send an email to the person with the reply and comments.
Looks complicated but it’s not. Let’s start
Create the SharePoint Lists
If you don’t know how to create lists, I have a step-by-step tutorial on how to do it and the best practices to create them.
Employee
Disclaimer: Since I only have one person in my account (myself), I need to cheat a little. I need to create a column with the email so that I can send it to test. While building this, define the person as type ”Person” and the boss as ”Person” also. Then you can have access to the email and other useful information.
The columns are:
Title - The name of the employee (in your case this can be anything since you’ll get the information from the person)
Boss - Who to send the request
Boss email - You won’t need this because you’ll have this in the person, but I need to add the additional field to make my life easier.
Remaining Days - How many days the person has left
Person - The Office 365 user
Email - See disclaimer above
Now let’s create the requests list:
The columns are:
Title - We’ll use this to write what’s happening
Person - Lookup to the employee table. The person who’s asking
Person Remaining Days - Having the additional field here allows us to fetch the file directly and not have to get the item in the “employee” list
Status - Status of the request
Requested Days - How many days off?
Simple. Now let’s create the flow:
Flow time
Now let’s start having some fun. The Flow is quite simple, but let’s break it down into small steps to explain it better.
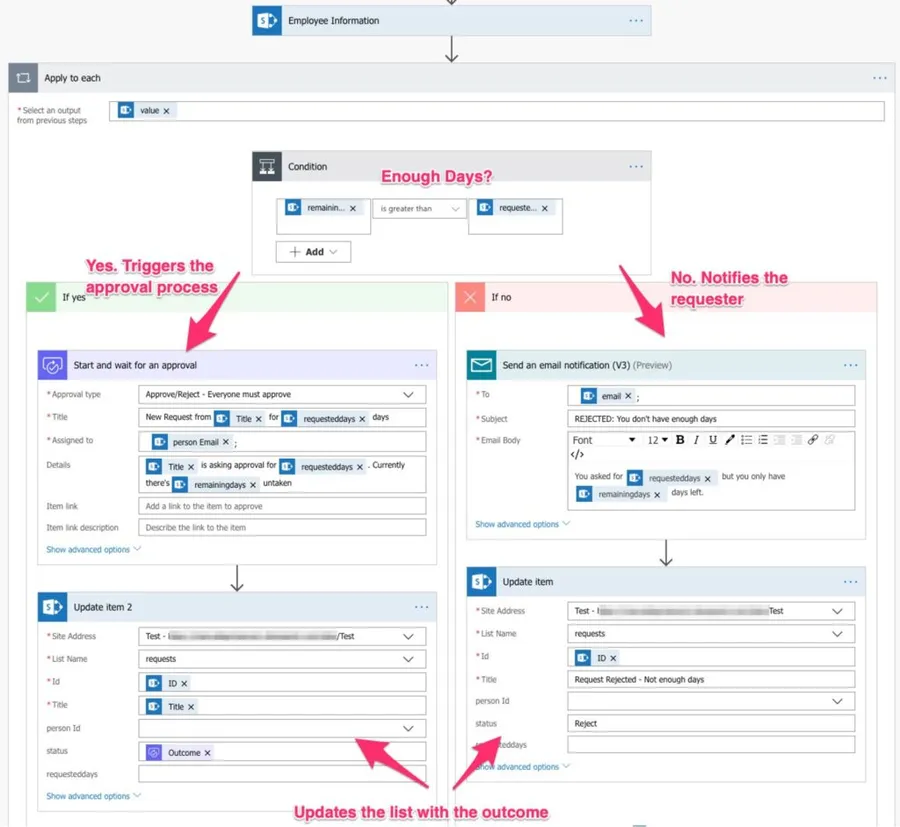
First, the trigger monitors if there’s any new item in the “requests” list. If there is we find the employee in the employee table by searching by ID and limiting the return to 1 since we’ll always have only one person with the same ID.
Next, let’s check the remaining steps.
There are three possibilities:
There aren’t enough days. Then it’s rejected, and the requester notified
There are enough days. The approval process is triggered and updates with the outcome:
The manager rejects
The manager approves
Let’s run all three possibilities and check if all works fine.
Testing
Let’s do some tests to ensure all parts of the approval process are working correctly. To test, insert a new value in the “request” list, and it will trigger the flow automatically.
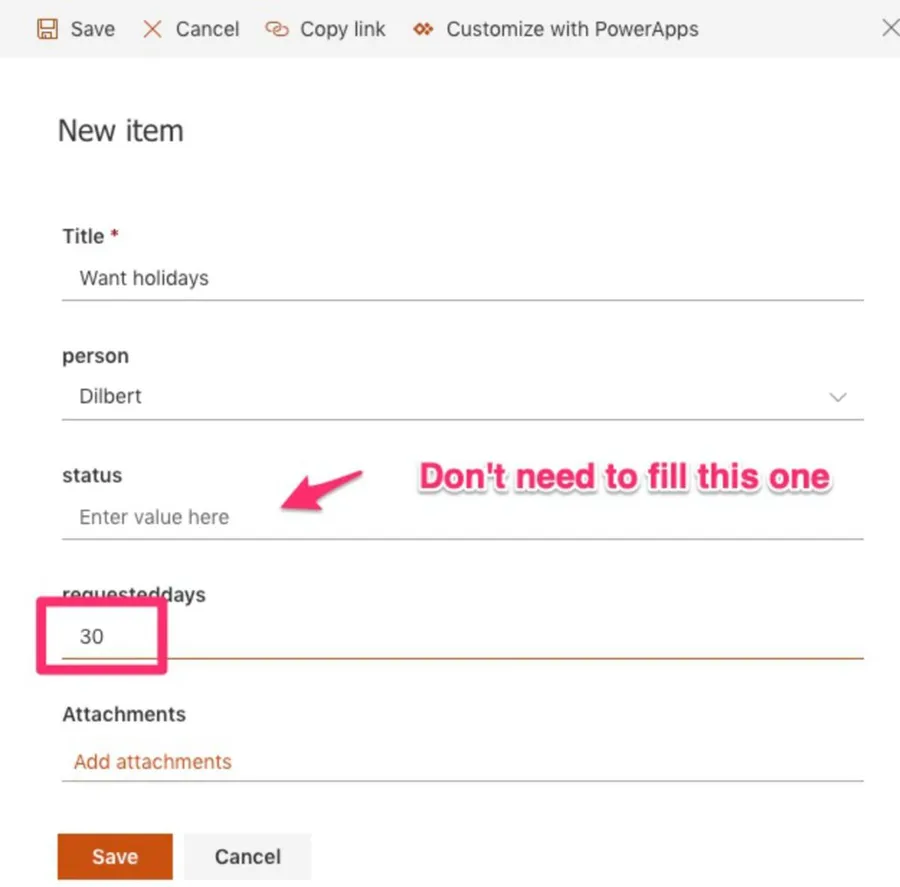
Test 1: Ask for too many days
Let’s ask for 30 days.
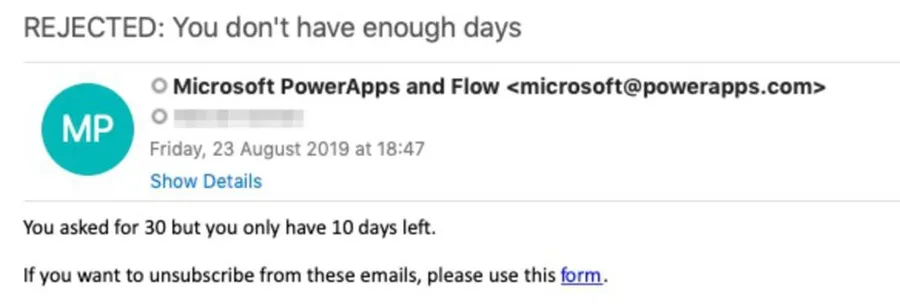
We get an email right away:
Let’s check SharePoint:
It works!!!
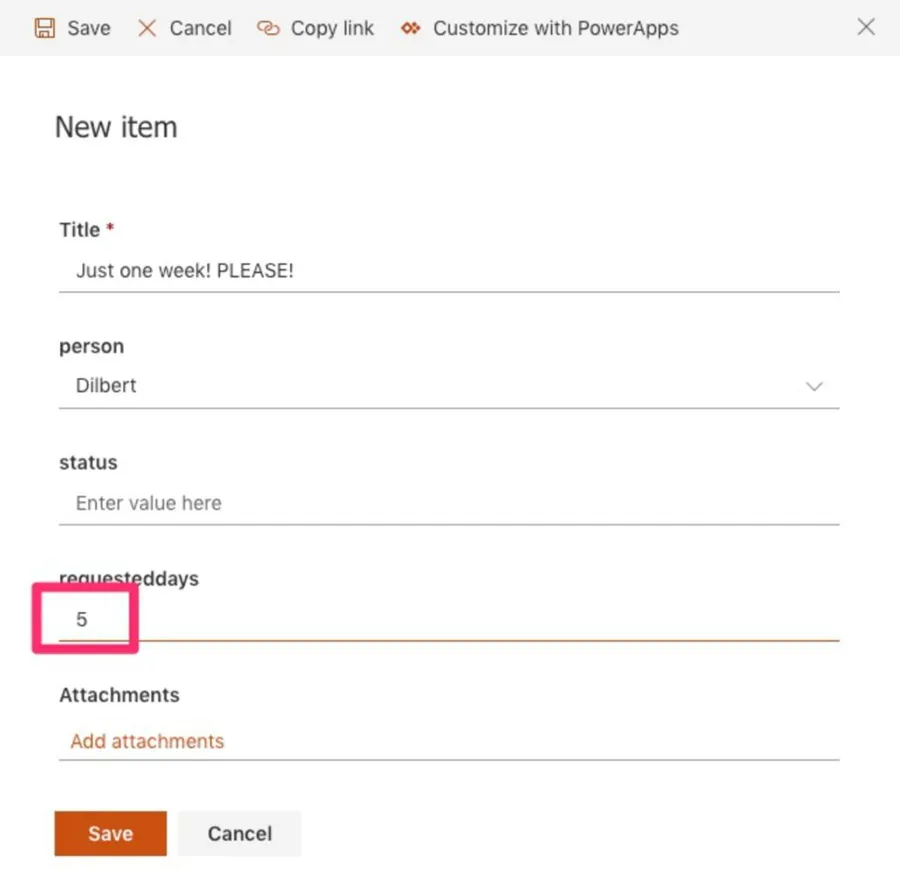
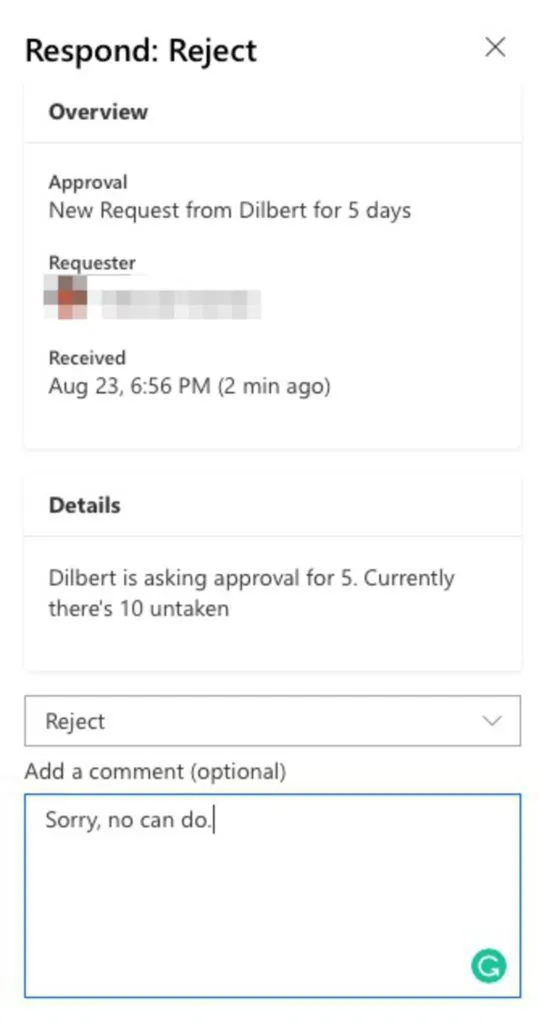
Test 2: Ask for enough days and boss rejects the request
Lets’s ask for five days off
The boss receives the email:
But rejects it:
Let’s check SharePoint:
Good!
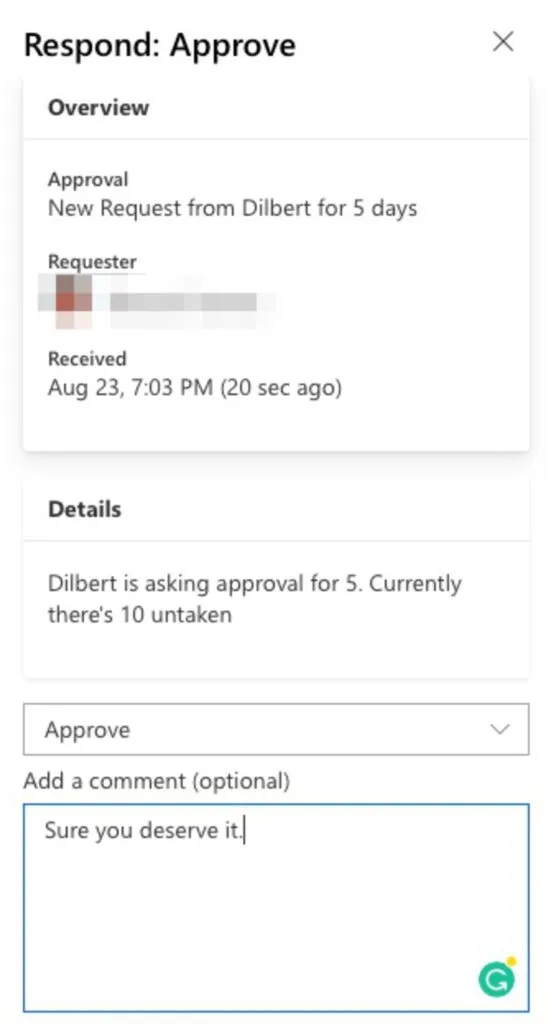
Test 3: Ask for enough days and boss accepts the request
Same steps as before but different reply.
Let’s check SharePoint:
Final thoughts
I tried to create a simple example that demonstrates the power of approval processes built in Flow with only a few steps. You can then create additional steps, add multiple people to the approval process, notifications, etc.
Have a suggestion of your own or disagree with something I said? Leave a comment or interact on Twitter and be sure to check out other Flow-related articles here.
Featured Image by Katya Austin on Unsplash
good stuff, thank you. Question - when the boss approves it and adds comments where are the comments stored? I have a similar flow that triggers when someone uploads a label to SharePoint an approval email will go to 4 people ( all need to approve). Each one can approve or reject the label. two things i can t figure out is where the comments get stored and if there are 4 people that need to approve how can I tell who has not approved it yet. Right now it is a black hole.
Thank you,
Sam
Hi Sam,
You can use the "Responses Comments," but this is an array. You always need a loop to get all the answers, even if you send it to just one person.
<img src="https://manueltgomes.com/wp-content/uploads/2020/09/Screenshot-2020-09-27-at-14.52.36.png" alt="Get Comments from Approval" />
You can define a variable or an array and then use it to store that information.
Hope this helps you.
Manuel
Gemma Griffiths
||
I need to set up the following flow please
load the invoice to sharepoint
send for review (could be a number of people)
once reviewed, automatically goes to approver (this could be a number of different people)
once approved comes back to the person who created the file


good stuff, thank you. Question - when the boss approves it and adds comments where are the comments stored? I have a similar flow that triggers when someone uploads a label to SharePoint an approval email will go to 4 people ( all need to approve). Each one can approve or reject the label. two things i can t figure out is where the comments get stored and if there are 4 people that need to approve how can I tell who has not approved it yet. Right now it is a black hole. Thank you, Sam
Hi Sam, You can use the "Responses Comments," but this is an array. You always need a loop to get all the answers, even if you send it to just one person. <img src="https://manueltgomes.com/wp-content/uploads/2020/09/Screenshot-2020-09-27-at-14.52.36.png" alt="Get Comments from Approval" /> You can define a variable or an array and then use it to store that information. Hope this helps you. Manuel
I need to set up the following flow please load the invoice to sharepoint send for review (could be a number of people) once reviewed, automatically goes to approver (this could be a number of different people) once approved comes back to the person who created the file