Power Automate reacts perfectly when things change in Microsoft Planner. For example, we have a trigger that fires “When a task is completed”, which can be used for things like:
- Notify people that a task has finished.
- Trigger an authorization “When a task is completed” to move forward in the workflow.
- If you’re writing an article, for example, Flow can archive the working Folder and upload the article to your CMS when it’s finished.
Many things can happen when someone completes a task, so let’s check in more detail how it works.
Where to find it?
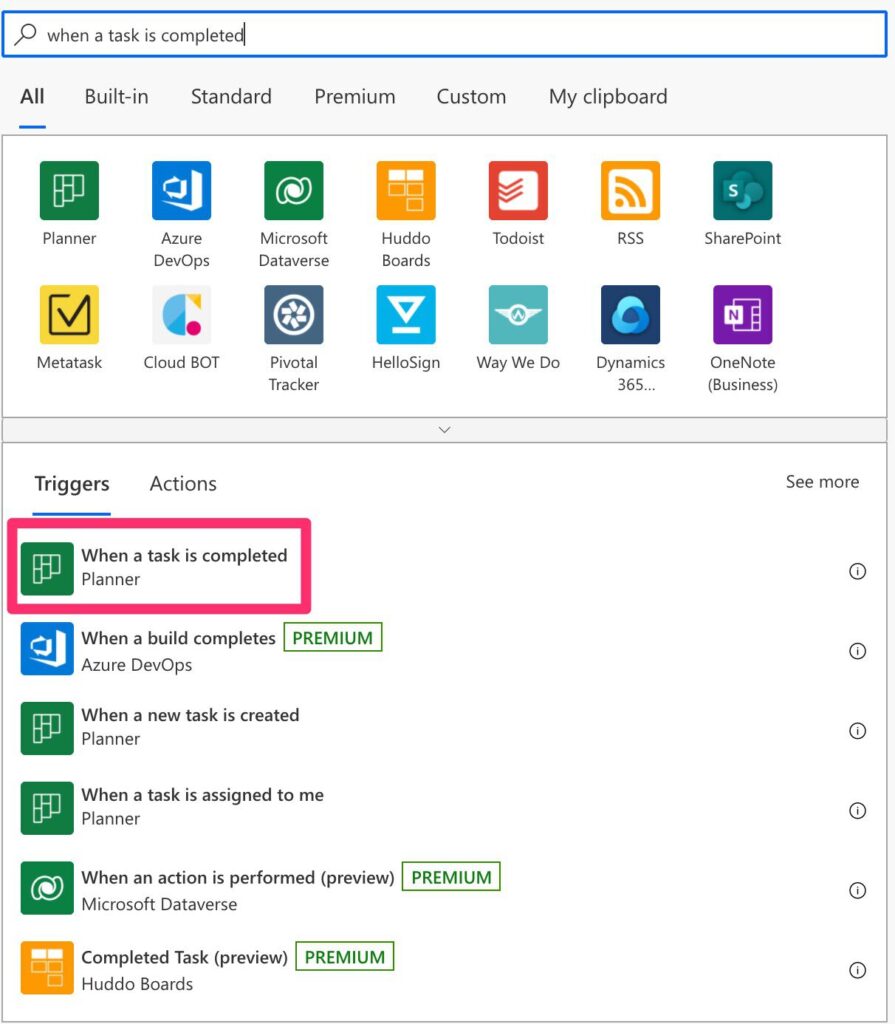
Let’s start by searching for the “When a task is completed” action to find it.

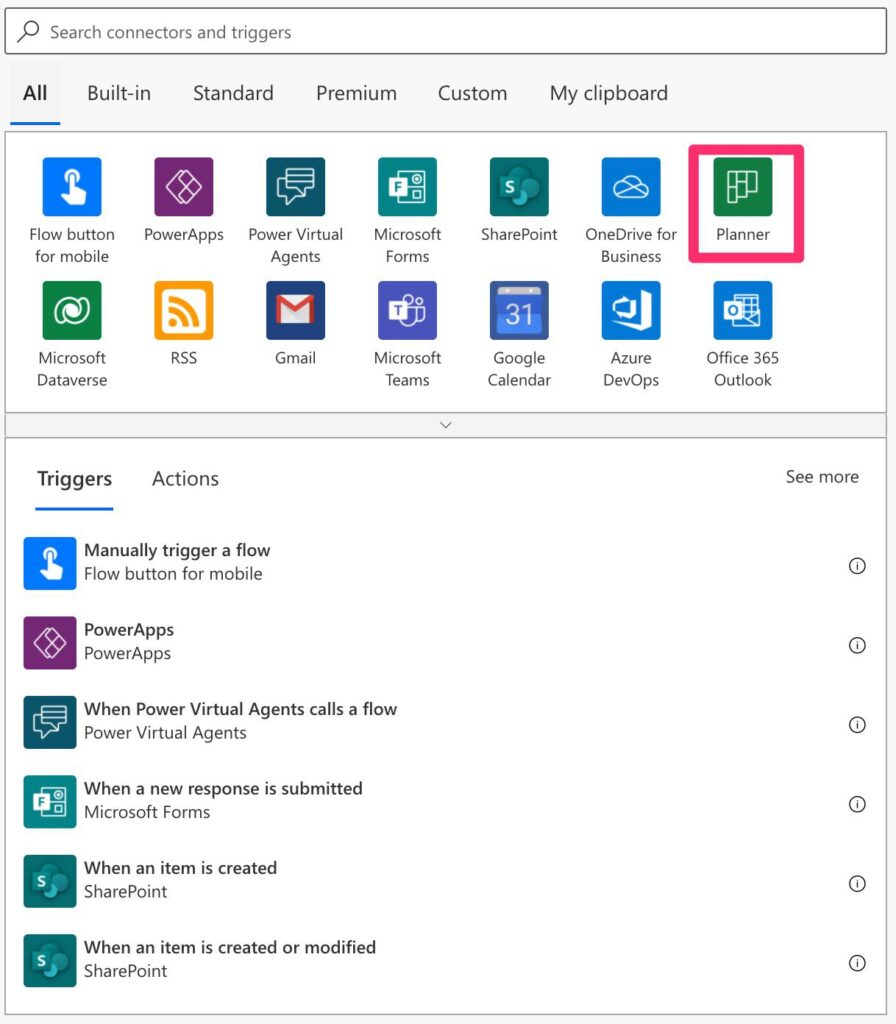
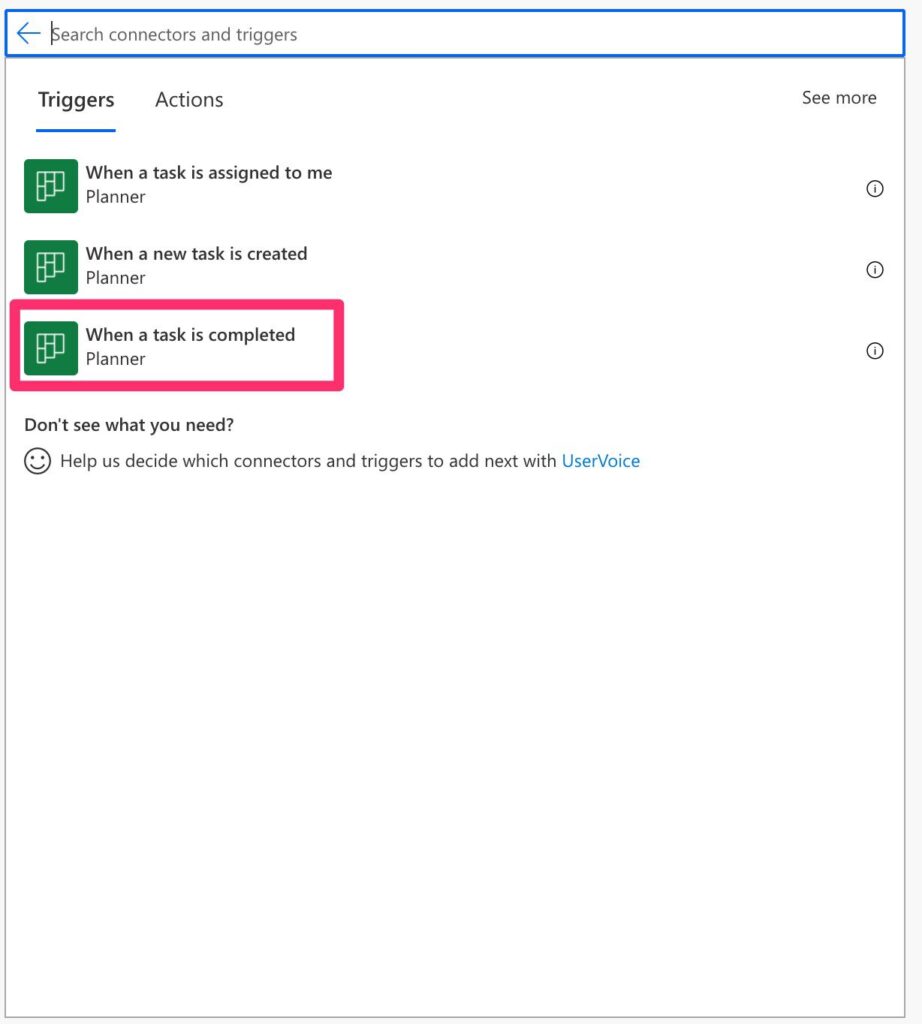
You can find the “When a task is completed” action under Microsoft Planner.

You can pick the option.

Here’s what it looks like.

Power Automate tends to save the most common triggers on the main screen, so check there before going through the full hierarchy. Also, you can use the search to find it quickly.
The trigger is super simple to set up. You need to point it to the group and Plan, and you’re ready to go.
Usage
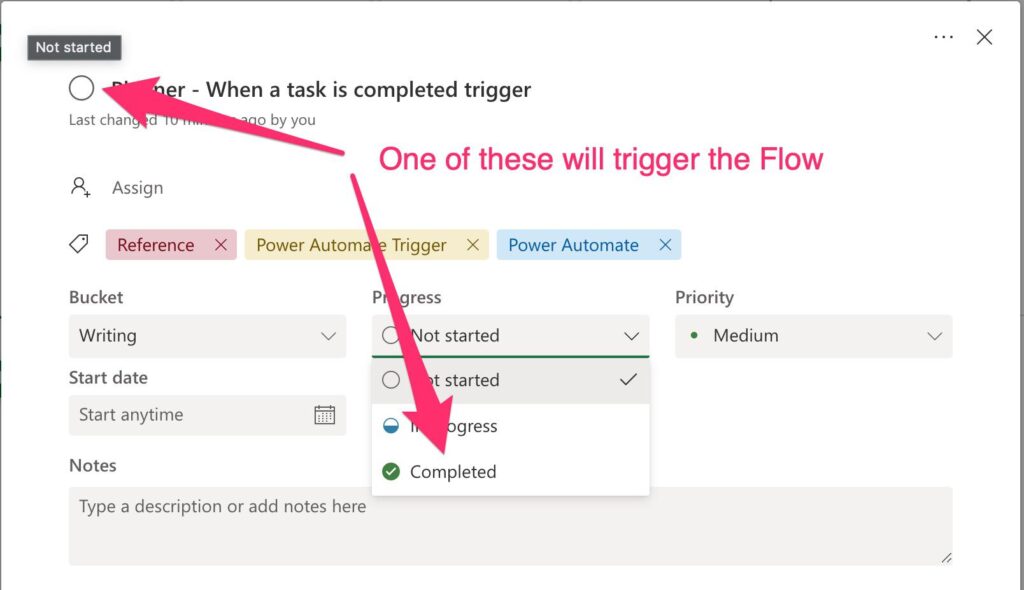
The Flow will trigger only when someone masks a task as completed by pushing the complete button or selecting “Completed” in the “Progress”.

That’s it. Not a lot more to think about.
Outputs
The trigger returns a lot of information in a JSON format, although Power Automate converts the JSON automatically for you. Here’s an example:
{
    "headers": {
        <redacted>
    },
    "body": {
        "@odata.etag": "W/\"JzEtVGFzayA=\"",
        "planId": "fa-pZcAHT7g",
        "bucketId": "fPjsGArNo-",
        "title": "test 3",
        "orderHint": "8585770537681000160PV",
        "assigneePriority": "",
        "percentComplete": 100,
        "createdDateTime": "2021-06-24T16:46:17.4713108Z",
        "hasDescription": true,
        "previewType": "reference",
        "completedDateTime": "2021-10-04T12:43:26.6364817Z",
        "referenceCount": 10,
        "checklistItemCount": 20,
        "activeChecklistItemCount": 20,
        "id": "jaarcIS_AEKwFmsSMr5LcpcAHH-6",
        "createdBy": {
            "user": {
                "id": "691d3181-d794-44fb-aba1-a267da4f229f"
            }
        },
        "completedBy": {
            "user": {
                "displayName": null,
                "id": "e5a88596-2510-11ec-9621-0242ac130002"
            }
        },
        "appliedCategories": {},
        "assignments": {},
        "_assignments": []
    }
}
We’ll ignore the headers since they don’t have much helpful information for us.
The trigger will return the basic information of the task without its details—the counts for the checklist and references, who created and updated it. If you need more information, you can always use the “Get a task” or the “Get a task details” actions.
Limitations
There’s no documented limitation for this trigger, but please let me know by email or interact on Twitter if you know one.
Recommendations
Here are some things to keep in mind.
Never generate the Group or Plan ID.
You should never generate IDs manually. If you have a task that is similar in multiple planners, then you need to replicate the trigger per plan that you have. Tools change, and IDs change with them. So you should never have to know the ID of a Group or Plan.
Finally, having the IDs will make debugging more challenging because you need the description of the Plan to guide you.
Name it correctly
The name is super important since we can get the trigger from anywhere and with anything. Always build the word so others can understand your use without opening the action and checking the details.
Always add a comment.
Adding a comment will also help to avoid mistakes. Indicate your expectations, why the Flow should be triggered, and the data used. It’s essential to enable faster debugging when something goes wrong.
Back to the Power Automate Trigger Reference.
Photo by JOSHUA COLEMAN on Unsplash


very nice information. thank you