
Did you know that you can limit the Flow's trigger based on any criteria? For example, let’s say that you’re catching a Microsoft Forms reply, but you don’t want to see your answers since they are for testing purposes. You can tell Power Automate that you only want to trigger, except for you. Or, for example, when you create an item in SharePoint and want to exclude the ones made by you.
Let’s see how we can do it.
The concept
First, let’s look at where to find it. You can find it in most triggers since it’s something that it’s innate to Power Automate and not the applications that it’s monitoring.
So how do we limit the data? Power Automate will return a lot of data when the trigger happens, and we will build a formula to check the data. If the formula returns “TRUE” then the trigger will fire; otherwise, it won’t.
For example, let’s look at SharePoint. You can use the “When an item is created or modified” action to understand when an item is created. This will return something like this:
{
  "headers": {
    <redacted>
  },
  "body": {
    "@odata.etag": "\"4\"",
    "ItemInternalId": "61",
    "ID": 61,
    "Title": "Title",
    "Modified": "2022-07-18T07:55:46Z",
    "Created": "2022-05-25T13:58:57Z",
    "Author": {
      "@odata.type": "#Microsoft.Azure.Connectors.SharePoint.SPListExpandedUser",
      "Claims": "i:0#.f|membership|manuel@manueltgomes.com",
      "DisplayName": "Manuel T Gomes",
      "Email": "manuel@manueltgomes.com",
      "Picture": "https://manueltgomescom.sharepoint.com/sites/TEST/_layouts/15/UserPhoto.aspx?Size=L&AccountName=Alsina365@Alsina.com",
      "Department": null,
      "JobTitle": null
    },
    "Author#Claims": "i:0#.f|membership|manuel@manueltgomes.com",
    "Editor": {
      "@odata.type": "#Microsoft.Azure.Connectors.SharePoint.SPListExpandedUser",
      "Claims": "i:0#.f|membership|manuel@manueltgomes.com",
      "DisplayName": "Manuel T Gomes",
      "Email": "manuel@manueltgomes.com",
      "Picture": "https://manueltgomescom.sharepoint.com/sites/TEST/_layouts/15/UserPhoto.aspx?Size=L&AccountName=Alsina365@Alsina.com",
      "Department": null,
      "JobTitle": null
    },
    "Editor#Claims": "i:0#.f|membership|manuel@manueltgomes.com",
  }
}
I removed most of the information since not all of it is important to us. What’s important to understand is what we’re going to do.
The formula
Let’s say that we want to filter by the person. We have the “Author” with all the information we need to filter, like the name or the email. Since we’re going to filter, you can use the one you like, but I always prefer email. It’s a safer “key” than the email that can be adjusted in the future.
Here’s the formula:
@not(equals(toLower(triggerOutputs()?['body/Author/Email']),'manuel@manueltgomes.com'))
So what are we doing here? Let’s break it down.
- Not function - meaning that everything inside will be negated, so if the result is “false,” it will be transformed into “true”.
- Equals function - will validate if a string is the same as the second one. IN
- toLower function - will get the string and transform all characters to the lowercase representation.
We start from the inside out. So we’re lowering the characters, so we have the same base to compare. Sometimes, emails can be returned in uppercase, and the comparison will fail if we don’t do this. After this, we compare if the email of the “Author” is the one we want. If it is, then the ”Equals” function will return “true”, but since we decided that we wish to all of them except our email, we need to negate the result.
Where do we put the formula?
Now that we have a formula, we need to know where to put it. There’s where the “settings” come into play. This option is not apparent from the start, but as soon as you know where it is, I’m sure you’ll use it much more often.
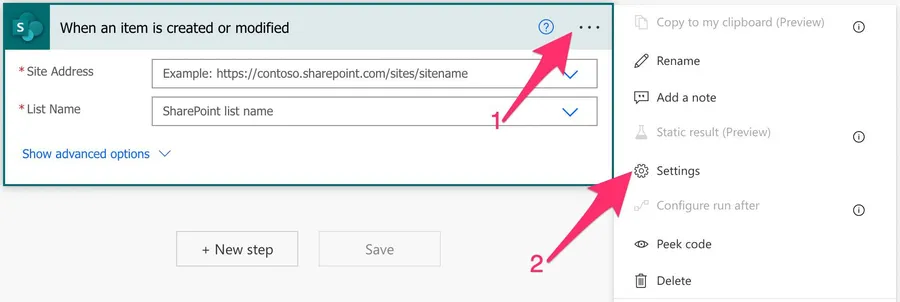
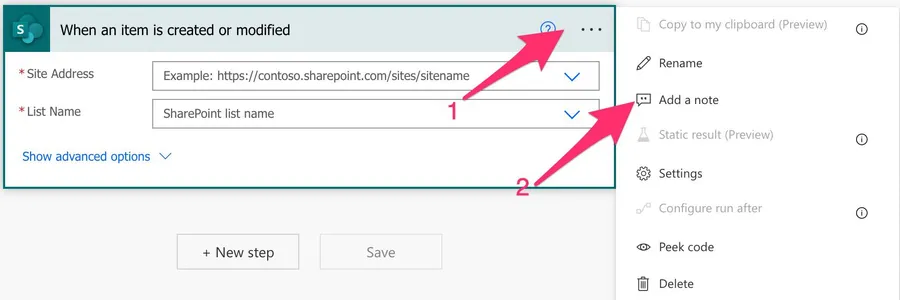
To start, pick the trigger and the three dots and select “Settings”.
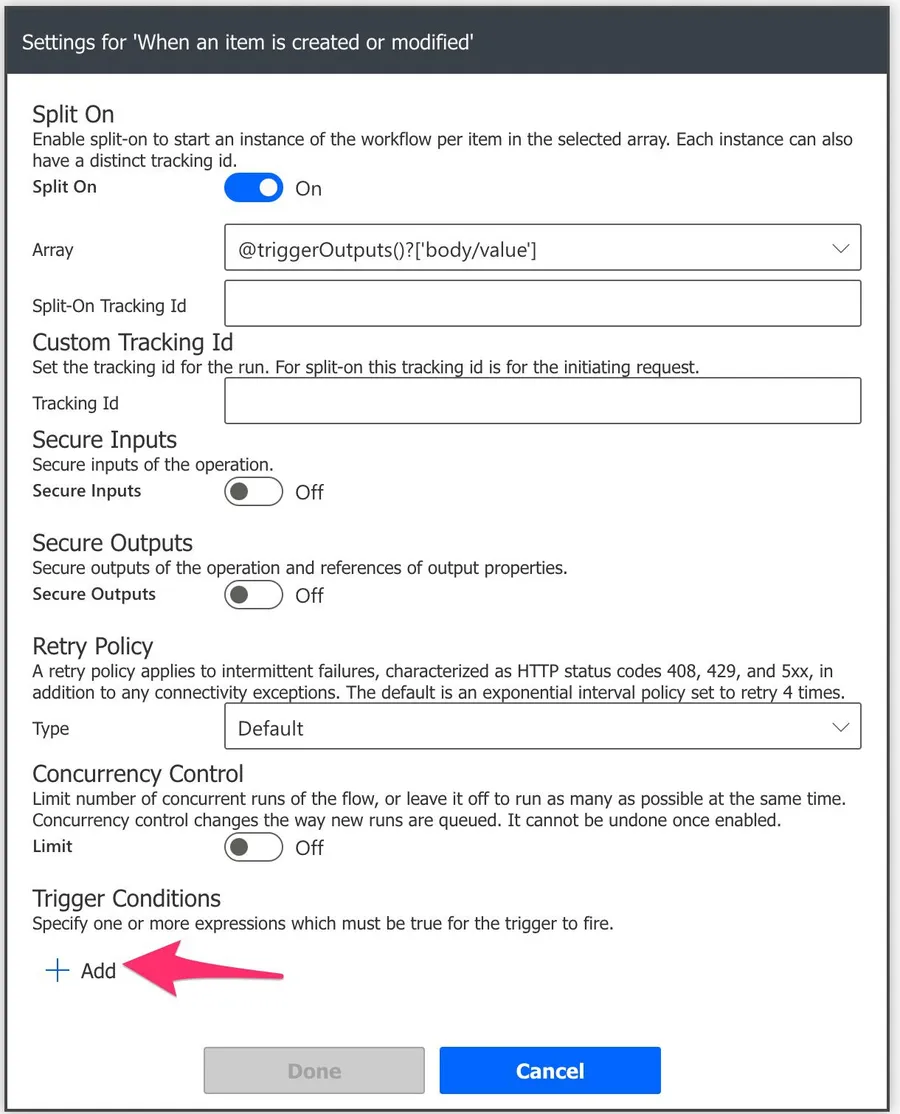
After that, add a new “Trigger Condition”.
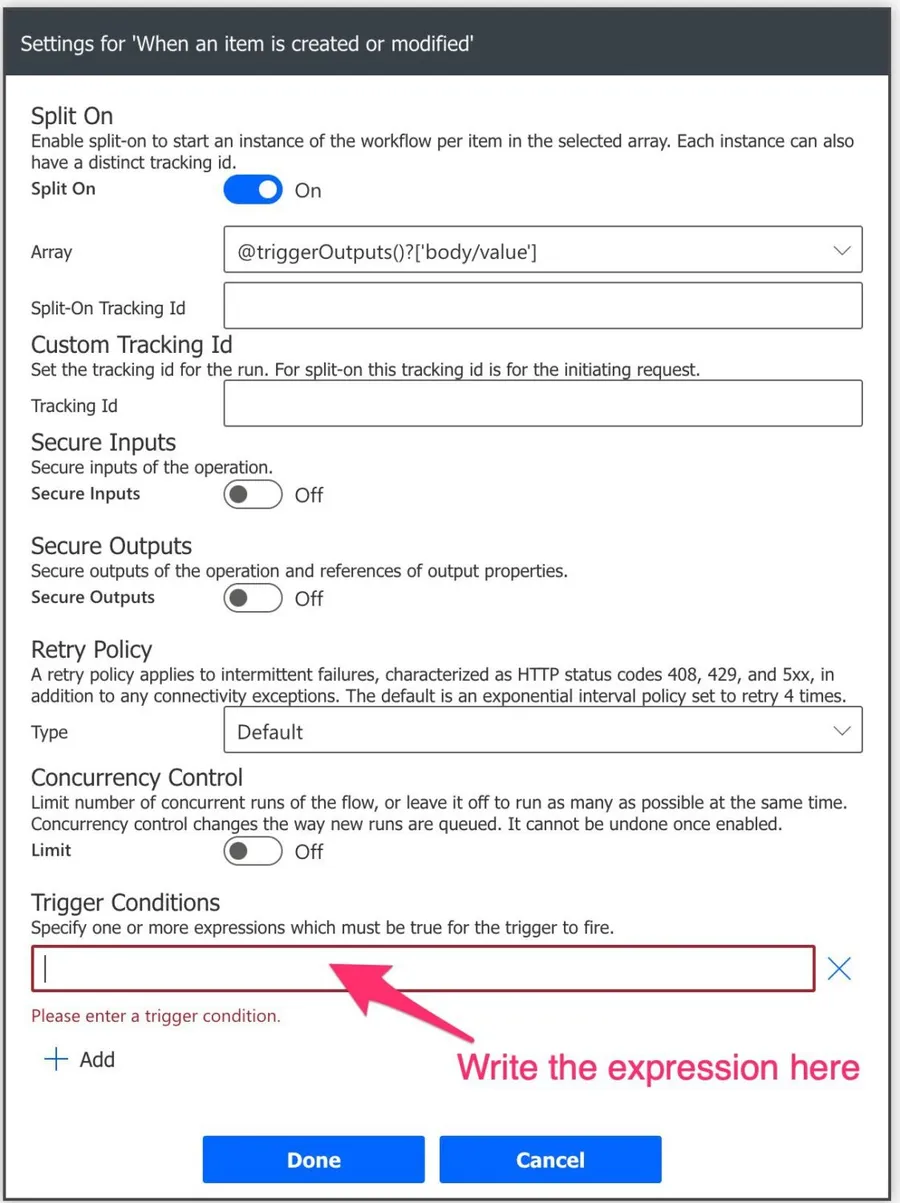
Add the expression above:
Here’s what it looks like.
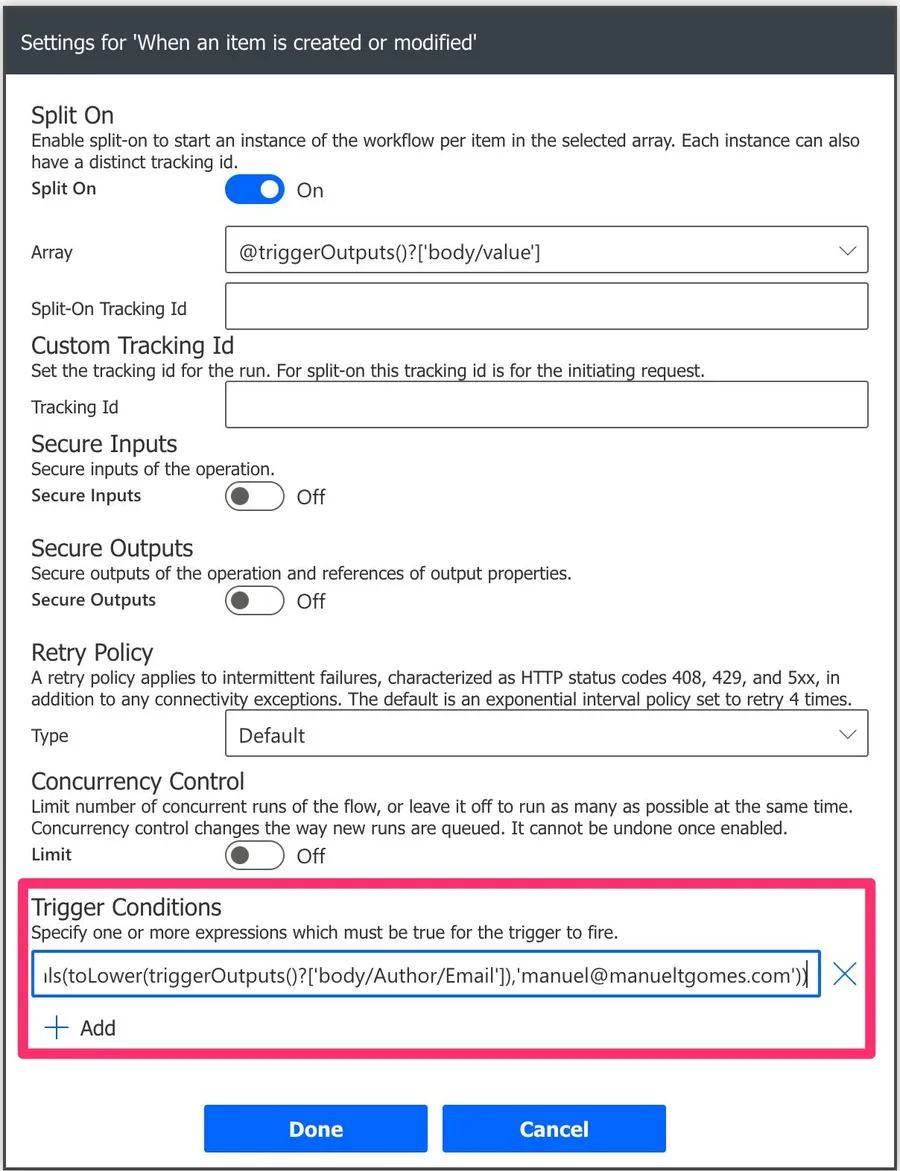
Now that you have the formula, the Flow will trigger when the condition is “true.”
Comments are critical here.
Notice that after we add the condition, the trigger looks precisely the same.

If we don’t know that there’s a “Trigger Condition” we would think that the Flow is broken if it doesn’t fire for all conditions. To avoid this, include a comment or note in the Flow’s trigger so that it’s clear to everyone what is happening. If you don’t know, here’s how to do it:
Write the note and hit “return.”
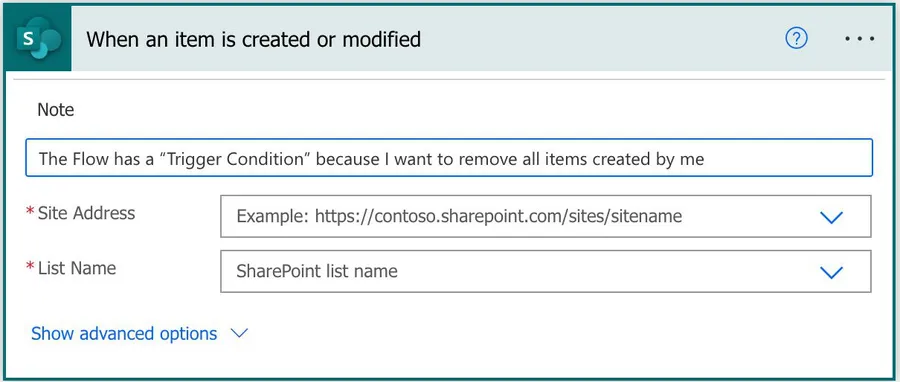
The overall “Trigger Condition” behavior is quite hidden, so it’s important to signal that to everyone. I’ve seen people wasting time debugging a “broken” Flow when a simple comment would save a few hours in frustration.
Final thoughts
This behavior is helpful, but I don't see many people using it. Since Flows have limited runs, it will be better if we can save a few by having the behaviors we don’t want trigger the Flow. Also, since we filter the behaviors we don’t like, it makes the Flow a lot simpler since we know that it will only fire with the data we want.
Photo by Mike Hindle on Unsplash


No comments yet
Be the first to share your thoughts on this article!