Microsoft's products are amazing and their integrations are amazing, but one of the handiest is the integration between Power Apps and Power Automate. I like that I can define a Power App, send the data to Power Automate, it does all the heavy lifting, parsing, creating files, etc., and then returns the data to me to show to the user. It’s super simple to integrate and quite powerful.
The Setup
Let’s create a simple Power App with 2 fields. One to send to Power Automate and another to receive data from Power Automate. The point is not to make it attractive, the point is to show how the integration is done.
First, create a new Power App.

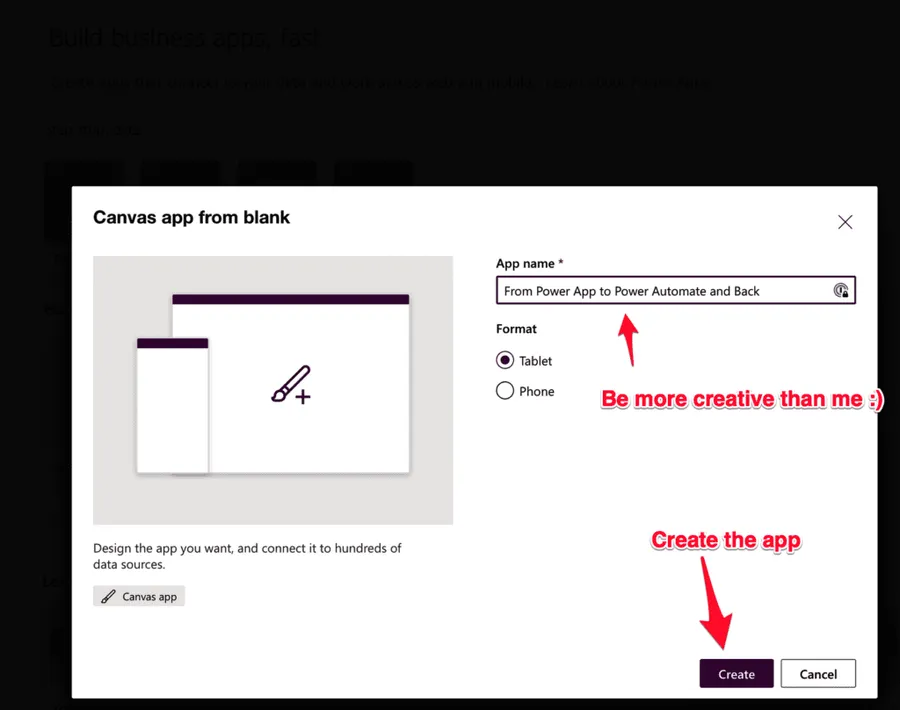
Give it a name.
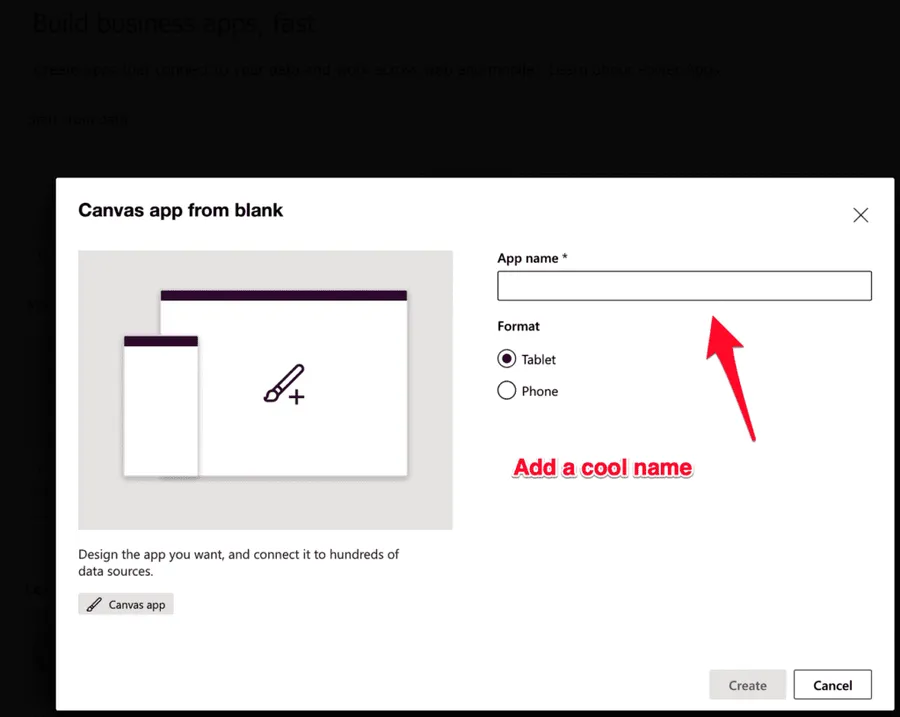
Create the app.
Add the text fields.

Now let’s look at the Power Automate side.
Power Automate
There’s nothing fancy with the Power Automate. Create a new automated one and press skip. It’s easier to all in Power Automate’s editor.

Let’s add the Power App trigger.
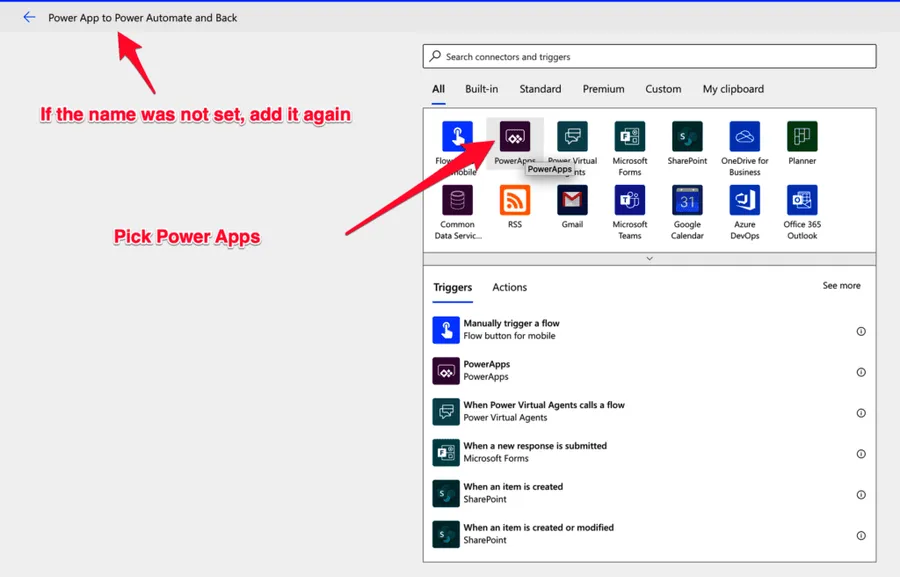
Pick "PowerApps".
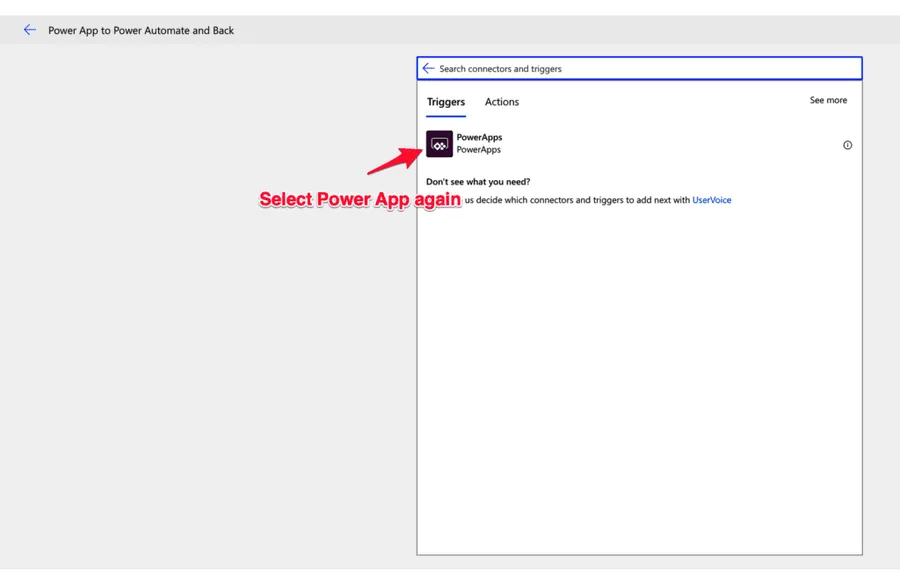
And you’ll get something like this:

Let’s add the additional information and we’ll be done with it. I’ll explain the purpose in the next section.; these note that I’m returning a number, but you can return right away since you’re displaying it in a text.
There’s something you need to understand. Power Apps create variables to pass arguments to Power Automate. To create a new one, you just need to select any component and pick the following:
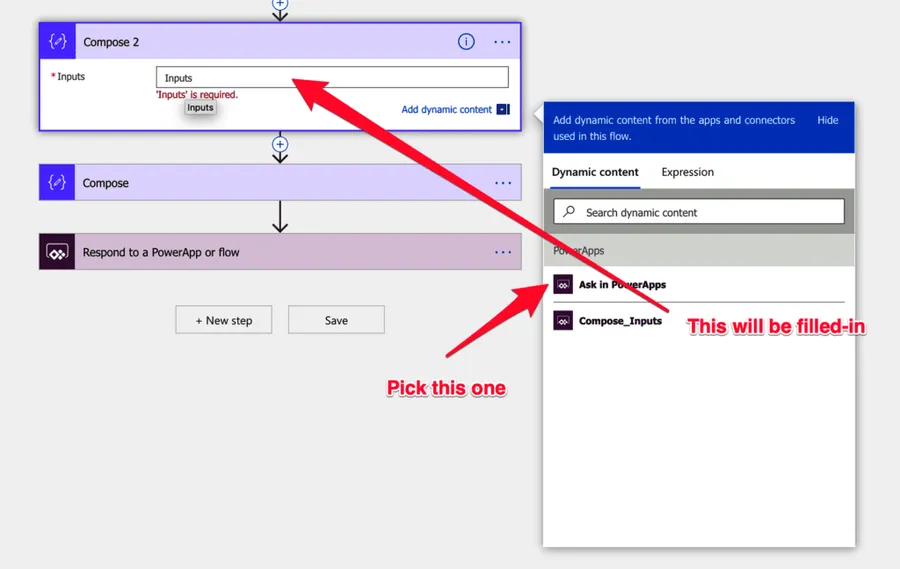
Then you can use the variable to do calculations as we have above:
add(int(triggerBody()['Compose_Inputs']),10)
Connecting both
Let’s pick a simple example. I send a number, and Power Automate adds 10 to it. I know that it’s simple, but the important part is to understand the basics. When you do that, you’ll be able to do complex interactions by yourself.
In Power Apps, let’s add a button to trigger the whole process:
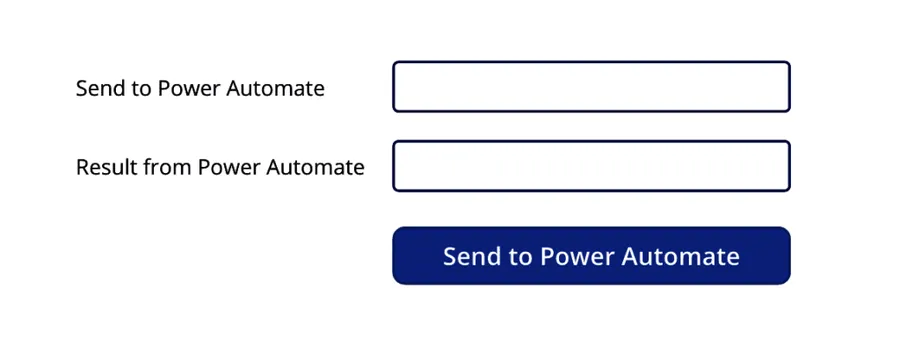
Now add the Power Automate to the button:
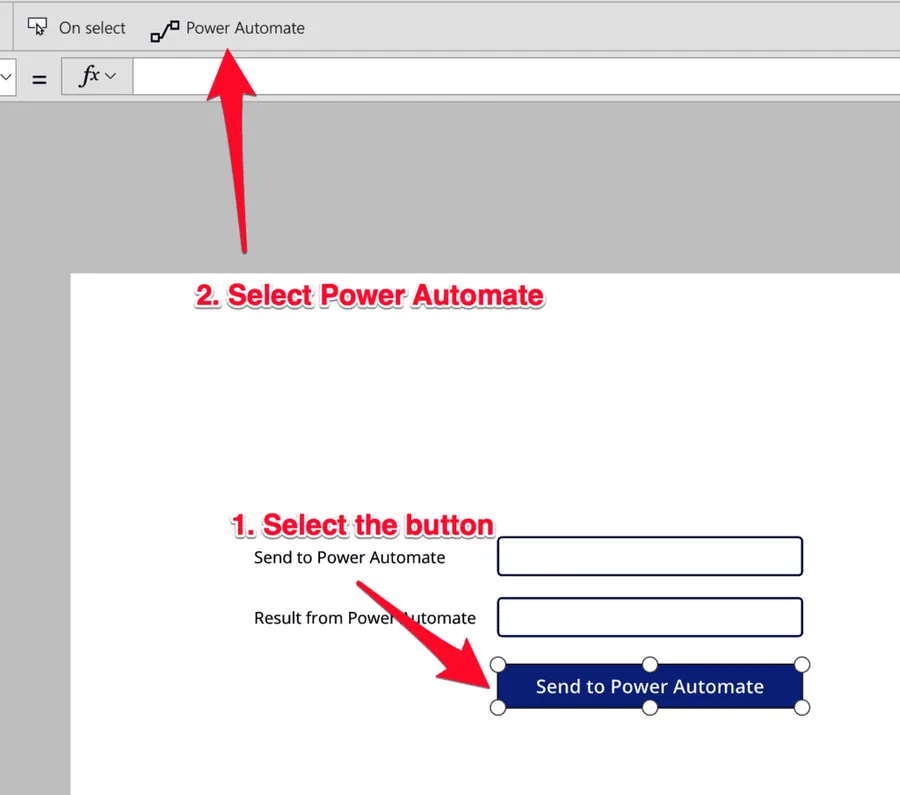
You’ll get an option to see the available Power Automates:
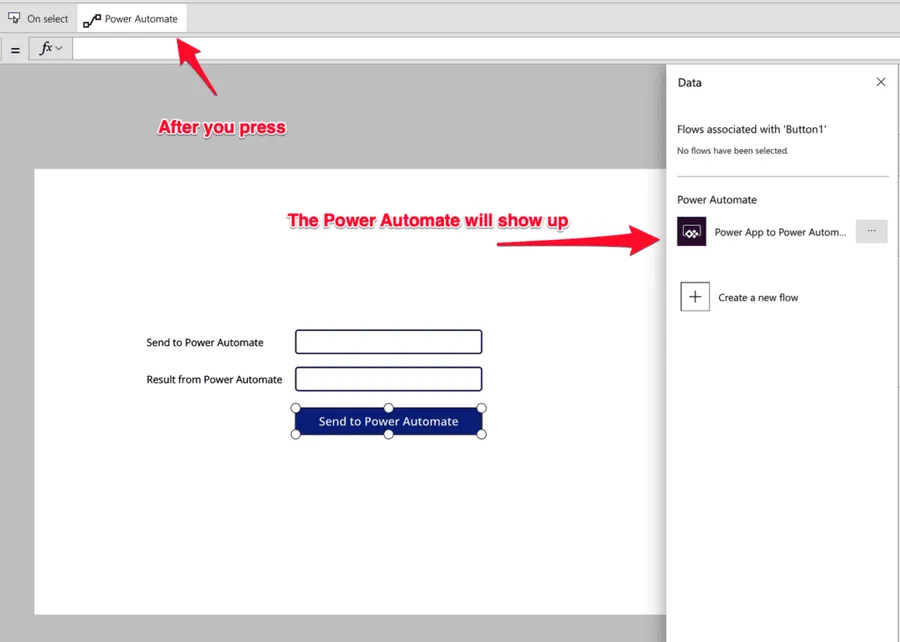
Pick the one and wait a little bit so that Power Apps can make the necessary connections:
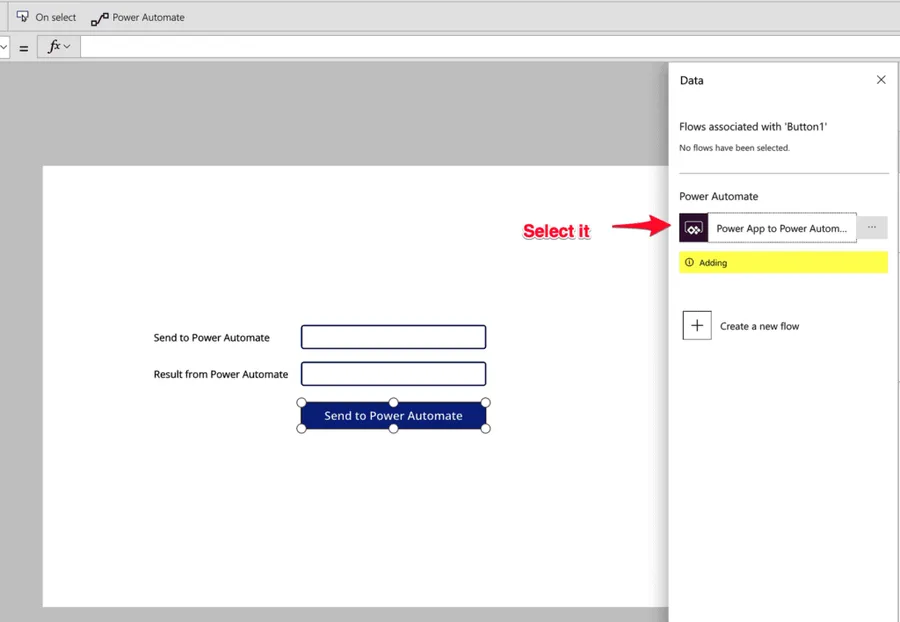
All connections are made, so we’re good to do:

Finishing up
Now we’re only missing one thing. Send the parameters to Power Automate and receive them and update the fields. Let’s do this:
PowerApptoPowerAutomateandBack.Run(TextInput1.Text)
Then let’s set up a variable to collect the information from Power Automate. Still, since we want the variable to collect the return from the Power Automate, we need to encapsulate it in the reply.
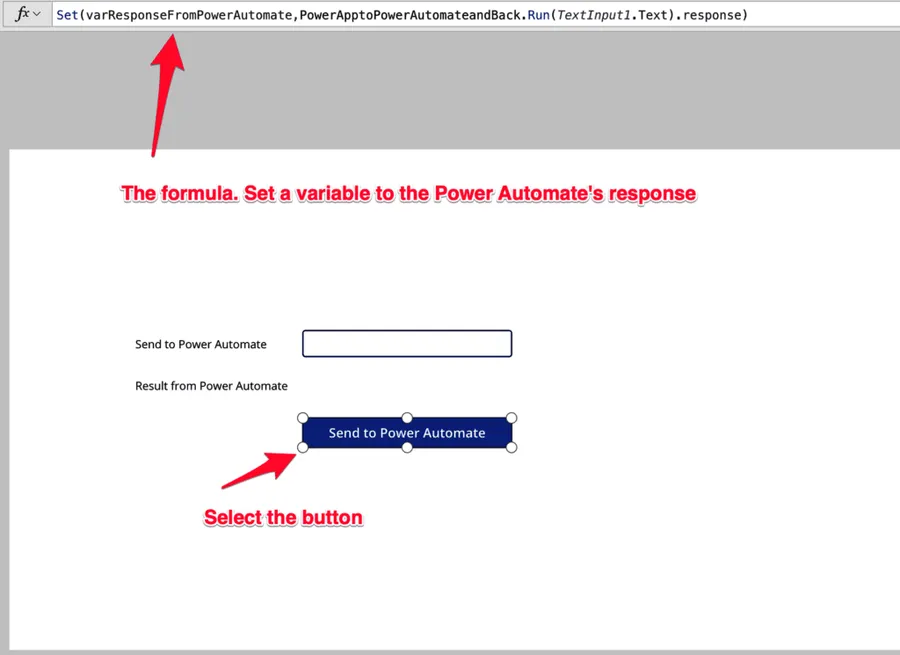
Let’s break the formula down
Set(varResponseFromPowerAutomate, ....)
With this, we’re setting the variable “varResponseFromPowerAutomate” with the value that we collect:
PowerApptoPowerAutomateandBack.Run(TextInput1.Text).response
The button will call the Power Automate that we created earlier and run with one parameter (the first text field). After the ".response" is the variable that you created at the end of the Power Automate. Here’s a recap:
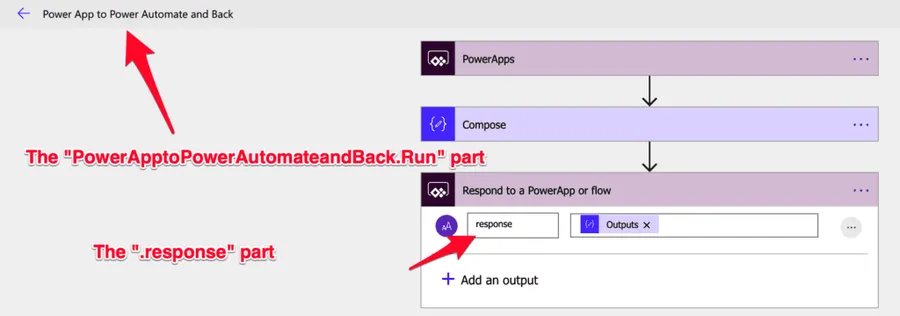
Testing
The only thing you need to do to test it is to put a number and see what happens.
Let’s add a number.
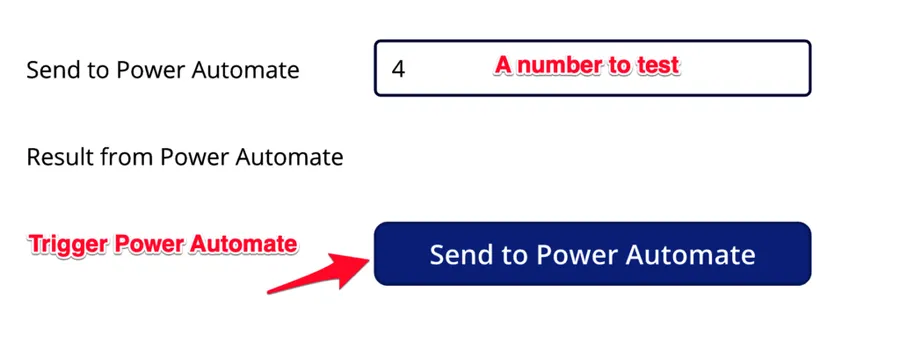
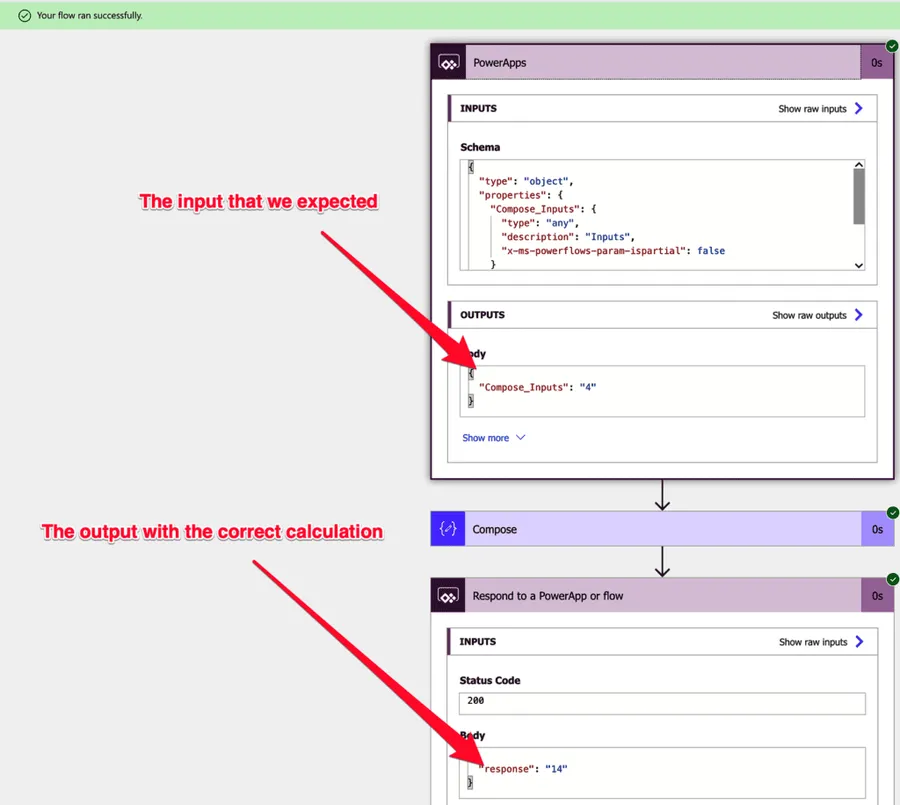
Now let’s check Power Automate to see if it’s triggered correctly.
And then check the app to see if the label is updated:
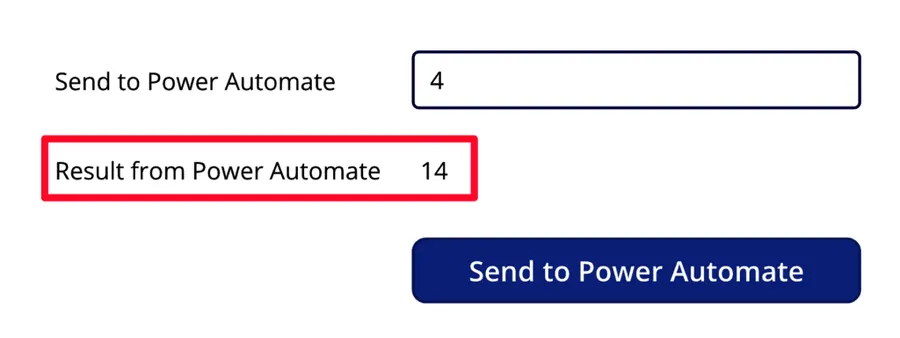
All is working fine, and now you can see the process working from start to end.
Final Thoughts
I made many screenshots, sorry about that; I think it’s important to show how things are done. The overall process is simple once you understand the mechanics, so you can pass as many arguments as you want and return as many as you want. It’s a powerful integration where you can harvest the best of both worlds. Please give it a go.
Have a suggestion of your own, or disagree with something I said? Leave a comment or interact on Twitter and be sure to check out other Microsoft Power Apps-related articles here.
Photo by Braden Collum on Unsplash


No comments yet
Be the first to share your thoughts on this article!