I ran into this issue in the Power Automate Community and found it interesting. It has all the things that automation can do for us. It’s tedious, mechanical, and error-prone if we do it manually. People were asking how to copy the same file into multiple folders using Power Automate , and that’s a great question. Copying files, especially when it needs to be periodical, is quite boring so today, let’s see how automation can do this for us.
The problem
Let’s define the problem first. Let’s say you have a template file you use with all your customers. Regardless of what it is, it needs to exist in all your customer folders. And let’s say the file needs to be regenerated periodically (for example, every year). Depending on the number of clients you have, this can be a tedious job, not to mention quite an error-prone if you forget to copy to one client, for example.
Another problem is where to find the folders. There are multiple strategies to store folders, like a SharePoint list that we can iterate and get the folder paths or the sub-folders representing a client. Regardless of where you get your bearings, we need a list we can use as a destination for the folders.
So we need something that goes through a list of folders and copies a file. Simple enough, so let’s see how to do it.
The solution
For this article, let’s pick the more complicated way to get clients. To get the list of sub-folders dynamically with the “List Folder” action, go through them, and get the folders to copy the file. The “List Folder” action does a lot of the work for us because it provides not only the name of the file but also the folder.
So if you need OneDrive, you can find the same actions that perform similarly.
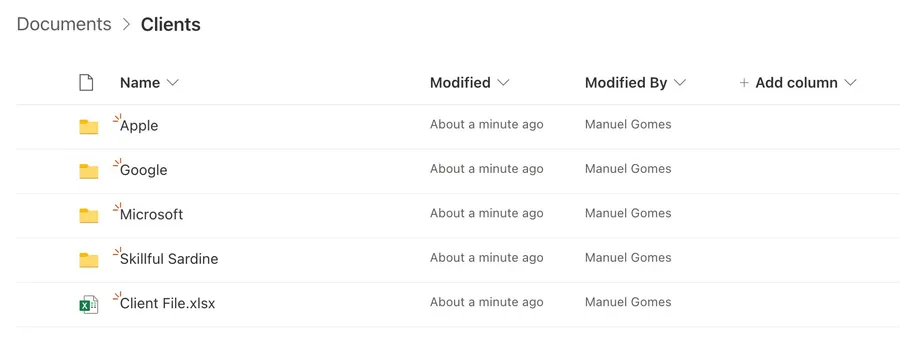
Let’s look at a sample folder in SharePoint.

This folder has all the customer folders and the file to copy. This is an Excel file, but this strategy works with any file.
Getting only the folders
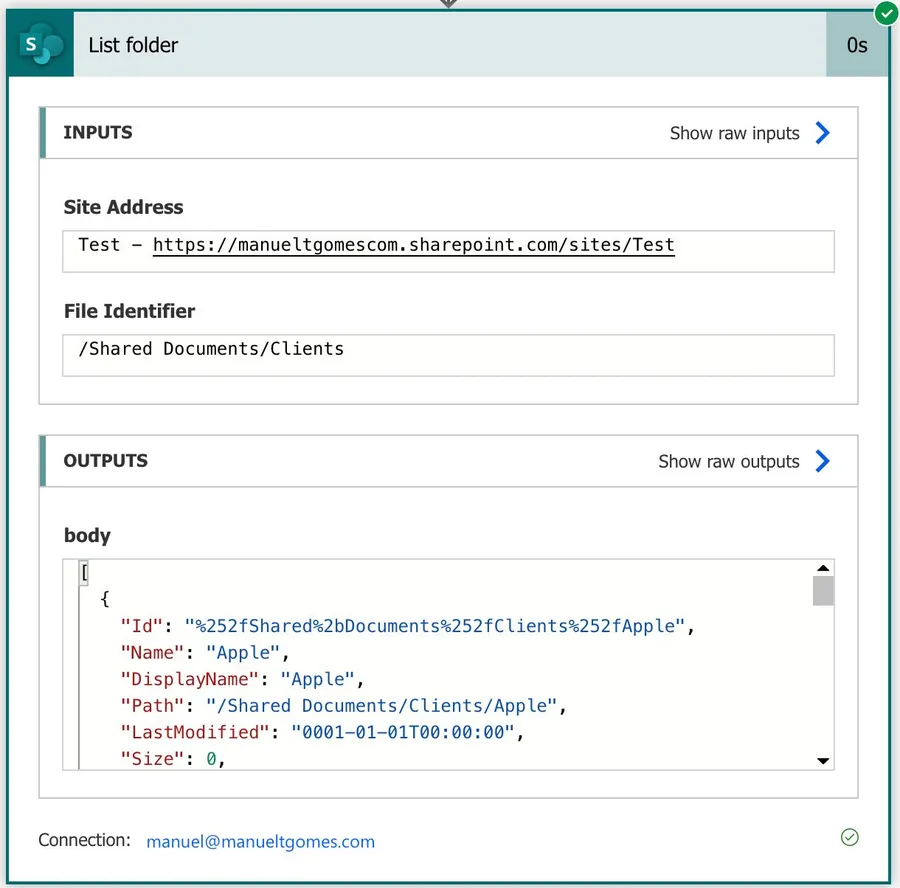
Now let’s look at how to get all folders:

If we run, we get the following:

Notice that we get everything in the folder (files and folders), so if we scroll down, we’ll also see our file.

So we need to filter by folders, but again the “List Folder” action will properly provide an “IsFolder” we can use. Now let’s use the “Apply to Each” effort to get all values and the “Condition” action to filter the results:

Copy the File
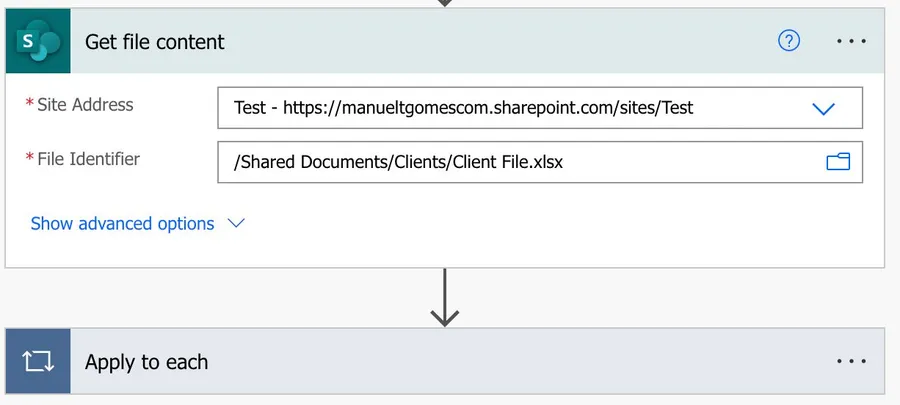
Now that we have a list of all folders we can target to copy the file, let’s copy it, but first, let’s get the contents of the file using SharePoint’s “Get file content” action.

Notice that we’re putting SharePoint’s “Get file content” action before the “Apply to Each” action and not inside. The result will be the same, but putting it here will make your Flow run faster since we’ll only do it once. If you put it inside the “Apply to Each” action, it will be called per folder, which is a waste since the file is always the same. Small details like this add a lot of running time to your Flows, so be careful when placing the actions in your Flows.
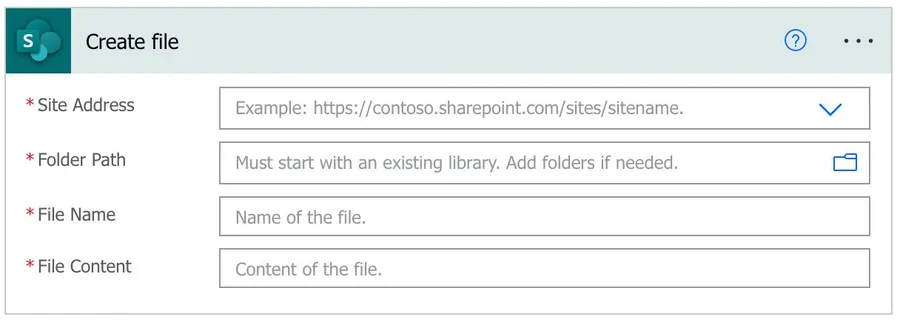
Finally, we need to copy the file. It’s straightforward since we have the place to put it and the file to copy.

Here’s what it looks like inside the “Apply to Each” action.

Notice that we’re combining information from all actions. We get the path from the “List Folder” action , the name we define since we know what name we want, and then the file content from the “Get File Content” action.
Here’s what it looks like after we run it. The “Apple” folder before.

And now, after we run it.

We’re only doing this for five folders but imagine 500, and then you would appreciate this strategy and how much time it can save you.
Final thoughts
Laborious work should be avoided at all costs, and we have automation to help us deal with this. In the example above, we can save time and motivation by not copying information repeatedly with a few steps.
Photo by Natalia Yakovleva on Unsplash


What is the function details for true?