Today a common problem that we can fix with a bit of strategy. In the past, I wrote about how to add attachments to Microsoft Planner from Microsoft Teams. I want today to focus in more detail on the “dynamic part” and explain how things work. The strategy is common and can be used for other connectors that support it, so today, let’s look at adding Microsoft Planner checklist dynamic elements.
So let’s look at the problem and solution.
The structure
So first, we need to understand what we’re going to target. For example, when you add a new reference or checklist to a task in Microsoft Planner, you can add the fields manually in the “Update task details” action.
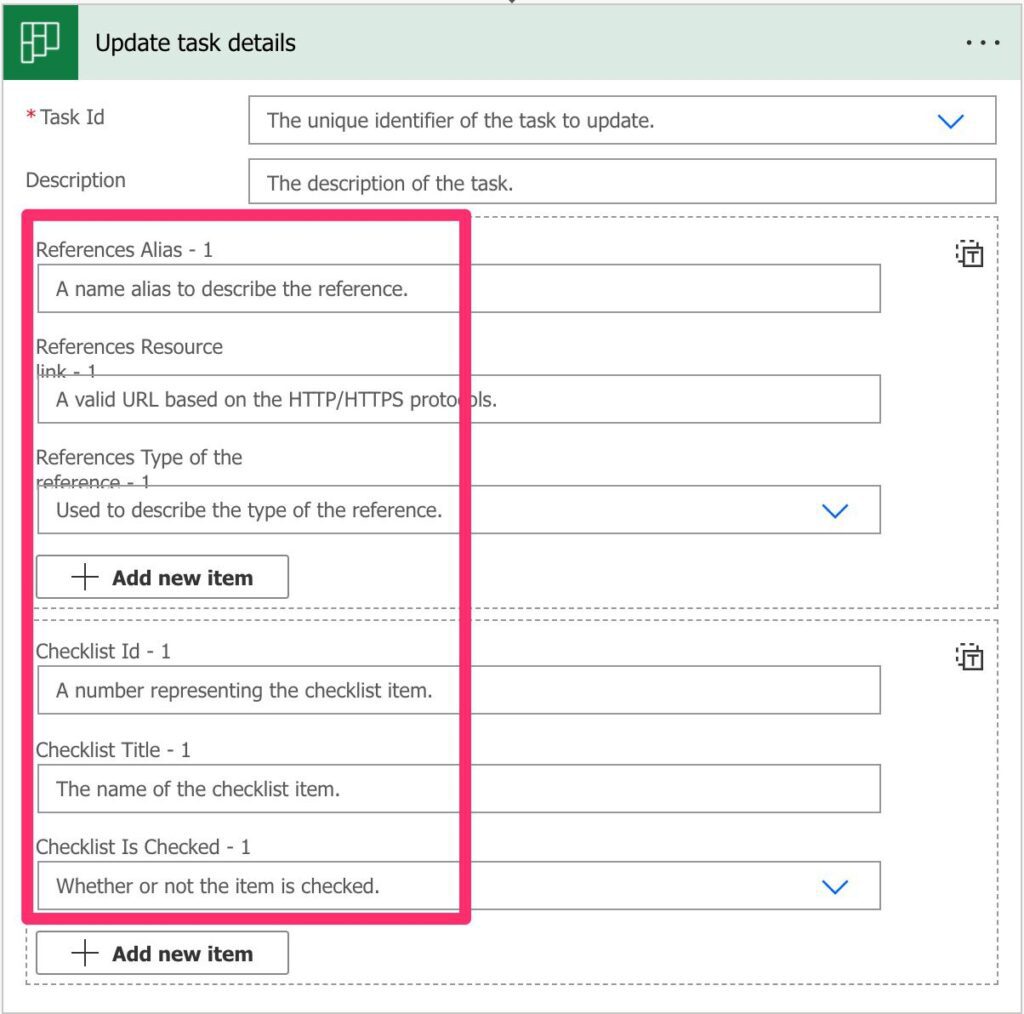
But what if we don’t know how many items? For example, if we have an email that arrives with attachments and we want to add them to the list?
Add planner checklist items dynamically
How to add checklist items dynamically to Microsoft Planner? For example, you have a Flow with 15 checklist items defined, and you need to add or remove some. It’s a pain to edit the Flow every time you need to do this, so here’s a template for how to do it without changing your Flow. I wrote an article explaining all the processes so, if you have any questions, you can check it here.
Or add attachments dynamically to an email.
Add attachments to email dynamically.
This template shows you how to add files to an email dynamically. You can find the explanation and a step-by-step tutorial here.
We can’t press “add new item” during the Flow’s run, so we need a better way. So let’s check how to do it.
The solution
The solution is staring at us at the button in the right corner.
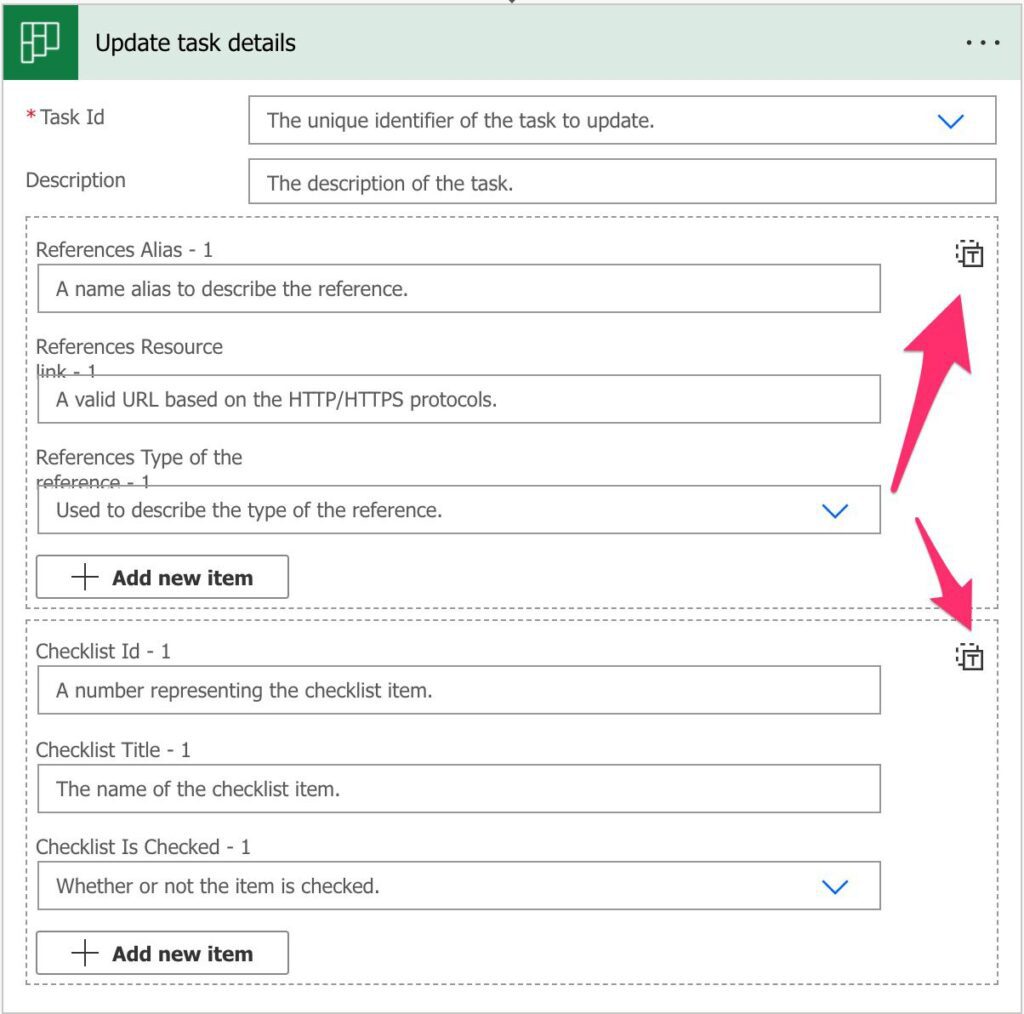
When pressed, it doesn’t look advantageous.
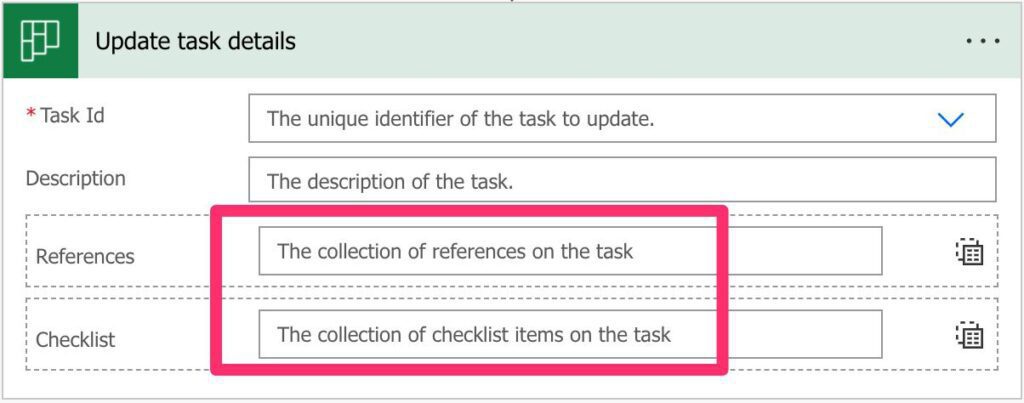
So let’s make it worthwhile. First, let’s fill it in with some data that points to each field. This way, when we shift back, we will know where each field will be mapped.
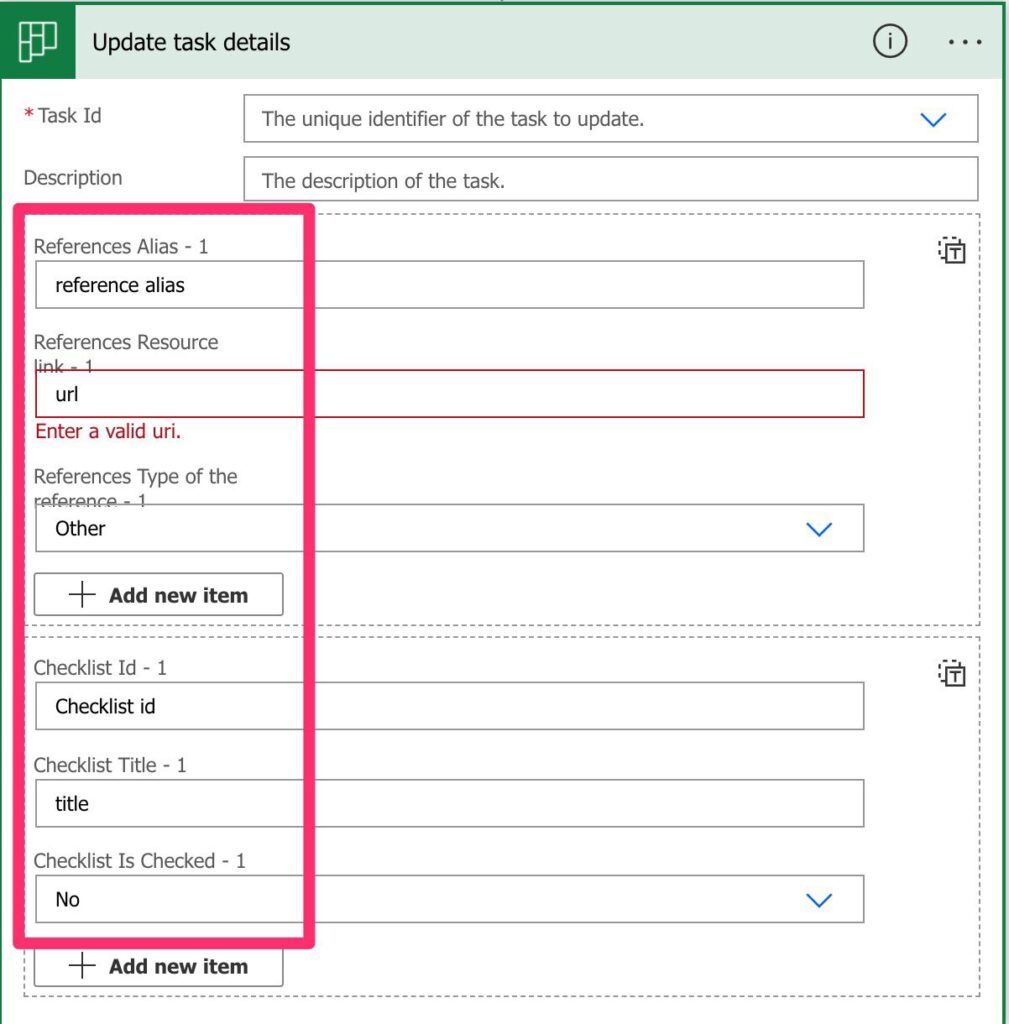
The data doesn’t need to be authentic. Our objective is to know that the value X is mapped in location Y. Here’s what it looks like.
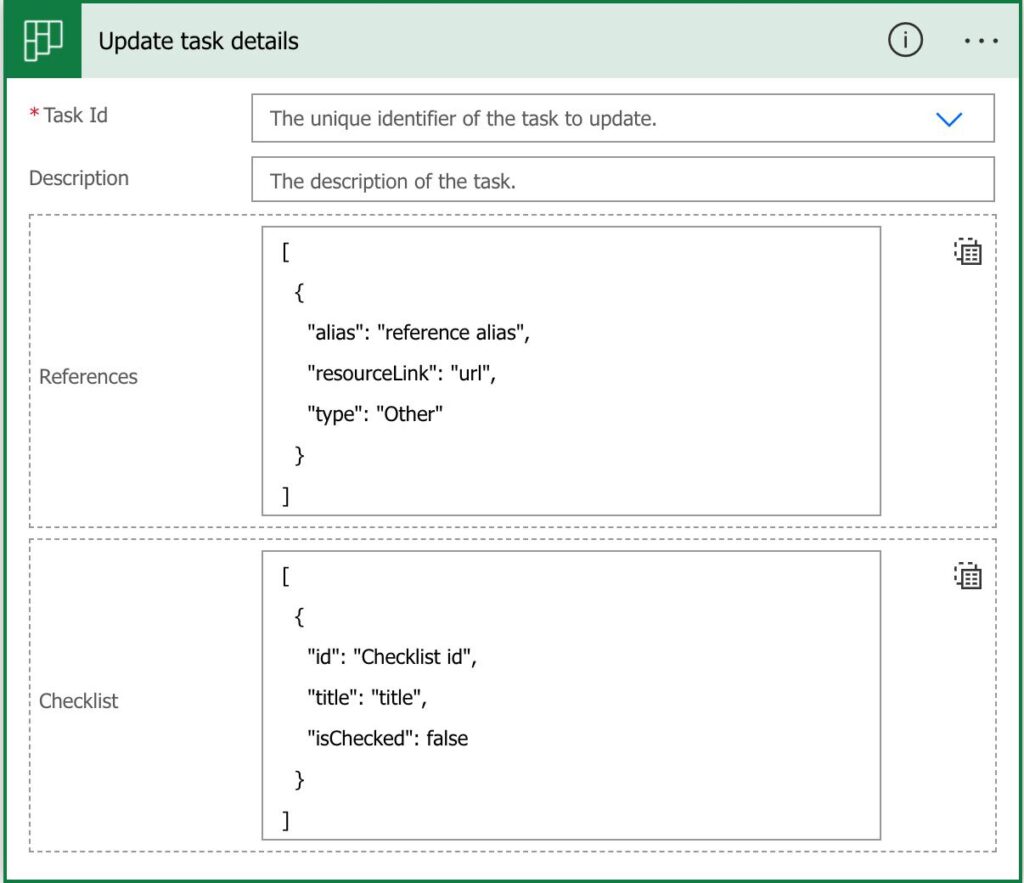
We can work with that. It’s a JSON format, and we know the field’s names now.
Creating the array
So let’s say that we have an array of tasks that we want to add every time a new task is created. So using a Compose action and the createArray function, let’s build that array:
createArray('Create the task','Fix the task','One more task')
(I’m not the most creative person ever, but you get the picture.)
Now let’s build the array. We need something like this:
[
  {
    "id": "Create the task",
    "title": "Create the task",
    "isChecked": false
  },
  {
    "id": "Fix the task",
    "title": "Fix the task",
    "isChecked": false
  },
  {
    "id": "One more task",
    "title": "One more task",
    "isChecked": false
  }
]
The “id” needs to be unique so we can use the title as the unique identifier.
Now let’s start with the array, so here’s the whole structure.
Here’s what we need to do:
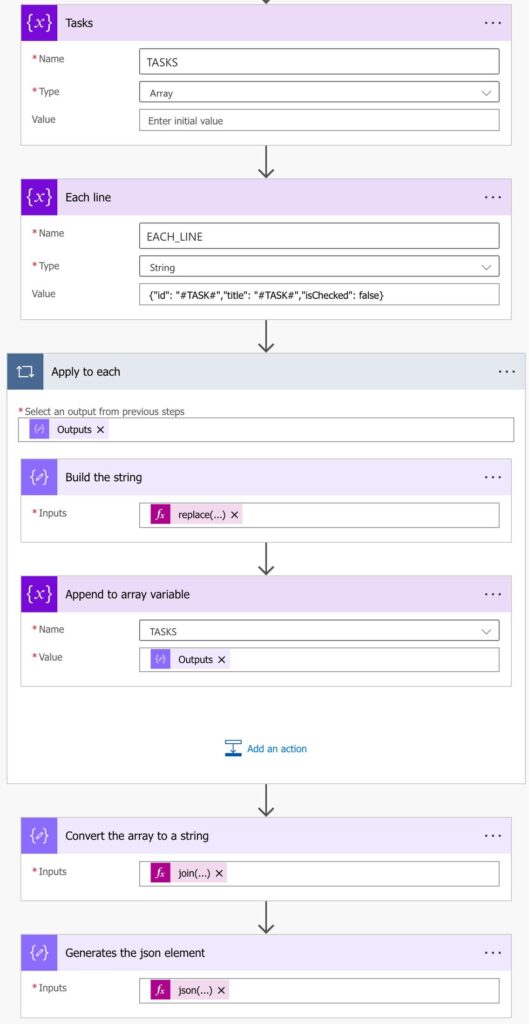
First, we create a new array variable to hold all generated items. To do that, we use the “Initialize variable” action. After that, we build the string with the structure that we need. Removing the information from above, we need:
{
    "id": "TASK",
    "title": "TASK",
    "isChecked": false
  }
So if we have a string with this value, we can re-use it in the “Apply to Each” action. Let’s make it a bit more unique:
{"id": "#TASK#","title": "#TASK#","isChecked": false}
Now we can use the replace function to replace the “#TASK#” by our task.
So now, let’s use that variable in our “Compose” action. The replace function is quite simple:
replace(variables('EACH_LINE'),'#TASK#',item())
We’ll replace our string from our “template” with each “Apply to Each” action element. We get the “each element” part by using the item function.
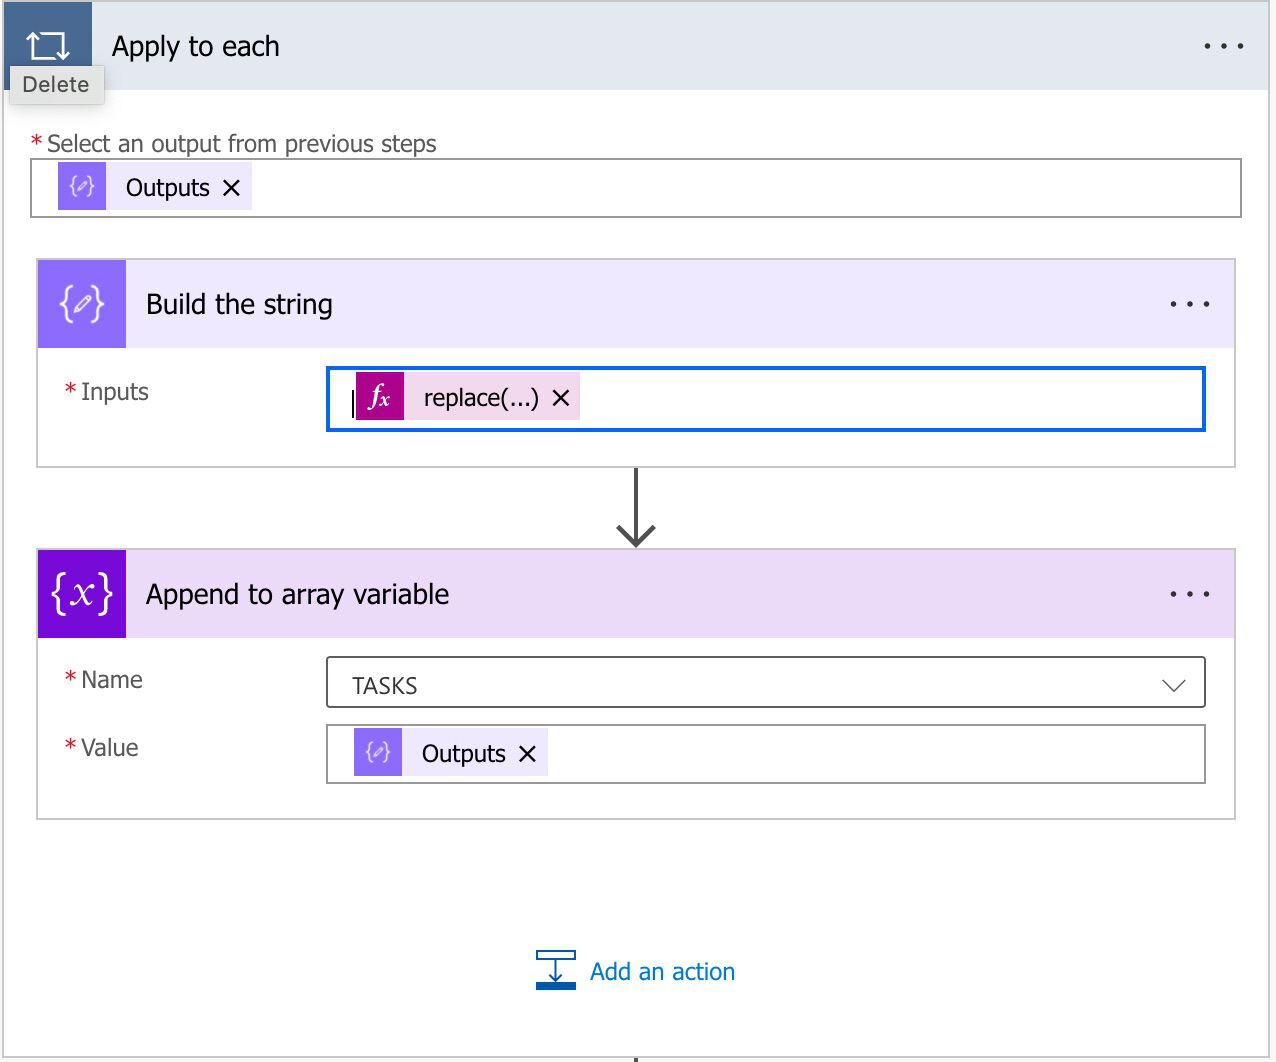
After that, we’ll append the result in the array.
Now that we have the array with all elements that we need, let’s build a string with them.

The join function will help us with this by fetching all elements and separating them with a comma.
join(variables('TASKS'),',')
Almost there!
Converting it to JSON
We know we need a JSON element, so we need to use the (SPOILER ALERT) the “json” function.

Since we have multiple elements, we need to define an “array” of elements. In JSON, it’s as simple as adding “[“and “]” in all elements. So using the concat function, we’ll have the following formula:
json(concat('[', outputs('Convert_the_array_to_a_string'), ']'))
The json function requires a string, but since the concat function returns one, we’re good. So here’s what we get:
[
  {
    "id": "Create the task",
    "title": "Create the task",
    "isChecked": false
  },
  {
    "id": "Fix the task",
    "title": "Fix the task",
    "isChecked": false
  },
  {
    "id": "One more task",
    "title": "One more task",
    "isChecked": false
  }
]
Now that we have everything, let’s update the task.
Using the result
Now that we have all the work done, we can use the result in the “Update task details” action.
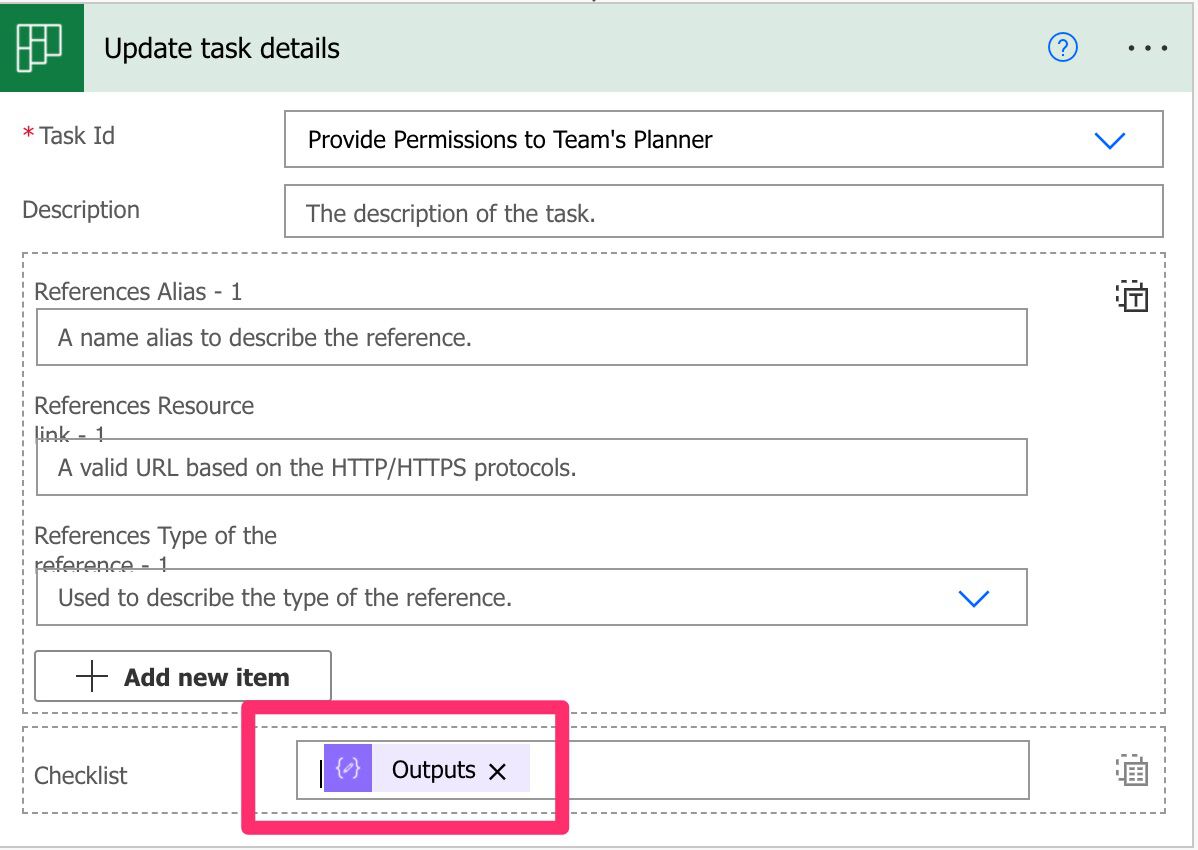
Simple and effective.
Final thoughts
It’s all about strategy, and I understand it can look tricky to do all the actions, but the result is quite nice. We have a dynamic object that we can use to insert data in dynamic fields.
My objective is for you to know it’s possible. Then, after you know how it’s done, you will be able to do some automation that previously was not possible.
Photo by Jeremy Bezanger on Unsplash


