by
by In many forms, you may want to display information to the user only if he/she selects a specific kind of information. Let’s think, for example, if you’re submitting a travel request. You may only want a one-way ticket or roundtrip ticket, you may wish to a shuttle or not, or you may want to pick the type of transportation to the destination. If the information varies, so are the choices, thus making a form that adjusts to this kind of information is essential. To achieve this, you can create branches were, depending on the inserted data, you may need to fill in or not extra information.
The form
Let’s start by building the form that we described before. First, the necessary details:
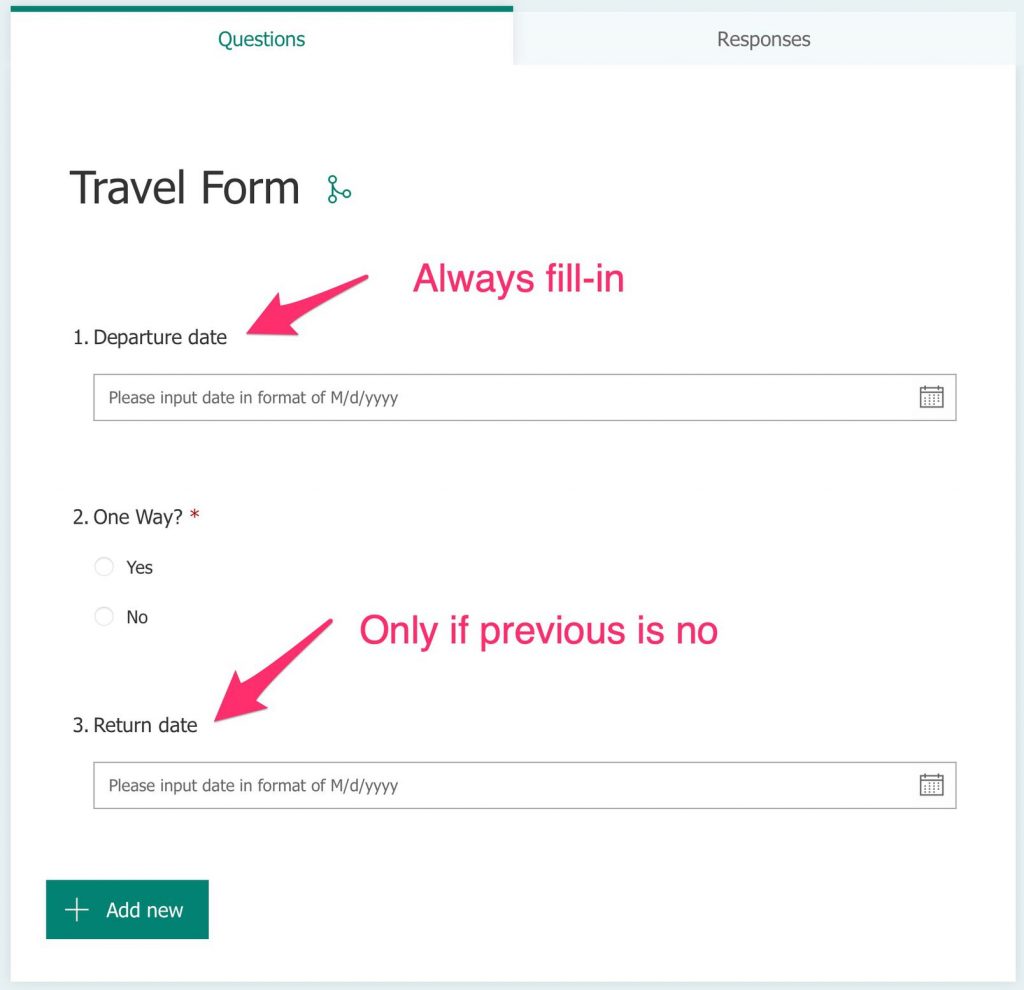
We want to fill in the return details only if the type of trip is a roundtrip. To do this, select the branching:
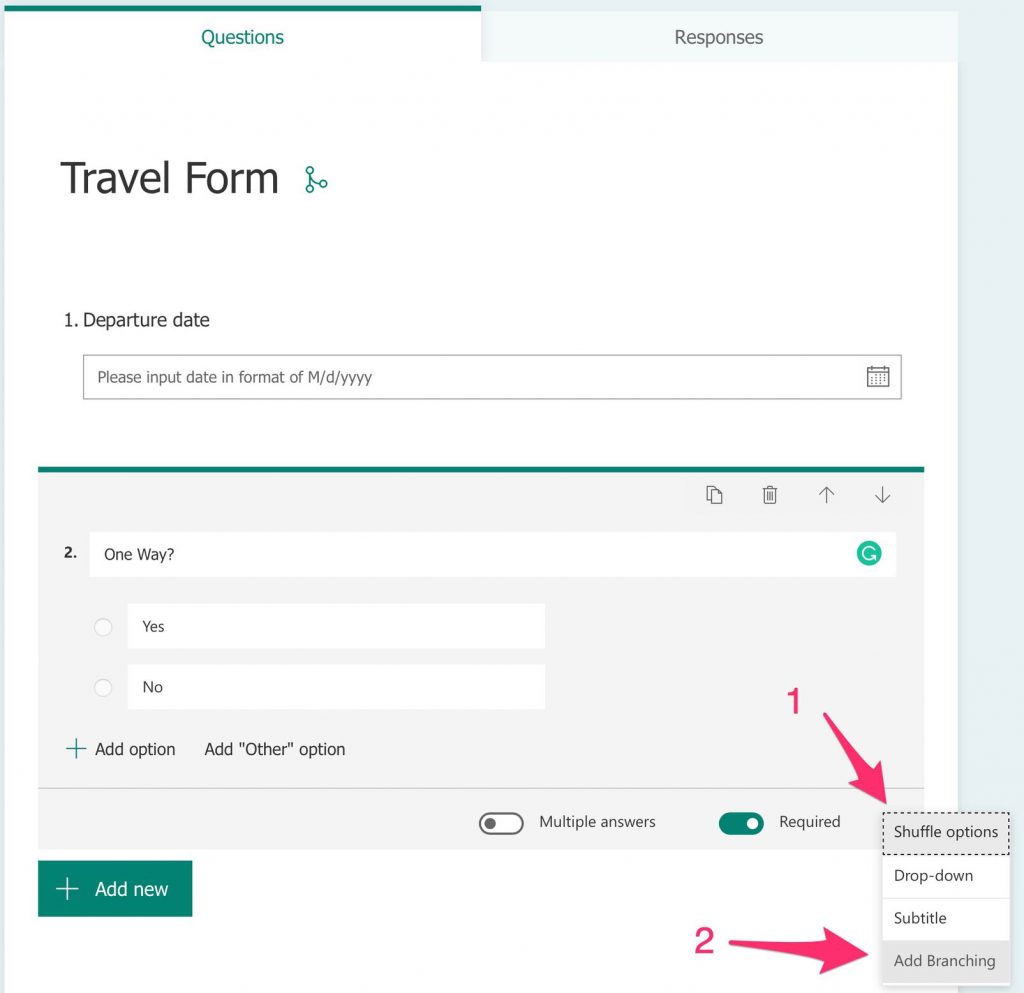
And then select “Add branching.”
After that, you can pick the path of each of the options:
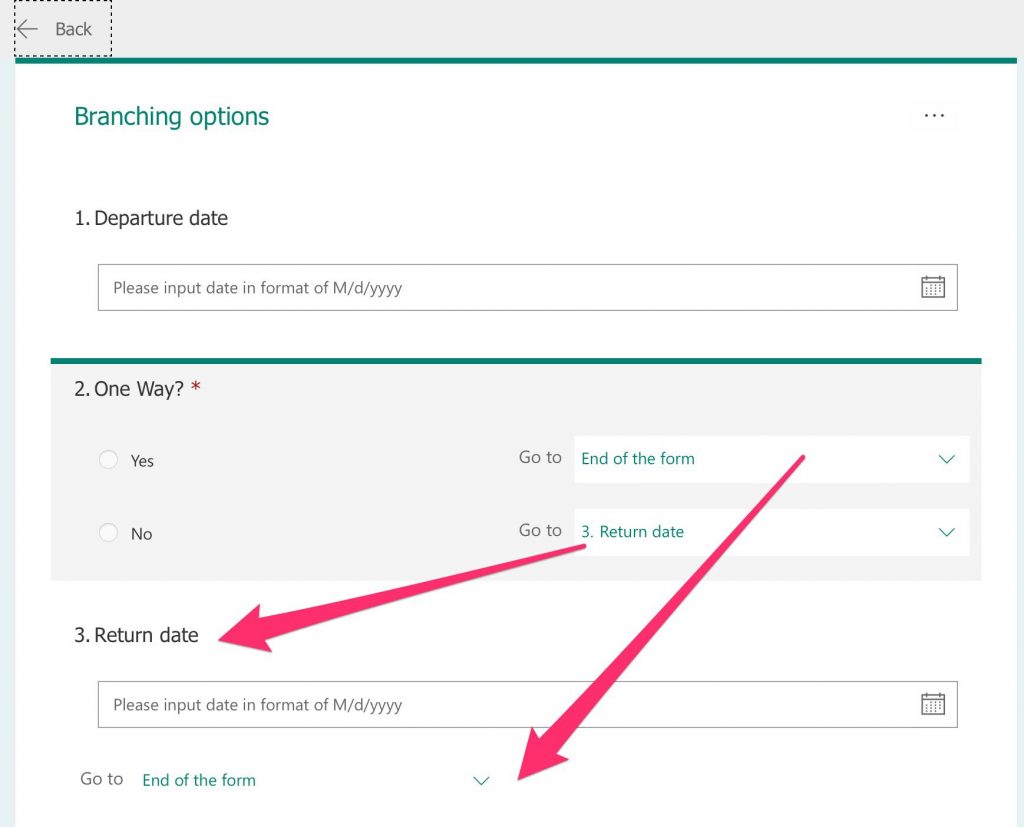
As you can see, there are multiple choices, but in our case, if it’s a “one-way trip,” we want to go to the end of the form and quit the app.
That’s it. Quite handy and straightforward.
Why do this?
User experience is one factor, but the most crucial factor is that if you want people actually to fill in your forms, you need to make them as simple, intuitive, and straightforward as possible. People, at least me, hate fill-in them, but they are essential if you want to standardize the flow of information.
Also, this is an excellent way to collect data in an organized way. Think how clean the data will be if you only provide the users with dropdown and date pickers and other similar components. You’ll ensure that the data is always entered in a specific way and validated automatically. Now think if you have to do this using email, how much work you would have to parse each request.
Another reason and one of my favorites is automation. You can automate certain parts of your branch to parse automatically, and only parts that a human needs to check will be delivered. You’ll reduce the workload of a person, and when you have to provide data, you ensure you always provide correct data.
Final thoughts
It’s a simple example, but it demonstrates how easy it can be to make stuff straightforward for your users. Making things simple is essential, but having the information always in the same format and allow you to automate will be a significant boost in productivity. Don’t forget that all of this applies to mobile also, so if you have a user that accesses the form from their phone or tablet, it will look good and have the same validations and be easy to use. All of this with a couple of clicks is not bad at all.
Have a suggestion of your own or disagree with something I said? Leave a comment or interact on Twitter and be sure to check out other Microsoft Forms-related articles here.
Photo by Simon Berger on Unsplash