
Let’s say that you get an email all the time, but it’s not you who should deal with them. For example, you receive something from an old role and want to forward it to the person responsible for it. The “forward an email” action is the one that will help you achieve this automatically, so let’s see how to use it.
Where to find it?
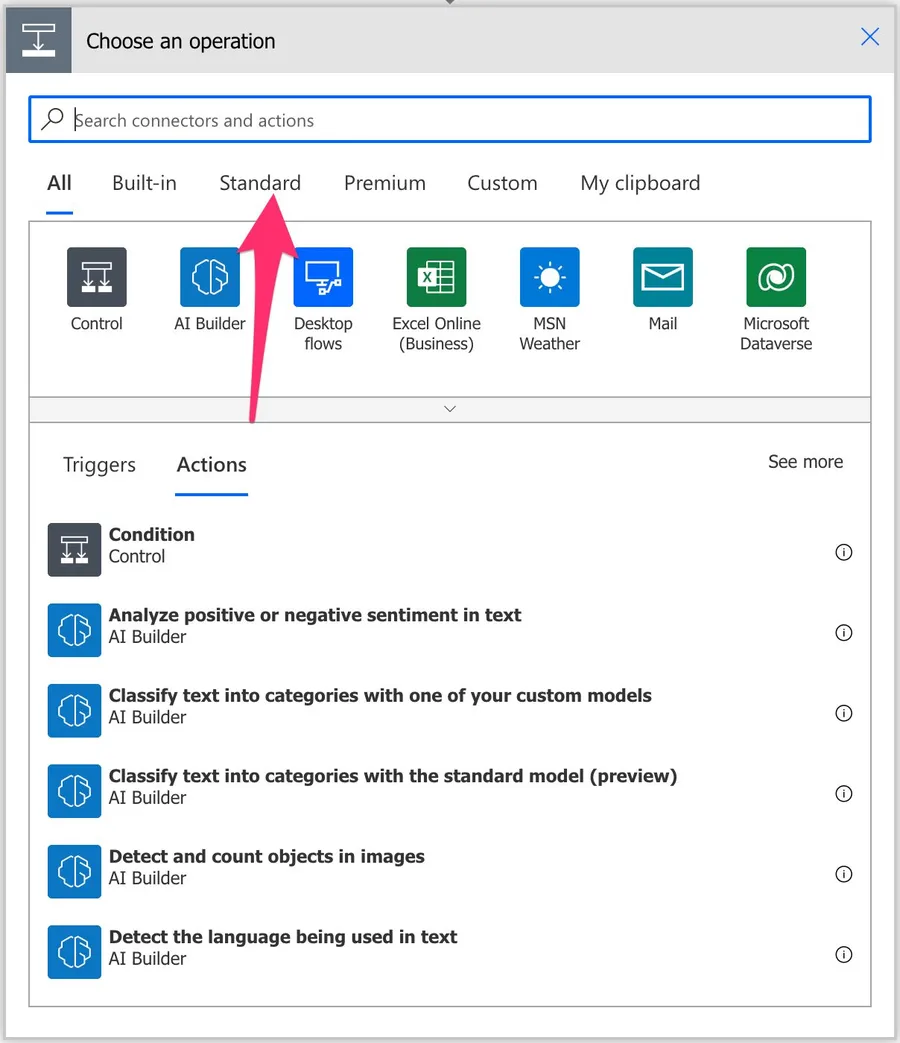
To find it, you need to go to “Standard”
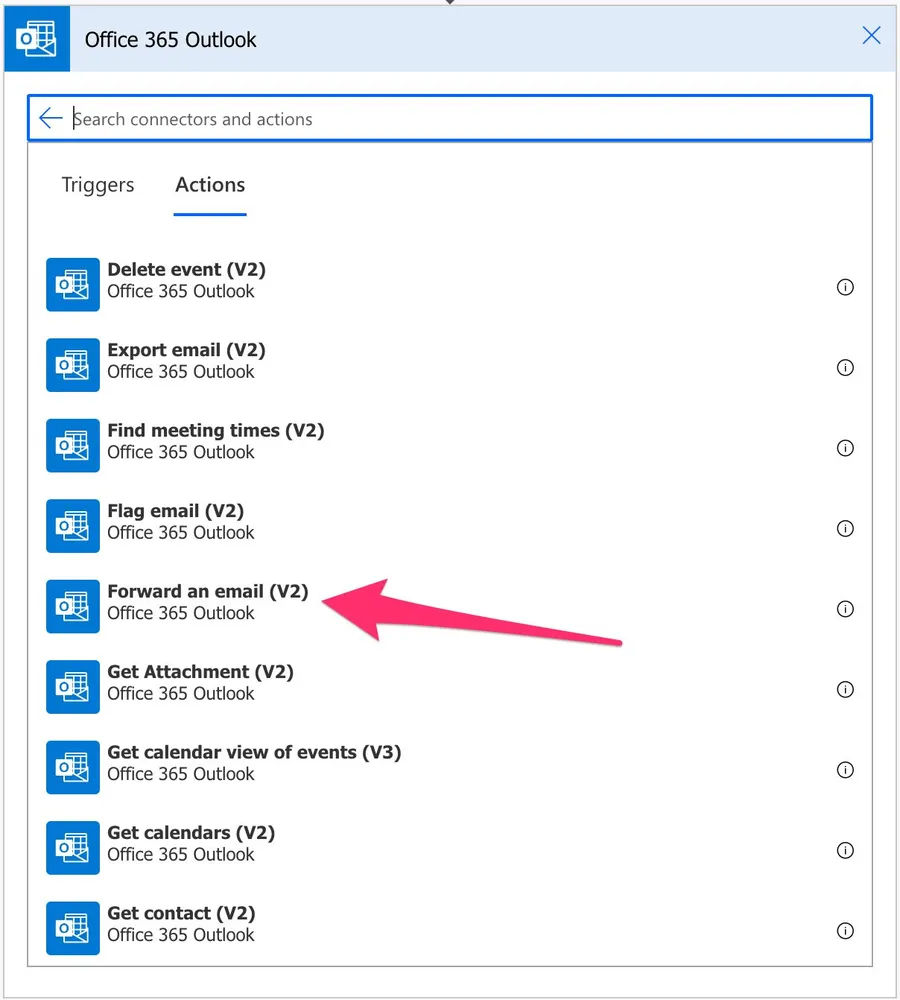
Find “Office 365 Outlook” (you may need to expand to find it)

You may need to scroll to find the action:

Select the “forward an email” action.
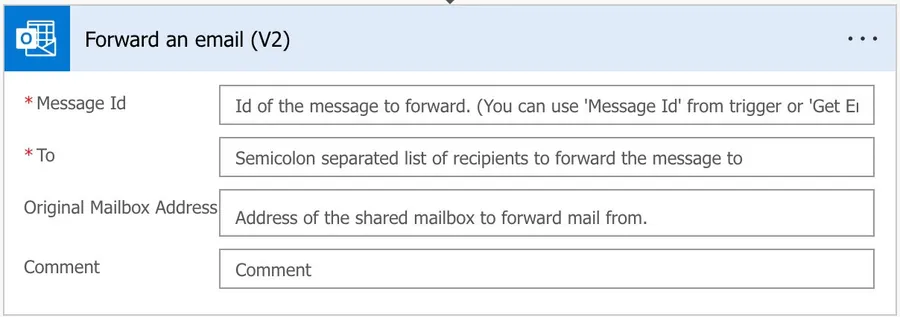
Here’s what it looks like:
Now that we know how to find it let’s understand how to use it.
Usage
Microsoft did a great job simplifying a super complex action, but let’s look at the fields individually because there are some caveats that you should be aware of.
Message ID
The message ID is something that you need to fetch from somewhere. It’s not something deterministic that you can calculate, so it’s usual provider by another action or trigger. For example, if you have the trigger, “When a new email arrives, " you’ll automatically get the email ID you can use in forwarding the email. This goes for any action that fetches emails, like “Get Emails”.
The “Forward an Email” action won’t be able to forward your email without this, and it will fail if you can’t find an email with that ID.
Another important note is that the ID is independent of where the email is. You don’t have a different ID if the email is moved from the inbox to another folder, for example, so you can consider that the ID follows the email in your mailbox.
Finally, some actions return “Conversation Id” or even “ID”. Don’t be confused because these are different than the ones we want to forward the email to. So be sure always to use the “Message ID” when forwarding an email.
To
This is where you’ll put the person (or people) to whom you want to forward the email to. The emails should be separated by semicolons so that Outlook knows they are different.
Be careful putting emails here. Remember that this will always forward all emails to all email addresses, so be sure your colleagues know you’re forwarding the information to them.
Original Mailbox Address
You don’t need to fill in this field unless you want to access another mailbox. The default folder list will always be yours. This field is here so you can define shared mailboxes, for example, and access the list of folders it contains.
Comment
The comment is optional, but you should use it. Although you may warn your colleagues is a nice gesture to provide some context for things like:
- Why are you sending the email?
- What the other people can do with the email
- Common actions or things to consider
Be respectful of people’s time. There’s nothing worse than getting a forward of an email without any context and any warning.
Limitations
You need to have permission to access a shared mailbox before you can forward the email. You won’t be able to configure any permission in the action since they are configured centrally, so consult with your administrator if there’s something wrong. A good rule is if you can see the shared mailbox in your desktop version of Outlook, then you have permissions. This is not a limitation but generates some issues when trying to use the action.
Recommendations
Here are some things to keep in mind.
Use it wisely
Having emails automatically forwarded can be good, but you must ensure that the rules you have in place to figure out what email should be forwarded are rock solid. There’s nothing worse than forwarding a private email or an email that the other person should not see. Also, please remember that this action is permanent without any notification. You’ll only have a copy of the forwarded email in your inbox. You can build notifications in your Flow, but be careful.
Name it correctly
The name is super important since we can forward any email. Indicate why the email is being forwarded, even if you go into details in the comments. Always build the name so that other people can understand what you are using without opening the action and checking the details.
Always add a comment.
Adding a comment will also help avoid mistakes. Indicate the forwarding rules and why you’re picking those emails to go. Things make sense today but in a few months, not so much. It’s essential to enable faster debugging when something goes wrong.
Always deal with errors.
Have your Flow fail graciously and notify someone that something failed. It’s horrible to have failing Flows in Power Automate since they may go unlooked-for a while or generate even worse errors. I have a template that you can use to help you make your Flow resistant to issues. You can check all details here.
Back to the Power Automate Action Reference.
Photo by Neil Fedorowycz on Unsplash


No comments yet
Be the first to share your thoughts on this article!