Notifications are both a blessing and a curse. It’s super handy to have notifications that alert you of things you need to do, but they will be a distraction if they are too many and too frequent. Microsoft Teams enables you to have many notifications, like approvals, @ mentions, and more, but it’s super important to keep things manageable. So let’s see how to get your notifications under control in Microsoft Teams.
Strategy
As always, let’s focus first on the strategy to have the right balance between notifications and information. For example, on Microsoft Teams, you can have the following types of notifications:
- Chat
- Meetings
- People
- Other
Depending on your job, position, and requirements, you may need different types of notifications. But, in my opinion, regardless of the type of position that you hold, there are some notifications that I would advise turning off.
- @mentions - If you’re not aware, in Microsoft Team, you can press “@“ and follow by the person's name for them to be notified. Also, you can use the “@channel” for everyone at a channel to receive a notification. The issue here is that people abuse this, and the benefits are not worth the hassle. This is the equivalent of people replying to all on mass emails. The noise to information ratio is too big.
- Likes and reactions - You don’t need to be warned right away that people liked something. Again, the noise to information ratio is too large for it to be worth it.
- People status - this one, you have to opt-in, which is a plus. Use this as sparkly as possible. You’ll receive a notification when someone comes online or changes their status to available. In my opinion, I don’t see a lot of benefits to having this. If you need to talk and it’s urgent, commonly, you’ll either call the person or use different methods to get their attention.
There’s more, but these are the biggest offenders. Keep things as most as possible on your feed and not as a notification.
Finally, we have approvals. These can be time-sensitive, and you should think about them for a bit. If they are, a notification is justifiable. If you delay approving, then something may go wrong, so keep this in mind. But if you can disable these notifications also.
Notifications
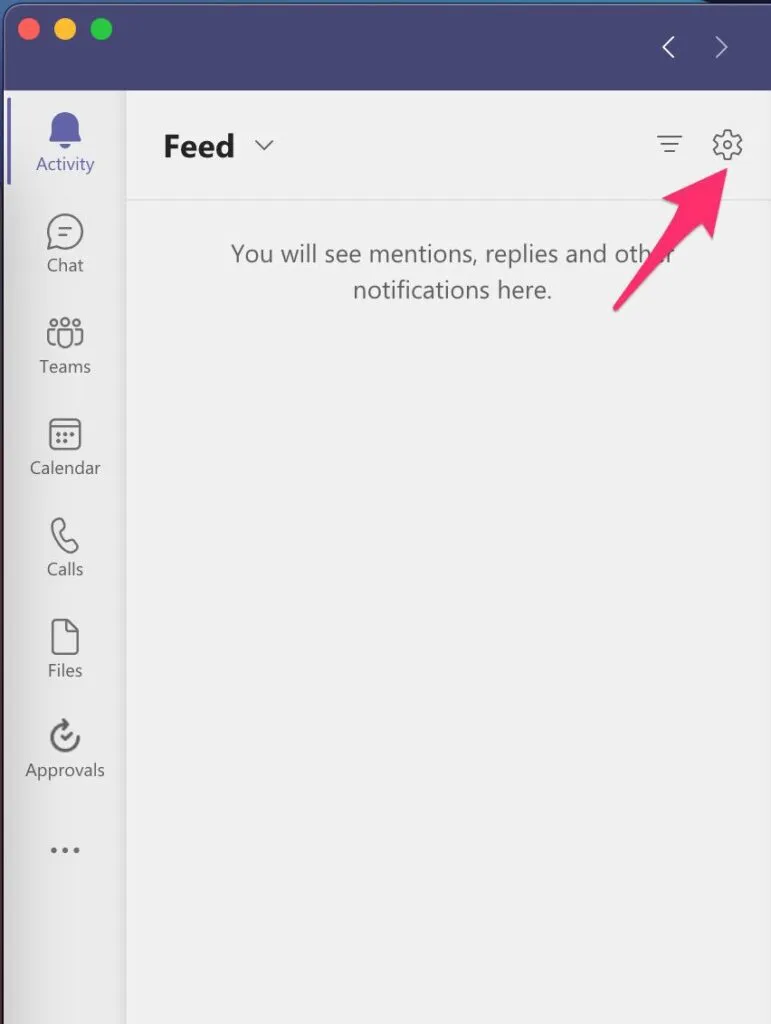
Now that we have the concepts laid out, let’s check how to deal with notifications in Microsoft Teams.

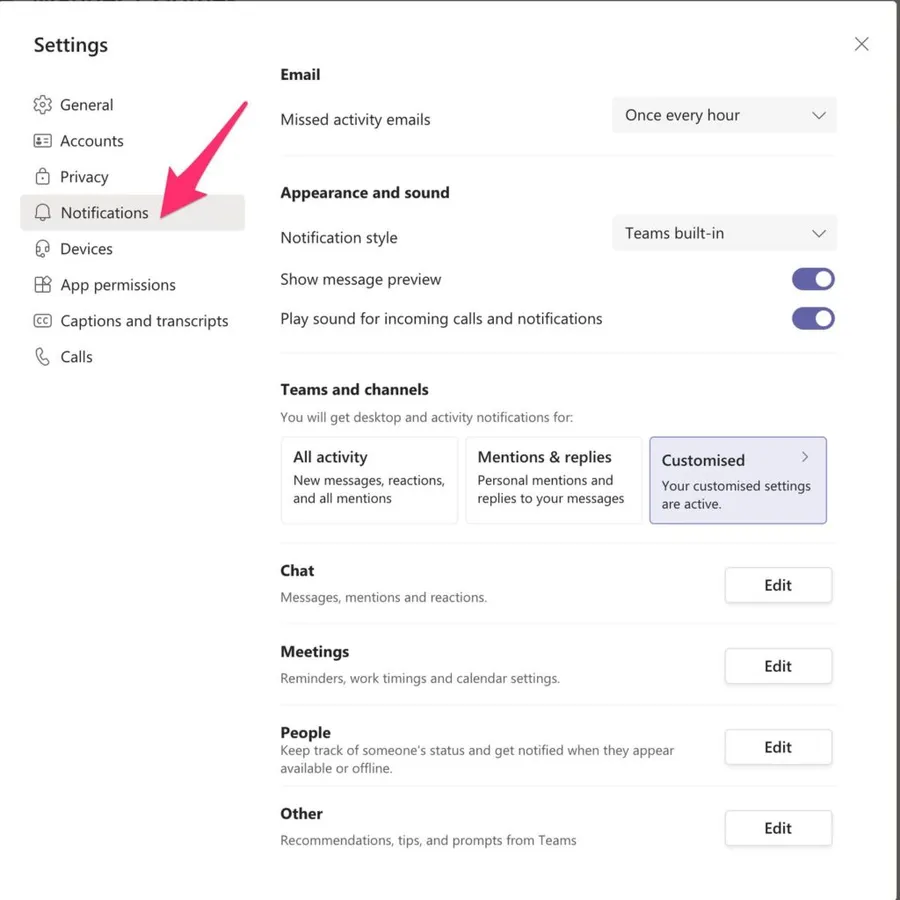
In the options, select “Notifications.”

Select “Customised” so that we can define the ones we want to receive or not. The first time you select “Customised,” you’ll receive a notification for what you want to configure. This is a good start but keep iterating until you have the right balance.

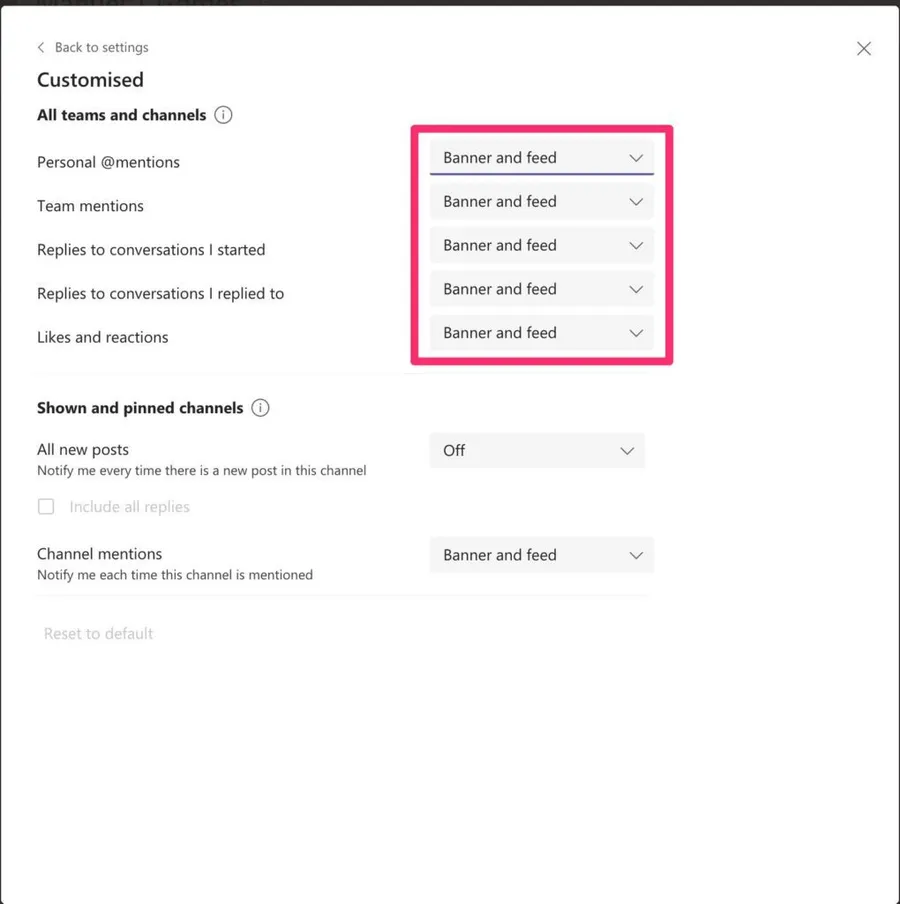
When you select an option, you’ll get something like this.

Banner notifications are the “usual” notifications that you’re used to in Windows.
As mentioned before, I would advise keeping things as minimal as possible. Keep banner notifications as sparse as possible. It’s also useful to check all options and think a bit if you need them.
Final thoughts
Please comment or email me if you have more to add to this article or have a different strategy? I’m always interested in finding out what are the strategies that you use to keep productive.
The main point of the article is not to explain how to deal with notifications. That part is easy. The point is to have a defined strategy for dealing with notifications so that you’re not distracted all the time and keep on being as productive as possible.
Photo by Oleg Devyatka on Unsplash


No comments yet
Be the first to share your thoughts on this article!