While Power Automate has many built-in connectors for these services, there are times when you need more control or access to features not available through standard connectors. Think of Power Automate as hiding the complexity and showing you a nice interface where you can do complex calls without worrying about APIs and complex HTTP requests. So, let’s take a look at how to achieve this and how to call Microsoft Graph API from Power Automate.
Setting up Azure AD for Graph API access
The first step in Graph API with Power Automate is registering an application in Azure Active Directory. This registration creates an identity for your application and allows you to set up the necessary permissions. This is an essential step since you can do a lot in Graph API (good and bad), so it’s important to restrict as much as possible the permissions so that, if something goes wrong and your secret is released, people won’t have the “keys to the kingdom”. Also, it’s a nice safeguard for you since you can define “read” permissions only for a specific area, and therefore, even if you make a mistake, the API won’t allow you to change anything.
Keep this in mind. It’s tempting to add all possible permissions “just in case,” but it’s super easy to add more if you need them later.
Create a New App Registration
To do this, you will need to be able to access Azure Portal and approve applications in your organization.
Here are the steps necessary:
- Sign in to the Azure Portal
- Navigate (or search for) “App registrations”
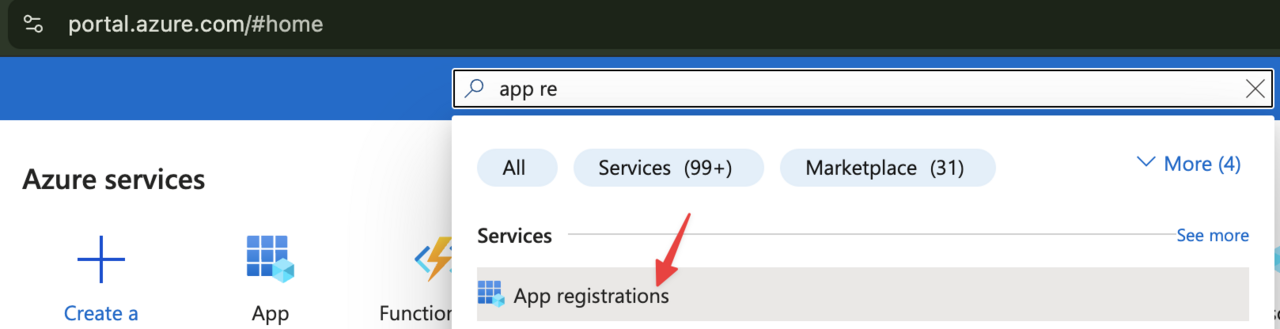
- Click on “+ New registration”

- Enter the following details:
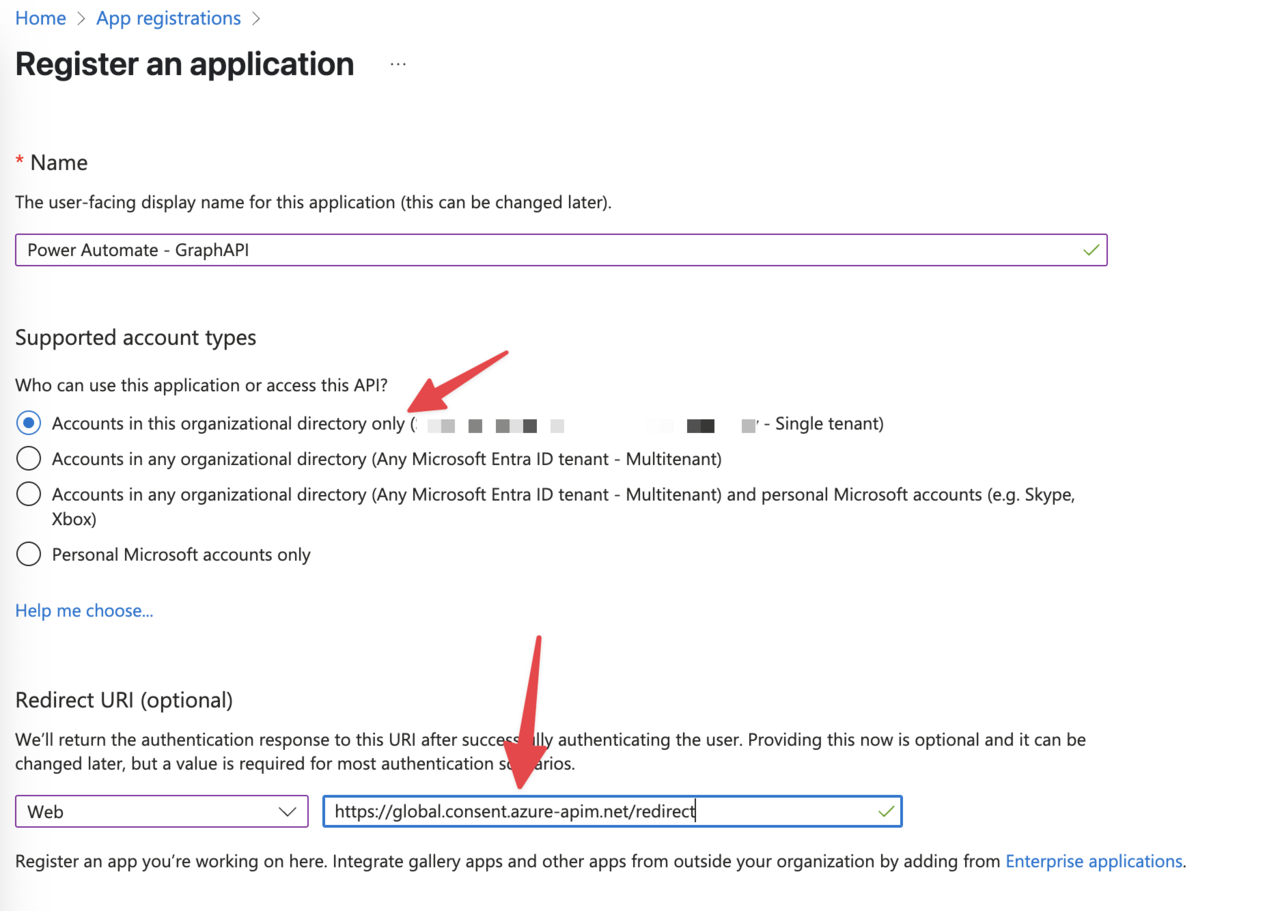
- Name: Choose a descriptive name (e.g., “PowerAutomate-GraphAPI-Integration”)
- Supported account types: Select “Accounts in this organizational directory only”
- Redirect URI: Select “web” and use the following URL: “https://global.consent.azure-apim.net/redirect”
- Click “Register”
Now that you have an app registered to Azure, please make note of the following values:
- Application (client) ID
- Directory (tenant) ID
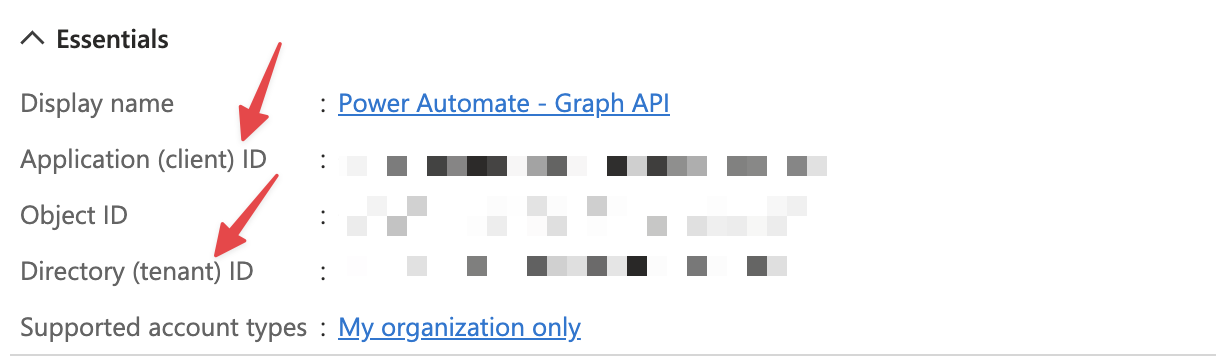
These will be needed when configuring your Flow.
Setting up a client secret
For Power Automate to authenticate to Graph API, you’ll need a client secret:
- In your app registration, navigate to “Certificates & secrets”

- Click “New client secret”
- Add a description and select an expiration period
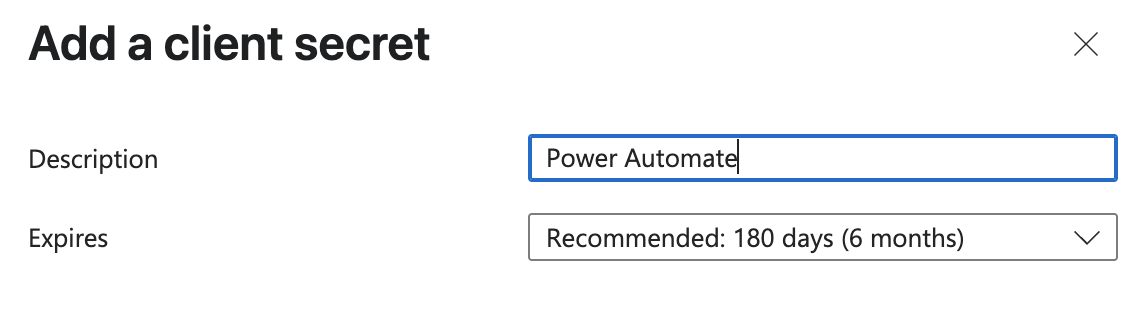
- Click “Add”
Please make note of this value as well. It will be important in a bit. The value won’t be visible after a few minutes, so after that time you’ll see something like this.

⚠️ COMMON MISTAKE:
There’s a super common mistake that people do (myself included) where people copy the “secret_id” and not the secret “value”.

(I’ve removed that secret so don’t try to use it 😉)
If you get an error like this:
Http request failed as there is an error getting AD OAuth token: '...: Invalid client secret provided. Ensure the secret being sent in the request is the client secret value, not the client secret ID, for a secret added to app '...'. Trace ID: ... Correlation ID: ... Timestamp: 2025-04-24
14:13:192.
You’ll know why..
Configuring API permissions
Now you need to configure the permissions your app needs:
- Navigate to “API permissions” in your app registration
- Click “Add a permission”
- Select “Microsoft Graph”
- Choose “Application permissions” (for background processes) or “Delegated permissions” (for user context)
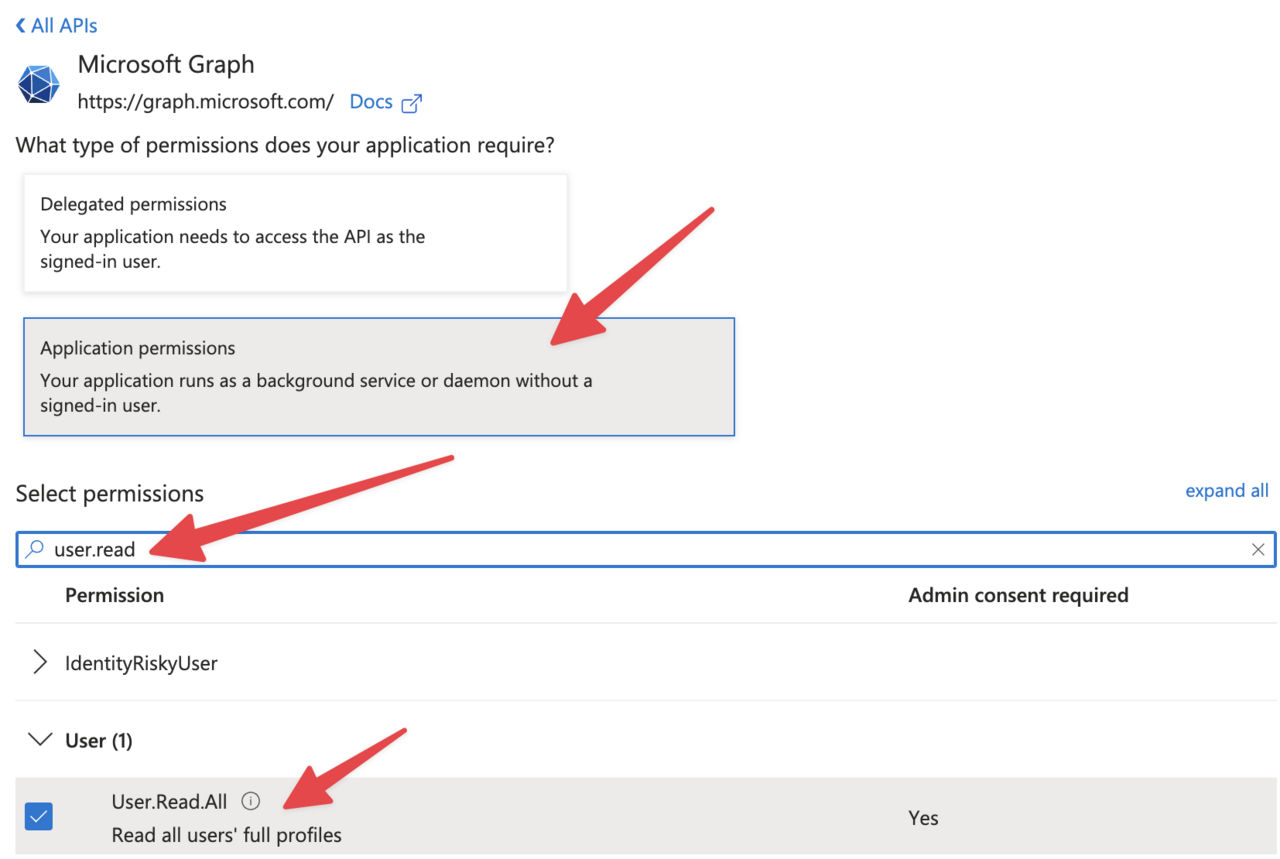
- Select the permissions you need. In our example, we want to list users, so we’ll select “User.Read”
- Click “Add permissions”
- Click “Grant admin consent” (requires admin rights)

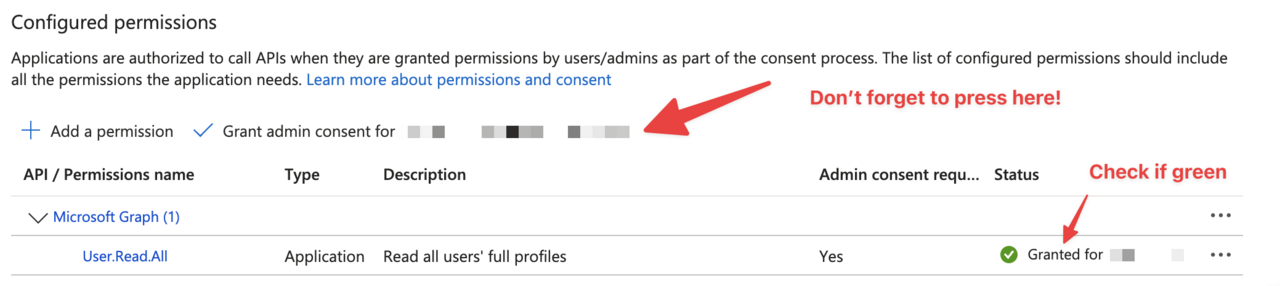
⚠️ COMMON MISTAKE:
The last step is usually forgotten and a source of frustration. Once you select the permission you need to apply it. You’ll see that is correctly applied in green next to the permission.
Once again, only provide permissions that you need and no more than that.
Connecting to Graph API in Power Automate
Now that we have our Azure AD application set up, let’s configure Power Automate to connect to Graph API and answer the question of this article on how to call Microsoft Graph API from Power Automate ☺️.
It’s possible to access via a token, but it requires a bit more work. I see a lot of people suggesting this online, but I think it makes things a bit more complex. The solution I’m going to show hides some of that complexity allowing Power Automate to take care of that behind the scenes.
Let’s create a sample graph request.
Making a Graph API request
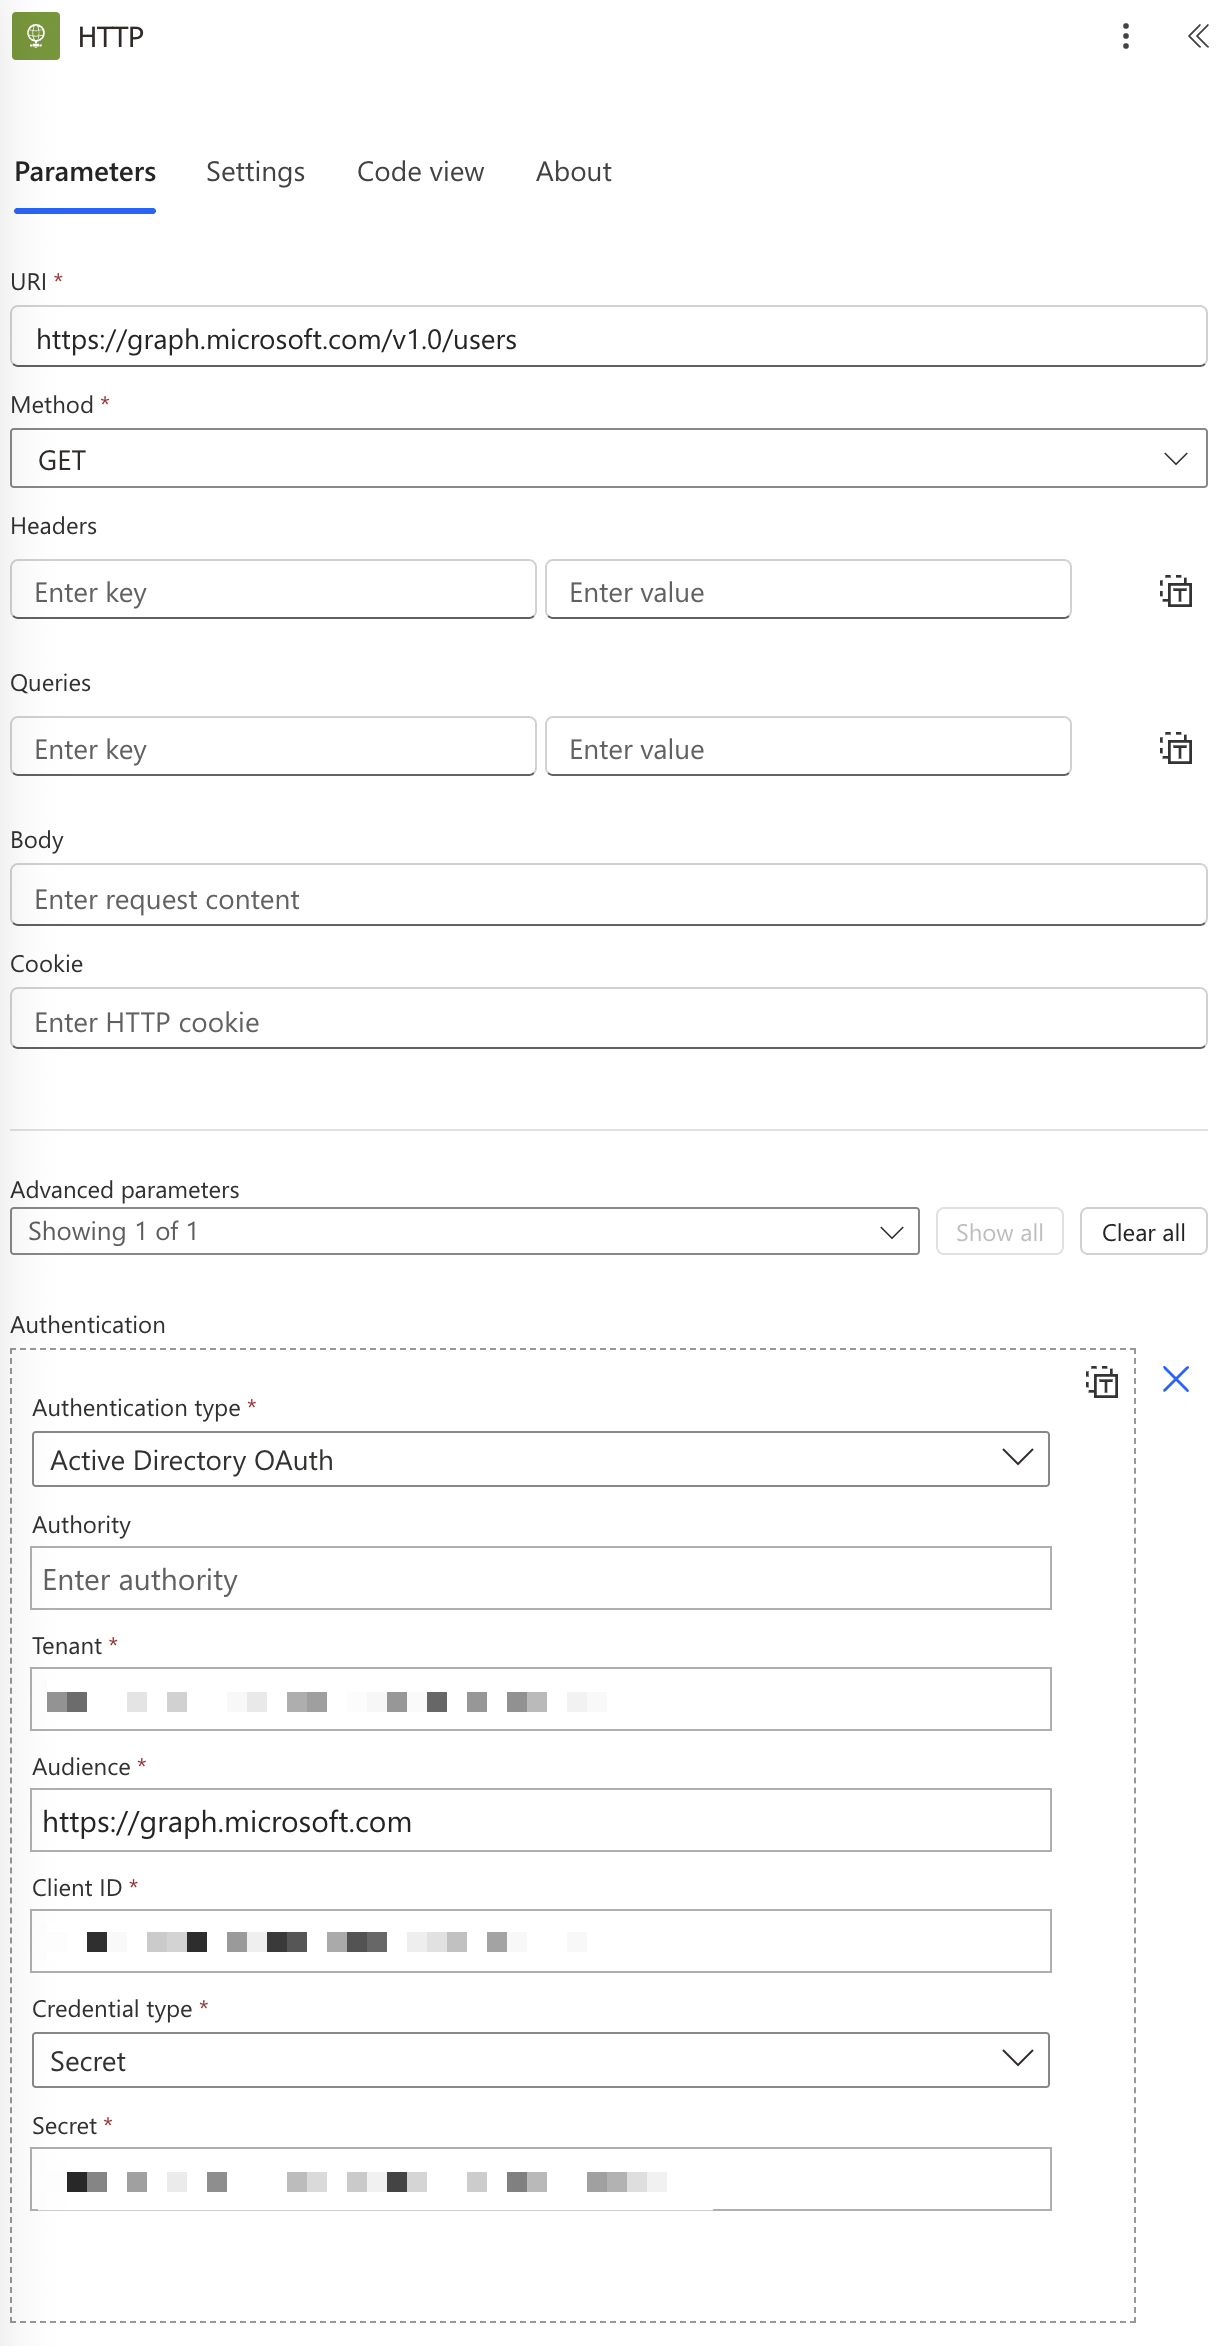
Let’s do a quick call to Graph API to get the users.
- Add another “HTTP” action
- Configure it as follows:
- Method: GET (or appropriate method for your API call)
- URI:
https://graph.microsoft.com/v1.0/users(or your desired endpoint) - “Advanced Parameters” and select “Authentication”.
- Add the parameters
- Authentication Type: Select “Active Directory OAuth”
- Tenant: Copy the value from before
- Audience: You can add
https://graph.microsoft.com - Client ID: Copy the value from before
- Secret: Copy the value from before (⚠️the “value” not the “secret_id”).
Here’s what it looks like:
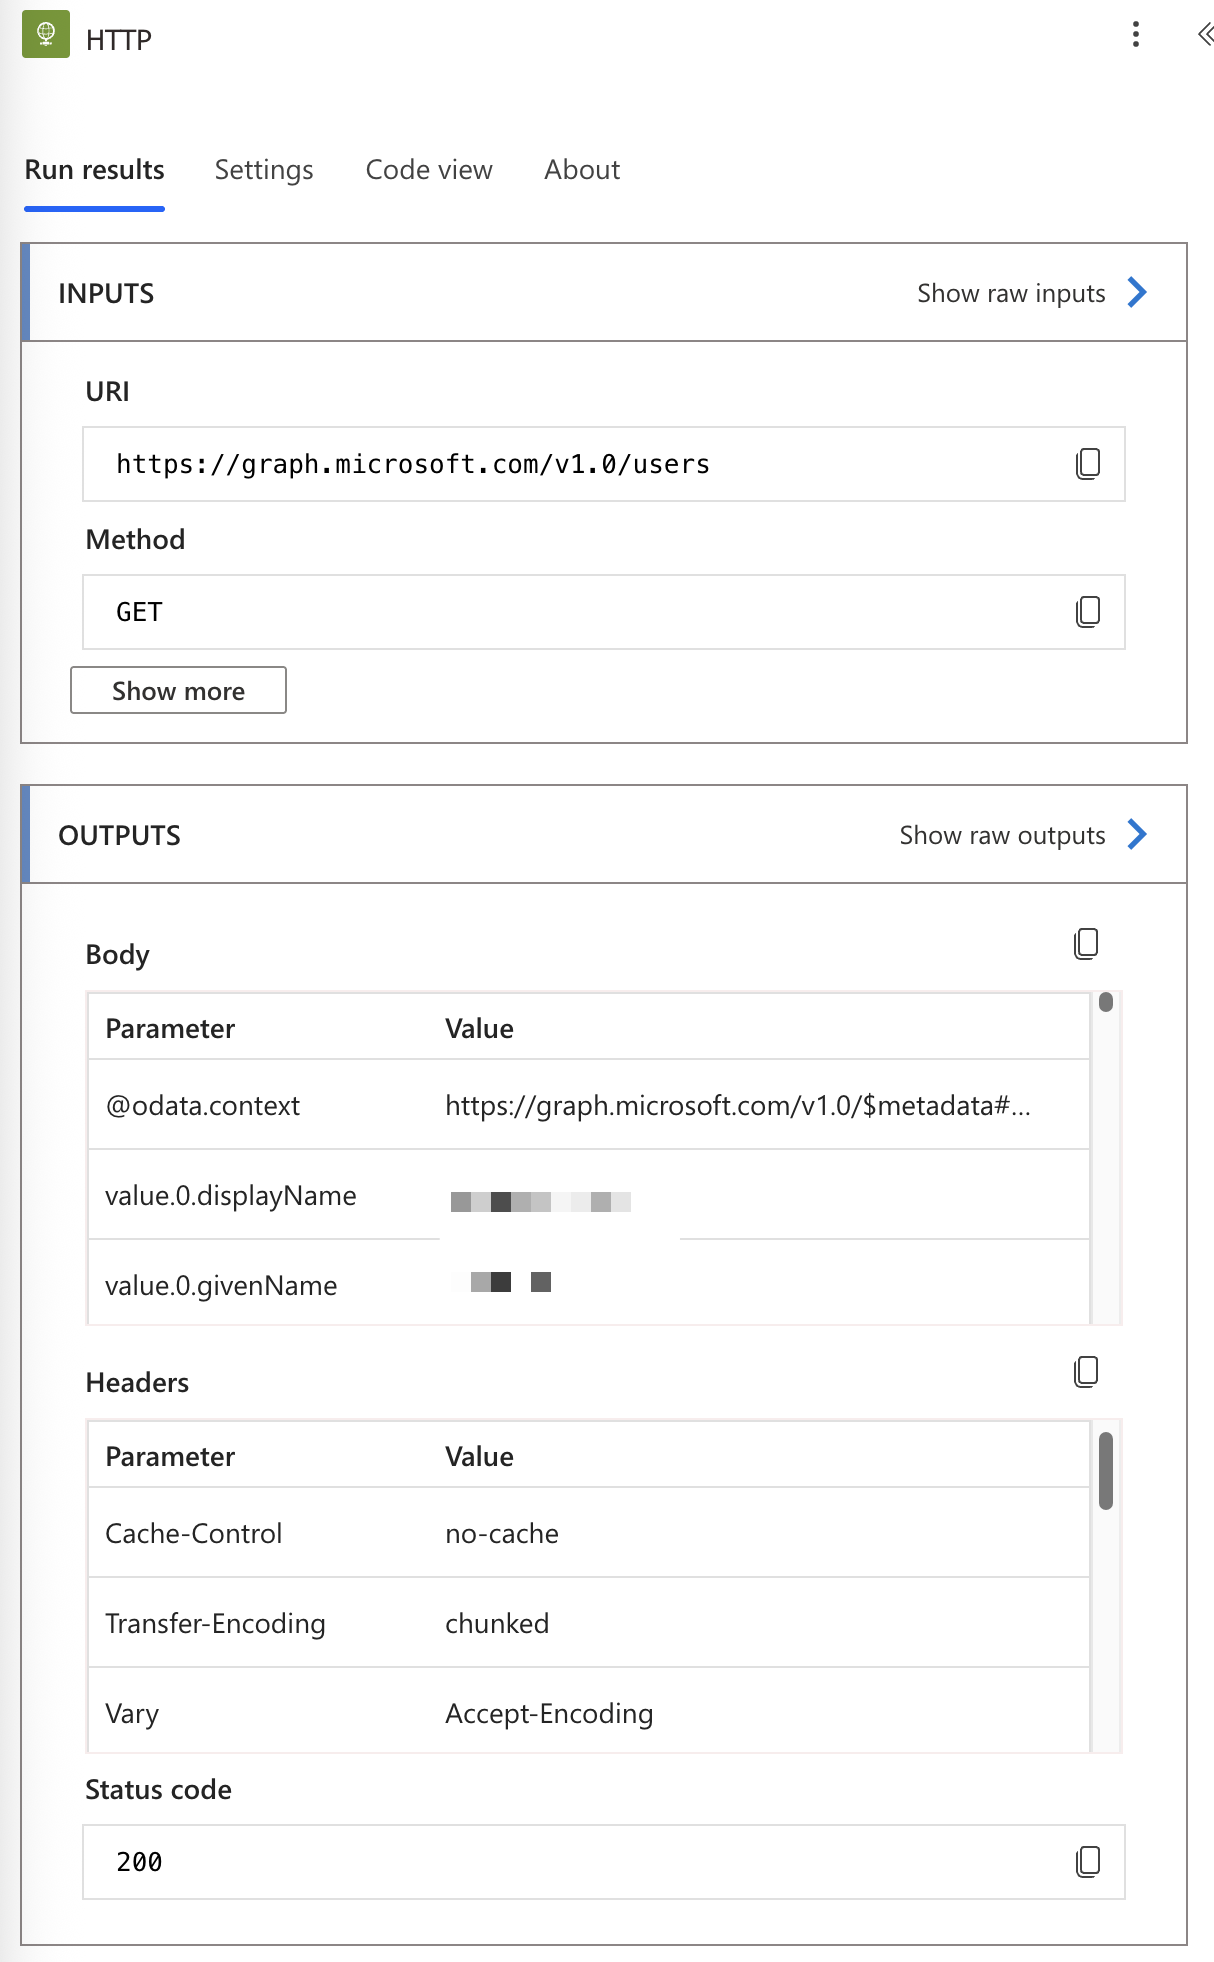
When we perform the HTTP request we’ll see the list of users:
Parsing responses
Most Graph API responses are in JSON format. To work with them in Power Automate:
- Add a “Parse JSON” action after your HTTP request
- For Content, use the Body output from the HTTP action
- For Schema, you can:
- Use “Generate from sample” with a sample response
- Or build the schema manually based on the Graph API documentation, but I don’t recommend it. It’s
You may get a super common error with the schemas, so please check this article for the solution.
Handling Errors
I have an article called “Try Catch Finally” that covers how to deal with errors. You can use “Scope” actions to isolate specific actions and react if something goes wrong.
Final Thoughts
I know it looks like it’s quite complex, but you will only have to do most actions once. Also, this is a skill you gain since it unlocks many automation possibilities if Power Automate doesn’t support it directly.
Remember these key points:
- Set up your Azure AD app with the correct permissions and security.
- Always provide the least possible permissions. If you need only read, don’t provide write permissions, for example.
- Implement proper error handling to make your flows more robust since things may fail more often.
- Keep your client secrets secure and rotate them periodically. Also, don’t forget to change them when they expire.
Have I forgotten something? Please let me know.
You can follow me on Mastodon (new account), Twitter (I’m getting out, but there are still a few people who are worth following) or LinkedIn. Or email works fine as well 🙂
Photo by Armand Khoury on Unsplash