 by
by Power Automate and SharePoint work excellently, but I see many people with questions regarding how to fetch multi-select columns in SharePoint. Especially the “Person” columns that are complex objects, making things a bit more tricky.
Parse multi-choice columns in SharePoint
This template provides a full Flow that gets the information from SharePoint and details how to extract multi-select columns. For the sake of example, we’ll be using the “Person” type that is the most complex.
As always, I’ll provide you already with the template in case you want to explore it. If you want to understand what’s going on, here we go.
The list
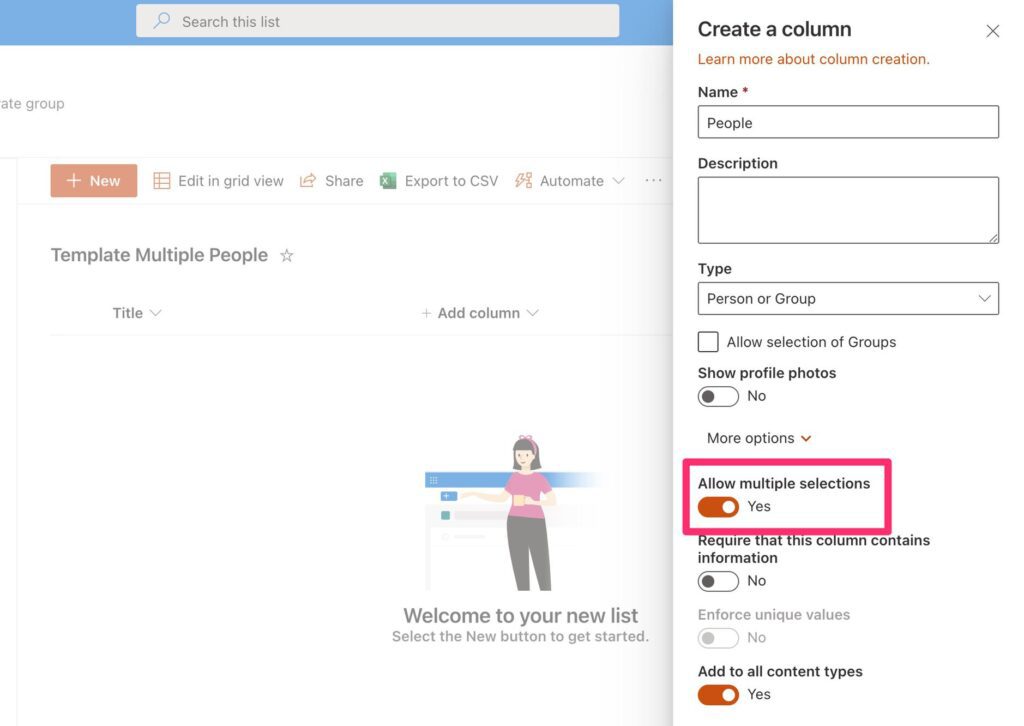
Let’s create a simple SharePoint list that contains a column for “People” as below:
Now that we have a sample list, let’s do the template.
The template
To have a real case to test, let’s fetch all unique people for all rows.

The steps are simple:
- Fetch all people
- For each person, check if the email exists in the array
- Add the email to the array if they don’t exist.
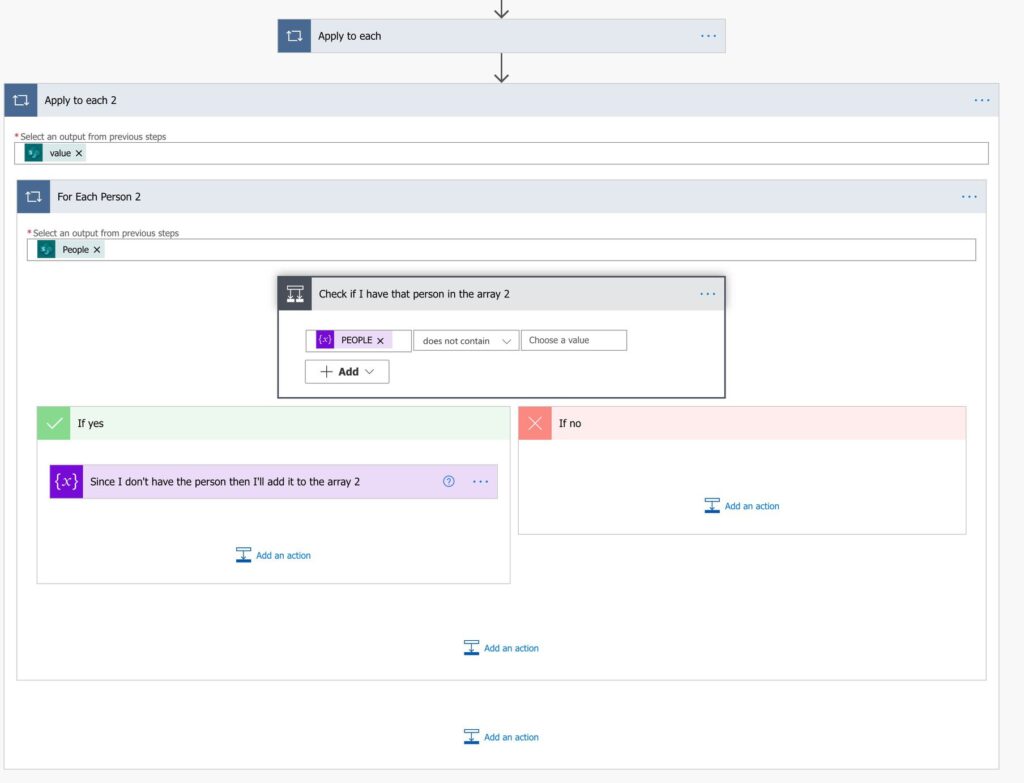
Why 2 “Apply to Each”?
Since we have multiple items in the SharePoint list, we need an “Apply to each” action to iterate them. But notice that we defined the column “People” as “Allow Multiple Selections”, so we can have several items on that column per record. So we need to:
- For each row
- In the row, for each element in the column “People”.
Keep this in mind when you’re building your Flows. For example, you may have nested “Apply to each” action depending on how many elements exist.
I don’t see the properties in the “Dynamic Content.”
Another issue that I see frequently is that sometimes the elements don’t show up in the “dynamic content.” Again, we can solve this, but we need to understand how the “Apply to each” action works.
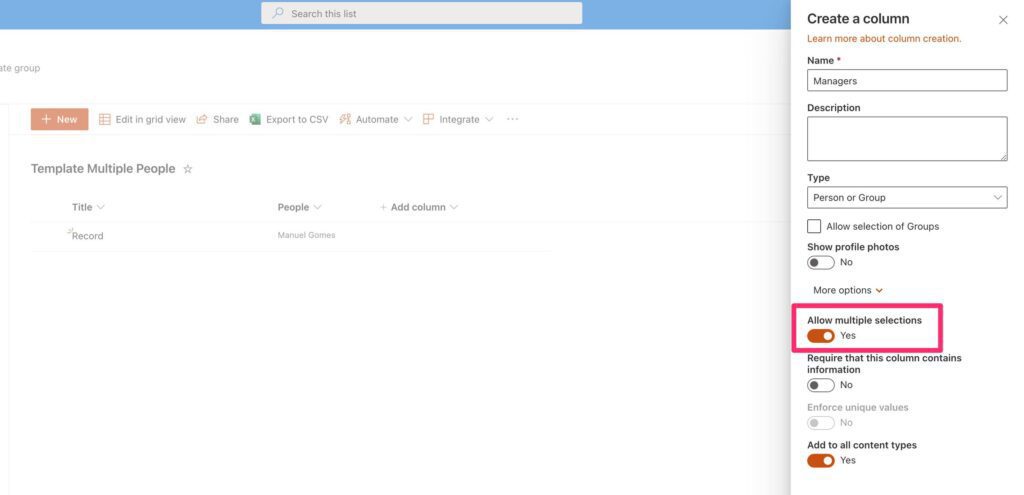
Here’s an example. I will add another person column with the same structure, but now called “Managers.”
Let’s do the same as before, using the same list. We only want different email addresses, so here’s what we do. We copy and paste the previous action, and we get:
Now let’s remove the “People” and add the “Managers.” So far, so good, but now let’s add the email to the “Condition” action. If you can’t see it on the “Dynamic Content,” don’t worry. We can build it ourselves. To do that, we can use the following formula:
items()?['Email']
So what’s happening here? First, we check the current item in the “Apply to Each” action using the item function. It will signal to Power Automate that we want the current item that is being iterated. After that, we indicate that we wish to use the square brackets notation to the “Email” field in that object. Finally, the “?” This shows that the field is optional, meaning that if we can’t find anything, the Flow won’t crash.
Final thoughts
The template is quite simple, but I wanted to show you how to deal with multi-select columns by adding nested “Apply to Each” actions and what we can do if we don’t see the values in the “Dynamic Content” tab. I’ll write a more detailed article about this soon, but I think it’s an excellent overview of the concept.
Photo by Eric Prouzet on Unsplash


whats the trigger? Get items cant be a trigger?