
You may have noticed that you have a new icon on your list of Office 365 products, called “Lists.”

We know the lists from SharePoint, but Microsoft Lists are something new wrapped into something old and stable. Let's take a look into more detail.
What are Lists?
Microsoft Lists are an amazing jump forward, turning SharePoint Site Lists into something accessible to everyone. Although SharePoint Site Lists are quite powerful and simple to use, they were always somehow difficult to customize, create and maintain. They grew from the need to store data and, most of the time, they were used as “databases” for other applications or platforms like Power Apps or Power Automate.
How are they organized?
Let’s take a look at how they work—first, something to know. The first time you open Lists, most of the time, you’re not greeted with an empty screen. If you have permissions to access lists in any SharePoint Site, they will show up here but looking a lot better.. Here’s my view:

As you can see, the lists are automatically added. I have lists that I use:
- To support some Flows, I’m running.
- Some lists I have in SharePoint to control some information
- Some lists I created here to test the tool
Please note that:
- The icons and the colors are random. You can customize them later.
- You can pick your favorite ones so that you don’t need to search for them in a huge list if that’s the case.

How do they work?
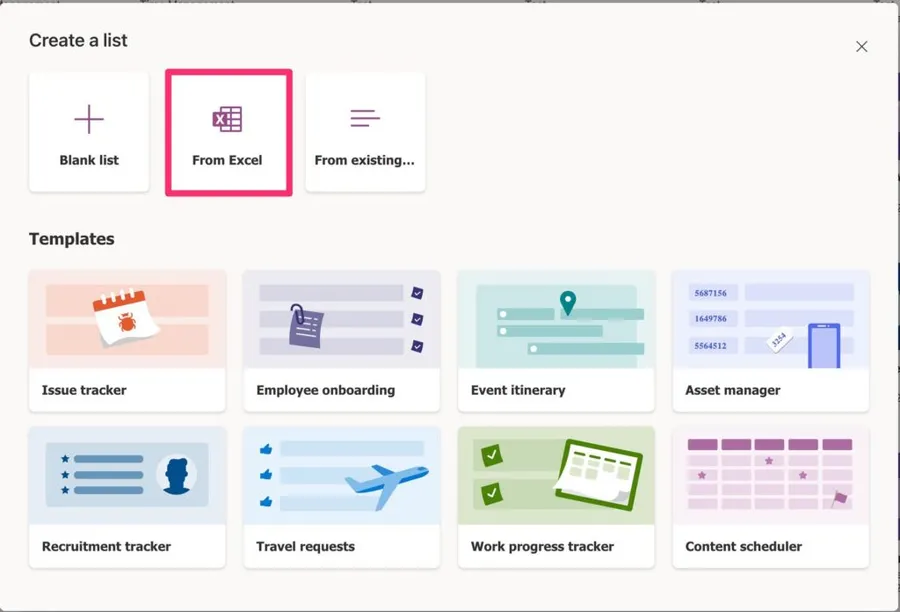
You have 4 ways to create a list:
- The “old” style by creating it in a SharePoint Site and then picking it in the option “From Existing….”
- Create a blank list
- Create from Excel
- From a template
Let’s look at them individually and see how awesome Microsoft Lists are. I’ll leave the first one out since it’s not the most interesting for our purposes. You know how to pick stuff from a list, so let’s check the other cases.
From a blank list
Although starting from zero can be a lot of work, starting with a blank list, in this case, can be an advantage. You can select the information that customizes the list from the start, like the color and the icon.
Before, lists needed to be created in a SharePoint Site, but now you can pick “My Lists.” This is extremely useful for users that are not familiar with SharePoint, where they can take full advantage of the tool. A nice touch from Microsoft in usability and lowering the barrier to entry.
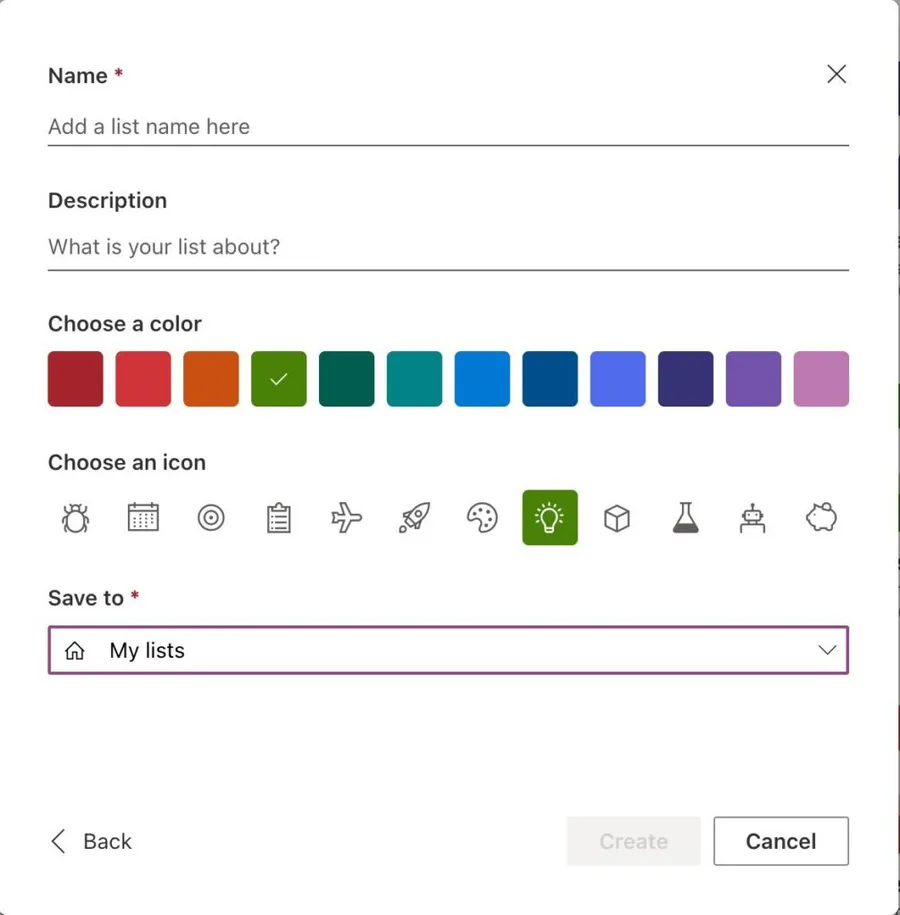
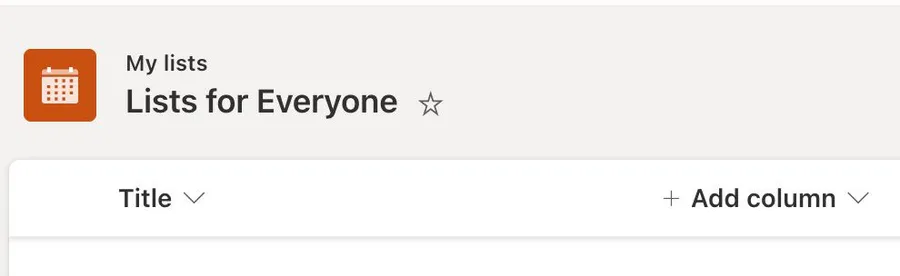
After that, you’re greeted with the “usual” UI you get from SharePoint but a little bit nicer. Please notice the similarities:
- You have the Title created for you. In the backend, it’s still SharePoint supporting the tool.
- Add column has the same options as SharePoint.
So you can consider this as SharePoint Site Lists, but built for everyone to use.
Create from Excel
If you have many Excels that you use to keep data, think about migrating them into a List. The process is super easy, and you’ll get a lot “for free” like:
- If you need to keep track of items related to people, you can select a type for that. It does the auto-complete and validation if the user is correct or not.
- Automatic type validation. Excel is good in many cases but not good at validating types. It’s worse when it tries to “convert” to something else, making the data a mess. Lists allow you to have a nice form that validates if the information is correct before it’s inserted.
- Form
Let’s import some data. To do that, I’m using a test dataset with sales orders. I like this example because Excel has multiple tabs, and not all of them contain data.
Importing Data
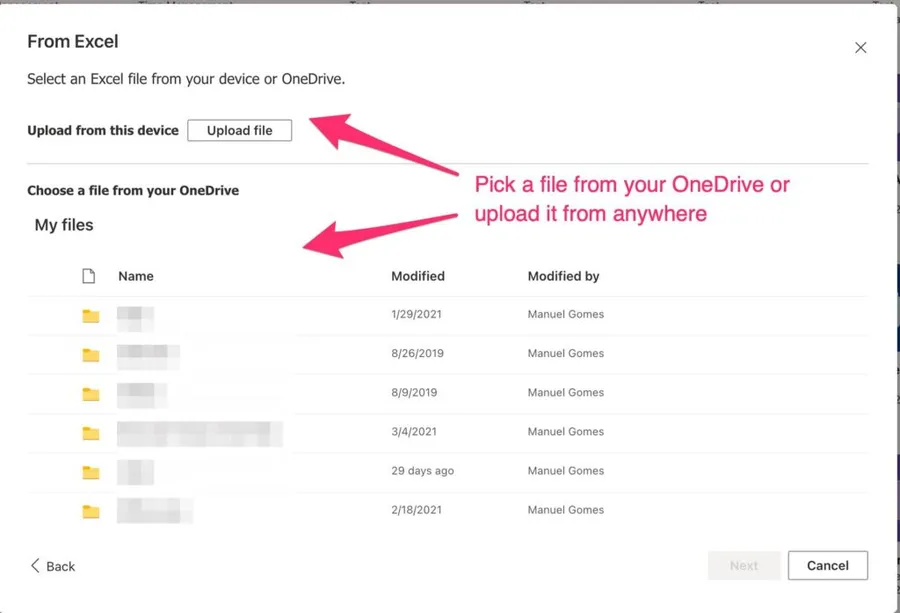
Pick “From Excel.”
You can select Excel from your OneDrive or upload it from anywhere on your computer.
The next screen will contain:
- A list of tables. If you have more than one, you can pick the one you want.
- A sample of your data.
- The mapping of that data.
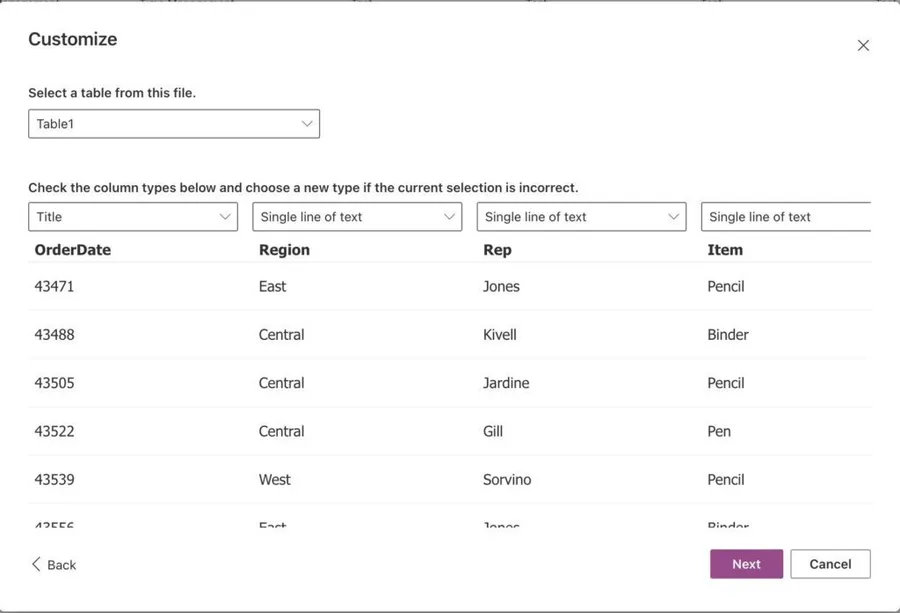
Microsoft Lists will try to “guess” the correct type of data, but you should pick and ensure that the data is stored in the correct format. This is especially important for numbers and dates. Then Microsoft Lists will create a new column with the same name as in your Excel.
You can notice that you have “Title” in the first column. It's a default column that is always created when a list is created. So always pick a field that you think adjusts to the “Title” section since it needs to be mapped.
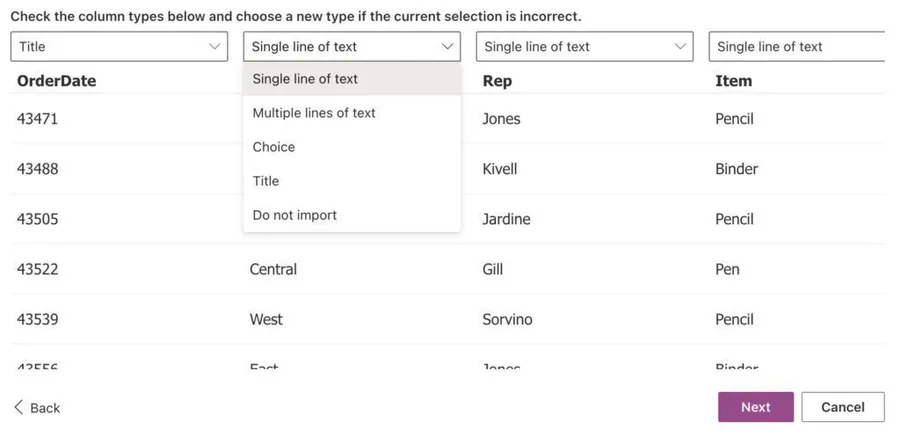
You can pick the columns you want to import and, in the ones you don’t to, pick “Do not import.” Here’s the final result:
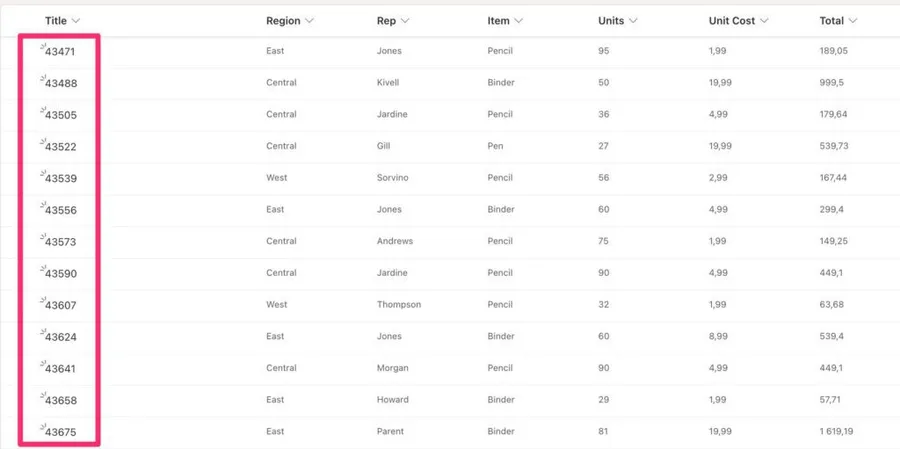
Notice that I left the date to be imported in the “Title” field. Since the date is stored in Excel as a number and the title is a text field, the data is converted and stored as you see above. I wanted to import it like this to show you how things can go wrong.
From a template
Microsoft did some of the work for us and created templates of Lists. These templates contain columns for a specific context, customization, and much more. They are fascinating and a good place to start when you’re learning.
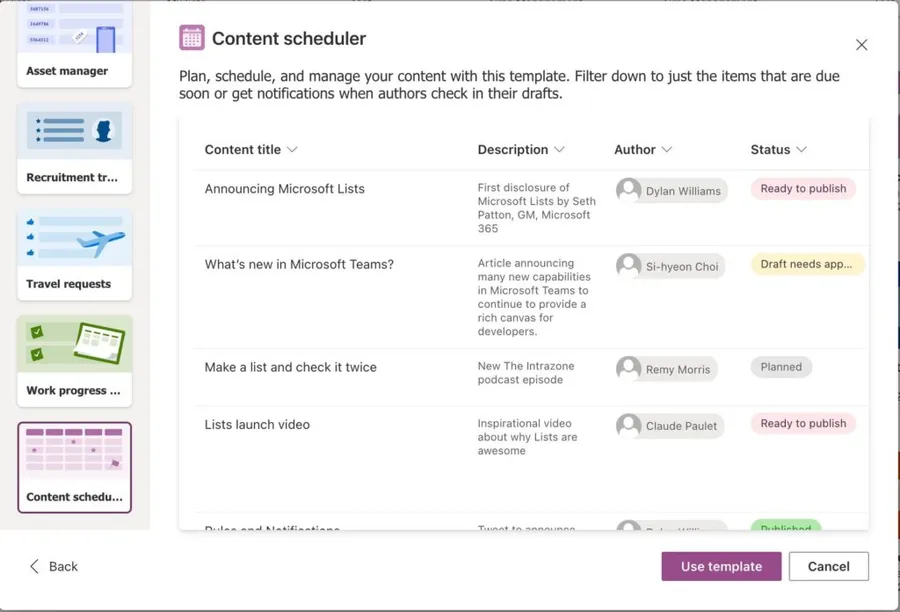
Another nice touch from Microsoft is that you can see how the data will look before creating the list. Notice that we have:
- Pre-defined status with color-coding
- People columns
- Description of what the list is for
You can find more once you create the list. I recommend exploring them. You can start with a template and then customize the list to your needs.
Please don’t keep them to yourself.
Having lists for your personal organization is ok, but lists shine when multiple people use them. If you have an “editorial calendar,” for example, having people change the status, assigning tasks to people, and collaborating directly in the list is extremely powerful.
To do that, use the “Share” feature, write the emails for the people you want to collaborate and you’re done.
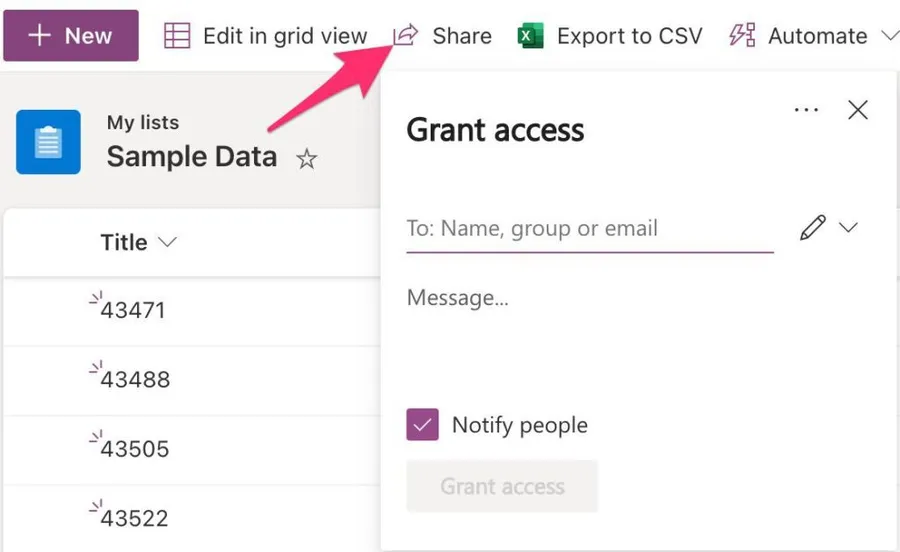
Please note that people, by default, will be able to see and edit all the information. To restrict that, you can:
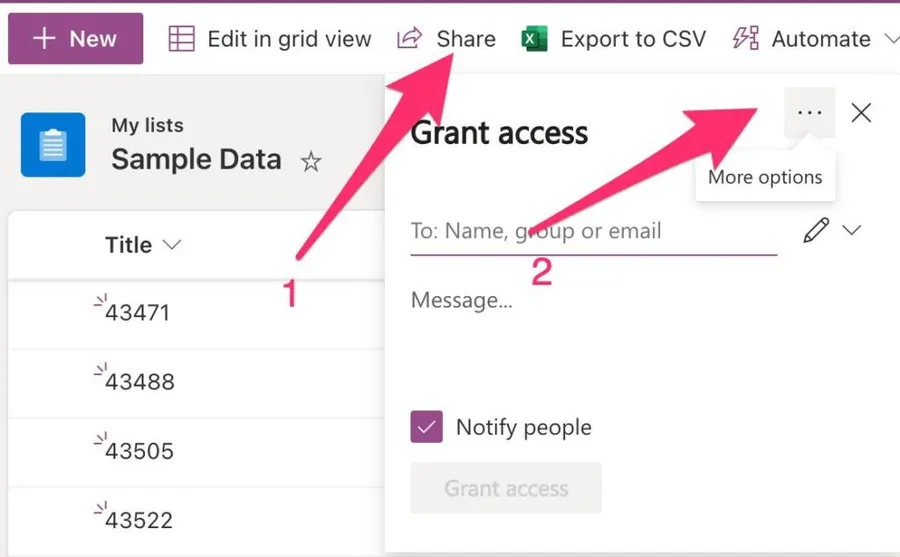
Then select “Manage Access.”
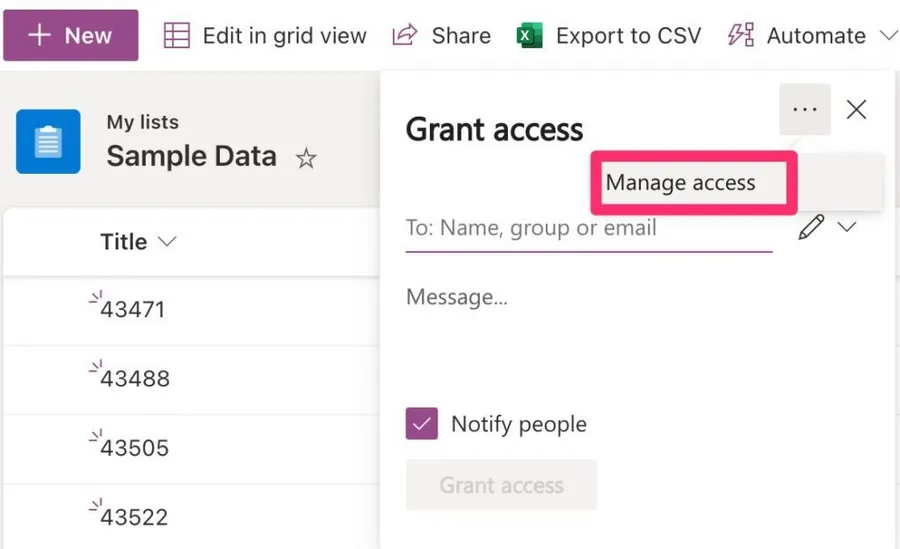
You can define, per person what’s the access that they have:
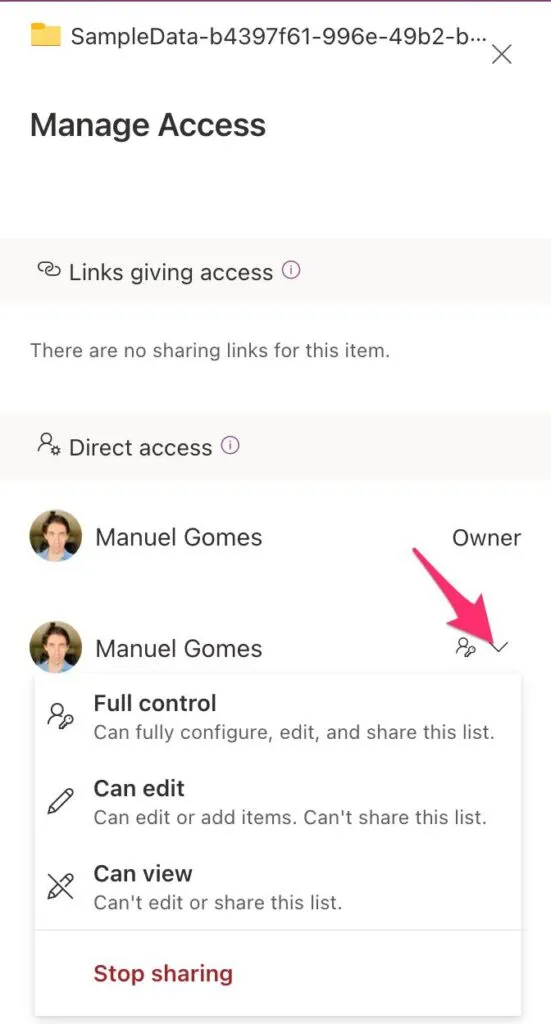
People can have:
- Full control meaning that they can edit lists, add new columns, and delete existing ones.
- Edit control where they can edit the data but not the LIst’s structure.
- Read-only access
You can remove the person’s access entirely by following the same steps and use the “Stop Sharing.”
Final thoughts
Microsoft Lists brings Lists to everyone. They are simple to use and mighty because they piggyback on years of experience applied to SharePoint Site Lists. You don’t need a lot of training to show people how to use them, and I’m sure that you can see how much people will gain if they use them in their daily tasks.
This article bridges SharePoint with Microsoft Lists, but I’ll create a new section to go over some of its features that I didn’t mention in this article. There’s a lot to explore.
Photo by Cathryn Lavery on Unsplash
No comments yet
Be the first to share your thoughts on this article!