As for all Office 365 tools, Power Automate integrates with Microsoft Planner, and there’s a lot that we can do. If you want an example, I recently published an article detailing how to “add planner checklist items dynamically.” So let’s explore e bit further the Update task details Action.
Where to find it?
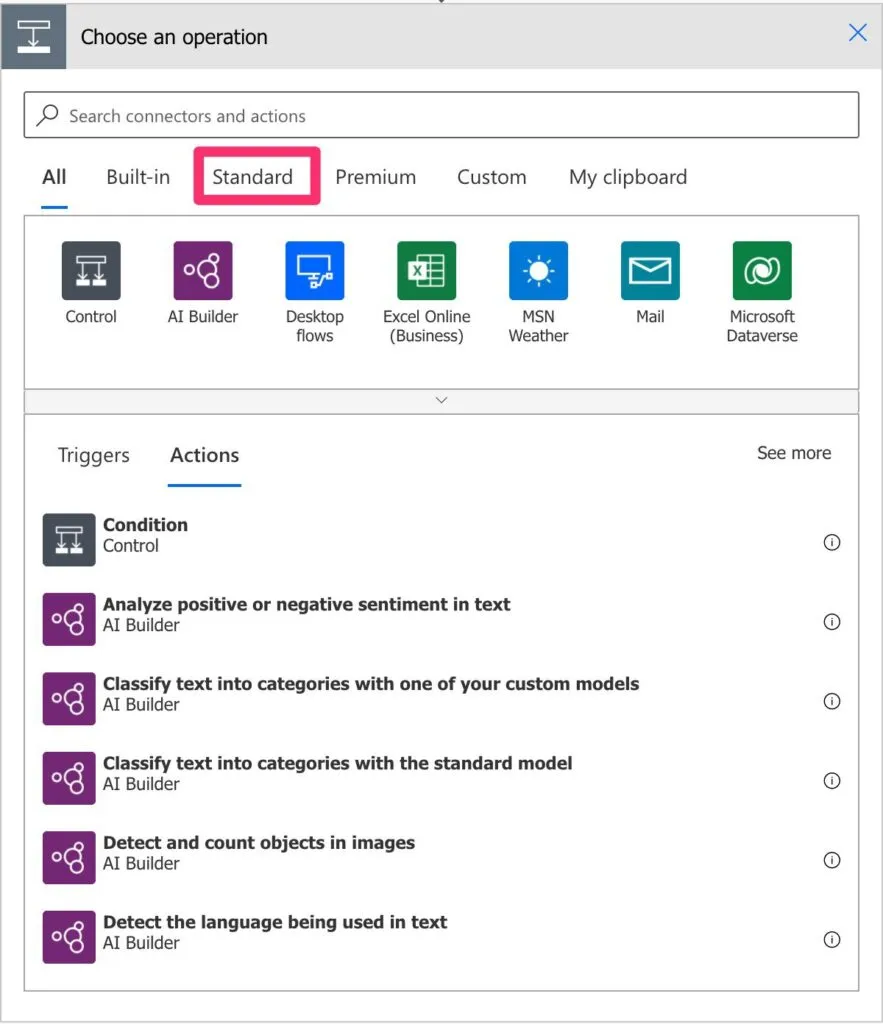
You can find it under “Standard.”
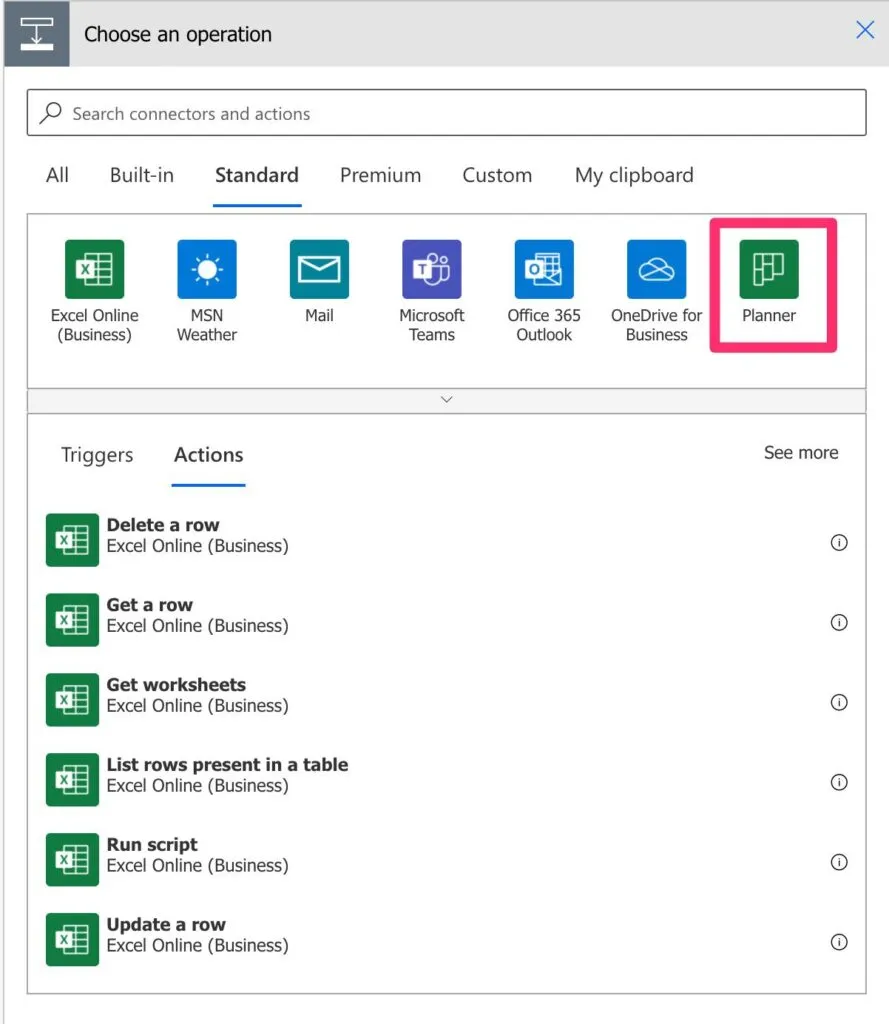
Find the “Planner” group.
Then pick the Update task details Action.
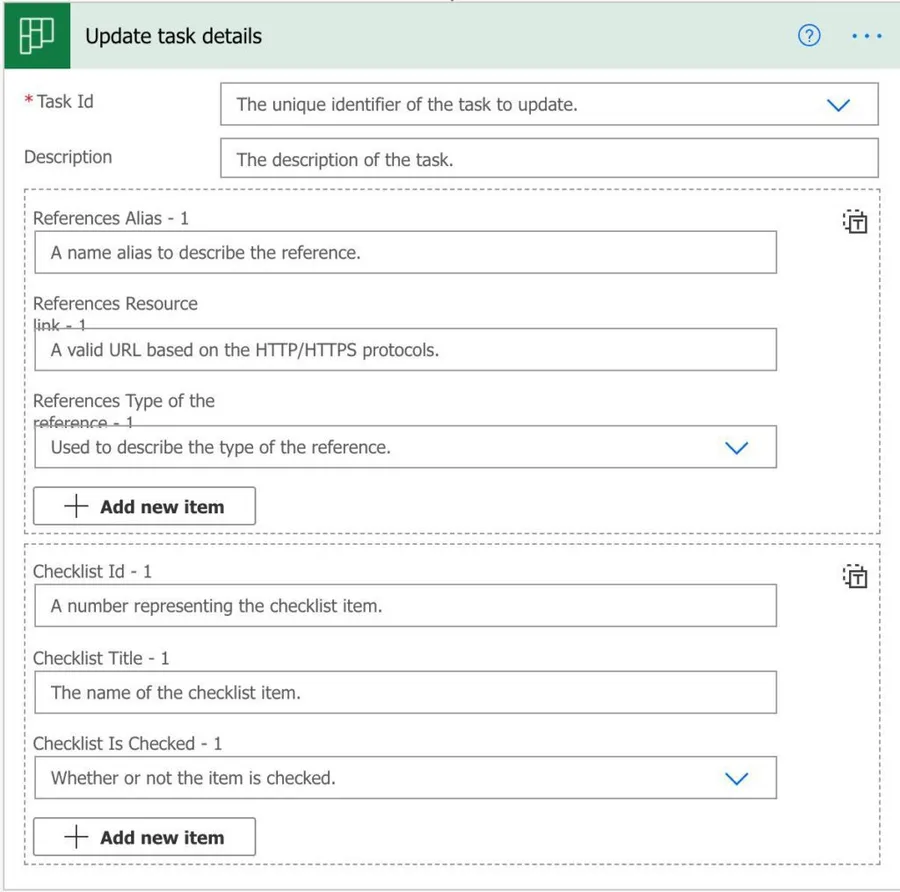
Here’s how it looks like:
Usage
There are 3 main areas for the Update task details Action.
- Task Id and description - basic information for the task
- References
- Checklists
Let’s look at each of them individually.
Tasks details
First, since we’re updating the task, we need to identify it. You can pick the action from the list or provide an ID. Most of the time, you’ll use an ID to identify the task. This ID can come from either a Trigger, like When a task is created trigger.
We also have the “description” that maps to the “notes” in Microsoft Planner.
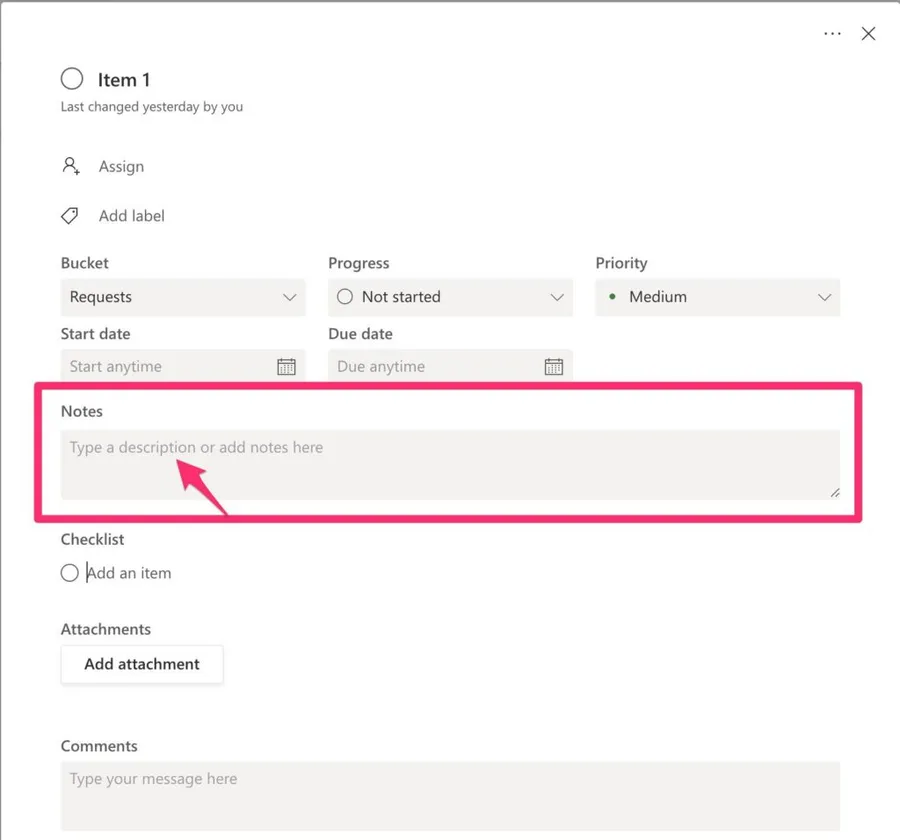
I think Microsoft will rename this to uniform the names to avoid confusion, but, in the meantime, you have it’s important to know where it maps to.
References
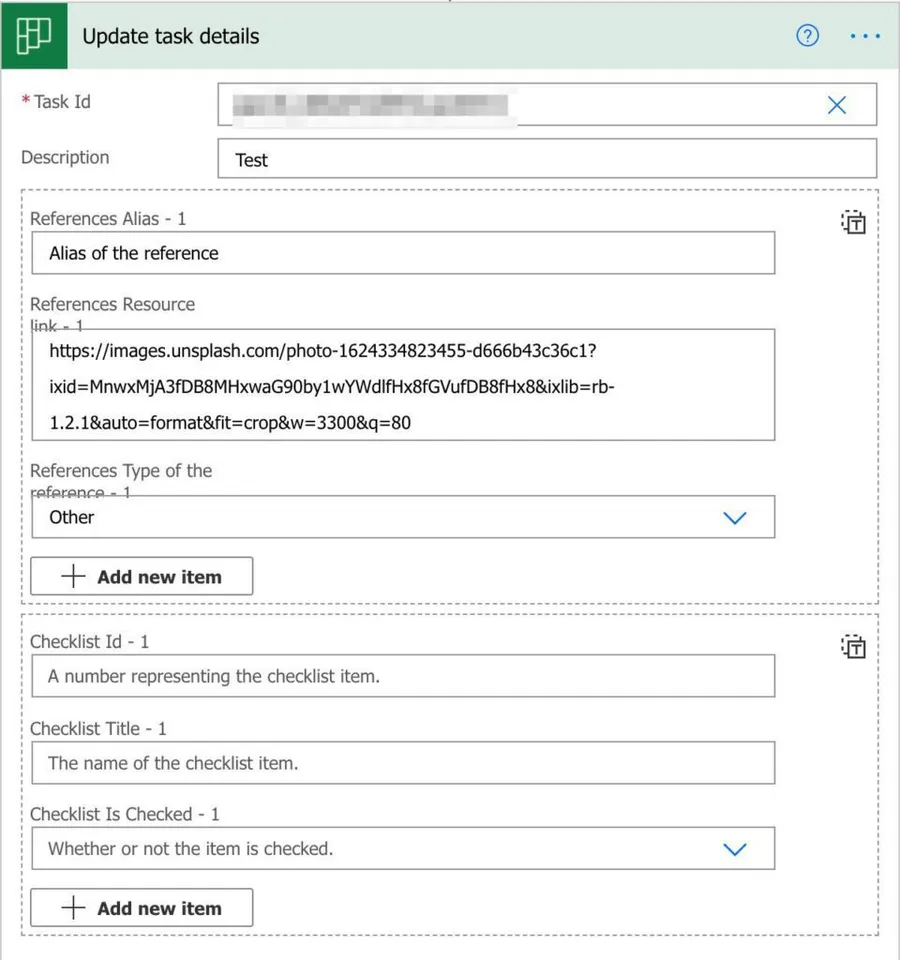
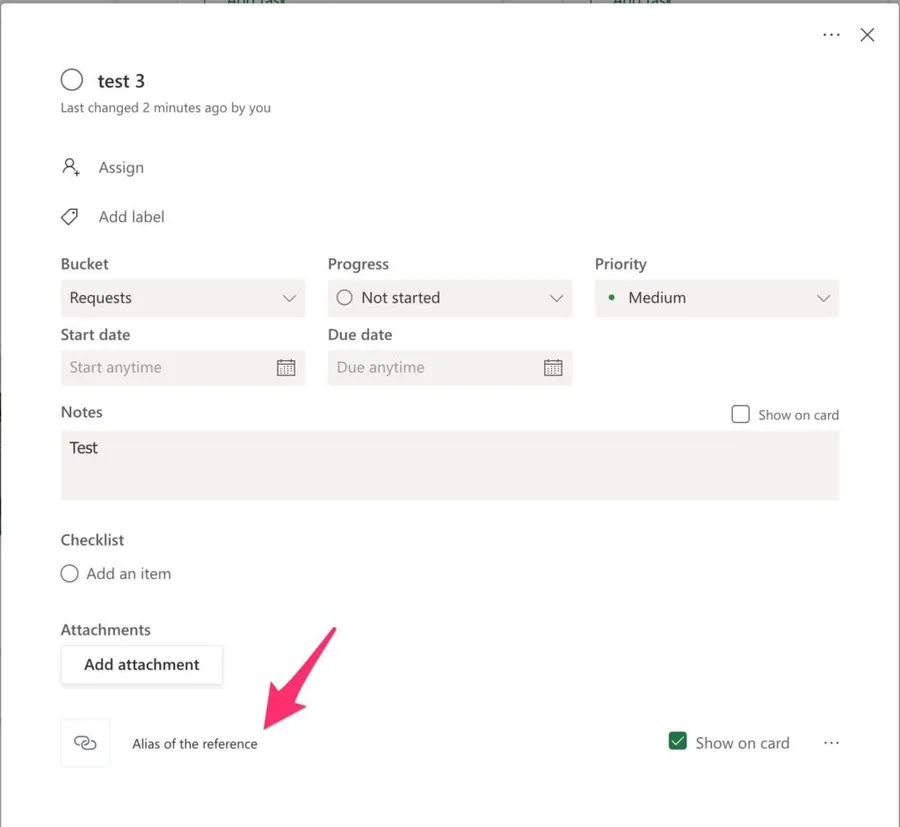
References map to the “attachments” section on your Flow. The attachments are not the kind you’re used to, and this is one of the things Microsoft Planner shines. The attachments have types, and, depending on its type; it behaves differently. For example, if we add a link to a webpage:
Your planner will look like this:
There are a few caveats that you should be aware of. First, the types of references in Power Automate and Microsoft Planner are not the same.
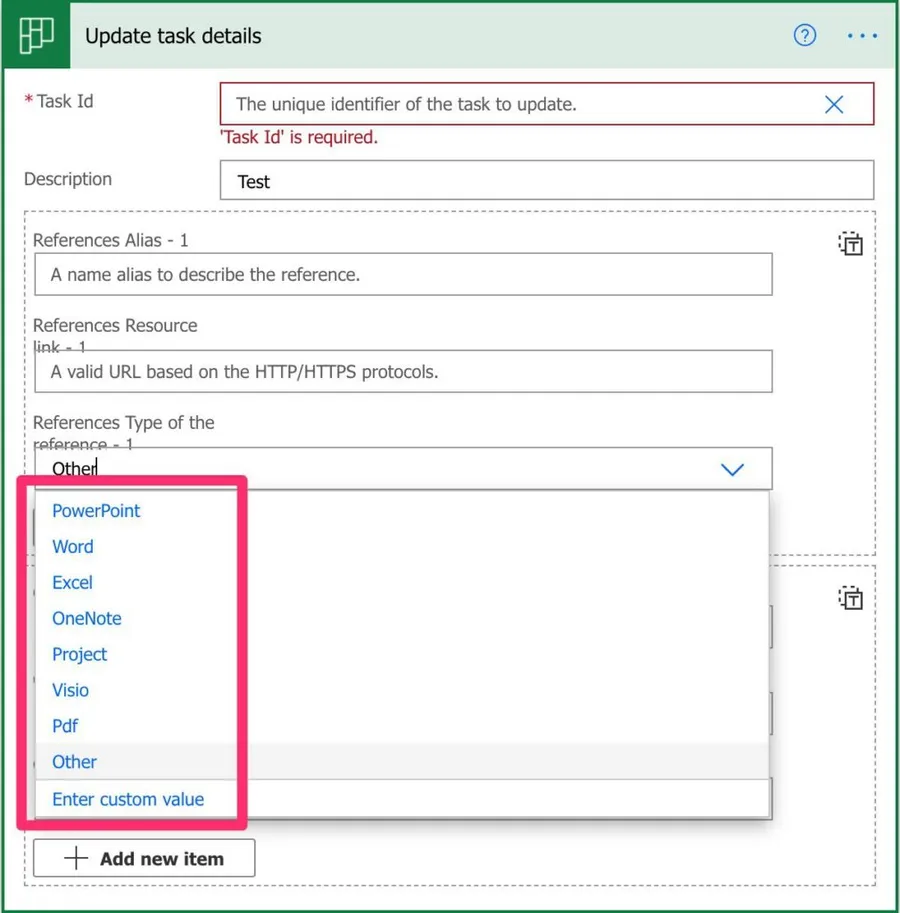
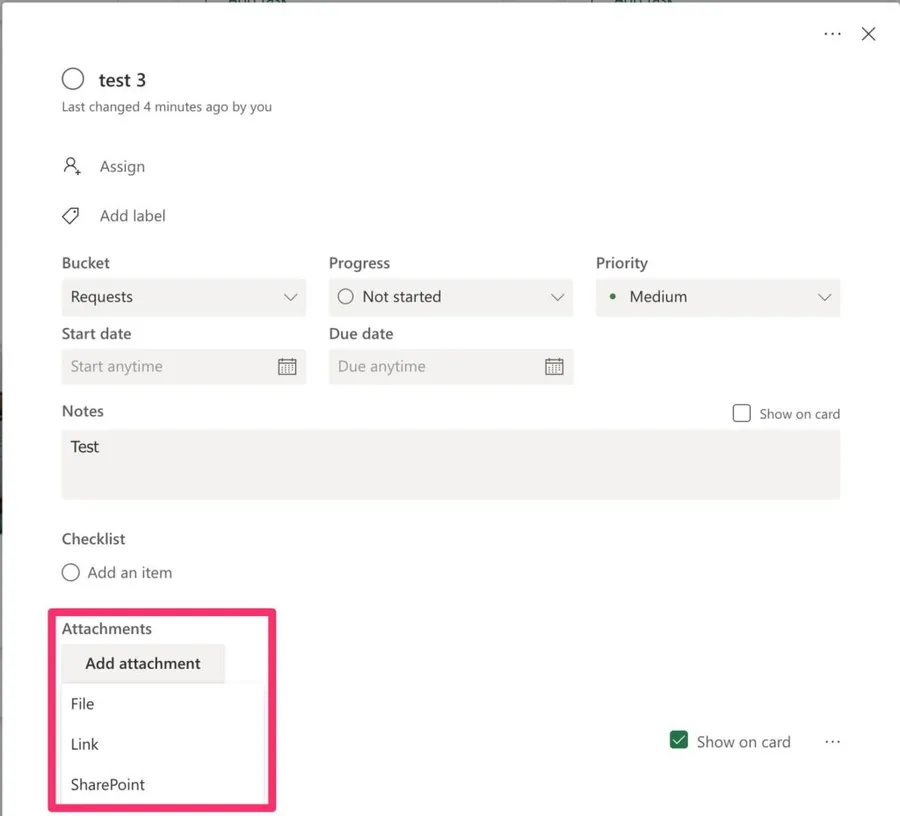
You should be aware of this, but as you can see, there’s not a lot of overlap between them.
Checklist items
You can also add checklist items to a task. The creation is quite straightforward where you need to define an ID, title, and if it’s already checked or not.
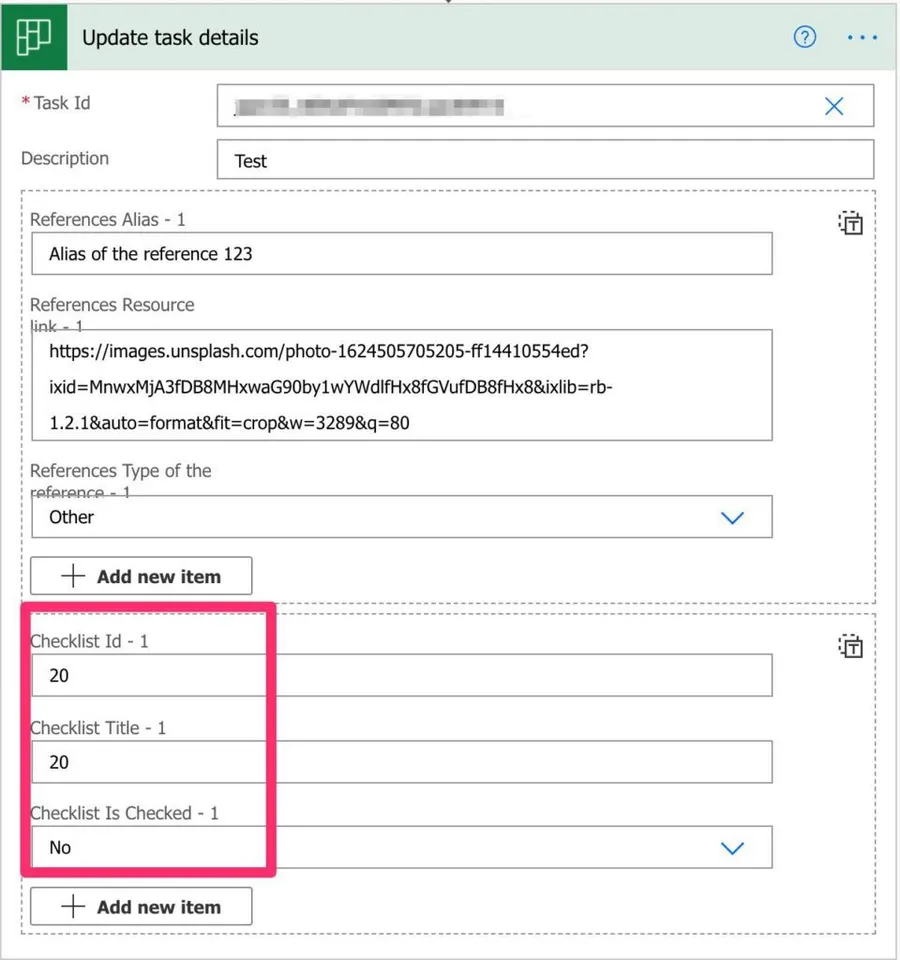
I would strongly advise against defining the item as “checked” unless you update the item to be checked. Don’t add checklist items that you don’t need since you’re limited to the number of checklist items per list.
Limitations
Here are some limitations for the Update task details Action separated by each area.
Attachment Limitations
You can only add 9 attachments to a task. If you try to add more, Microsoft Planner will disable the button.
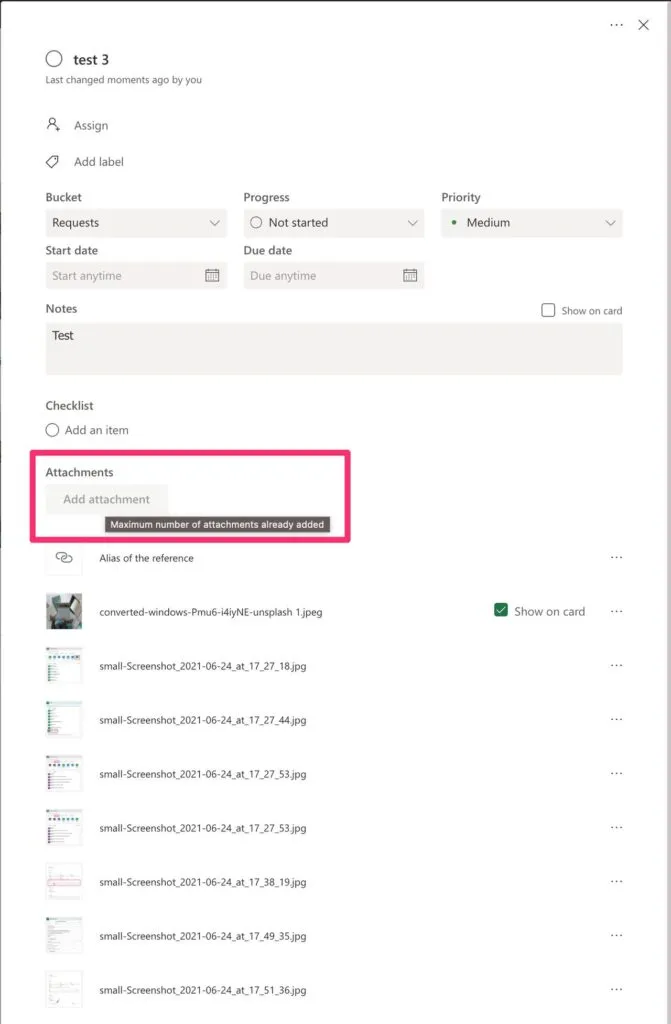
But since we’re dealing with Power Automate, we’ll have two distinct behaviors. If the URL or File already exists, then the description and type will be updated. If the URL or File doesn’t exist then, Microsoft Planner will allow and insert another item. You read it correctly, so looking at the above example, we’ll have:
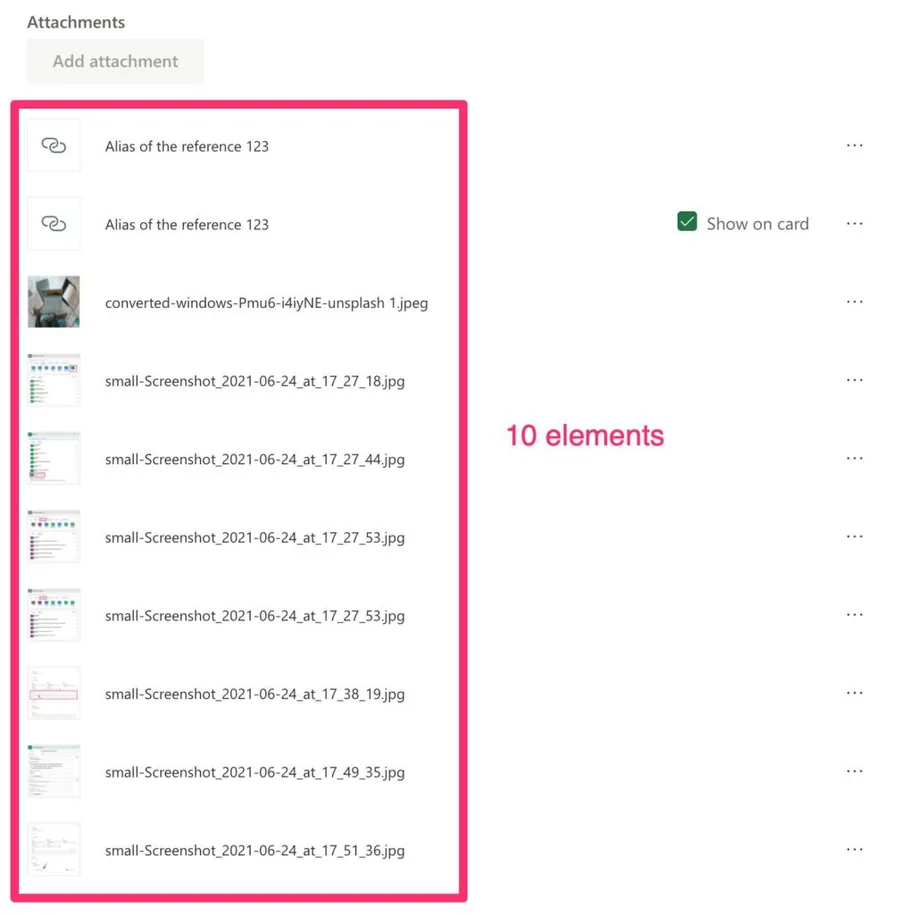
I’m sure that Microsoft will plug this hole soon, but you can keep on adding references as long as you use Power Automate.
Attachments are unique
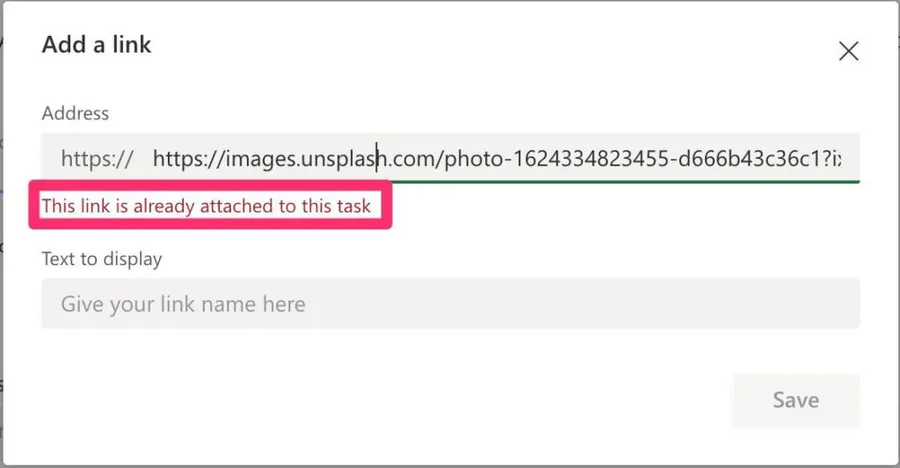
To a certain point, Microsoft Planner is smart to ensure that the files and URLs are unique so that you don’t insert duplicate values. This is a good limitation to have, and that’s what it looks like when you try to insert an URL that is already “attached.”
Checklist Items Limitations
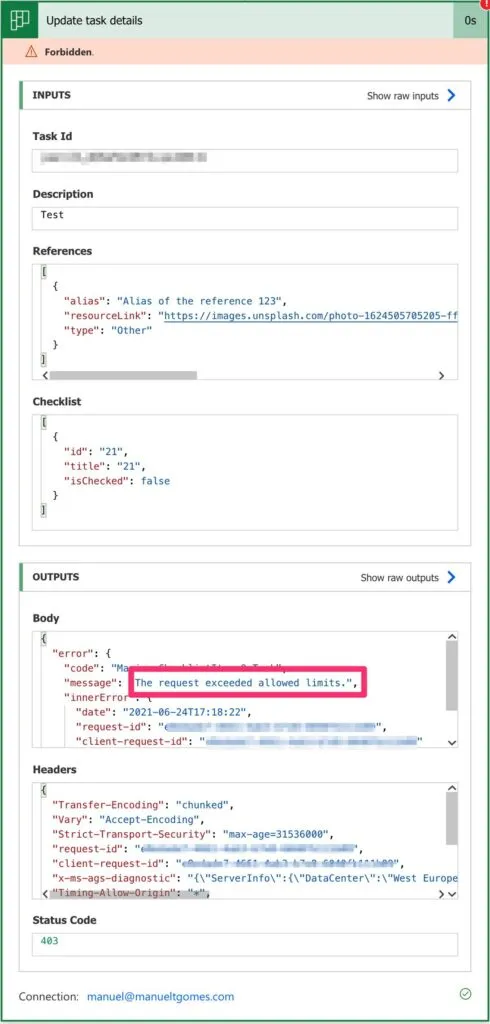
You can only have 20 checklist items in a task. If you try to add more in Power Automate, you’ll get an error:
Checklist Items are unique.
You’ll have the same behavior as in the attachments. If you try to update a checklist item with the same ID, the name will be updated. The Flow will run without errors.
Recommendations
Here are some things to keep in mind.
You can add them dynamically.
If you have a lot of items and attachments, you can create them dynamically. I describe how to do it in the article ”add planner checklist items dynamically.” I recommend using this strategy to add a “template” somewhere and change the items there without changing the Flow.
Never try to generate the task ID yourself.
The task ID is quite opaque and can change behind the scenes. If you want your Flow to keep working, always use the ID provided by a trigger or another action.
Name it correctly
The name is super important in this case since we can be doing a lot of actions. Update the checklist items, create new ones, add new attachments, or any other combination. Always build the name so that other people can understand what you are using without opening the action and checking the details.
Always add a comment.
Adding a comment will also help to avoid mistakes. Indicate if you’re creating or updating items, such as if you intend to update if the item already exists. It’s important to enable faster debugging when something goes wrong. Also, since the behavior changes if the item already exists or not (for both attachments and checklist items), proper documentation of the intention is vital; otherwise, you’ll never know the initial intention from the Flow was.
Always deal with errors.
Have your Flow fail graciously when the file doesn’t exist and notify someone that something failed. It’s horrible to have failing Flows in Power Automate since they may go unlooked for a while or generate even worse errors. I have a template and a template that you can use to help you make your Flow resistant to issues. You can check all details here.
Dealing with errors is especially important in this case, where there are many paths of failure that need to be addressed, like if we reached a limit, for example.
Back to the Power Automate Action Reference.
Photo by David Ballew on Unsplash




Thank you for the tutorial. I have a question: How can I delete a file attachment from a task? For instance, if a user is only allowed to attach Excel files, any other file type should be removed. Checking whether it's an Excel file or not is straightforward. However, with the "Update task details" action, I can only attach files, not remove existing ones. If I delete the file using the SharePoint connector, the file still appears in the task, even though it no longer exists. Any suggestions on how to remove existing attachments from a task?
Is it possible to 'tick' the Show on Card option from Power Automate Update Task Details?
or 'untick'?