In my opinion, the Planner “when a new task is created” trigger is one of the most useful Planner triggers. Tasks are created frequently, and having a way to catch and, for example, add checklist items or assign them automatically to a default person saves a lot of time.
So let’s look at the “when a new task is created” trigger and how we can use it efficiently in Power Automate.
Where to find it?
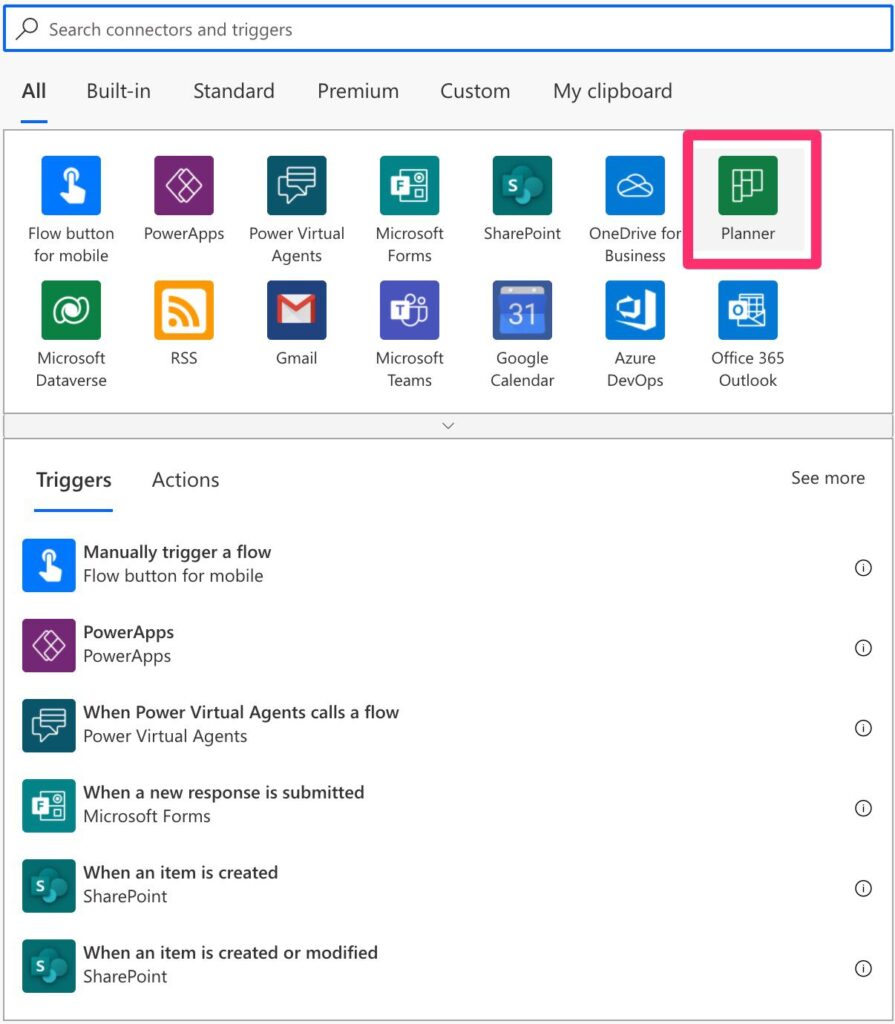
You can find it in the Planner’s section.

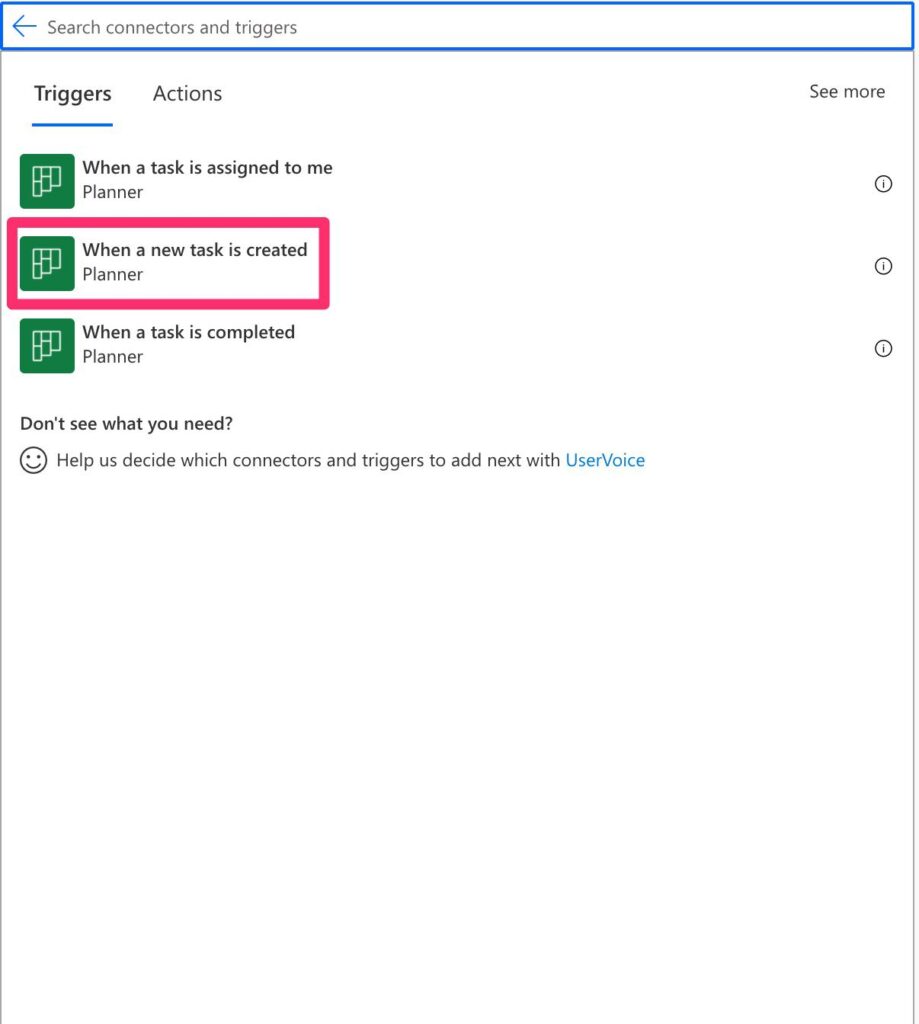
And then select it from the list.

Power Automate tends to save the most common triggers in the main screen, so check there before going through the full hierarchy. Also, you can use the search to find it quickly.
Usage
Triggers usually require little configuration. Usually, you need to define where to “point” and look for changes.

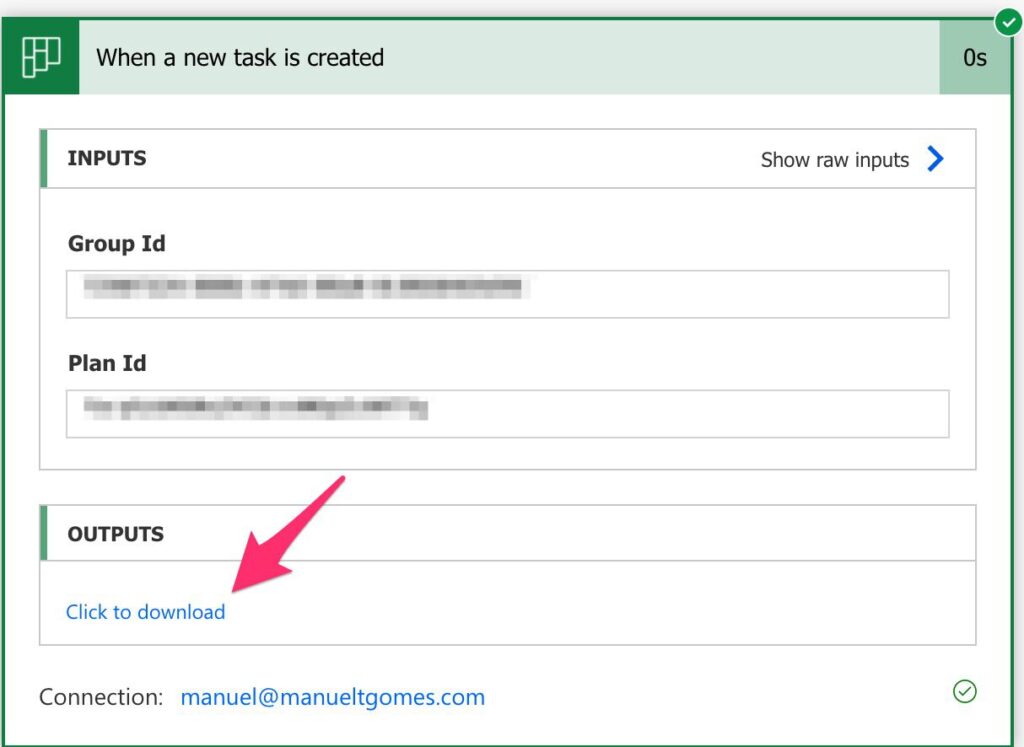
In the case of the Planner “when a new task is created” trigger, we need to define the following:
- Group Id – This list shows all A.D. Groups. You can find the complete list in your Azure Portal (you need to be an administrator to see the groups). These groups can be created automatically for you or defined, but this is a topic for another article. What’s important to know is that not all groups have planner instances, so you may see the next item empty.
- Plan Id – The unique identifier for a planner within the selected group. Please note that the plan must exist, so you can’t create one within the trigger.
Outputs
The trigger returns a lot of information in a JSON format, although the conversion from JSON is done automatically for you. Here’s an example:
{
    "headers": {
        "Transfer-Encoding": "chunked",
        "Vary": "Accept-Encoding",
        "Strict-Transport-Security": "max-age=31536000",
        "request-id": "8b2e38e7-13c8-4ad1-836b-bfd79f2980ae",
        "client-request-id": "8b2e38e7-13c8-4ad1-836b-bfd79f2980ae",
        "x-ms-ags-diagnostic": "{\"ServerInfo\":{\"DataCenter\":\"West Europe\",\"Slice\":\"E\",\"Ring\":\"5\",\"ScaleUnit\":\"003\",\"RoleInstance\":\"AM1PEPF000051D6\"}}",
        "OData-Version": "4.0",
        "retry-after": "60",
        "Timing-Allow-Origin": "*",
        "x-ms-apihub-cached-response": "true",
        "Cache-Control": "no-cache",
        "Date": "Wed, 23 Jun 2021 10:51:38 GMT",
        "Location": "https://europe-002.azure-apim.net/apim/planner/shared-planner-1dafa0a6-7d3f-4c33-bb9a-d5ab-cbbffb7e/v2/v1.0/planner/onnewtask_trigger/plans/fa-pSzbK60u2VCQcvxNGpZcAHT7g/tasks?groupId=7298f324-11111-1111-11111-8c0660469d96&triggerState=6376004224511111111",
        "Content-Type": "application/json",
        "Content-Length": "1124"
    },
    "body": {
        "@odata.etag": "W/\"JzEtVGFzayAgQEBAQEBAQEBAQEBAQEBARCc=\"",
        "planId": "fa-pSzbK1112VCQ1111NGpZcAHT7g",
        "bucketId": "fPjsGArNo011111_PYHU11111LWX-",
        "title": "Item 1",
        "orderHint": "8585771615111118015Pi",
        "assigneePriority": "",
        "percentComplete": 0,
        "createdDateTime": "2021-06-23T10:50:45.1150323Z",
        "hasDescription": false,
        "previewType": "automatic",
        "referenceCount": 0,
        "checklistItemCount": 0,
        "activeChecklistItemCount": 0,
        "id": "GP11QCNV111TPWT111fJC511111MSn",
        "createdBy": {
            "user": {
                "id": "b6a19137-1111-1111-1111-1a43ba4739fb"
            }
        },
        "appliedCategories": {},
        "assignments": {},
        "_assignments": []
    }
}
I’m showing you this because it’s essential to read this information when debugging your Flow. To know what the trigger returned:

Then click the “outputs.”

You’ll get a “raw” version of the JSON displayed above.

It’s essential to look at the “body” section:

With this information, you can check if the data you expect is the data that the Flow gets. The fields are readable, so you know if you have “assignments”: {} then there’s one assigned to the task, for example.
If something’s wrong, but you get the correct data, you know there’s an issue somewhere in your Flow.
Limitations
Some Microsoft Planner Task fields won’t be returned in the trigger. You need to use the “Get task details” action to get them.
The items are:
- Description, but you’ll get a flag indicating if there’s a description or not
- Last change date (“Get task details” action won’t return this)
- The name of the person that created it. You must use the “Get user profile” action.
- The labels (“Get task details” action won’t return this)
- The start and due date (“Get task details” action won’t return this)
- The attachments (“Get task details” action won’t return this)
- The comments (“Get task details” action won’t return this)
You’re not able to do any filter on the data or when it will trigger. The Flow will run for all
Recommendations
Here are some things to keep in mind.
Name it correctly
Although the name is descriptive, constantly adjust it to the correct type of task you’re getting. For example, “When a new task is created in the To-Do List Planner.” Always build the name so that other people can understand what you are using without opening the trigger and checking the details.
Always add a comment.
Adding a comment will also help to avoid mistakes. You don’t need to indicate the group or the planner because the person can see it, but it’s essential to define what data is returned, if there are restrictions or filters, and if the data is sorted. Include any other data that is important to know. It’s essential to enable faster debugging when something goes wrong.
Always deal with errors.
I know that this is strange since the trigger usually won’t return an error. But it’s important to validate if the received data is in the format you expect. For example, if you have a field that is essential for your Flow to run but is not in the trigger, it doesn’t make sense to continue. Return an error and issue warnings so these errors won’t fall through the cracks.
Back to the Power Automate Trigger Reference.


