
Getting data into a Power Automate flow is the easy part. Showing it to a human in a readable way is where many flows fall apart.
The "Create HTML Table" action takes an array of objects and turns it into an HTML table that you can drop into an email, a Teams message, or a web page.
It belongs to the Data Operation group, the same family as the "Compose" action and the "Select" action, and like its siblings, it's a built-in standard action.
No premium license required, and it doesn't even need a connection since everything runs inside the workflow engine.
Where to find it?
Search for "html table" in the action picker, and you'll find it under the "Data Operation" group.
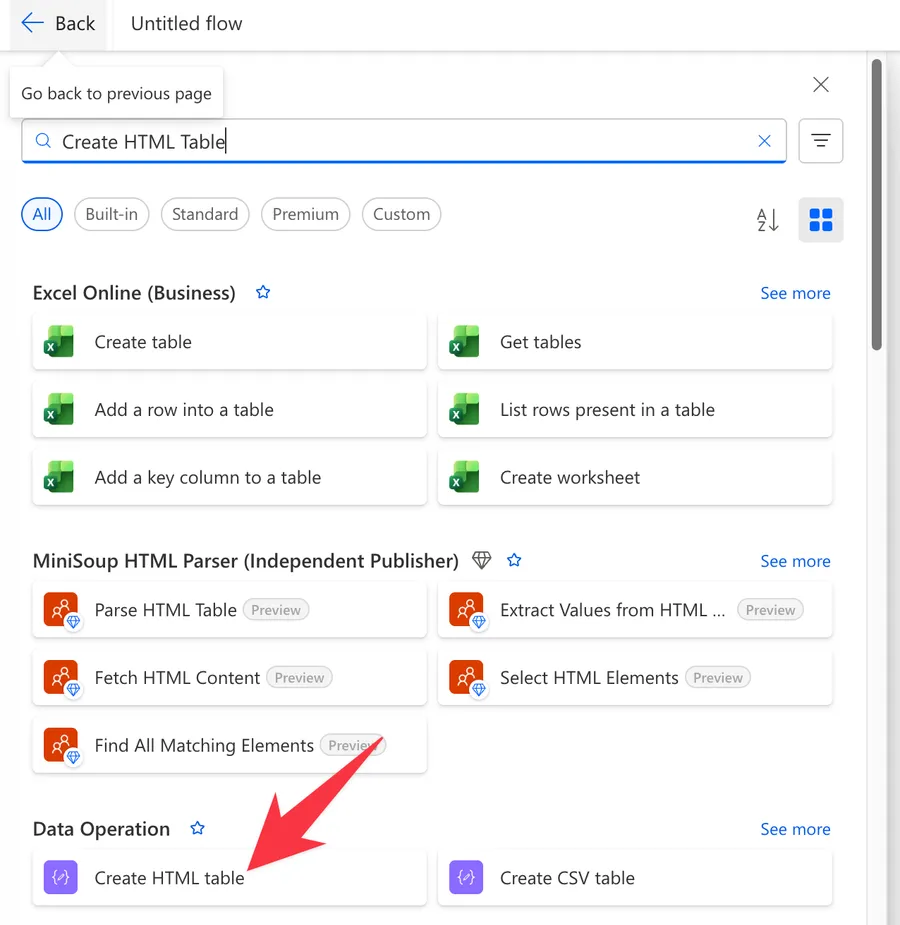
Here's what it looks like.
The "Create CSV Table" action lives in the same group and works the same way, but produces plain comma-separated text instead of HTML. The "HTML to Text" action does the opposite job, stripping HTML down to plain text. And Power Automate Desktop has its own "Create HTML" action, which is a different product entirely. This article covers the cloud flows action.
Now that we know how to find it, let's understand how to use it.
Usage
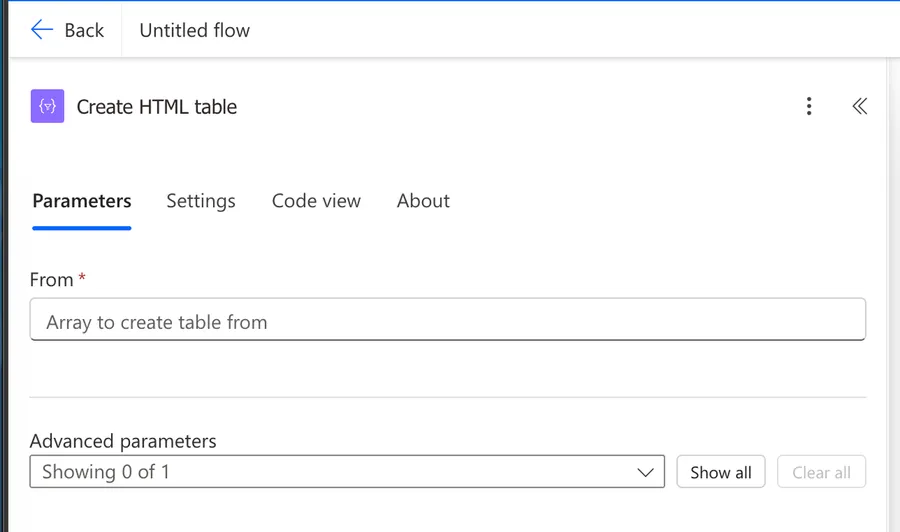
The action only has two parameters, but the second one hides most of the power.
From
The array of objects to convert. Each object becomes a row, and each property becomes a column. For example:
[
  { "Name": "Maria", "City": "Lisbon", "Tickets": 12 },
  { "Name": "João", "City": "Porto", "Tickets": 7 }
]
You'll usually feed it the output of another action, like the "Get Items" action from SharePoint, a "Filter Array" action, or a "Select" action.
Columns
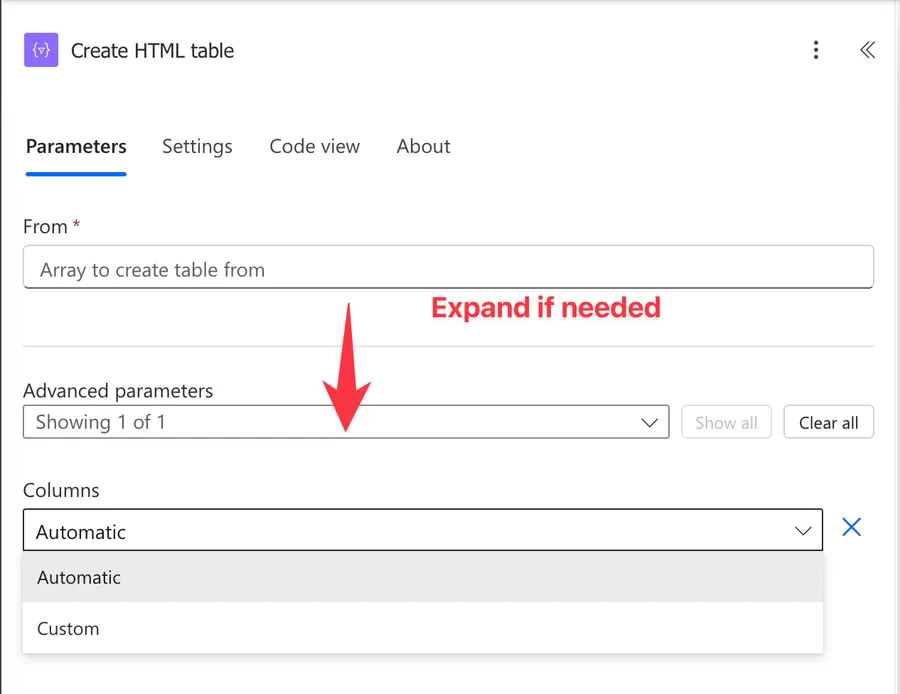
You'll find it under the advanced parameters, with two modes:
- Automatic, the default. Every property in the objects becomes a column, and the property name becomes the header.
- Custom, where you define each column yourself with a "Header" and a "Value" pair.
In Custom mode, the "Value" is usually an expression that pulls a property from the current object using the "item" function:
item()?['Name']
Here's the breakdown:
- The "item" function returns the object the action is currently processing, the same way it works inside an "Apply to each" action.
?['Name']safely navigates to the Name property. The question mark returns null instead of crashing the flow if the property doesn't exist. I explain why you need the question mark operator in detail in another article.
Custom mode is how you pick only the columns you want, rename headers into something friendly, and control the column order. Microsoft also documents that leaving the "Header" field empty removes the header text for that column, which is handy when you only want the values.
Using the action's outputs
The action returns a single output:
| Output | Description | Example Value |
|---|---|---|
| Output | The generated HTML markup as text | <table><thead><tr><th>Name</th>...</table> |
The markup uses the standard table, thead, tbody, th, and td tags, with no attributes and no styling. To grab it in an expression:
body('Create_HTML_table')
- The "body" function returns the output of the action with that name.
- Note the underscores. Power Automate replaces the spaces in the action's name when you reference it in expressions.
You can also use the "outputs" function with outputs('Create_HTML_table')?['body'], which gets you the same value.
Both the input array and the generated HTML show up in the run history. If the table contains sensitive data, turn on Secure Inputs and Secure Outputs in the action's settings.
There's no retry policy to configure since the action never calls an external service. If it fails, the problem is the data, not connectivity.
Non-intuitive behaviors
There's zero styling support
The output is bare HTML with no borders, no padding, and no colors, and there's no parameter to change that. Styling happens after the table is built, not inside the action.
The cleanest approach is a "Compose" action that puts a <style> block in front of the table. The block targets the plain tags the action produces, so you never touch the table markup itself:
<style>
table { border-collapse: collapse; }
table td, table th { border: 1px solid #AAAAAA; padding: 3px 10px; }
table tr:nth-child(even) { background: #D9E1F2; }
table thead { background: #4472C4; }
table thead th { color: #FFFFFF; text-align: left; }
</style>
Paste that into the Compose action, then add the table output right after it. One style block covers every cell, however many columns you end up with.
Some email clients ignore <style> blocks and only respect inline styles. For those, use the "replace" function to rewrite the opening tag instead:
replace(body('Create_HTML_table'), '<table>', '<table border="1" style="border-collapse: collapse">')
- The "body" function fetches the generated HTML.
- The "replace" function finds the plain
<table>opening tag. - It swaps it for a version with a border attribute and inline CSS.
You can chain several "replace" calls to reach the <th> and <td> tags too.
Nested objects show up as raw JSON
If a property contains an object or an array, like a SharePoint person column, the cell displays the raw JSON text. Flatten the data first with a "Select" action so every value is a simple string or number.
Dates and numbers come through raw
A date column arrives in ISO 8601 format, the international standard that machines like and people don't, so the cell reads 2026-01-12T00:00:00Z. Excel dates are less readable still, arriving as the underlying serial number.
The action has no formatting options, so format the values before they reach it. Put a "Select" action in front and wrap each value with the "formatDateTime" function:
formatDateTime(item()?['DueDate'], 'dd/MM/yyyy')
Numbers work the same way with the "formatNumber" function, for example formatNumber(item()?['Amount'], 'C2') for currency.
HTML inside values gets encoded
Putting <a href="..."> in a value doesn't produce a link. The action encodes the angle brackets, so readers see the literal tag as text.
Decode them afterwards in a "Compose" action with nested "replace" calls:
replace(replace(replace(body('Create_HTML_table'), '<', '<'), '>', '>'), '"', '"')
That turns every encoded tag in the table back into real markup. If you only want to decode your own HTML and leave the rest of the data untouched, put a unique placeholder in the value instead, then replace just that placeholder once the table is built.
Line breaks in values collapse
A newline inside a value survives into the HTML source, but HTML treats a newline as a space, so multi-line text arrives squashed onto a single line.
Swap the newlines for <br> tags after the table is built. The "decodeUriComponent" function turns the escape code %0A back into a newline character, which is the reliable way to type one inside an expression:
replace(body('Create_HTML_table'), decodeUriComponent('%0A'), '<br>')
Automatic columns take everything
Automatic mode includes every property in the objects, in the order they appear. Pass it the raw output of a connector and you'll get a very wide table full of internal fields. Shape the array first or switch to Custom columns.
The designer may wrap it in an "Apply to each"
The action takes a whole array at once, so it needs no loop. If you pick a single field from the dynamic content list instead of the array itself, the designer adds an "Apply to each" action around it, and you get one small table per row rather than one table.
Pick the array output itself, or set the "From" field with an expression such as body('Get_items')?['value'], and the loop never appears.
Limitations
The input must be an array of objects
An array of plain values like ["a", "b", "c"] won't work in Automatic mode. The action needs objects to infer the columns from. Either define Custom columns with item() as the value or reshape the array with a "Select" action first.
No sorting or grouping
Rows come out in exactly the order they arrive. If you need the table sorted, sort the data upstream, for example with an OData $orderby in the "Get Items" action.
Horizontal layout only
The headers always form the single top row. If you want a vertical layout, with the labels down the left side, you'll need to build the HTML yourself in a "Compose" action.
Troubleshooting Common Errors
The property 'columns' must be specified unless the 'from' property value is an array of objects
Cause: The "From" input is an array of plain values, or it isn't an array at all, so Automatic mode can't figure out the columns.
Solution: Check the action's inputs in the run history to see what actually arrived. Reshape the data into an array of objects with a "Select" action, or define Custom columns.
The email shows the HTML code instead of a table
Cause: The email action is sending the body as plain text.
Solution: In the "Send an email notification" action, set the "Is HTML" option to Yes. The Office 365 Outlook "Send an email (V2)" action renders HTML by default, so this usually catches people using other email actions.
The table renders but the cells are empty
Cause: The property names in your item() expressions don't match the data. Property names are case-sensitive, and the ?[] safe navigation returns null silently instead of failing.
Solution: Open the run history, check the action's raw inputs, and copy the property names exactly as they appear there.
Recommendations
Here are some things to keep in mind.
Shape the data with "Select" first
The "Select" action and this action are a natural pair. "Select" picks the properties, renames them, flattens nested values, and formats dates and numbers, and then Automatic columns do the rest. It keeps the table action simple and the expressions in one place.
Don't send empty tables
An empty input array doesn't fail the action. You just get a table with nothing in it. Check first with the "length" function or the "empty" function inside a "Condition" action, and skip the email when there's nothing to report.
Name it correctly
The name is super important since the table is usually one step in a longer reporting chain. Always build the name so others can understand what data it renders without opening the action, for example, "Create HTML Table, Overdue invoices for weekly email".
Always add a comment
Adding a comment will also help avoid mistakes. Indicate where the source array comes from and how it was filtered or shaped. It's essential to enable faster debugging when something goes wrong.
Always deal with errors
Have your Flow fail gracefully and notify someone that something failed. A silently failing Flow in Power Automate can go unnoticed for a long time, or cascade into worse errors further down the chain. I have a template that you can use to help you make your Flow resistant to issues. You can check all details here.
Final Thoughts
The "Create HTML Table" action is one of those small actions that quietly powers a huge number of reporting flows. It does one job, array in, table out, and does it reliably, as long as you accept that styling and data shaping happen around it, not inside it. Pair it with the "Select" action before and a style block after, and you have a clean, readable report in three steps. And if you ever need to go the other way, I wrote about converting an HTML table back into JSON too.
Back to the Power Automate Action Reference.
Photo by Jackson Sophat on Unsplash


No comments yet
Be the first to share your thoughts on this article!