
Although Excel is known for being a standalone application, there's a lot that we can do with Power Automate and tasks that we can automate. Today we'll explore how to automate the update of rows in an Excel file by using the "Update a Row" action. This action works for files in SharePoint, Teams, or OneDrive for Business, so let's look at how to use it. One thing to keep in mind from the start: the values you provide overwrite the cells you map, and any column you leave blank stays untouched.
Where to find it?
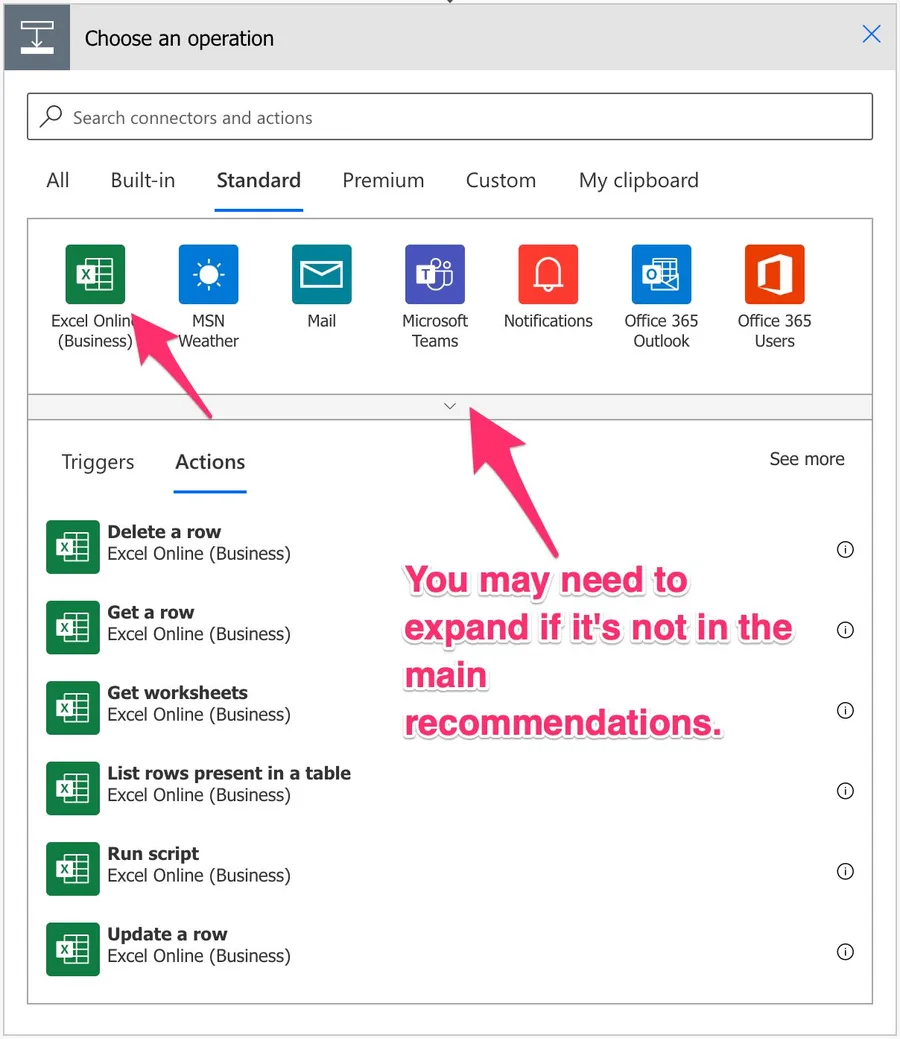
You can find it under "Standard".

Pick "Excel Online". You may see or need to expand the list depending on your suggestions.
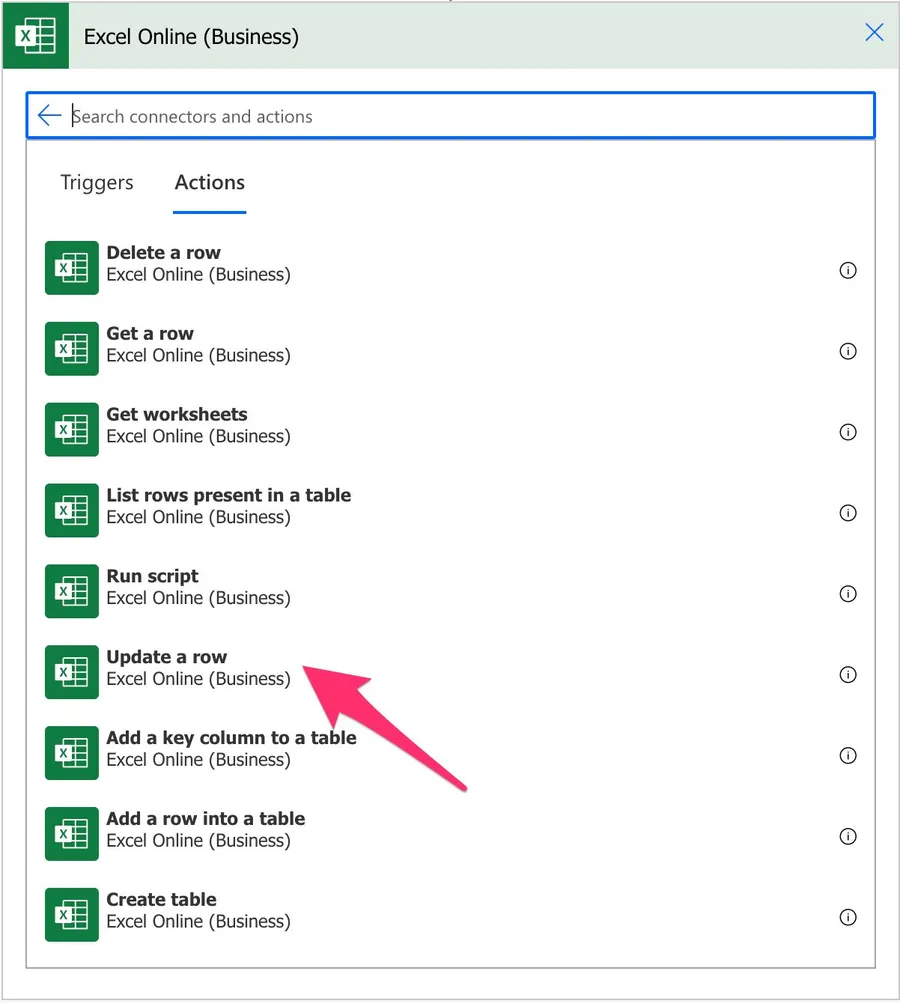
Select the "Update a Row" action:
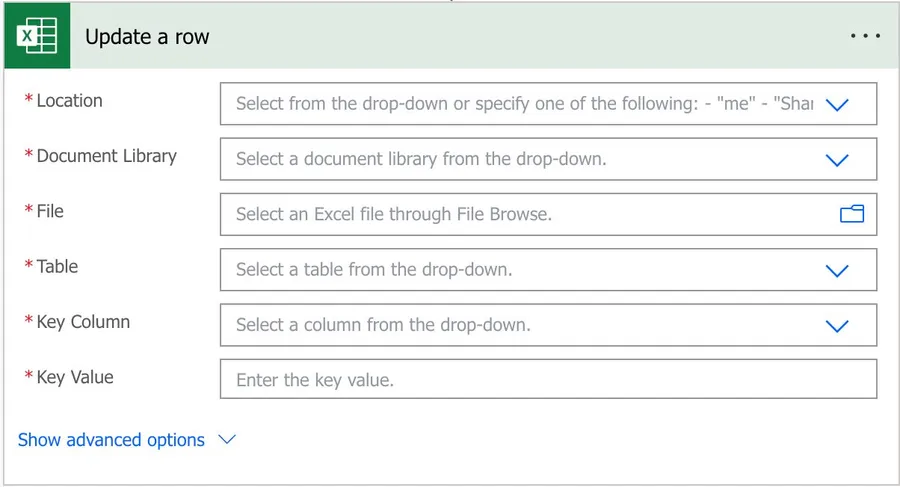
Here's what it looks like.
Power Automate tends to save the most common actions in the main screen, so check there before going through the full hierarchy. Also, you can use the search to find it quickly.
Now that we know how to find it, let's understand how to use it.
Usage
Before you can point the action at anything, the data in your Excel file needs to live inside a table. There are a few reasons Microsoft did this, but the most important one is that Power Automate needs a reliable way to identify the data you want, and a worksheet on its own doesn't give it one. It also makes inserting, updating, and deleting columns a lot easier.
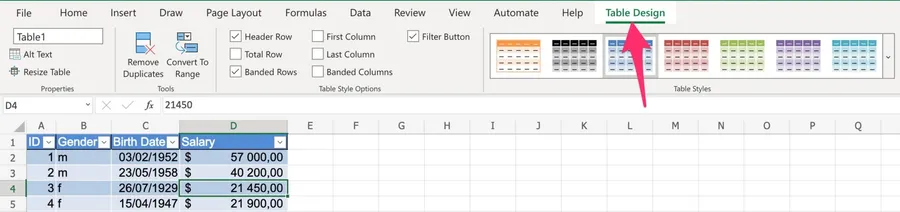
If you're not sure your file already has a table, open it, select a row, and check whether you have a "Table Design" tab in the ribbon.
If it isn't there, you'll need to create one first. I'm using Excel for macOS, but it works the same way in the Windows version. First, select the data.
Then press "Insert" and then "Table".
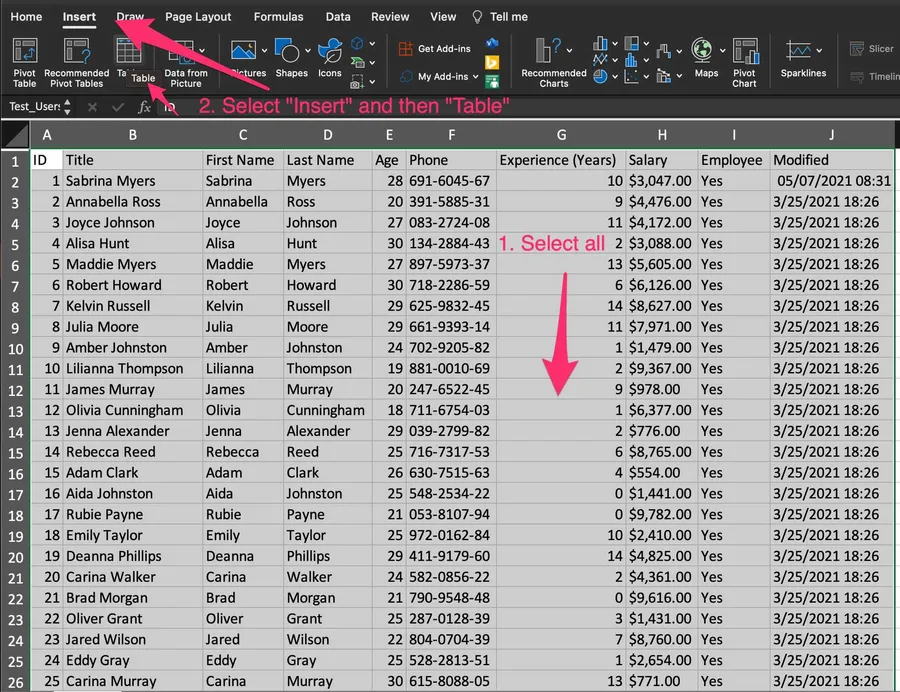
Don't forget to select "headers" if your data indeed has headers.
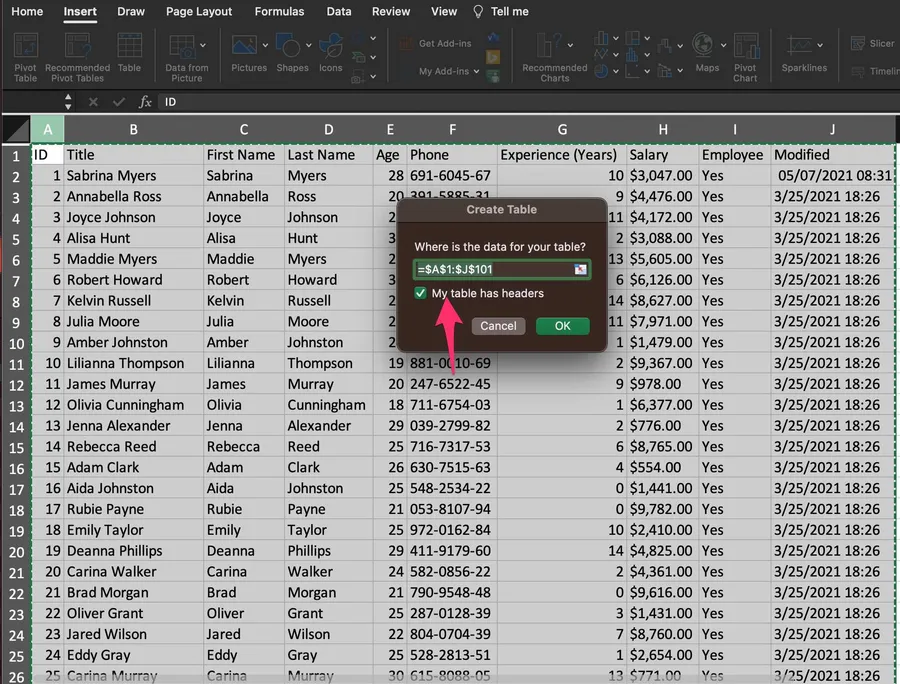
Here's what it looks like.
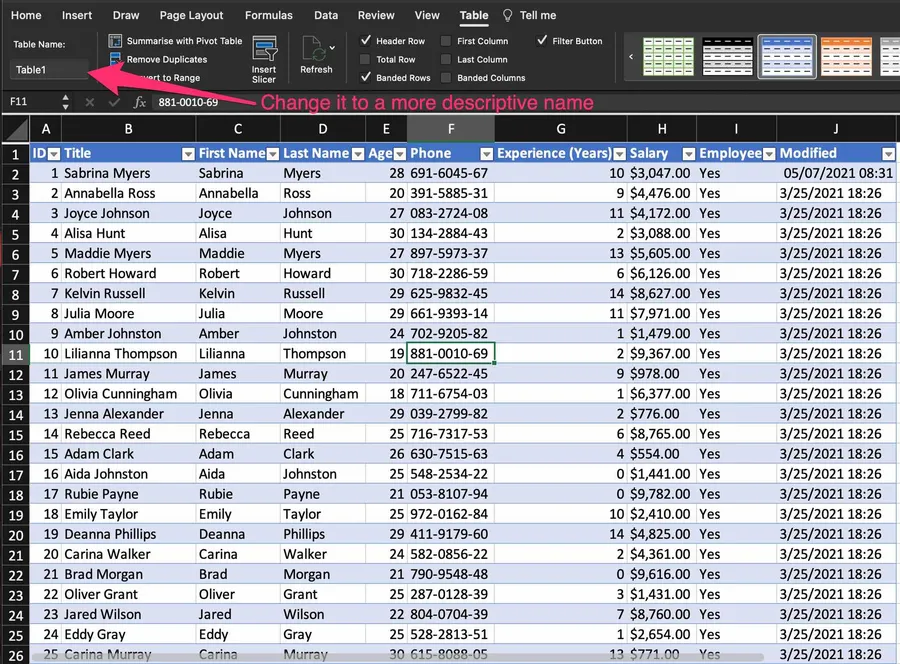
With a table in place, let's look at the fields the action gives us, one by one.
Location
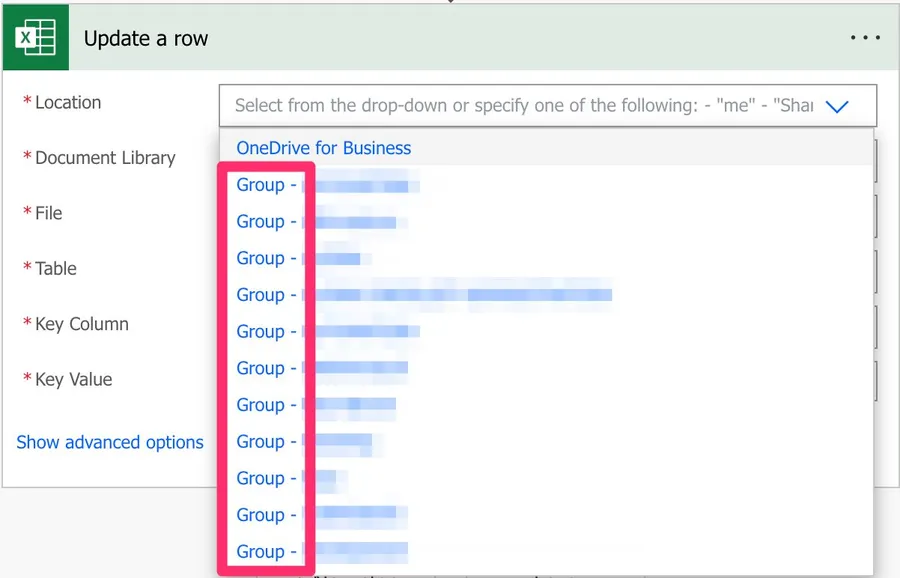
We can use SharePoint, Teams, or OneDrive for Business to find our Excel files. To do it, select the location where you want to find the data. For example, for OneDrive for Business:

As you see above, you have a lot of "Groups" sites that are commonly Microsoft Teams sites.
If you're looking for SharePoint sites, they are commonly displayed like this:
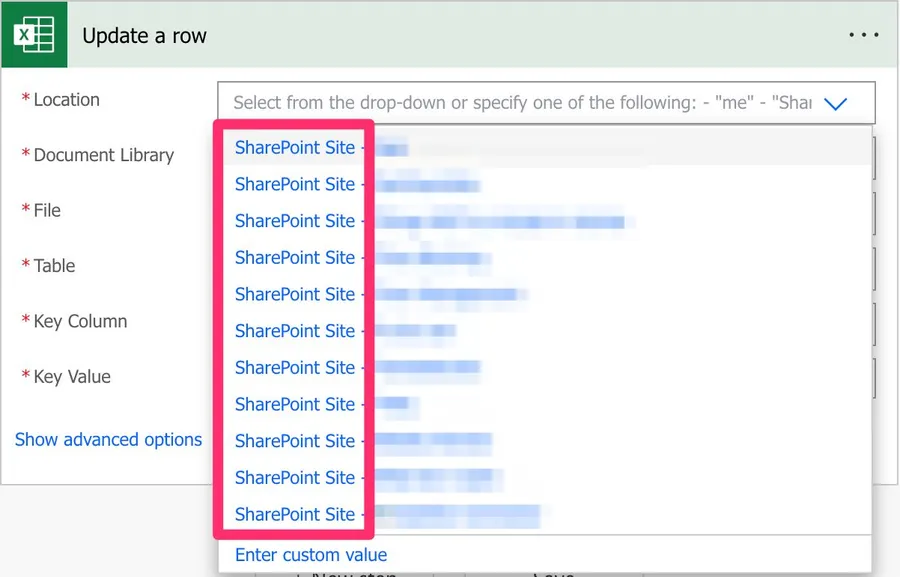
Since they all behave the same way, I'll refer only to SharePoint sites from now on, but keep in mind that you can also use Microsoft Teams and OneDrive for Business. I'll highlight the differences when appropriate.
Document Library
Since SharePoint sites can have multiple document libraries, we need to pick one from the list.
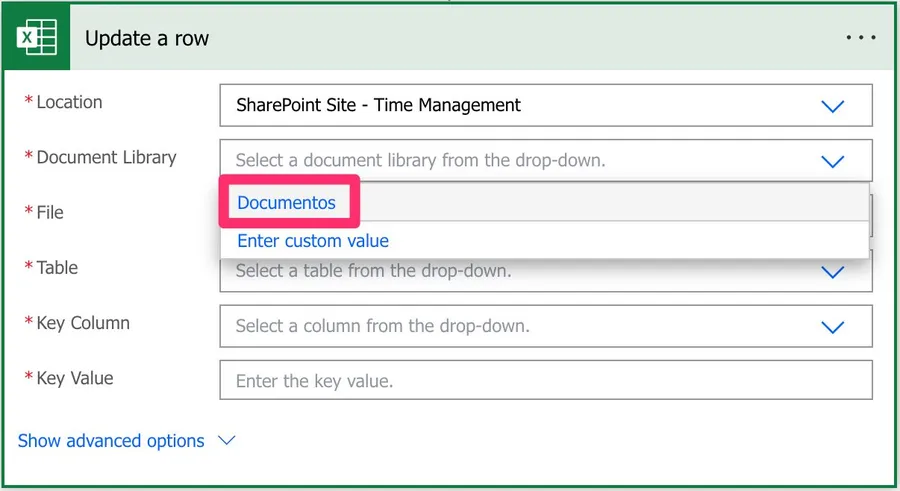
There's always one created by default called "Documents", or something different depending on your language, but since it's a mandatory field, you need to pick it. Otherwise, you won't be able to choose the file from the following field.
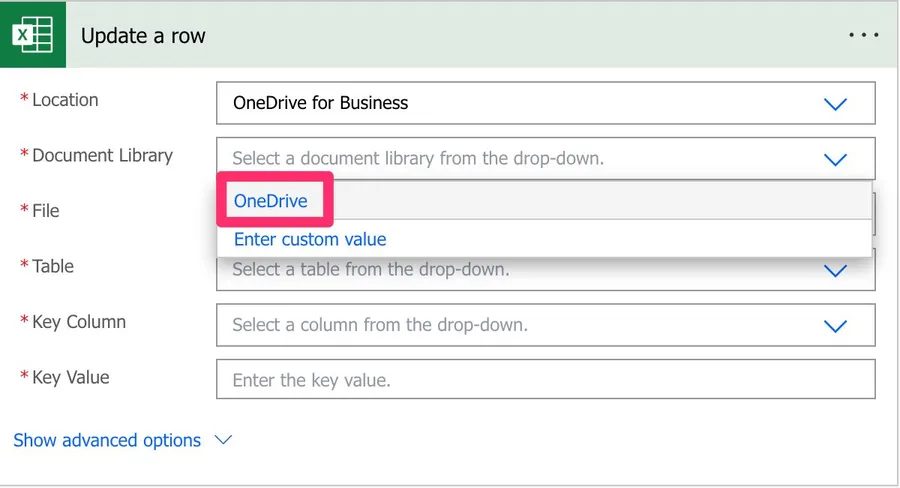
The same behavior occurs for OneDrive for Business, even if it's not possible to create document libraries there. Microsoft creates a document library that you can pick from the list.
File
Now that we have the locations defined, let's look at a file. You can pick the file in the "File Browser".
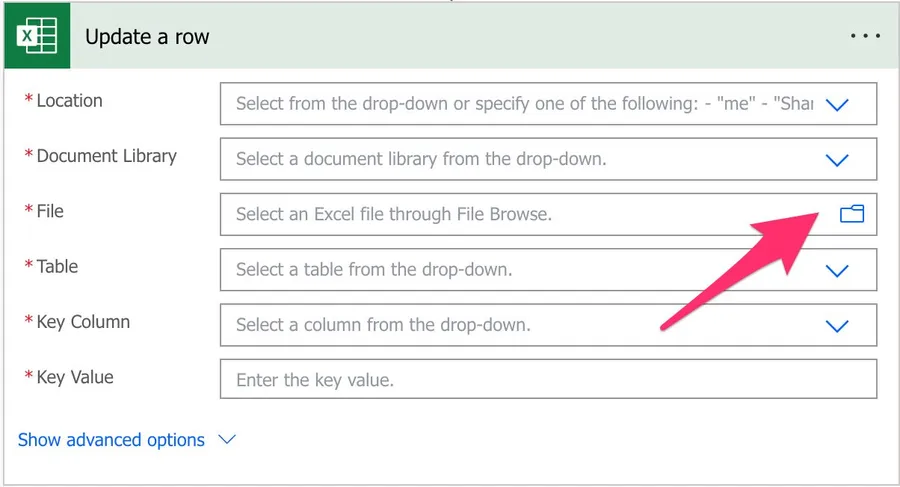
Or you can provide the path yourself, although I discourage this. Although you can do it, Power Automate sometimes returns strange errors related to the path, especially if the file has special characters. It's always recommended that you select the file directly in Power Automate's UI.
Table
Since the file can hold more than one table, we need to pick the one we want to work with from the dropdown.
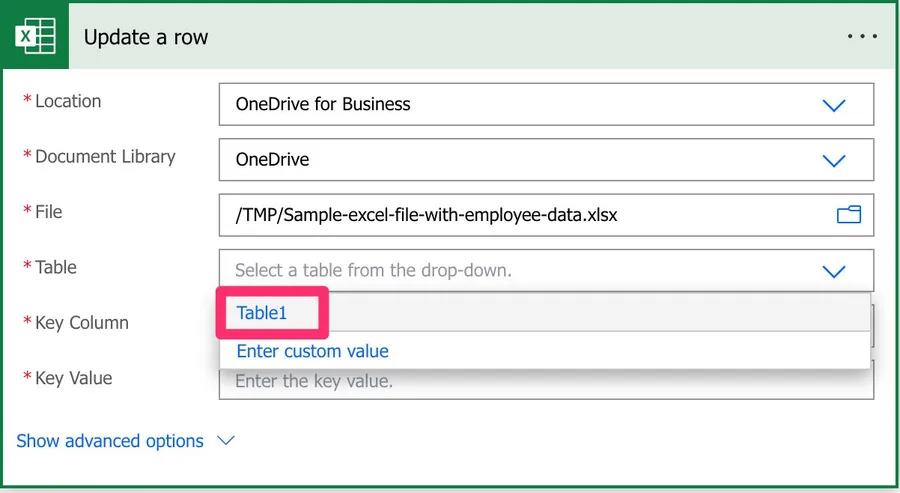
It's essential to define the one you want to manipulate. You can also provide the table's name as a "dynamic field", but to ensure that your Flows always work, I recommend picking it from the dropdown.
Key Column
Now that we have a file, we need to tell Power Automate how to identify the row we want to update. Since there could be multiple tables in Excel, Microsoft requires a key column that identifies the row inside the defined table. If you don't have one, you can use the "Add a key column to a table" action. Just know that it only adds an empty column, so you still need to fill it with unique values yourself, otherwise the update will never find a match.
Since we provided the path before, Power Automate checks the file and gives us a list of the columns in the provided table.
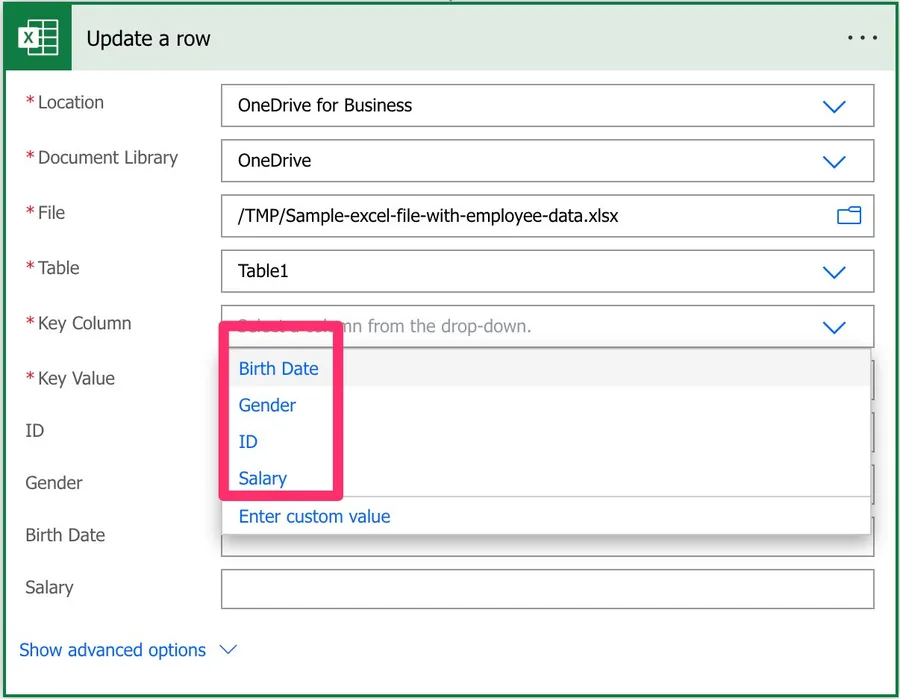
Notice that once we defined those fields, Power Automate added additional fields in the background for us to fill in. This is only possible because we are not dynamically providing any of the fields, which allows Power Automate to access the file, get the columns, and add them as fields.
Please be aware that if you dynamically define the path, table, or file, you need to provide the "key column" name yourself, since Power Automate won't find the list of columns before the Flow runs. When you type it, be careful with the casing, because the key column name is case-sensitive. "Id", "ID", and "id" are treated as three different columns, and the wrong one will simply not match.
A quick word on what to use as a key. It's tempting to reach for the internal "ItemInternalId", but that value is volatile and Microsoft doesn't support it as a key column, so stick to a real column you control. In case you don't know what "Key Columns" are, I have an article here that explains them in a lot of detail.
Key Value
Finally, we need a key value that identifies the row we want to update from the table. Notice that we're updating the item by providing an identifier, not the row number, since the same row can be inside multiple tables. The key value needs to be unique within the "key column" and should be a number.
Uniqueness matters more than it looks. If two rows share the same key value, Power Automate updates only the first match it finds and silently ignores the rest, so a duplicate can quietly leave half your data unchanged.
Advanced Properties
As you can see, there are also advanced properties that we can take advantage of. When you toggle them, you get an additional field as follows:
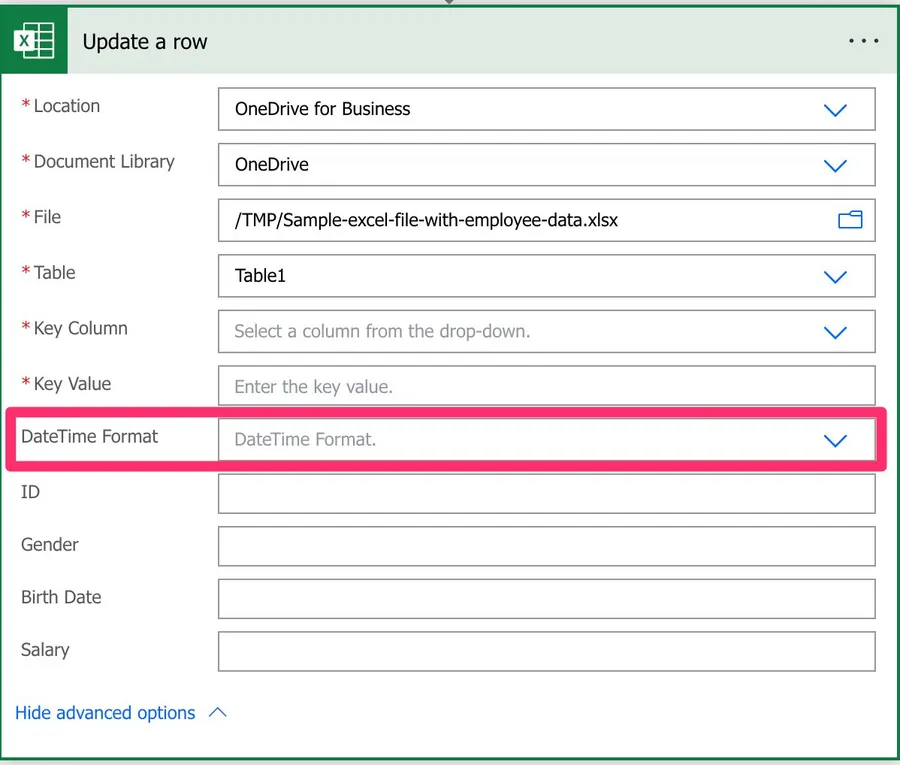
This field defines, for the date fields, how the date should be provided. Remember that Excel internally stores dates in a numeric format, even if it's presented to you differently. That number is the count of days since 30 December 1899, and the time of day is the decimal part. So Power Automate enables us to define the format of the data with two options:
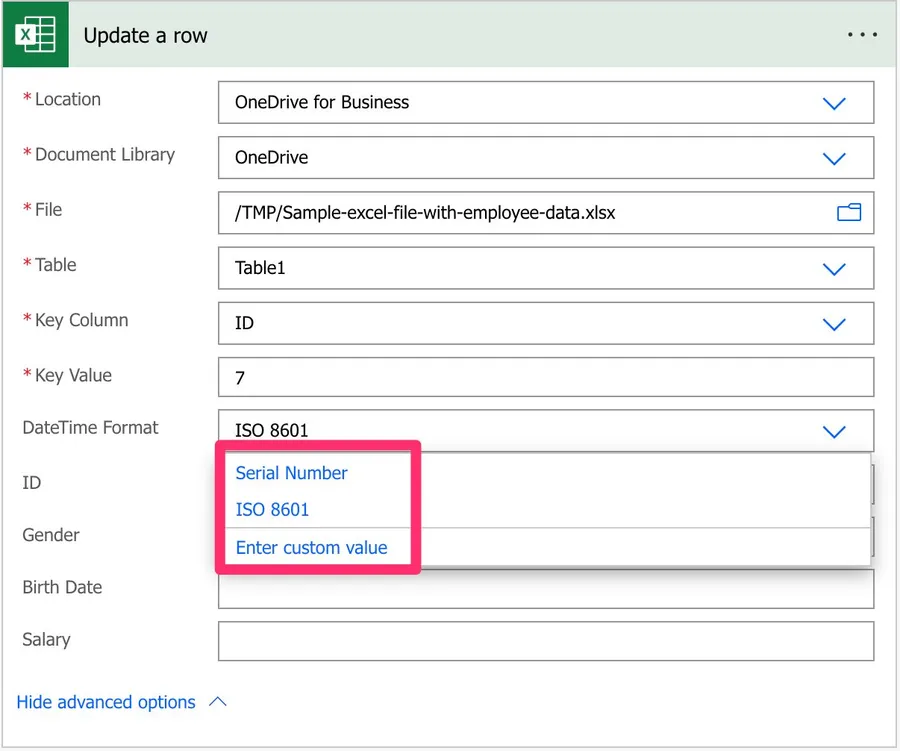
The "Serial Number" is the "native" way that Excel stores the date, meaning that if you want to provide a date, you need to provide a number. With "ISO 8601" you give a date that makes more sense to us, but in a fixed format. Functions in Power Automate, like the utcNow() function, return the date already in that format. If you have a date in a string, you can use the formatDateTime function to format it correctly. Just remember that Power Automate works in UTC, so an ISO value that ends in "Z" can look shifted compared to your local time.
A quick example
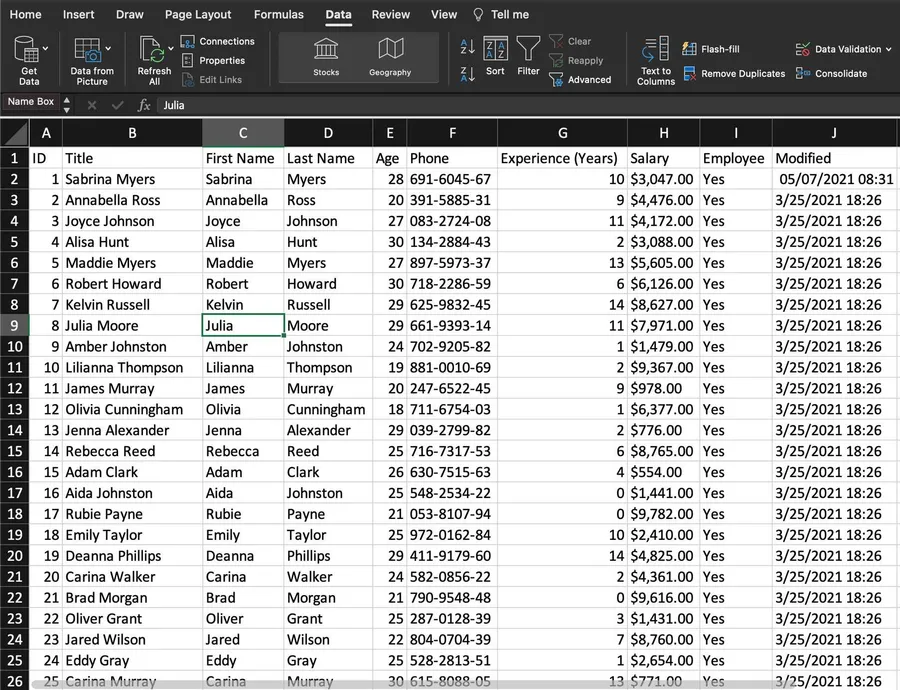
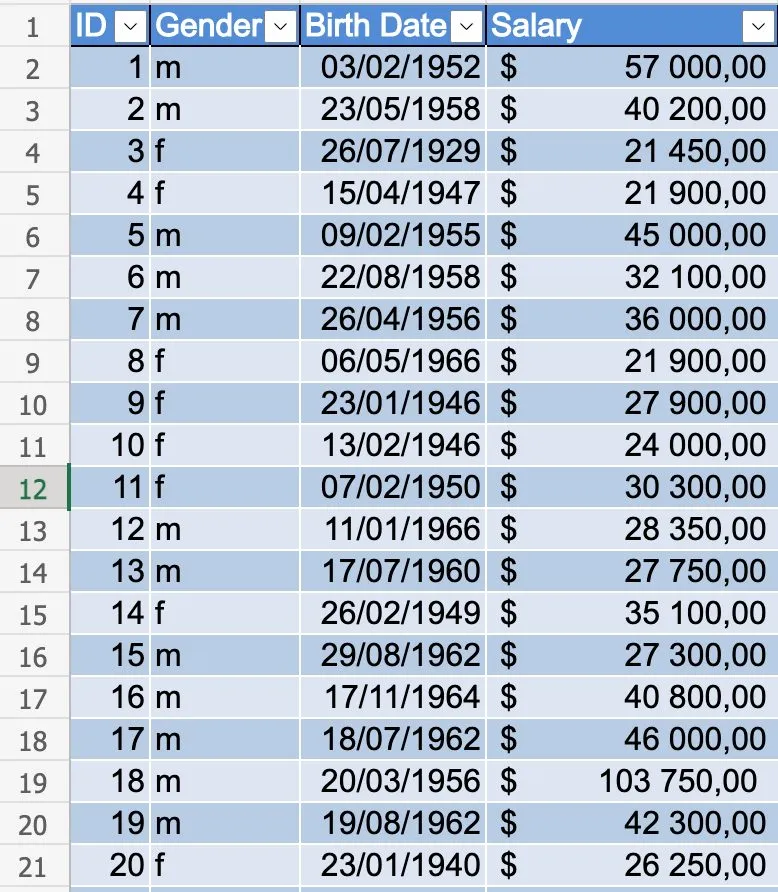
Let's look at a test file with anonymous employee information.
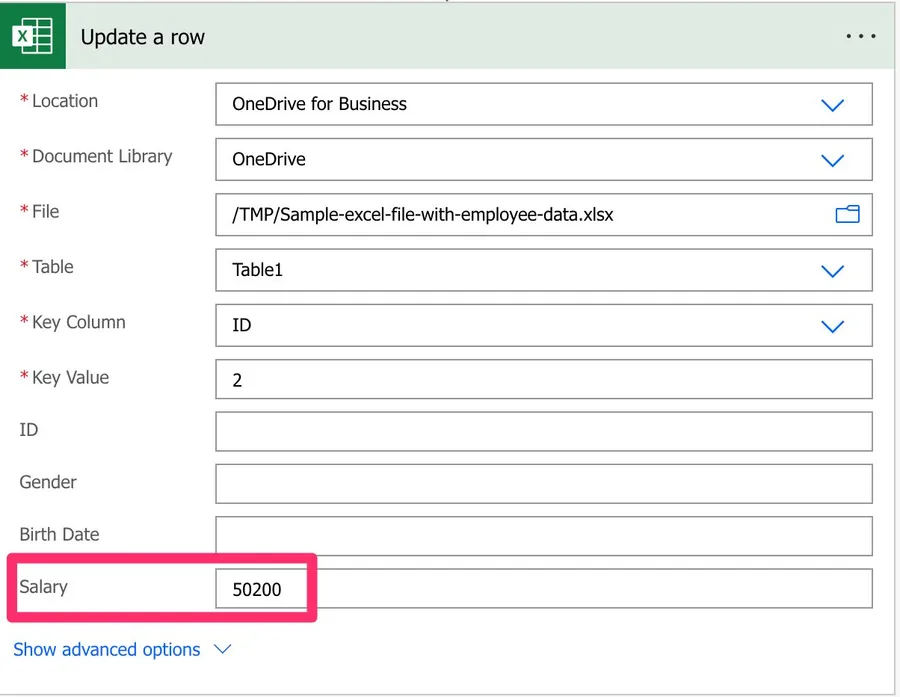
Let's say we want to promote a person and update their salary to another value. Here's what it looks like:
After we run it, here's what the Excel file looks like:

Be careful to ensure that you have proper error handling, especially after this action, since the action will fail if the ID cannot be found with an exception like this:
No row was found with Id '3'.
Non-intuitive behaviors
If you leave the values empty, it doesn't mean you want to delete the values in Excel for that column. It means that you don't want to make changes to that field. Notice the example above where I only filled in the "Salary" field, since that was the only one I wanted to update.
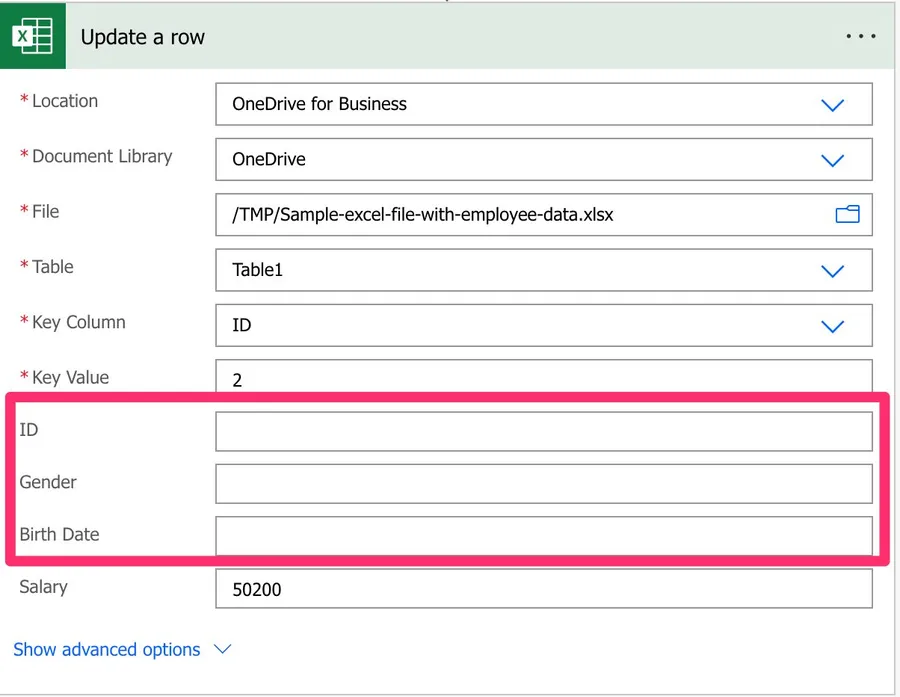
There's a good reason to map only what you actually want to change, beyond keeping things tidy. Every time Power Automate fetches a value from Excel and sends it back, the data is slightly converted, for example integers, percentages, and dates. So any field you map gets rewritten, even with the same value, and that round trip is a chance for the data type to drift. This is also why a value like a postal code with a leading zero, or a very long number, can come back changed, with the zero dropped or the number flipped into scientific notation. If a column needs to keep its exact text, format that column as Text in Excel and send the value as a string. By mapping only the column you're changing, you make the intent obvious and you avoid putting the other columns at risk.
If you want to remove the value from a column, please use the "null" special value that will signal to Power Automate that the information should be removed from the selected item.
Limitations
It could have been a temporary problem, but I had a lot of issues with some key column names, like "identifier", for example. If you're having issues with Flows returning strange error messages, consider changing to something like "Key Column". On a related note, avoid column headers that are only a number, since those can also confuse the action.
The "Update a Row" action only supports Excel Workbook files, so the workbook needs to be either ".xlsx" or ".xlsb". Older formats like ".xls" or a ".csv" won't work, and you'll need to convert them first.
A few documented limits are worth knowing before you build something big around this action:
- The Excel file can be at most 25 MB, and a single request can carry up to 5 MB.
- The connector is throttled at 100 calls per 60 seconds per connection.
- After Power Automate touches a file, it can hold a lock on it for up to 6 minutes.
- Changes can take up to 30 seconds to show up in the file, so don't panic if an update isn't instant.
- A single table supports at most two different key column names across all your Flows. If you go beyond that, operations start to fail in confusing ways.
Updating a lot of rows
The "Update a Row" action updates a single row per call, which is perfect for the day-to-day case. The trouble starts when people drop it inside an "Apply to each" and try to update hundreds or thousands of rows. Each row is one API call, and the connector is throttled at 100 calls per 60 seconds, so large loops slow to a crawl and can start failing with "429 Too many requests".
There's also a safety point that catches people out. Microsoft doesn't support writing to the same file from more than one place at the same time, so don't run parallel branches or several Flows against the same workbook, and set the "Apply to each" concurrency control to 1 when it loops over update actions. Otherwise you risk merge conflicts and lost data.
When you need to update a lot of rows, there's a much faster path. The "Run script" action lets you run an Office Script (a small piece of TypeScript) that reads, processes, and writes inside Excel's own engine in a single call, instead of one round trip per row. Flows that took many minutes in a loop can drop to seconds. A few things to keep in mind before you reach for it:
- "Run script" has its own limits, currently 3 calls every 10 seconds and 1600 calls per day.
- It supports macro-enabled workbooks (".xlsm") on top of the usual ".xlsx".
- It isn't available in the sovereign clouds (GCC, GCC High, and DoD).
For very high volume or when you need tighter control over retries, some people skip the connector entirely and call the Microsoft Graph API directly with an "HTTP" action. That's more work to set up, so I'd only go there once the simpler options stop keeping up.
Recommendations
Here are some things to keep in mind.
Keep IDs as strings or numbers
It's a lot easier to have identifiers as sequential numbers or random strings, since we can reference them without any transformation. Things become more error-prone if you use dates, since a date can be represented either as a string or a number. So keep things as deterministic and straightforward as possible.
Don't generate the ID for Excel
I'd strongly advise against calculating IDs yourself. You may look at an object and think, "I want the next one, so it's the ID+1". By coincidence it might be, but you can't be sure, so don't do it. Since the values can be anything and the sequence is not controlled, always reference identifiers you fetched in a previous action, like the "List rows present in a table" action, instead of inventing them.
Name it correctly
In this case, the name is super important to provide the context of what we're updating. Always build the name so that other people can understand what you're using without opening the action and checking the details.
Always add a comment
Adding a comment will also help avoid mistakes, since we can indicate why that row is updated in Excel. Also, if you're adding any elements dynamically, it's a good practice to explain how the values are obtained. Indicate where the path comes from, for example, if it's calculated and how. It's essential to enable faster debugging when something goes wrong.
Always deal with errors
Have your Flow fail graciously and notify someone that something failed. It's horrible to have failing Flows in Power Automate, since they may go unnoticed for a while or generate even worse errors. I have a template that you can use to help you make your Flow resistant to issues. You can check all the details here. Remember that if the "Key Value" doesn't exist in the "Key Column", the action will return an error, so it's essential to have a parallel branch that catches these cases. One subtle trap lives here too. If the action times out, often because of heavy recalculation on a large file, the default retry policy can fire the same write again, and you end up with duplicate updates. When a write isn't safe to repeat, set the action's retry policy to "None", and consider switching the workbook's calculation to manual to avoid the timeouts in the first place.
Final Thoughts
The "Update a Row" action is one of those everyday tools that does exactly what it says, as long as you respect the table and a unique key column. Map only the fields you actually want to change, keep an eye on the documented limits, and reach for Office Scripts once you find yourself updating rows in a loop. Get those right and updating Excel from your Flows becomes pleasantly boring.
Back to the Power Automate Action Reference.
Photo by Peter Herrmann on Unsplash


What if the key value I need is not a number?
Good afternoon Everyone, I also have the same problem, when I have a key value that I want to update in more than 1 row for 2 or 3column, but only 1 column at the top is updated, how to solve this problem. I want to update a row if the key value is 1, the status becomes OK. For my current problem, when I update only rows in 1 column, not all columns that have key value 1. Thank you. Example Key Status 1 OK 2 NG 1 OK