by
by One of the most common mistakes that I see in Power Apps is people hardcoding values in the app. Your app should not have multiple places where you store information, especially if it’s data that the user can pick. This is what’s called the “single source of truth.” One place to keep one piece of data. If that place is updated, the data is propagated everywhere.
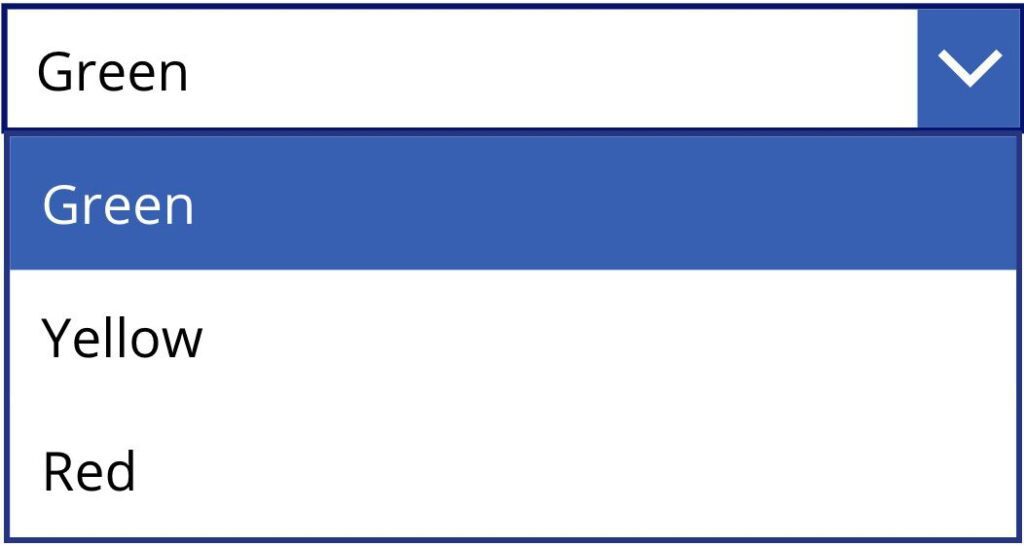
As an example, let’s think about a simple dropdown in Power Apps. Let’s say that we want to display the status based on a Choice column in SharePoint. The Choice column has the values configured and should use them in Power Apps. One of the major mistakes that I see is people copying the values from SharePoint to Power Apps and think:
“This won’t change and if it does it takes me 2 minutes to add a new one”
People either forget, leave the company, or changes happen in the worst possible time, so it’s good to have the app prepared to adjust to these changes.
Let’s define what is “Single Source of Truth” how it applies to Power Apps, and how we can avoid issues with our apps.
Why this example?
I picked this example on purpose because of the following. Let’s check the list first:
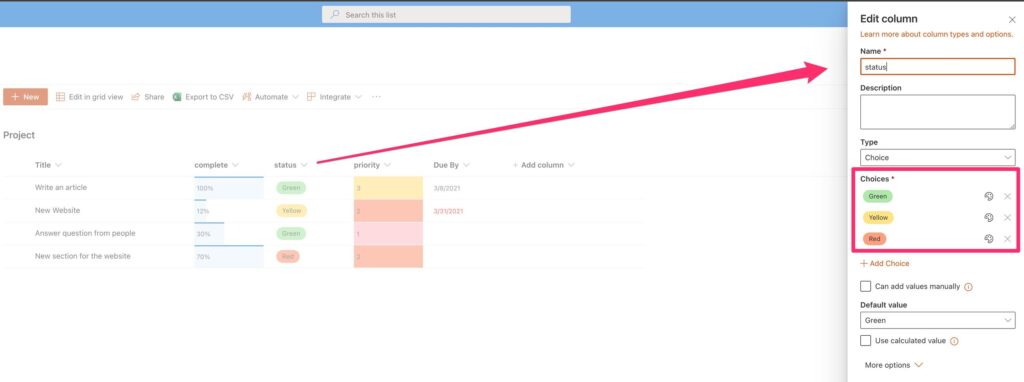
We have 3 choices so let’s create a dropdown in Power Apps.
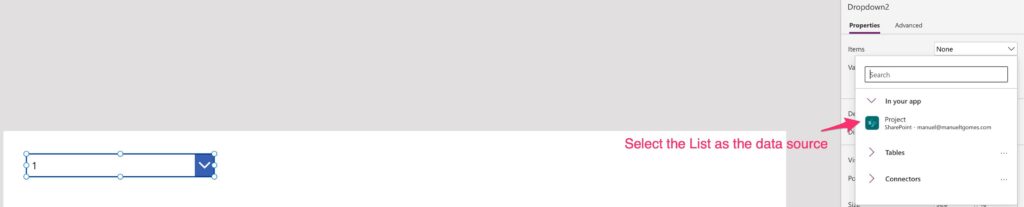
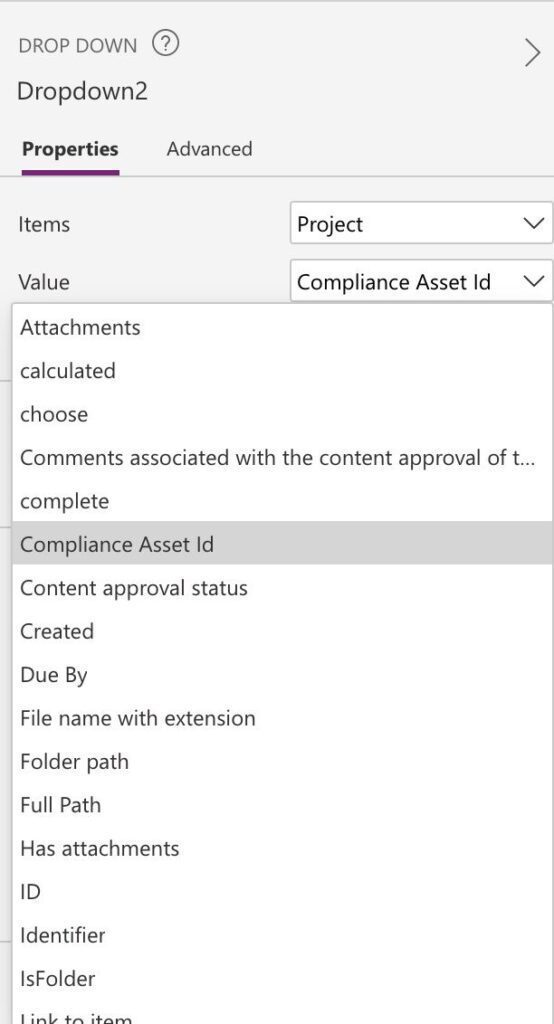
And then select the data source.
If you look at the list above, there’s no “status” column. This is the part where errors happen. Since there are only 3 values, Let’s create them and be done with it. But what if someone adds another value to SharePoint? It won’t show up in the Power App. One bug that could avoid.
Let’s check how to fix this issue.
Single Source of Truth
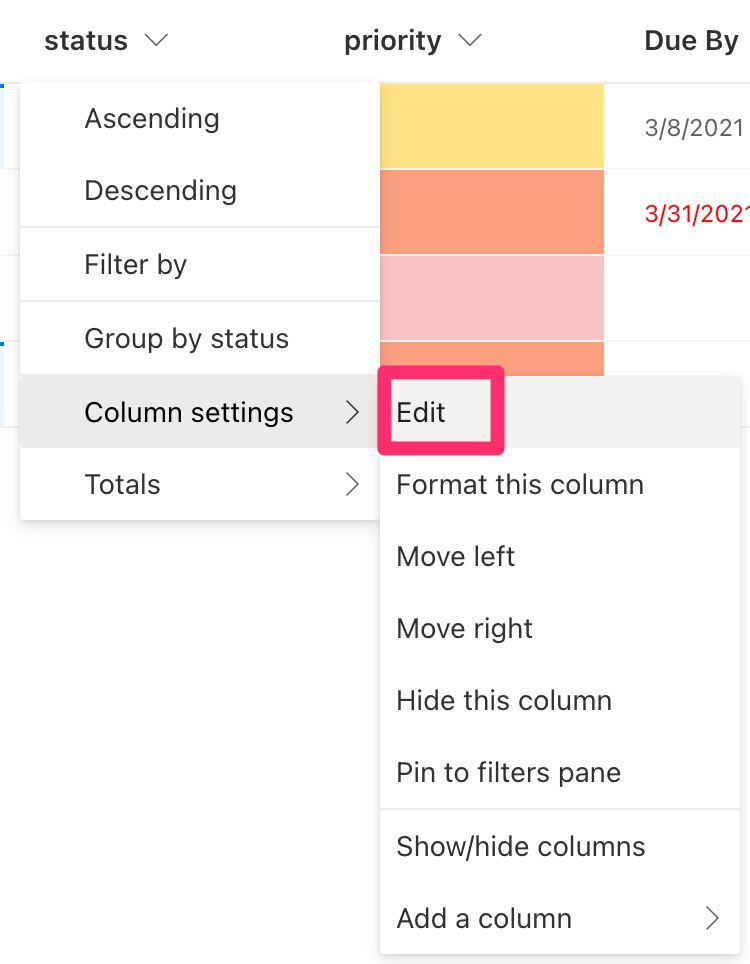
You should always have only one place where the values are configured. In our example, we have the SharePoint list that contains the values and the Power App that should only display them, regardless of what they are and how many they are. To do that, we need to do a small configuration in the “Advanced” section.
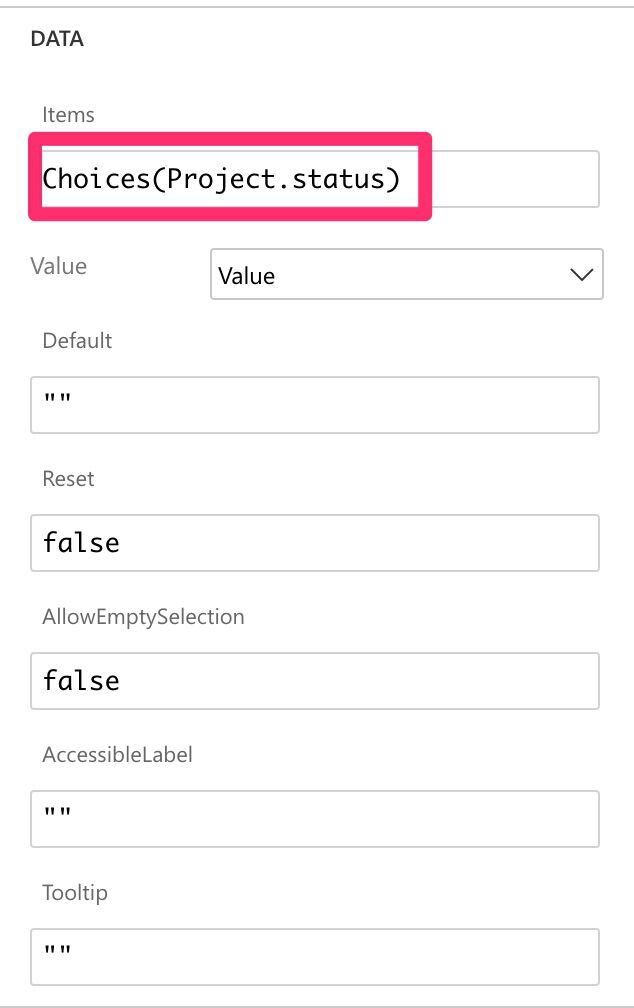
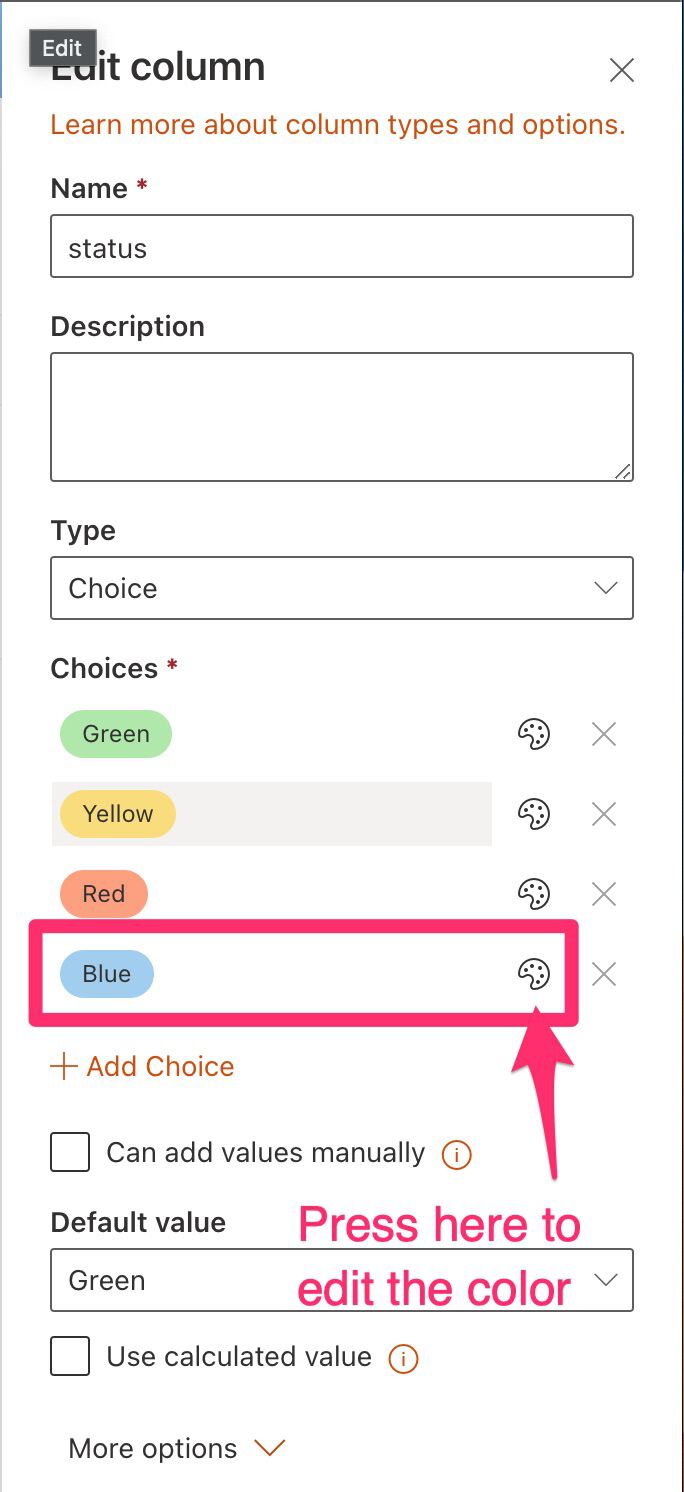
With the function “Choices,” you can have all the values in the SharePoint list column “status.”
Now let’s add a new value in SharePoint.
Add a new “Blue” value.
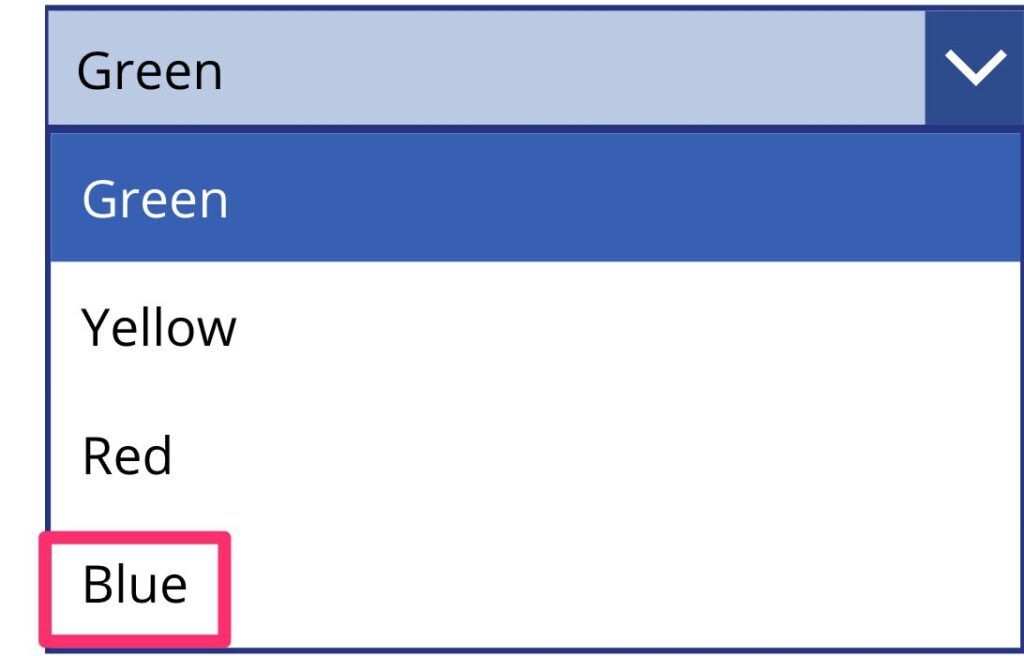
And let’s look at the drop-down: the value updated automatically, and no need for changes in the Power App or the code.
Final thoughts
With this article, I tried to show you a bunch of things at the same time. First, how to map the Choices column from SharePoint Lists in Power Apps. Another, and more important, how to have a single source of truth in your app. It doesn’t need to be in the data source, but it needs to be only in one place.
Also, I wanted to show you how to map SharePoint Choice columns in Power Apps. It’s something so simple to do properly and avoid issues in the future.
Photo by Marija Zaric on Unsplash