I have this idea on my mind for a while, ever since Microsoft announced Geospatial Features in Power Apps. I was curious when it was introduced and wanted to try using Power Apps maps, so this article is just that.
It may look that most companies don’t need this, but you may be surprised. We can do a lot with maps, and knowing what can be done with them can be quite useful. So let’s explore a little bit.
How to use it?
First, let’s create an app that presents maps. Let’s create a simple one where we have an interactive map to play around with.
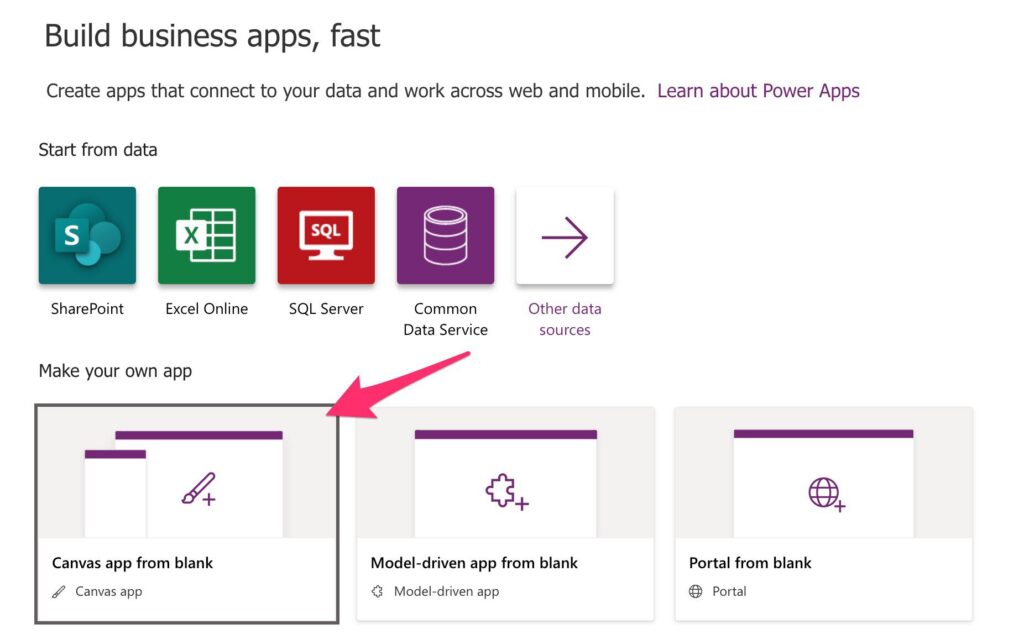
Go to Power Apps and select “Canvas app from blank.”
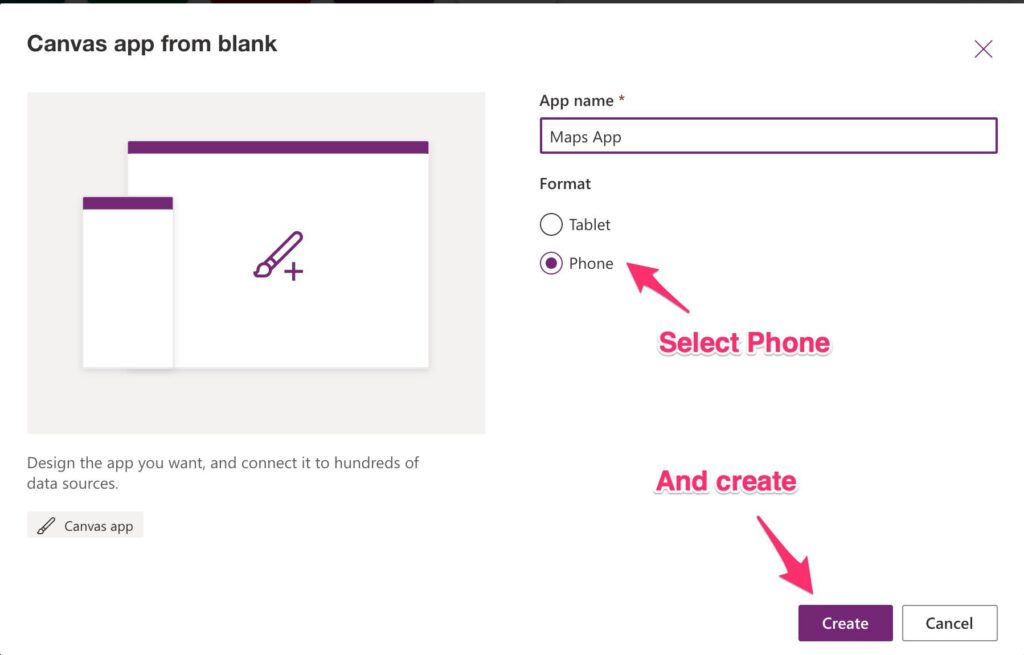
Name it, and you’re ready to go.
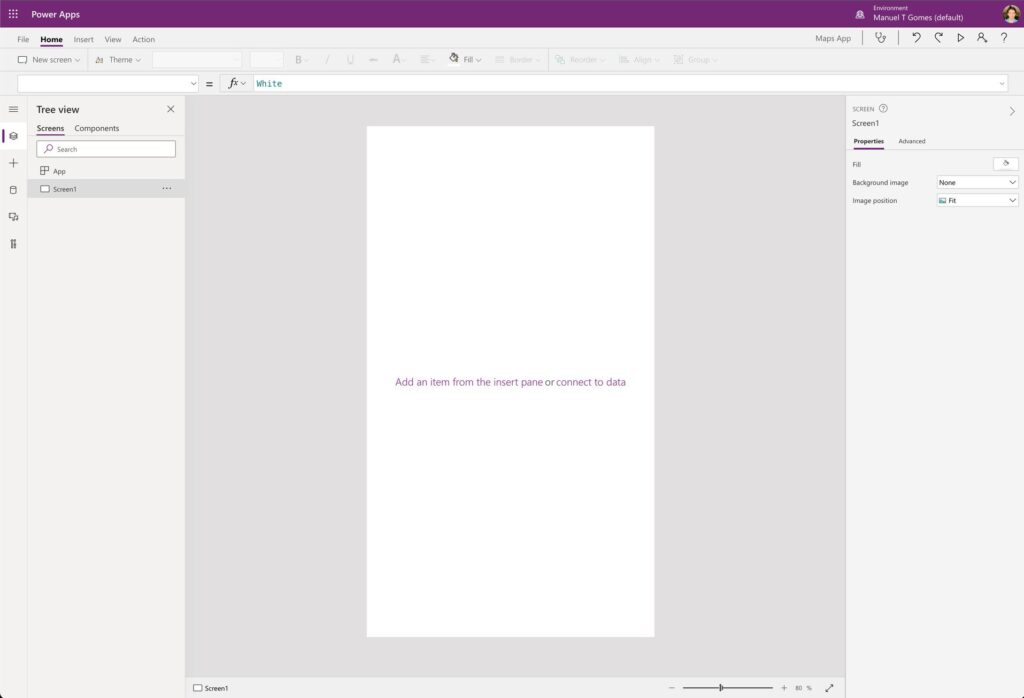
After creation, you’ll get something like this.
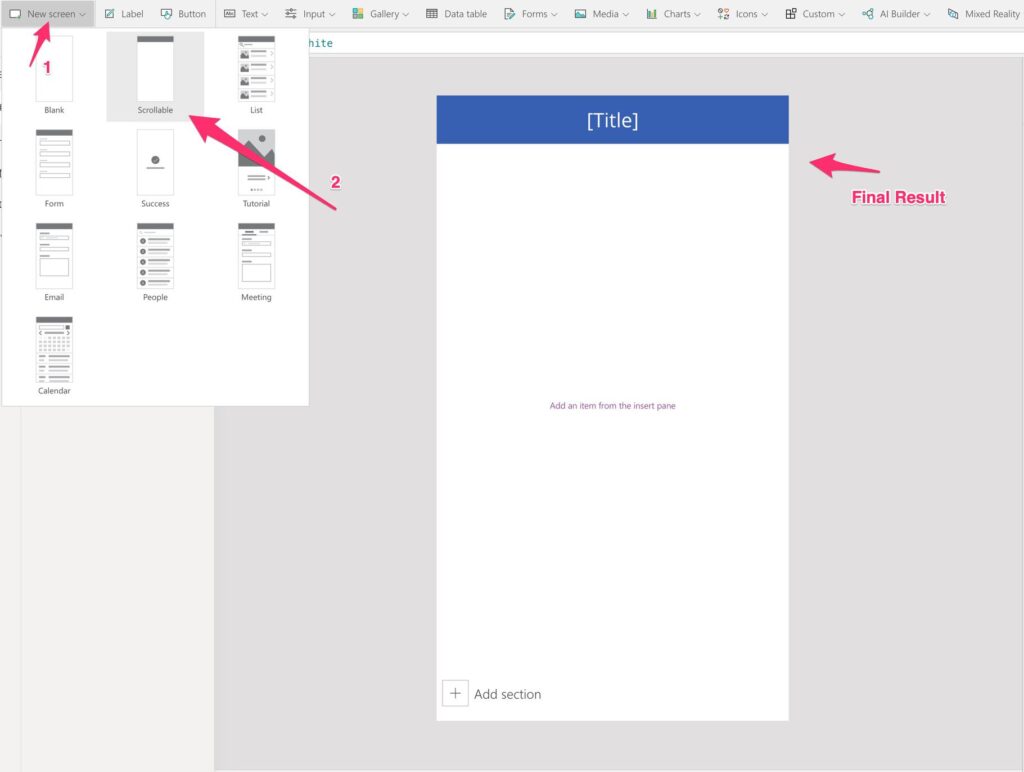
Add a scrollable screen, and let’s add the first map. I like starting with the scrollable screen because we’ll already have a nice header and label created for us.
Note:
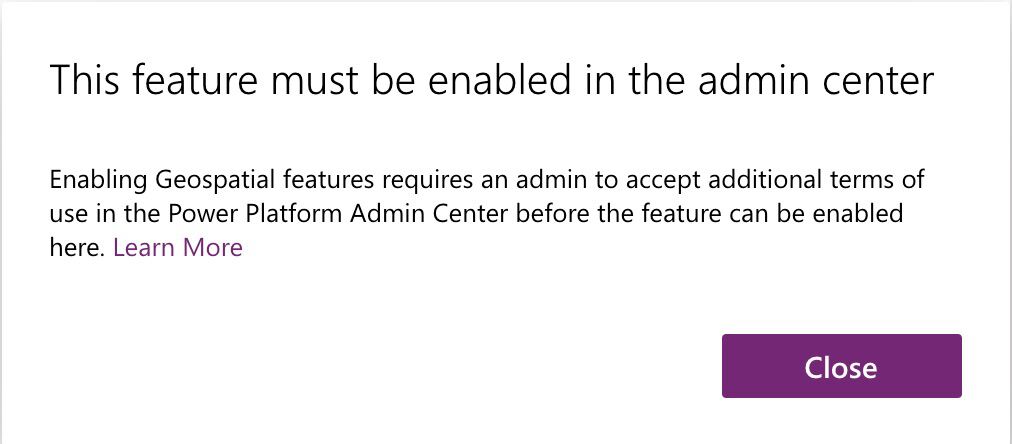
If you the error message below, it means that the feature is not turned on. You may need to ask your system administrator to enable it. I know it’s a bother, but it’s how Microsoft designed it because you have to agree to special “terms and services.” You can provide instructions or, if you have permissions, do it yourself by going here and following the instructions.
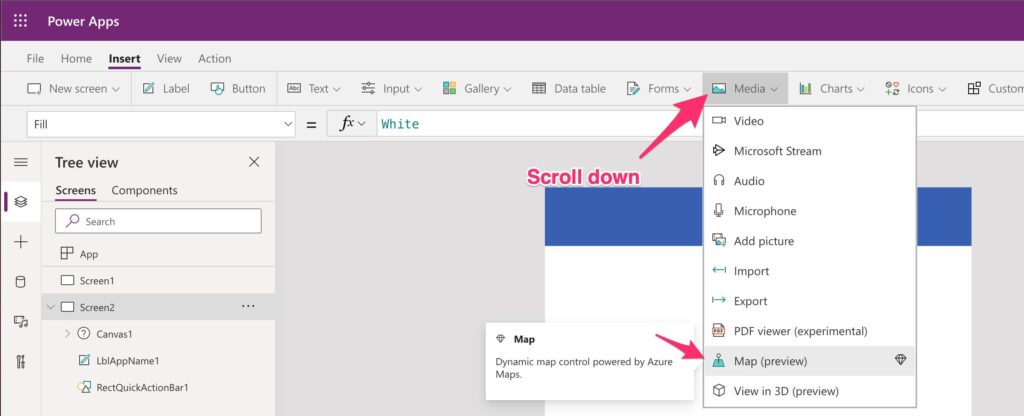
Let’s add our map.
Resize it, and let’s take it for a spin.
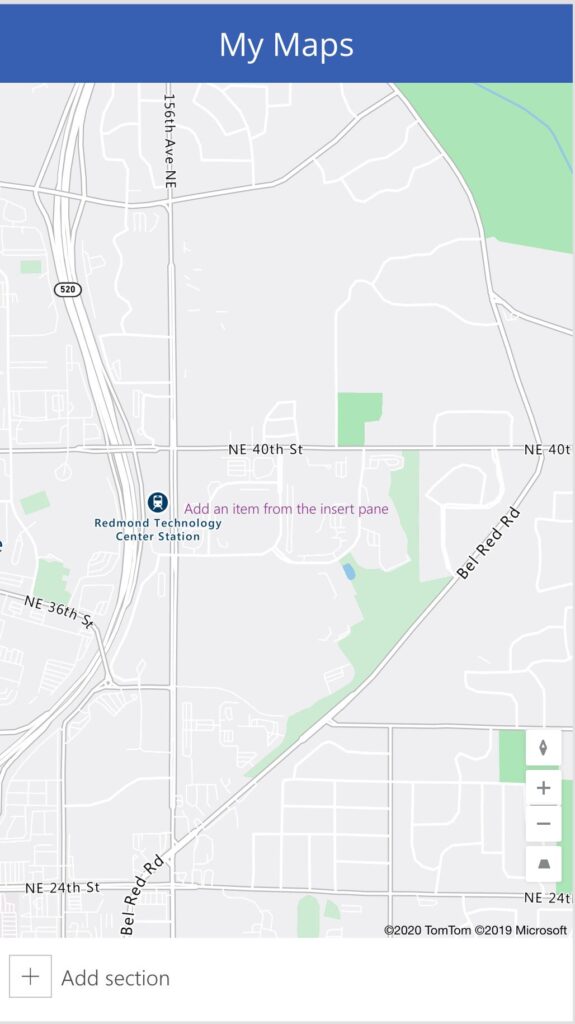
With simple steps, you have an interactive map to play around with. That’s awesome by itself but let’s do something more interesting.
Autocomplete addresses
Let’s add an input where you can fill in the address and show it on the map. Simple enough but quite complex to achieve in other platforms. In Power Automate is as simple as this:
Select the “Address input.”
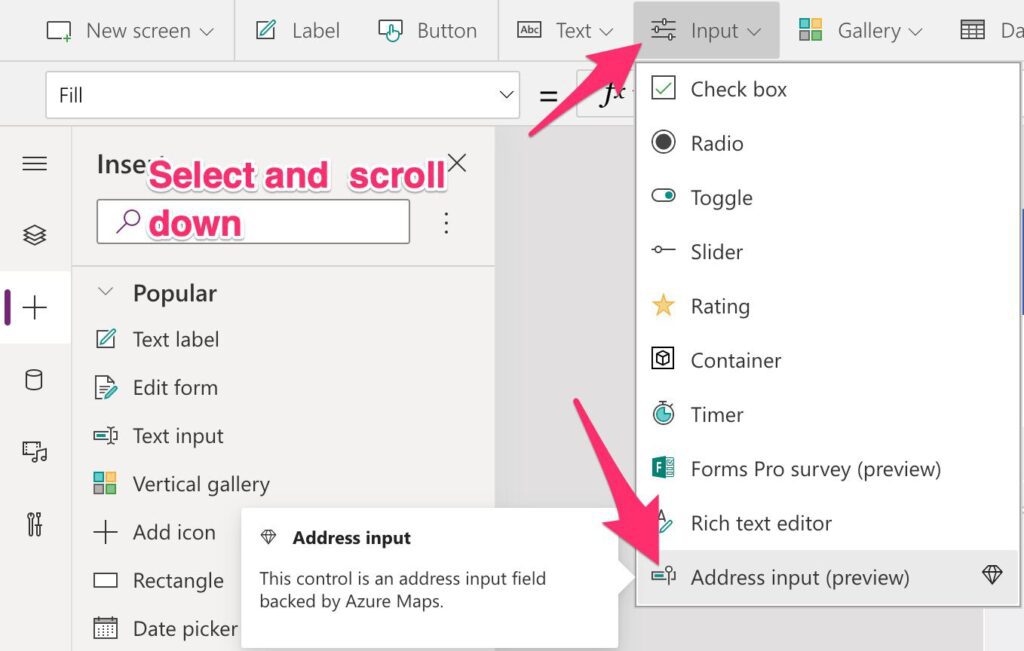
Resize it to fit in your app.
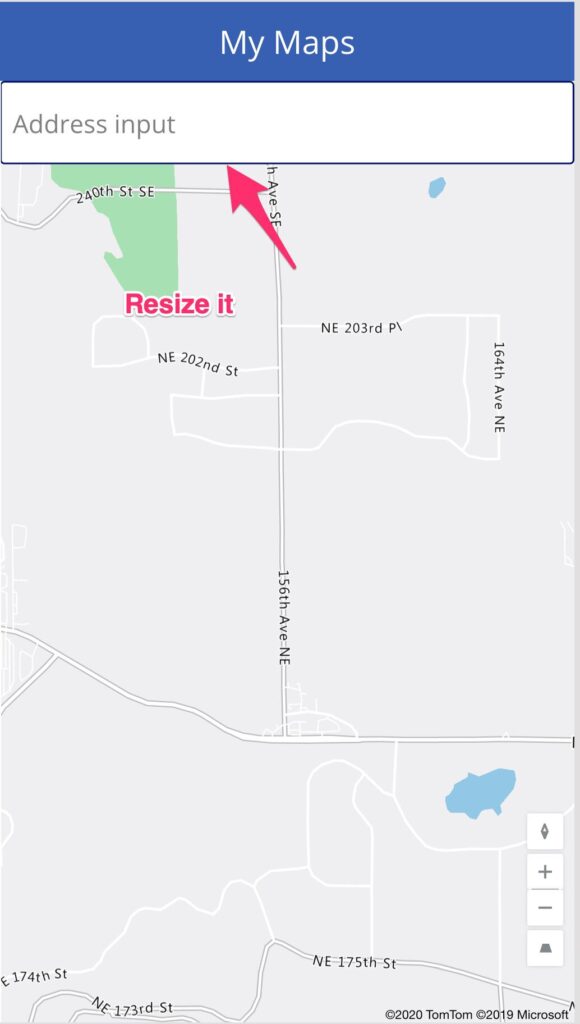
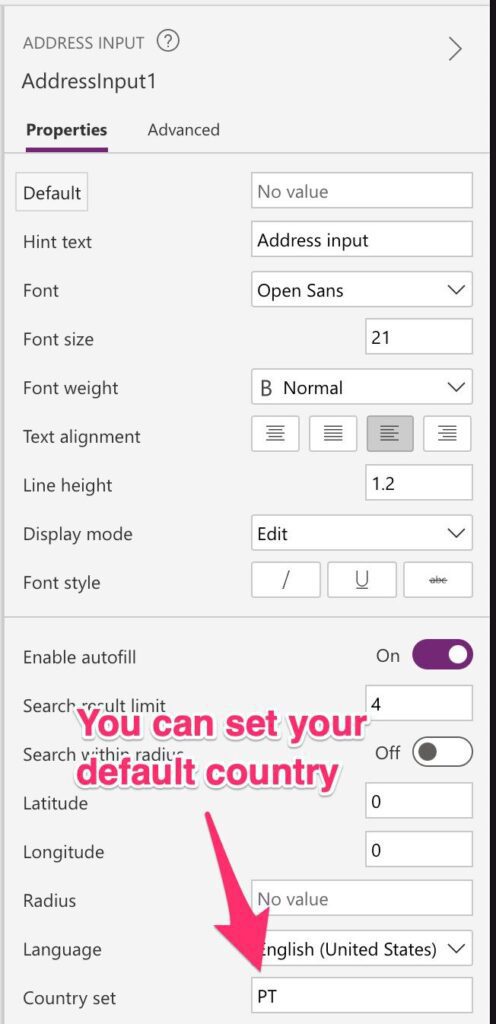
Optional: you can define the default country so that the suggestions are guided towards a more narrow location and don’t present stuff that isn’t useful. Also, consider changing the language to make sure that the address is interpreted correctly.
Start writing, and you’ll get suggestions.
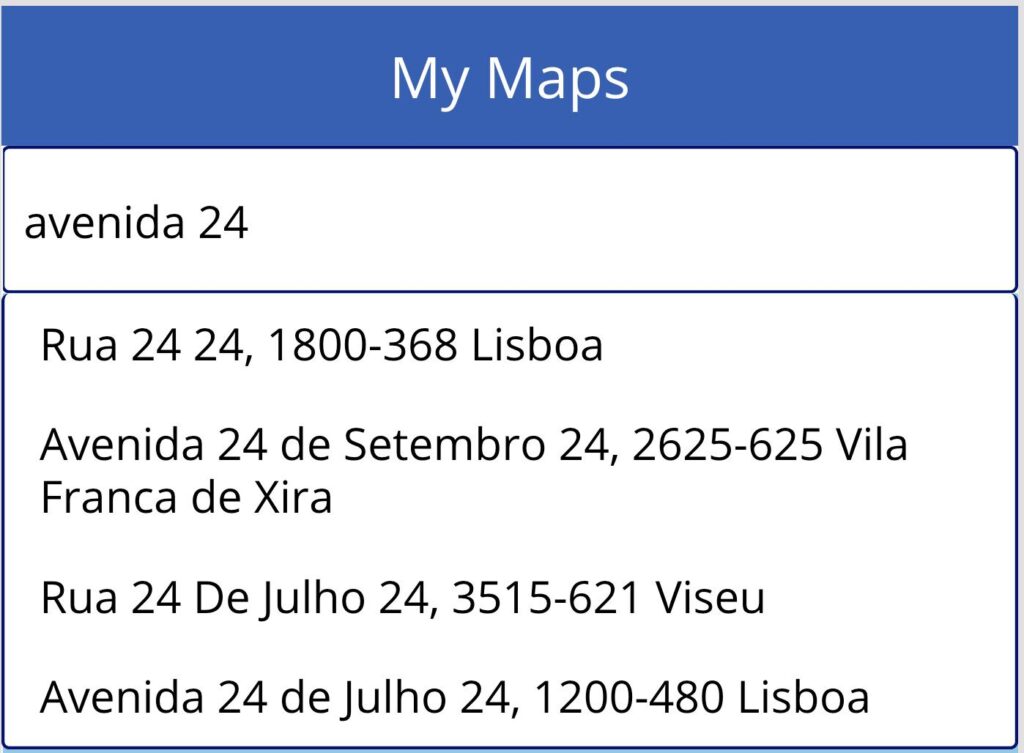
Awesome. Microsoft uses the maps API to get the addresses that you may want and autocomplete them. I like this feature a lot, and it’s handy on mobile, where writing is a little bit slower than on a desktop app.
Connecting everything
Now that we have the autocomplete working, we want the map to show the address we selected. To do this, let’s connect both components, but we need to understand how they work before we can do that.
The “Address input” will display addresses based on your search. It will return an object that contains a lot of stuff like the latitude and longitude, municipality, etc. The map, on the other hand, needs a data source that is a collection. Usually, you use a Datasource from an external entity, like SharePoint, for example, and then we can use it to populate a “Gallery,” but in this case, we don’t have one.
Power Automate allows us to create collections defined on data that we insert, so we can create a collection and add it to the maps as a source.
To achieve this, go to the “OnChange” in the “AddressInput” component and add this formula:
If(IsBlank(AddressInput1.SearchResultJson), "", Collect(locations, {Latitude: AddressInput1.SelectedLatitude, Longitude: AddressInput1.SelectedLongitude}))
Let’s break it down so that we understand all the sections:
- First, we check if the search result address has some value in it. We won’t add stuff to our collection if it’s empty so use the “IsBlank” function to check for this.
- We then use the “Collect” function to create our collection. In this case, we name it “locations” and add an entry for latitude and longitude when we select an address.
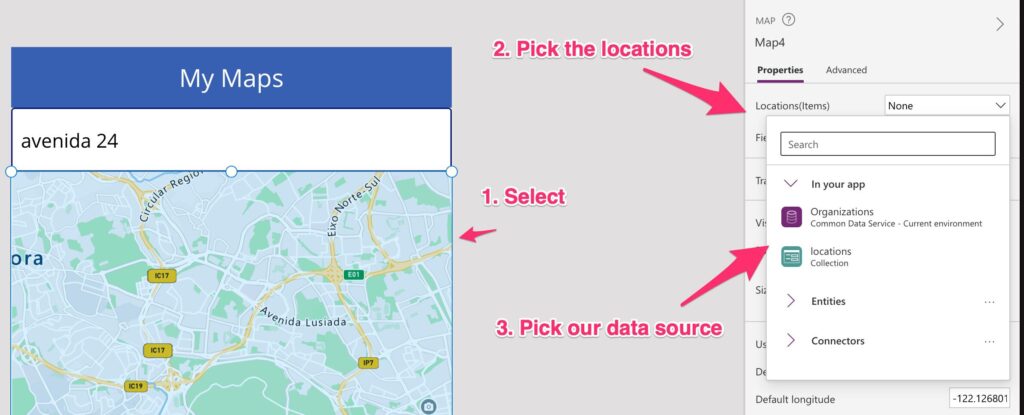
The final thing we need to do is to change the data source to our newly created data source so that the addresses are added to the map as pins.
So let’s do all the steps, starting with the “OnChange”:

Now let’s change the Maps part:
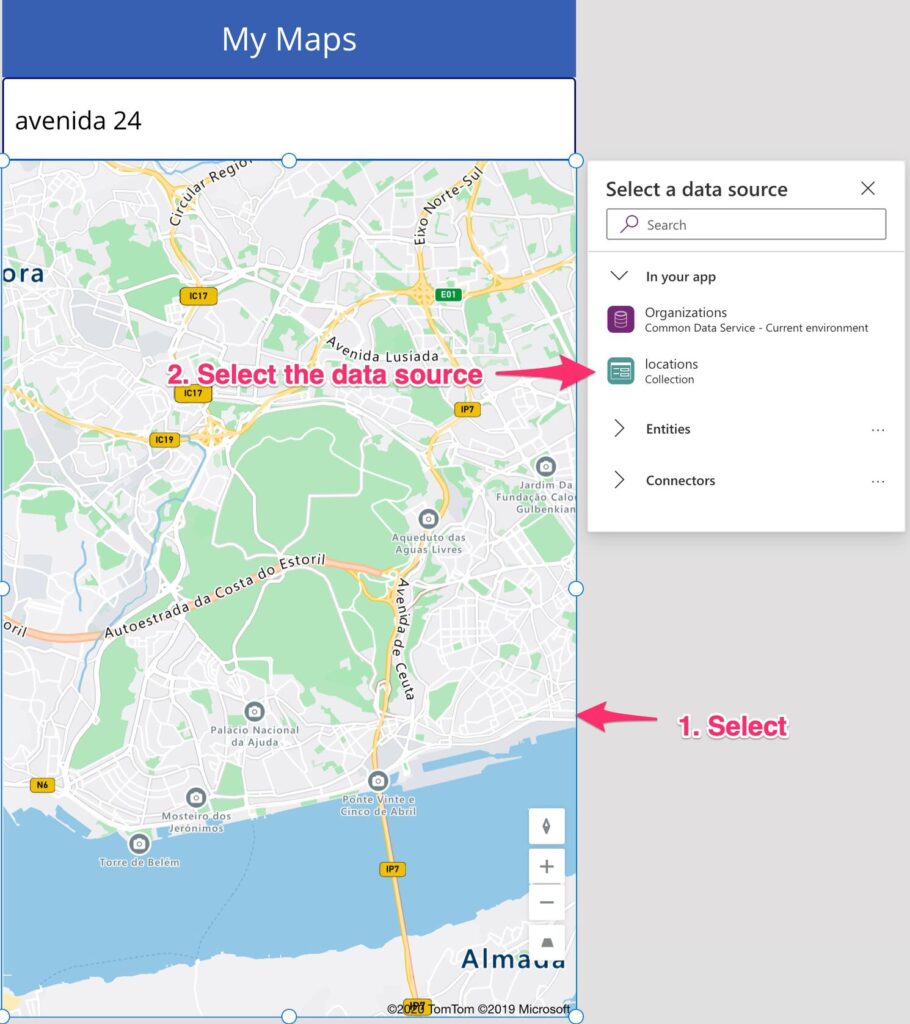
If, for some reason, you don’t see the popup, you can go to the following section in the properties to set it.
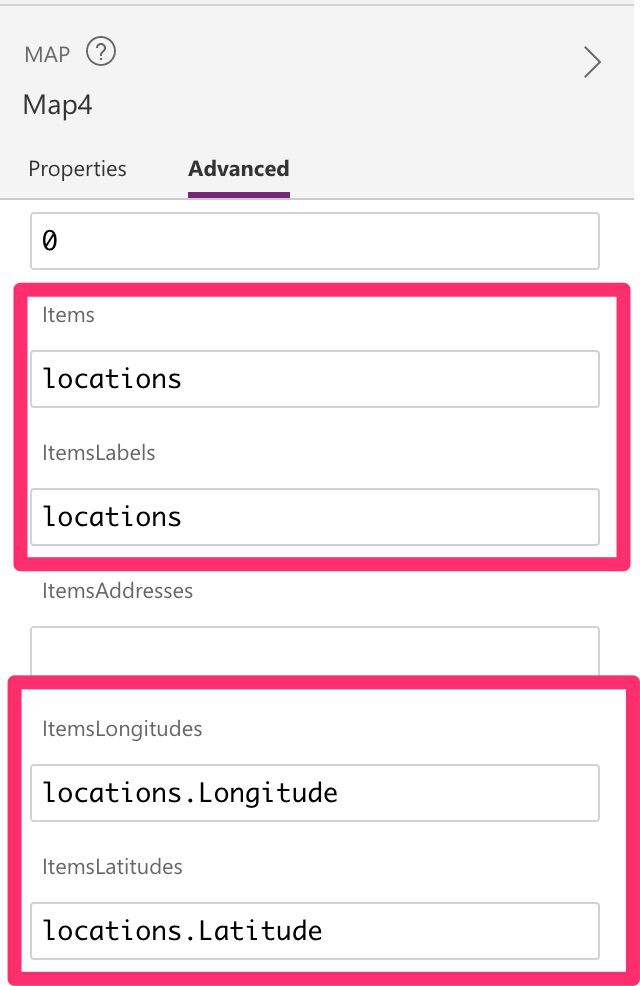
One last configuration is needed. We need to configure the mapping for latitudes and longitudes in the maps component. To do that:
Now run and select an address:
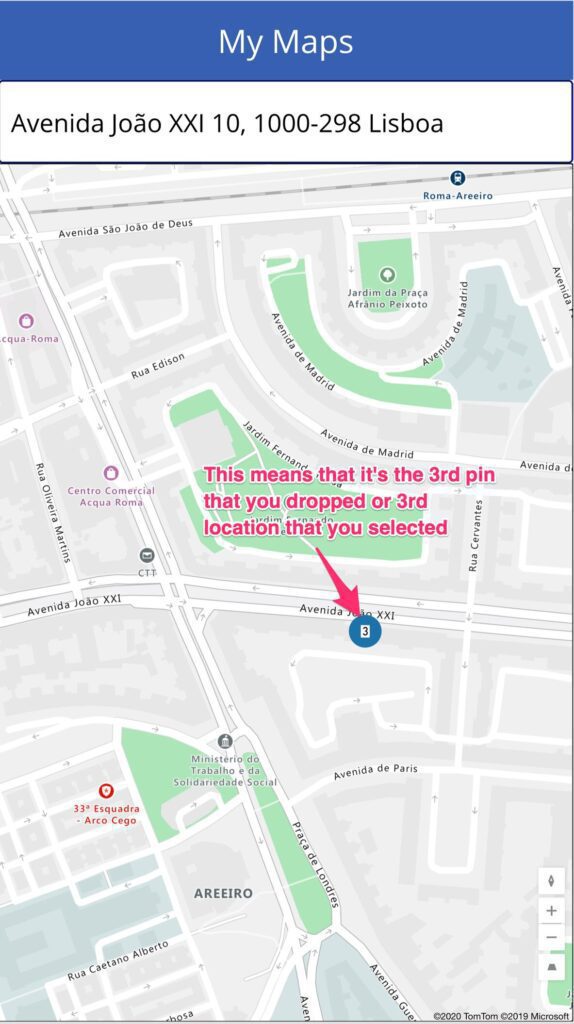
Awesome!
Final thoughts
You’ve seen here with a few clicks and configurations; you have a fully functional map and pin dropping functionality. If you open it on your mobile phone, you’ll have all these features working without doing absolutely anything extra.
Think about features like pinning the current location when someone goes to a restaurant and submitting an expense. Take a photo of the receipt, save it, and you’ll have a map of the places you’ve been. Or, if you have a database of employees’ offices location, you can add them as a Datasource to the map, and you’ll see the global distribution of your team.
It’s an amazing feature, and Microsoft does all the heavy lifting for you, so explore, and you will be pleasantly surprised.
Have a suggestion of your own or disagree with something I said? Leave a comment or interact on Twitter and be sure to check out other Power Apps-related articles here.


In the pin example, how did you get it to display “3” as the third pin? By that I mean, how do you get a variable image (do you have to custom create an image for each integer value, e.g.) and what property(ies) of the map control do you need to set to make that happen? In my case, I have two different things going on: a collection of locations which I have pins showing up (but all the same icon) and as each pin is clicked, it is sequenced from 1 to n (picking locations in an order, in other words). As a pin is clicked I want to display the sequence number like in your example, but I also want to change the pin shape. How do I accomplish that through map properties
or collection data columns?
Hi Larry,
The pin number is twofold:
1. It represents the number of elements in that “cluster” depending on your zoom.
2. The number of the pin by the order in the collection. Depending on you sort the collection, it will change the number of the element in the UI.
Regarding changing the shape, I have to dig a bit further. I never tried to do it, but please feel free to comment if someone has tried it.
Is this what you’re looking for?
Manuel
Hola, quisiera saber por qué me sale mal la parte de items, itemslatitud y todo eso, no me funcioa esa parte