Power Automate has a lot of cool features, but the area that is lacking, in my opinion, is function support. There are a lot of formulas that could be handy to exist in Power Automate that exist elsewhere (like Excel, for example), like finding the next business day.
One of the difficulties that I had was to create a function that, based on a date, would add X days and get the next business day. It looks easy enough, and I even tried formula, but it has many issues, and, in some edge cases, it doesn’t work.
if(and(greaterOrEquals(dayOfWeek(triggerBody()'date'),0),less(dayOfWeek(triggerBody()'date'),5)),addDays(triggerBody()'date',1),if(equals(dayOfWeek(triggerBody()'date'),5),addDays(triggerBody()'date',3),addDays(triggerBody()'date',2)))
It’s clunky, and it doesn’t work. I keep on looking at Excel with that excellent “WORKDAY” function that would do everything for me, and it got me wondering. Why not use Excel to do it? Power Automate integrates well with Excel and I could:
- Create a table that has the needed calculations done automatically
- Create a simple flow that inserts the row and collects the calculated data
- Remove the row in Excel since I won’t need it again
I can even make this a “generic” Flow where I can call it every time I need it. I tried it, and it works.
Here’s how to do it.
The Excel
Excel was quite simple to build. You can get a template of it here, but it’s simply:

Explaining a little bit more the fields:
- ID – Identifies the row. It’s important, so we know which row to delete
- Start Date – The date we want to calculate.
- Days to add – How many days to add
- Date End – The business day calculated automatically
- Net Days – Formatted string so that I can pass it easily from Flow to Flow.
I just needed two formulas:
=WORKDAY(@[Start Date];@[Days to add])
And
=TEXT(@[Date End];"aaaa-mm-dd")
That’s it. Simple and works all the time?
The Flow
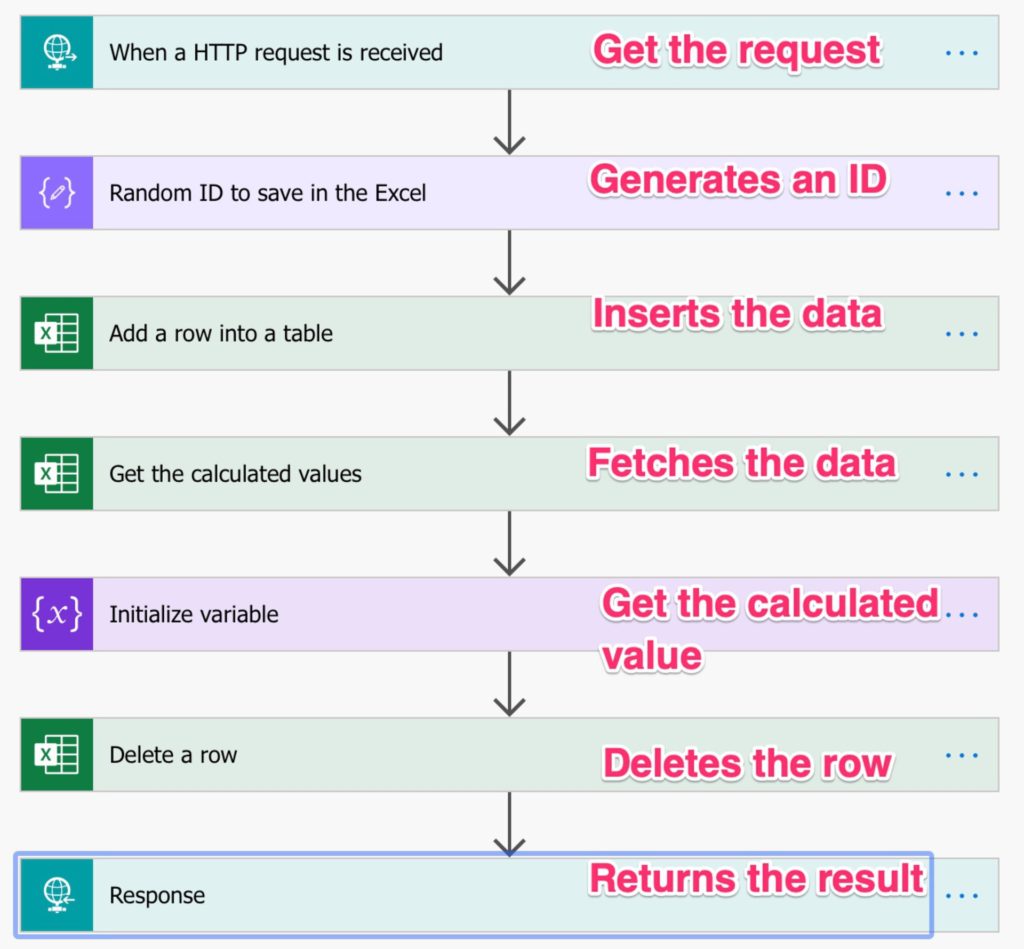
Now let’s build the Flow. There’s not a lot to it. We call it with the values that we need, send the information to Excel, fetch it, delete the record, and return the result.
Here’s the complete Flow:
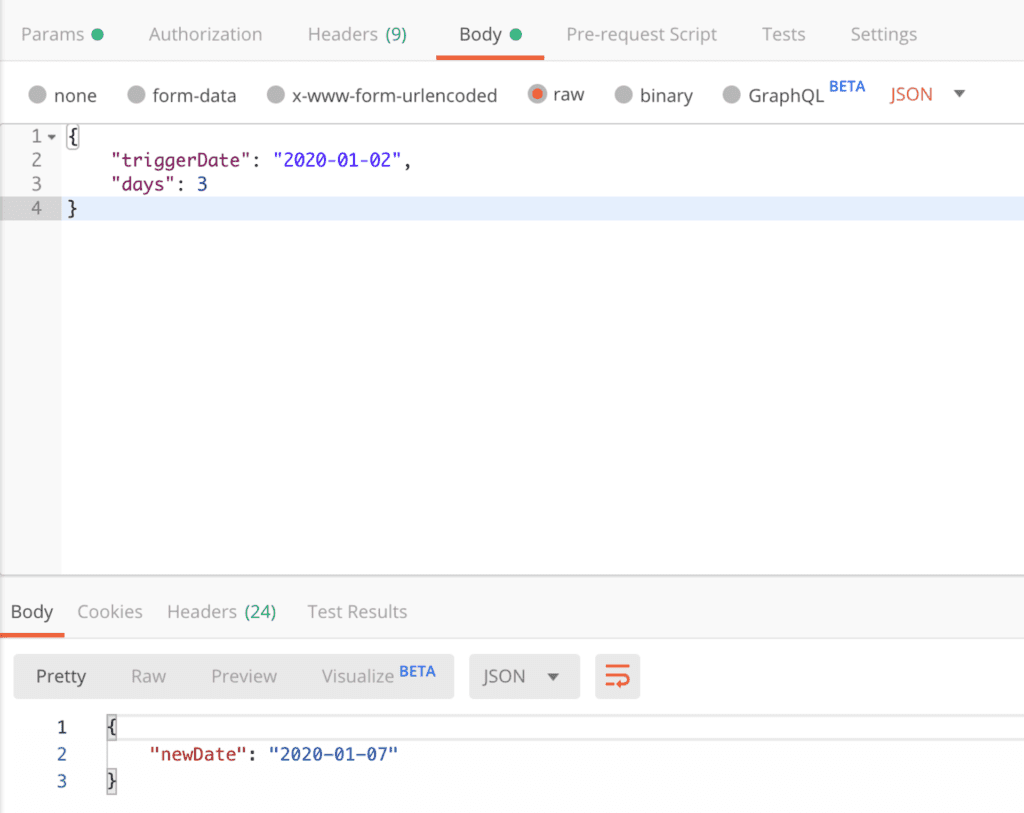
Using Postman, we can check if all is working:
You can download the Flow here directly or go to my Template section to check out other templates that might be useful to you. And don’t forget our helpful Excel that does all the work.
Let’s explain each step so that you can understand what’s going on.
The Trigger
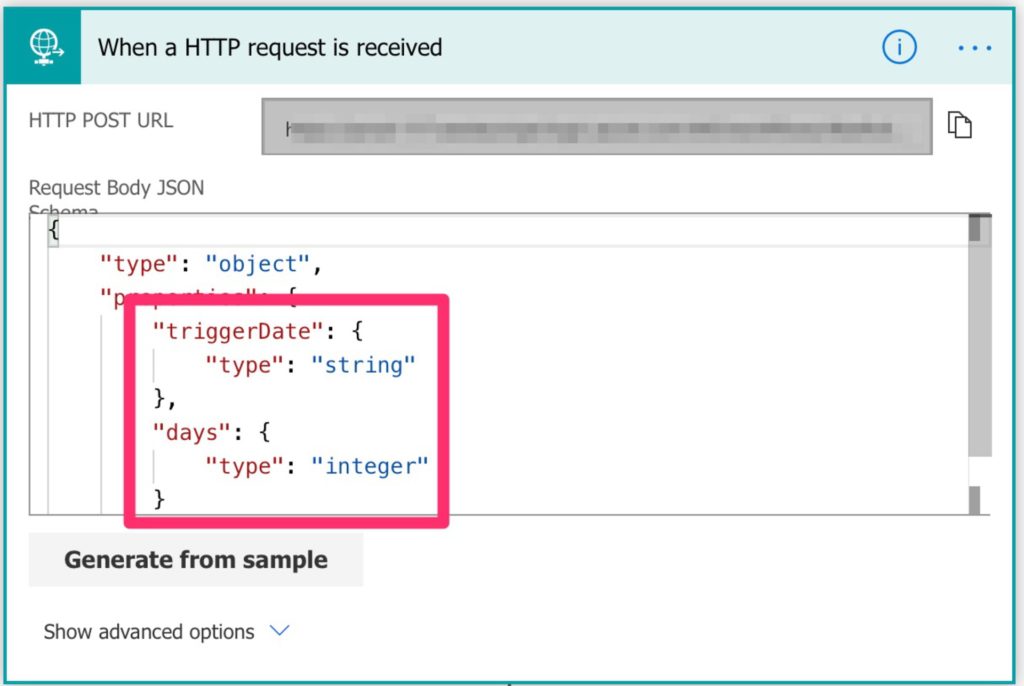
The first step is simple. You need to define an HTTP trigger and get the parameters that you need to do the calculation. If you’re not familiar with how to call HTTP triggers or what they are, I have another article that explains that in detail, either by using a solution or the one we’re using in this example.
Random Number as an ID
Next, we need to generate a random number that we’ll use to identify our record in Excel. It has a double advantage of a sequential number:
- If multiple people are using the Flow, we would never get results that we don’t want by using the same ID
- We don’t need to keep track of the sequence since we generate one number and discard it after

The formula is quite simple:
rand(10000,99999)
If you’re paranoid and want more significant numbers, increase the range, and the result will be the same.
Add to Excel
Now let’s add the information to Excel and wait for the magic to happen.
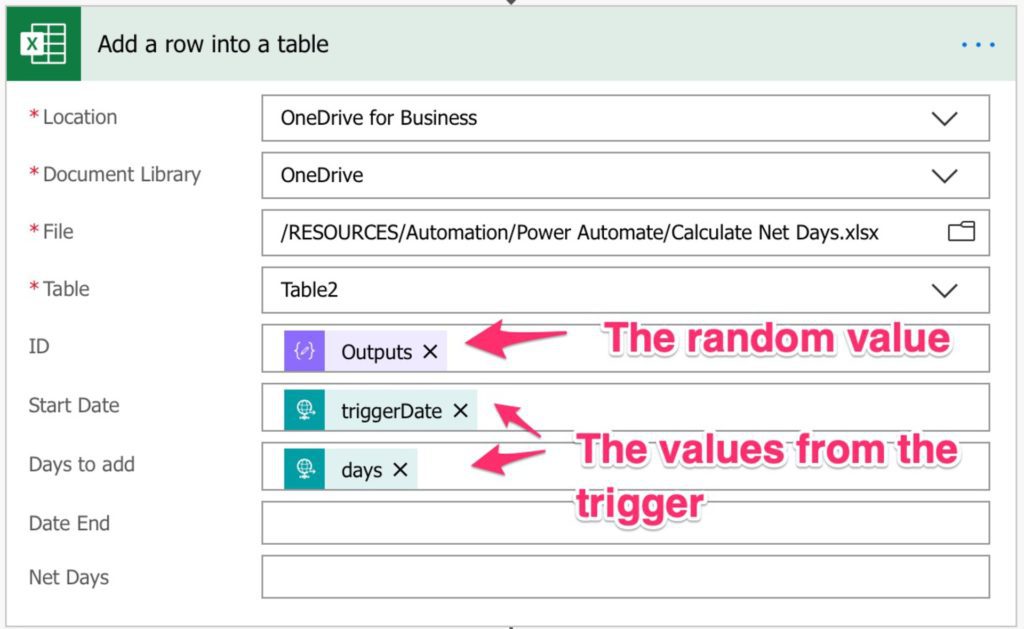
Nothing else is needed. Let’s fetch the record.
Fetching the record
To bring the record, we only need to provide a random number that identifies the row.
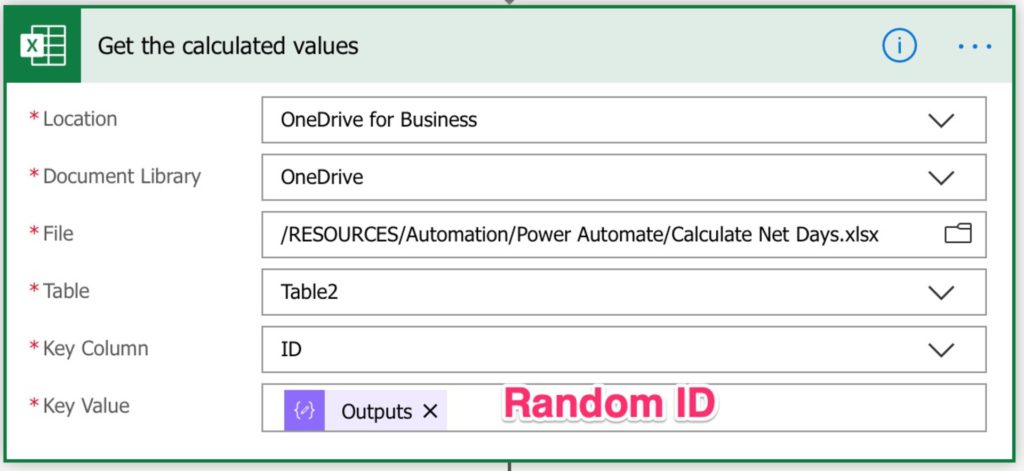
And we’ll get the values that we sent plus the calculated values with the next business day and the formatted string.
Saving the value
This step may look wasteful since we get the value from the connector but, since we’re deleting it after, I wanted to make sure that I save the value before deleting it. I know we could do without it so if you wish you can remove it

Delete the value
You may argue that it’s not necessary to delete the row since we’re generating unique IDs. I agree, but I don’t like to waste space when I don’t need it, and since we don’t need the value anymore, why not delete it.
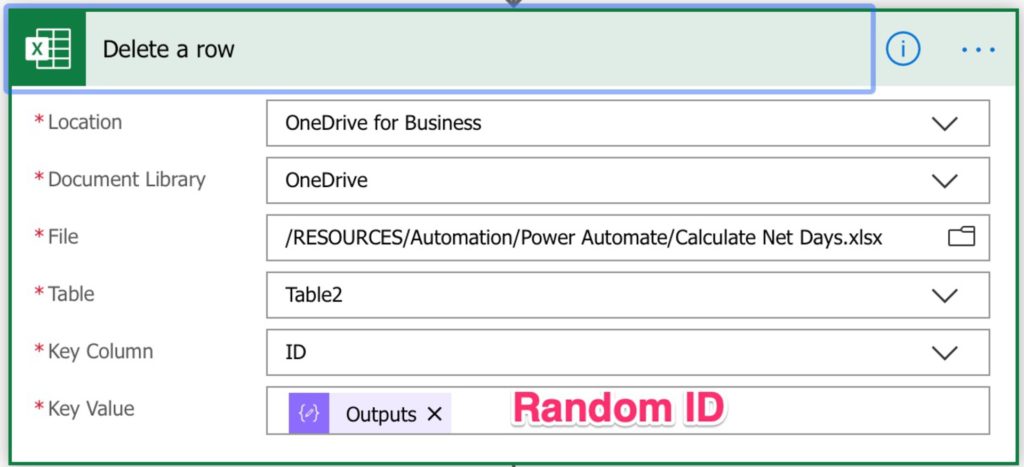
In case something goes wrong, we can open the Excel and see only the values that failed and not a massive list of values.
Return the result
Since you’ve done all the work, now you only need to return the value. I’m using the variable, but if you skipped that step before, you could use the value in the “Fetching Row” step.
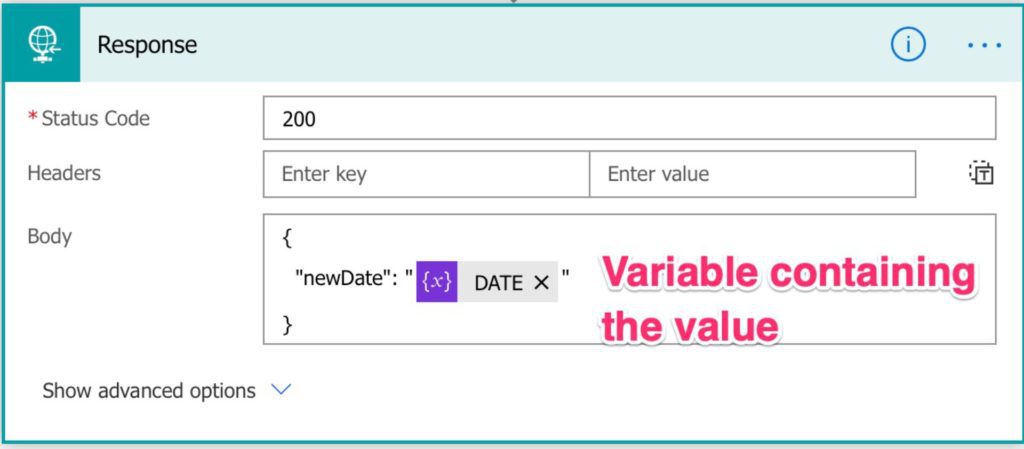
That’s it. A general Flow that you can use everywhere that does some complex actions in only a few steps.
Tiny limitation
I know what you’re thinking? How about bank holidays? Indeed we’re not taking them into account. That’s probably the next version of the Flow but, for now, it’s a good start. If you encounter this case, add one more day to your call, until I have another Flow ready for you that solves this issue.
Have a suggestion of your own or disagree with something I said? Leave a comment or interact on Twitter and be sure to check out other Power Automate-related articles here.
Photo by Andrew Butler on Unsplash


Awesome; Very helpful, I had no idea that this is possible.
So very cool! Lot of simplification opportunities for otherwise very complicated steps in Power Automate.
Btw. I also saved the format string in a new column [Date Format]. This way I could replace the hardcoded format string “aaaa-mm-dd” with a more generic formula for NetDays =TEXT(@[Date End];@[Date Format]). Now you can control the date format from the flow itself (e.g. I my case I needed ‘dd-mm-yyyy’).
That’s an AWESOME idea!!! Well done!! 🙂