When a Planner starts getting many tasks, it is important to add some automation to it to keep things manageable. The “List Tasks” action helps with that. With it, we can get all tasks in a
Where to find it?
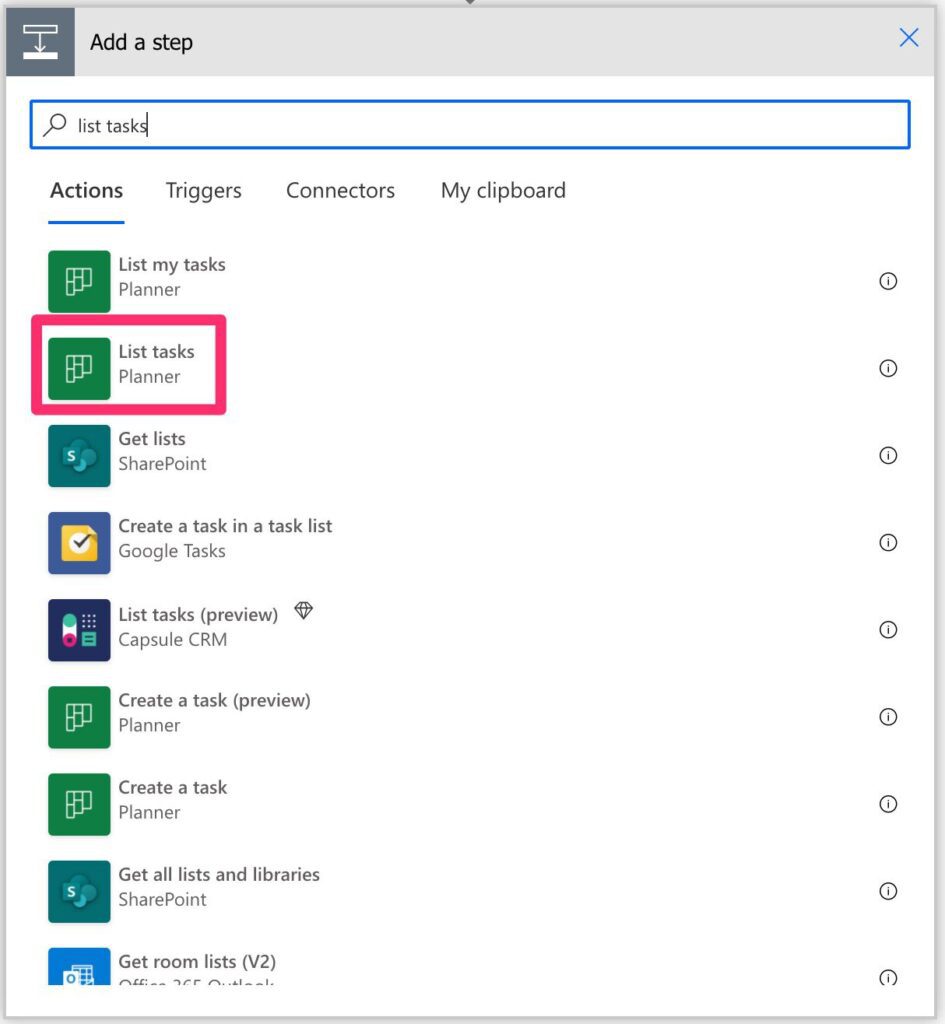
To find it, you can search for the “List tasks” action.

Here’s what it looks like:

Microsoft changed the way that Power Automate displays the steps. Now you have a huge list of actions that you can search. It’s arguable that this is simpler or not, but now I’ll only provide the search string you have to write to find the action.
Please don’t confuse with “List my tasks”. If you use this action, you’ll get incomplete results since it’s filtering for tasks assigned to you.
Usage
You need to define your Group and Planner, and you’re good to go.

You’ll get a lot of information like:
- ID
- Title
- Percent Complete (0 to 100)
- Has description
- Reference count
- Check List item count
- Active Check List item count
- Assigned
There’s a lot that we can get here, but if you want to get all details of a task, you can use the “Get a task” and “Get task details” actions. Each of them will return different elements of the task.
The action will return an array of elements, so you need to use the “Apply to Each” action to go over all of them.
Dates
All dates are returned in the ISO format, including milliseconds. For example:
2021-04-25T18:19:46.9749115Z
The format can be confusing to many, but Flow does an amazing job of converting the date to something you can understand based on your preferences.
Percentage
The percentages are returned with a 0 to 100 instead of the common 0 to 1 scale. This makes things easier to understand since we display the value without converting it.
Has description and Reference Count
I love the inclusion of these two fields. Without us needing to run the “Get task details” action, they will indicate if we have information in these fields. It’s super useful, but it’s a pity that we don’t have one for the checklist items also.
Assignments
Tasks can be assigned to multiple people. This field can be quite complex to understand since it will return a complex object. For example:
[
  {
    "userId": "<redacted>",
    "value": {
      "@odata.type": "#microsoft.graph.plannerAssignment",
      "assignedDateTime": "2021-04-25T18:19:46.9749115Z",
      "orderHint": "8585717240476885258PU",
      "assignedBy": {
        "user": {
          "id": "<redacted>"
        }
      }
    }
  }
]
If you want to get more information, you can always use the “Get user profile” action using the ID as a reference.
Checklist information
The checklist fields are also super helpful. With them, you know how many checklist items exist for the task and how many are still active without getting the full details of the task. You can do a lot with this information like:
- Close tasks that don’t have active tasks.
- If there are open tasks and the task is at 100, then close them
- If it’s over 0 percentage completed and if the existing tasks are all active, then something’s wrong.
These are only a few examples to show you how this can be useful to make decisions.
Applied Categories
This is a list of tags that were applied to a task. YOu’ll get the tag’s name, so it works differently from the buckets since you’ll get the whole information.
Limitations
As mentioned above, the tasks have more information than the one returned here, like:
- Description
- References
- Checklist items
To get this information, you need to use the “Get task details” action.
The action will also return the first 100 records. If you want more, you need to activate parallelization to get all values.
Recommendations
Here are some things to keep in mind.
Never generate the ID yourself.
Always get the ID either from a trigger or from another action. Never try to generate the ID yourself since they may change, and then your Flow will fail.
Name it correctly
The name is super important since having only “list tasks” doesn’t tell us much. Always build the name so that other people can understand what you are using without opening the action and checking the details.
Always add a comment.
Adding a comment will also help to avoid mistakes. Indicate why you are getting all tasks and from where. It’s important to enable faster debugging when something goes wrong.
Always deal with errors.
Have your Flow fail graciously and notify someone that something failed. It’s horrible to have failing Flows in Power Automate since they may go unlooked for a while or generate even worse errors. I have a template, and a template that you can use that will help you make your Flow resistant to issues. You can check all details here.
Back to the Power Automate Action Reference.
Photo by Lucian Alexe on Unsplash


