The “Create item Action” for SharePoint is, in my opinion, one of the most helpful Power Automate actions since it can remove a lot of the manual work of inserting data manually. Please always consider automatic data insertion in your Flows if you can. It eliminates many common mistakes of manually inserting data, like inconsistent data (Lisbon or LISBON) or simple mistakes when you insert data repeatedly.
Let’s see where to find it and how to use it efficiently.
Where to find it?
You can find the “create item” action in the SharePoint section. Select “Standard”:
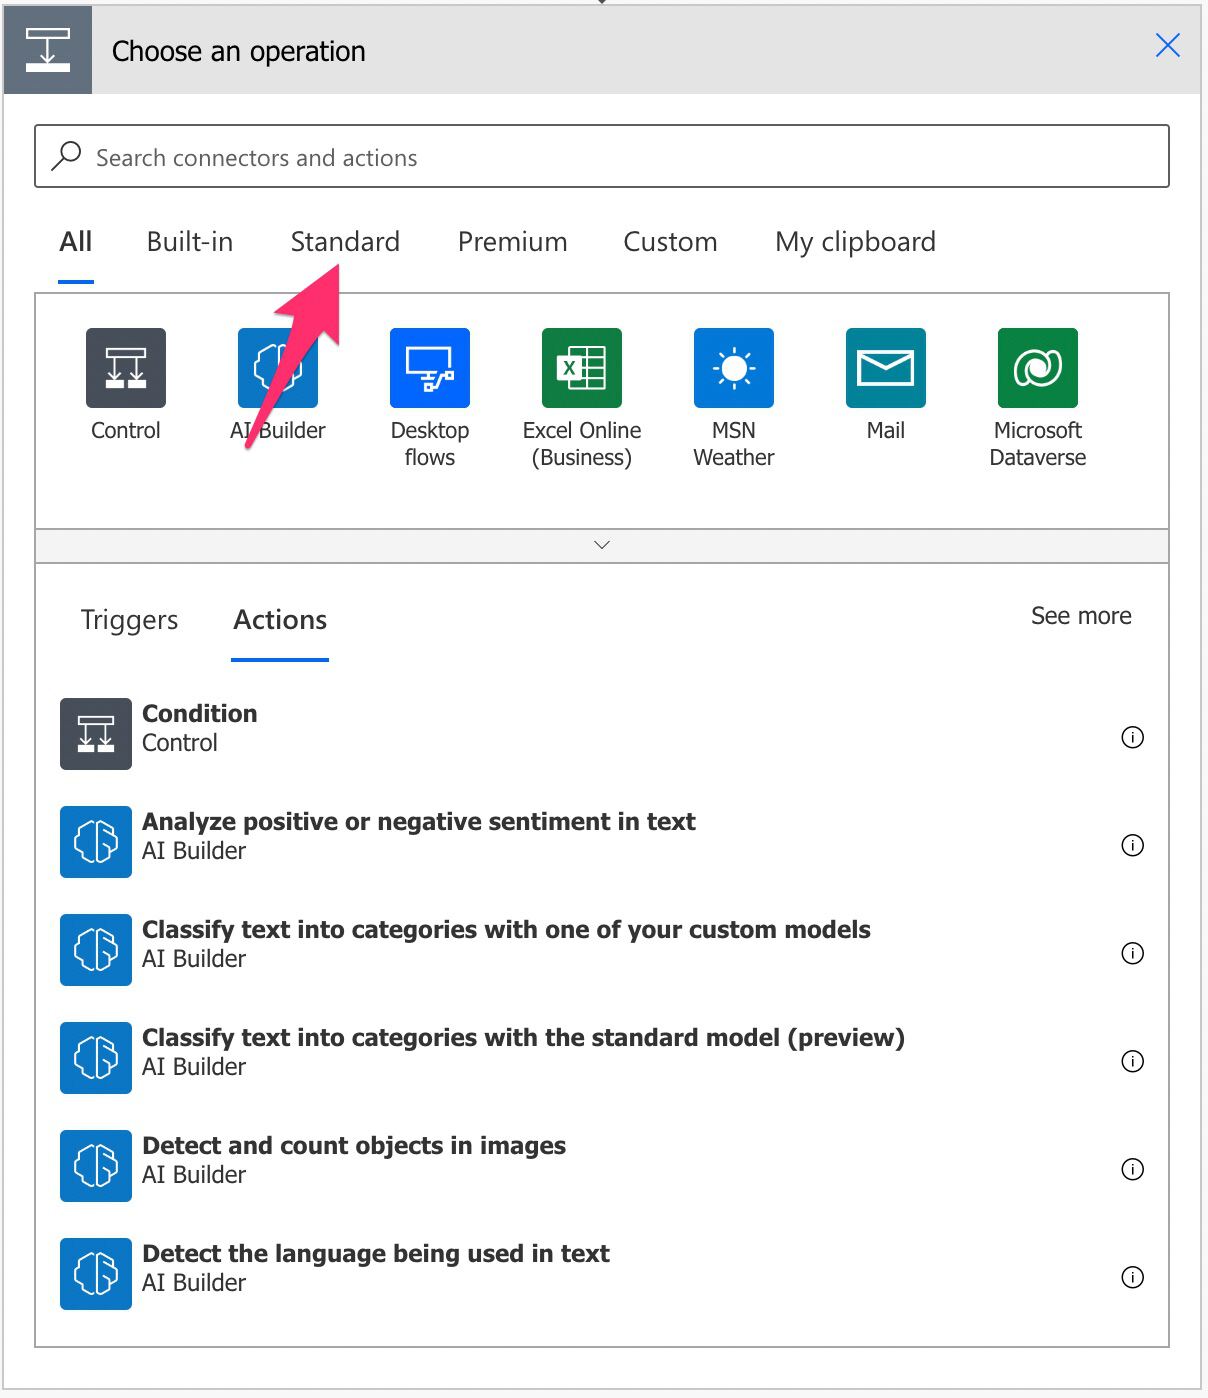
Power Automate tends to save the most common actions in the main screen, so check there before going trough the full hierarchy. Also you can use the search to quickly find it.
You may need to expand to find SharePoint.
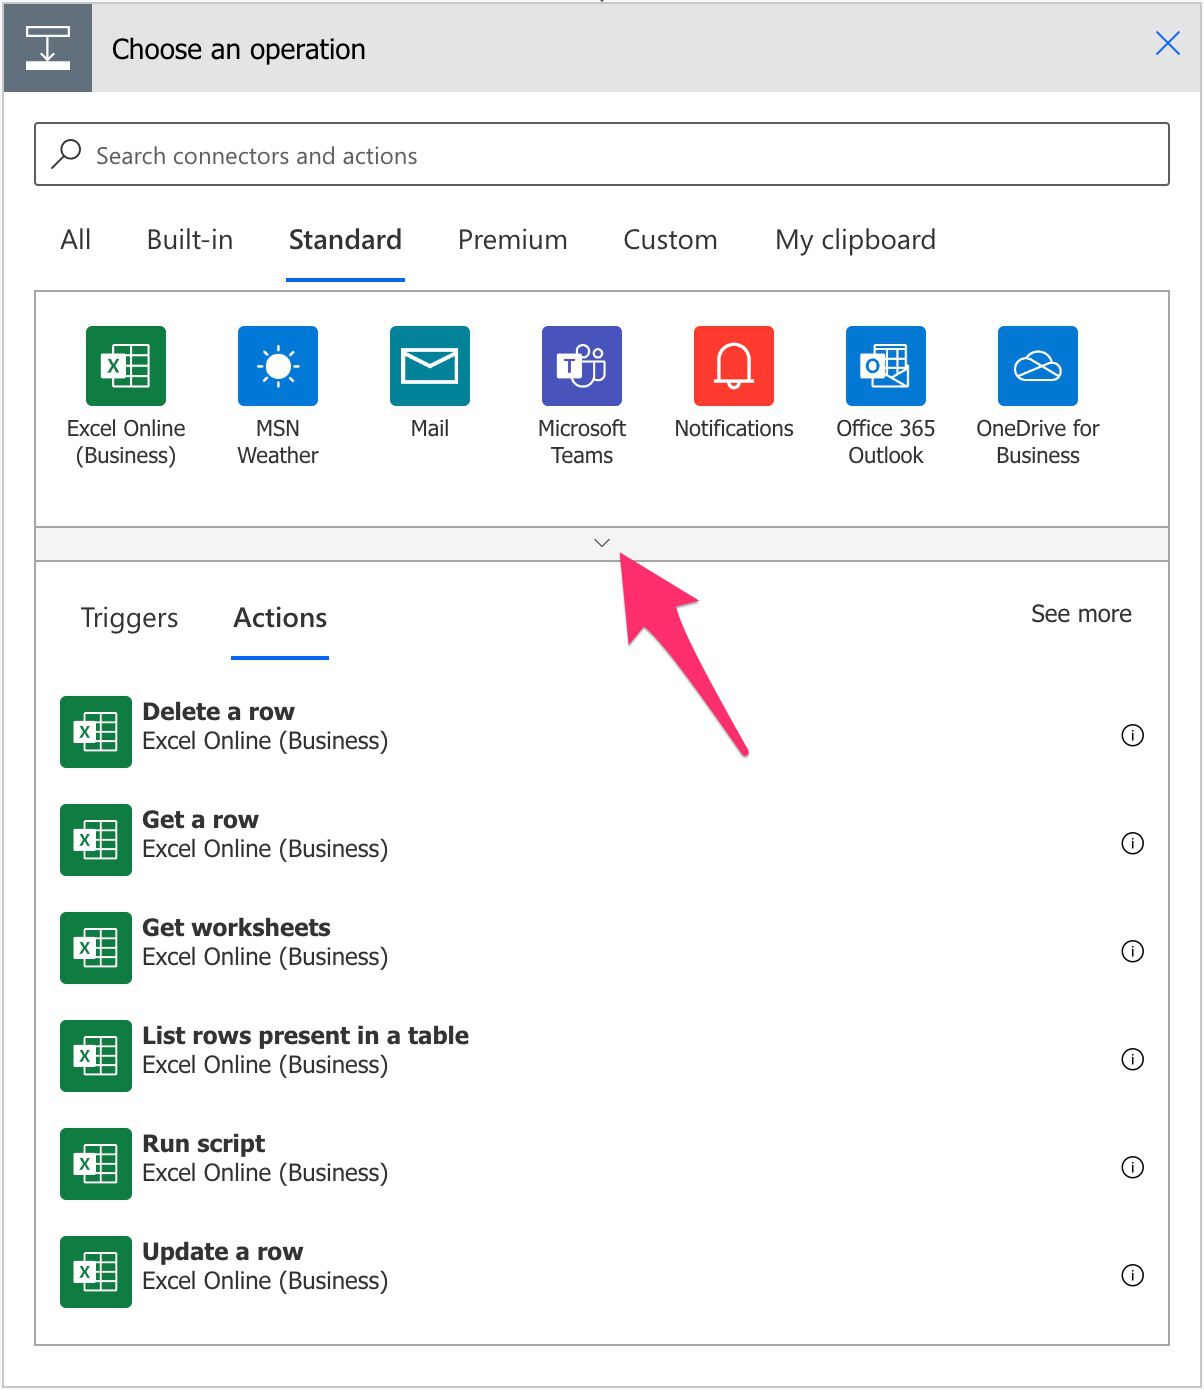
Select SharePoint.
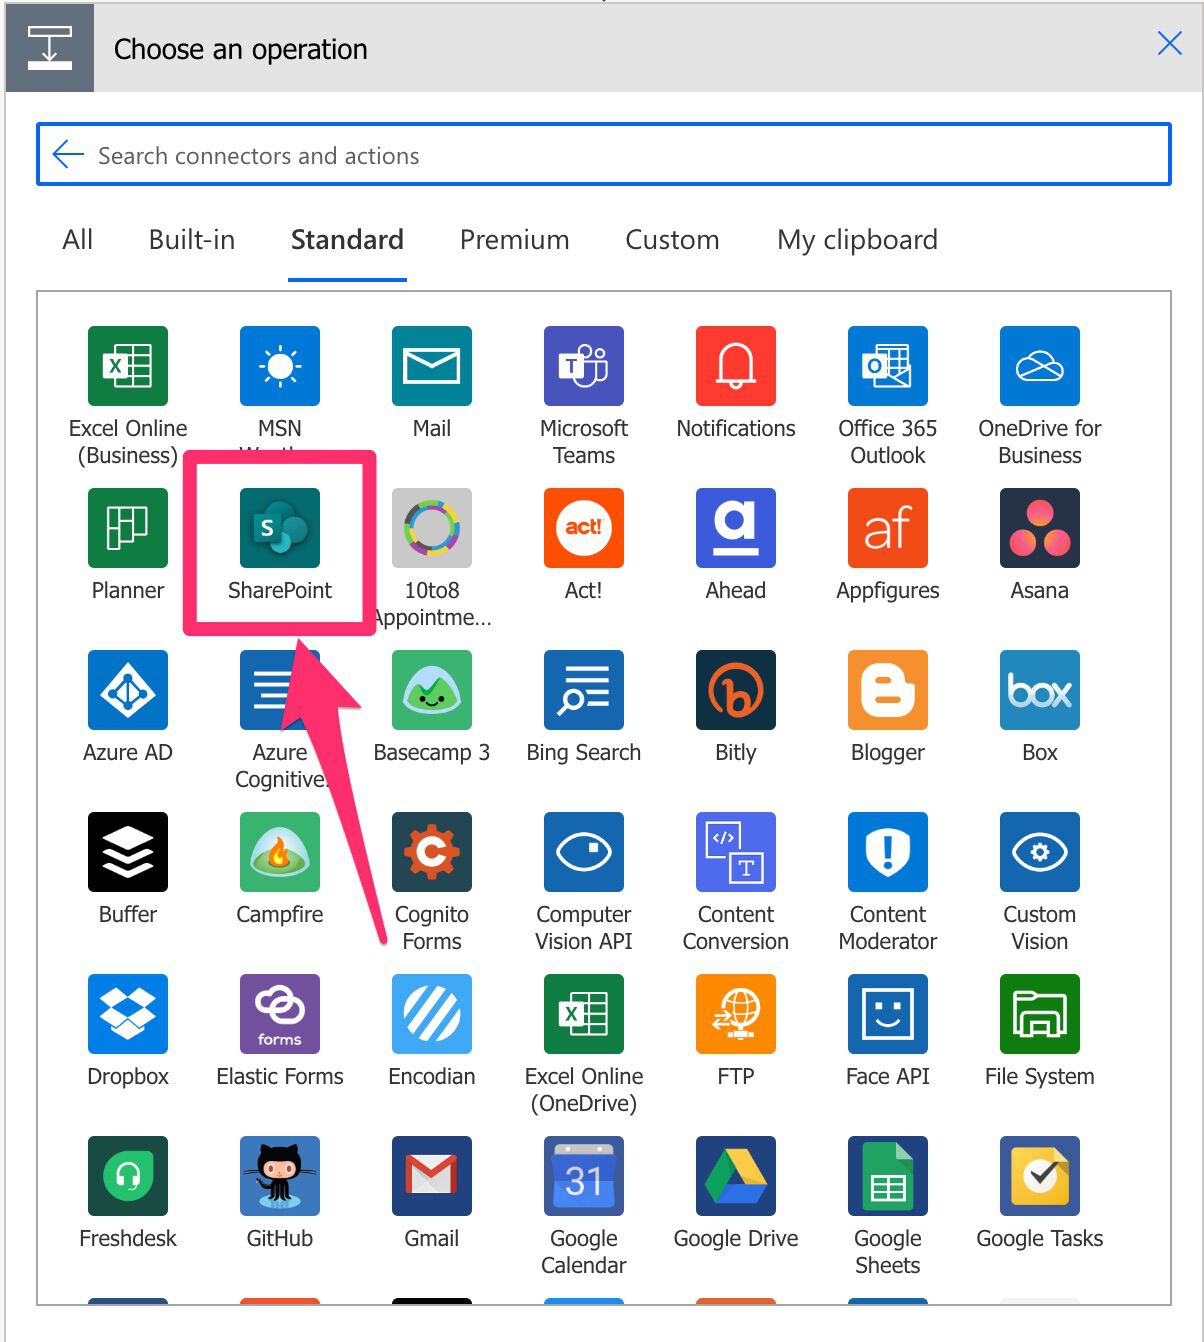
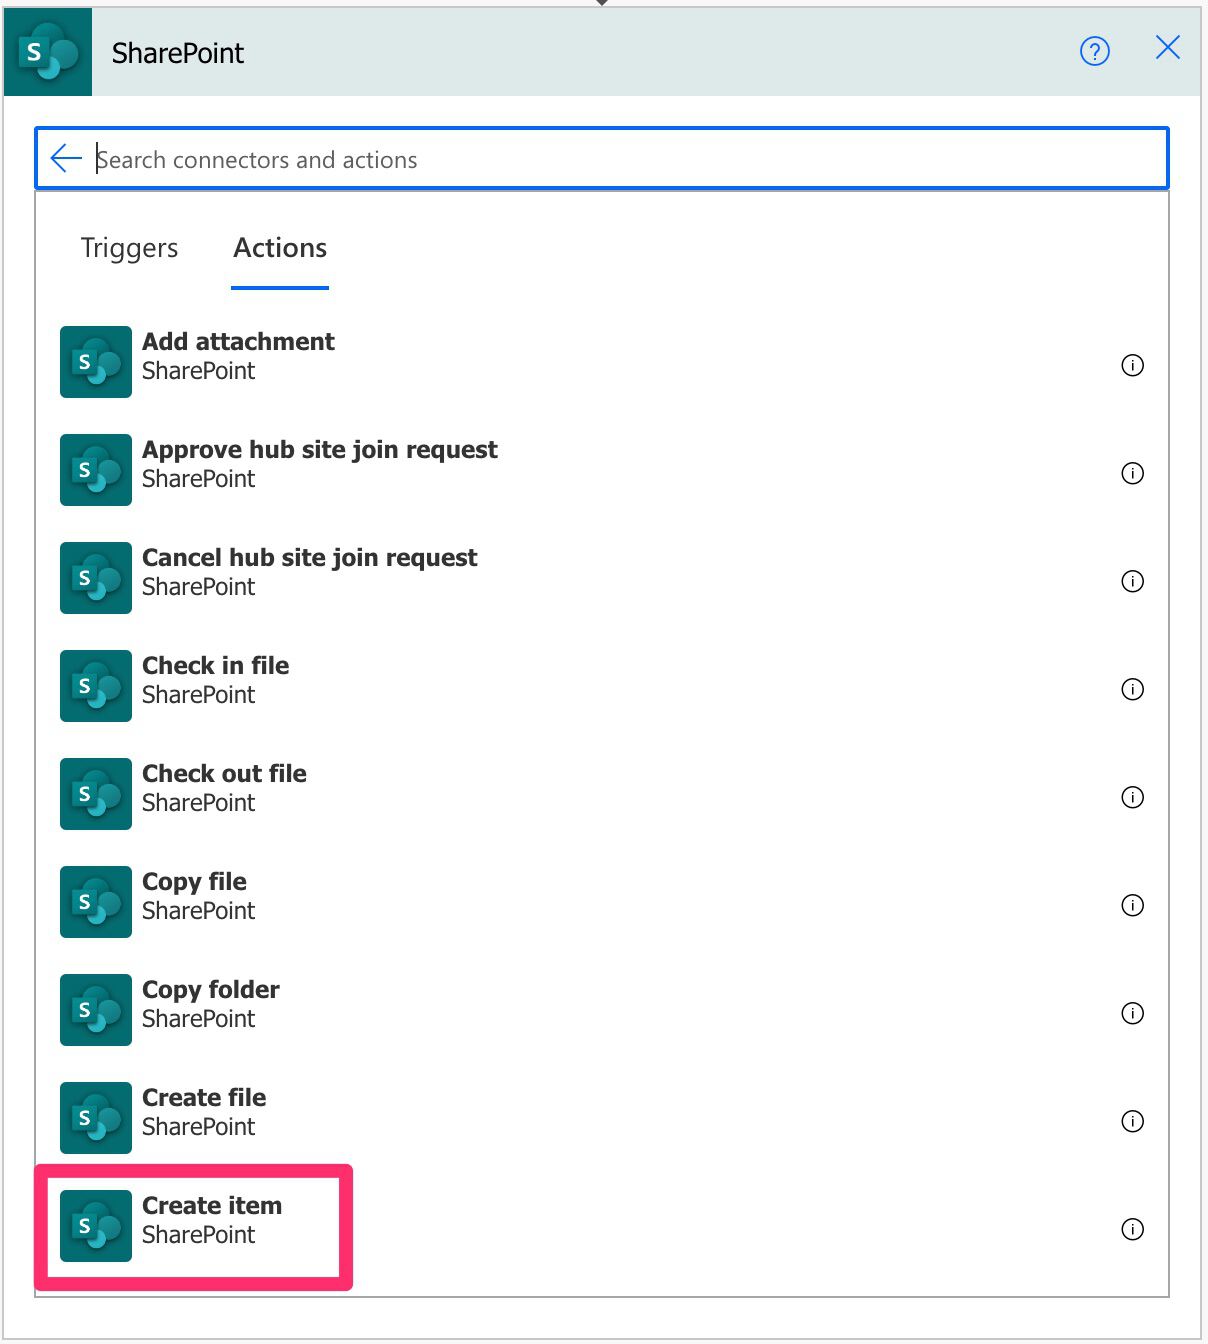
Find and select the “create item” action:
Here’s what it looks like:

There’s an advanced view that looks like this:
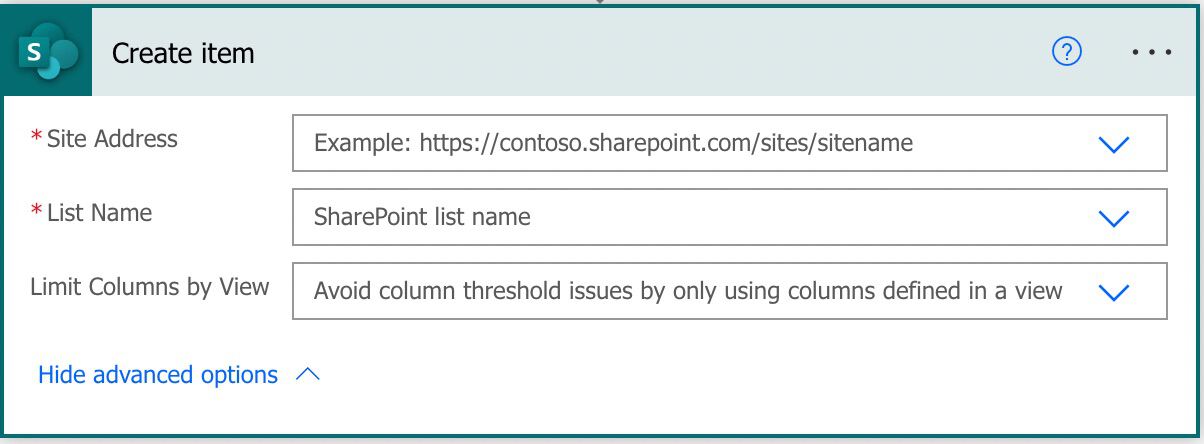
The “limit columns by view” is used when you want to limit the number of columns you display in the UI, making it a bit easier to manage in case of extensive lists since you’ll have a smaller action to manage. You still have to fill in the mandatory fields, so use this feature carefully. I always advise to have the view with all fields visible, but it’s up to you as long as you know what you’re doing.
Now that we know how to find it let’s understand how to use it.
Usage
Before using it, you always need the list to be created in SharePoint since you need to pick it in the action. So be sure to have the list created beforehand.
Let’s start with a simple list containing an artist, its musical style, and an optional field having the people who associate with them.

As soon as we fill in these fields in SharePoint’s “create item,” we go from this:

To this:
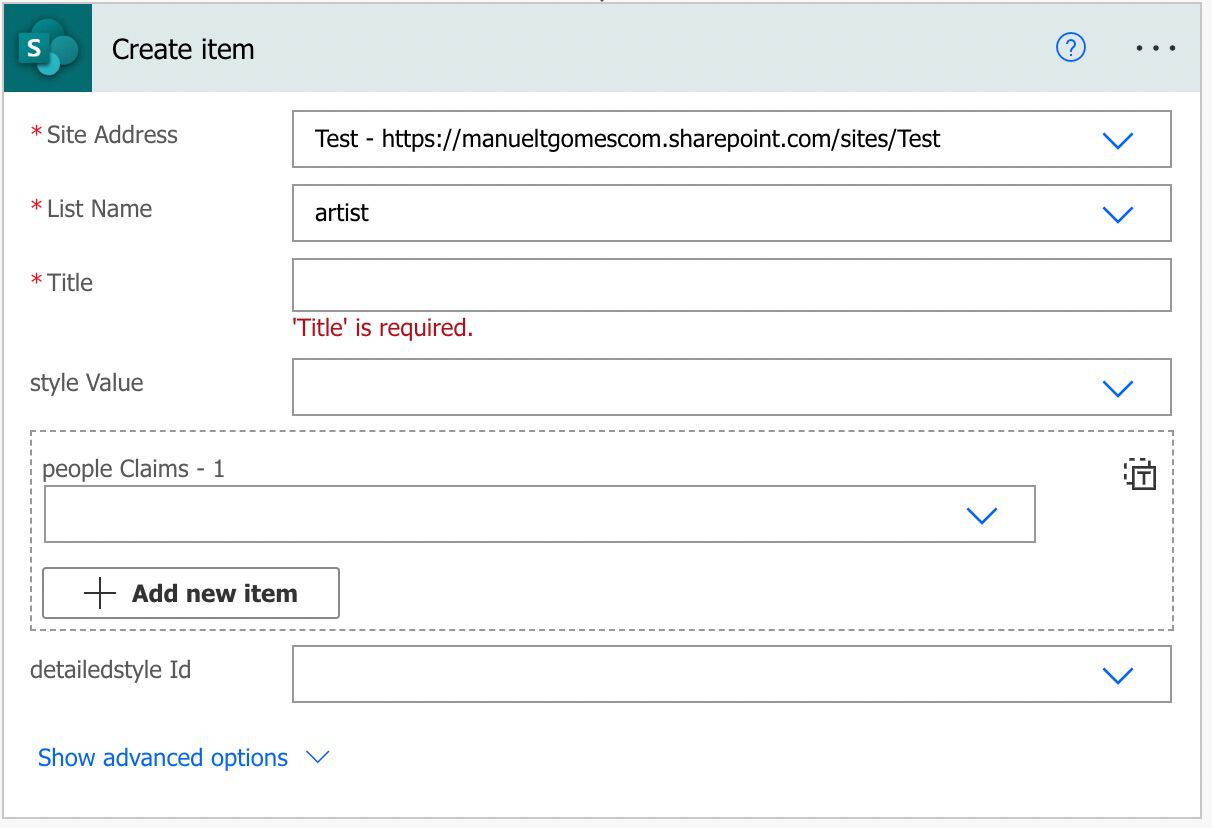
Power Automate needs to know what the list is so it can display the fields to you. It does a great job understanding the types and adding dropdowns with the values to make them easier to add.
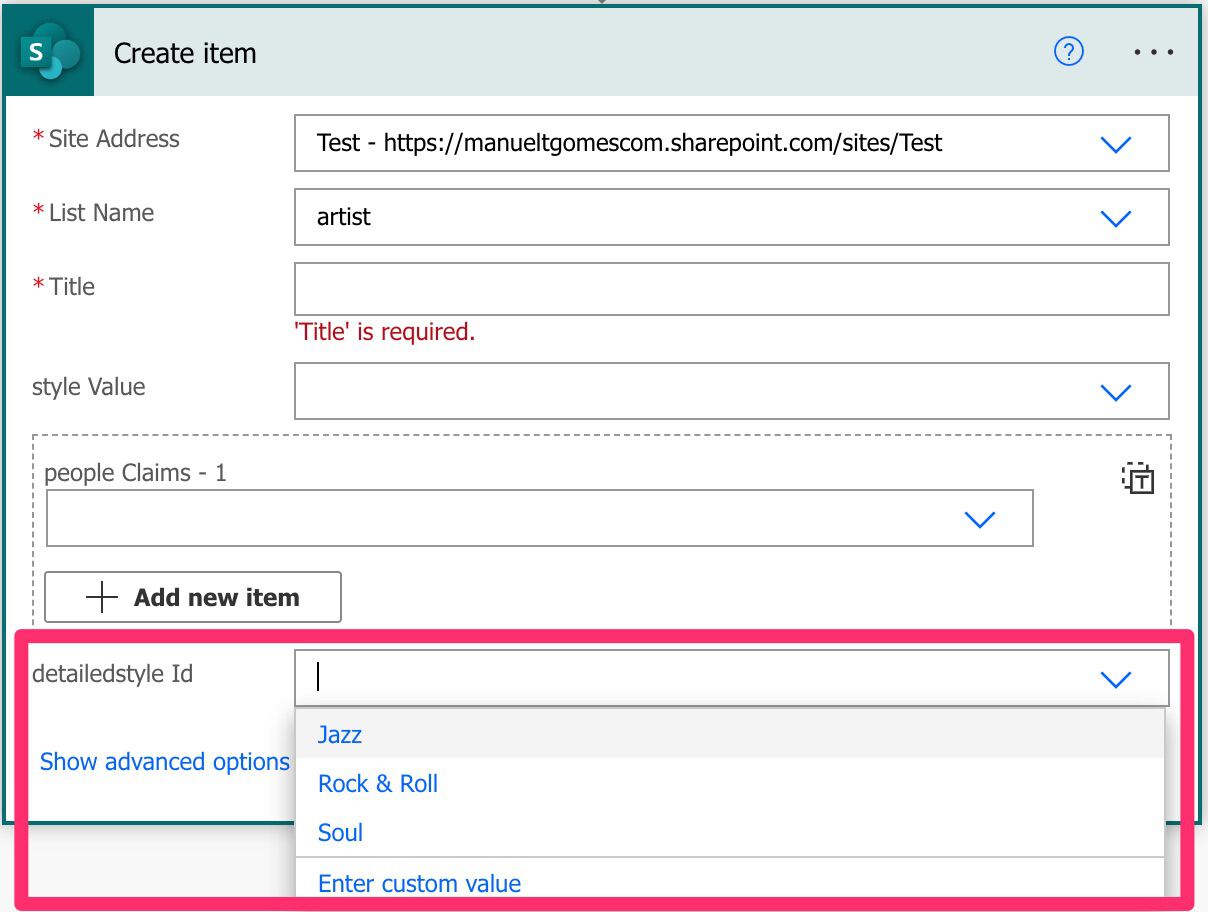
Notice that only the “Title” field is mandatory, so you know that Power Automate makes the extra validation to ensure that you always provide the necessary information.
Limitations
You can’t add attachments or images using the “Create item” action. It would help if you used the “Add attachment action” to do it.
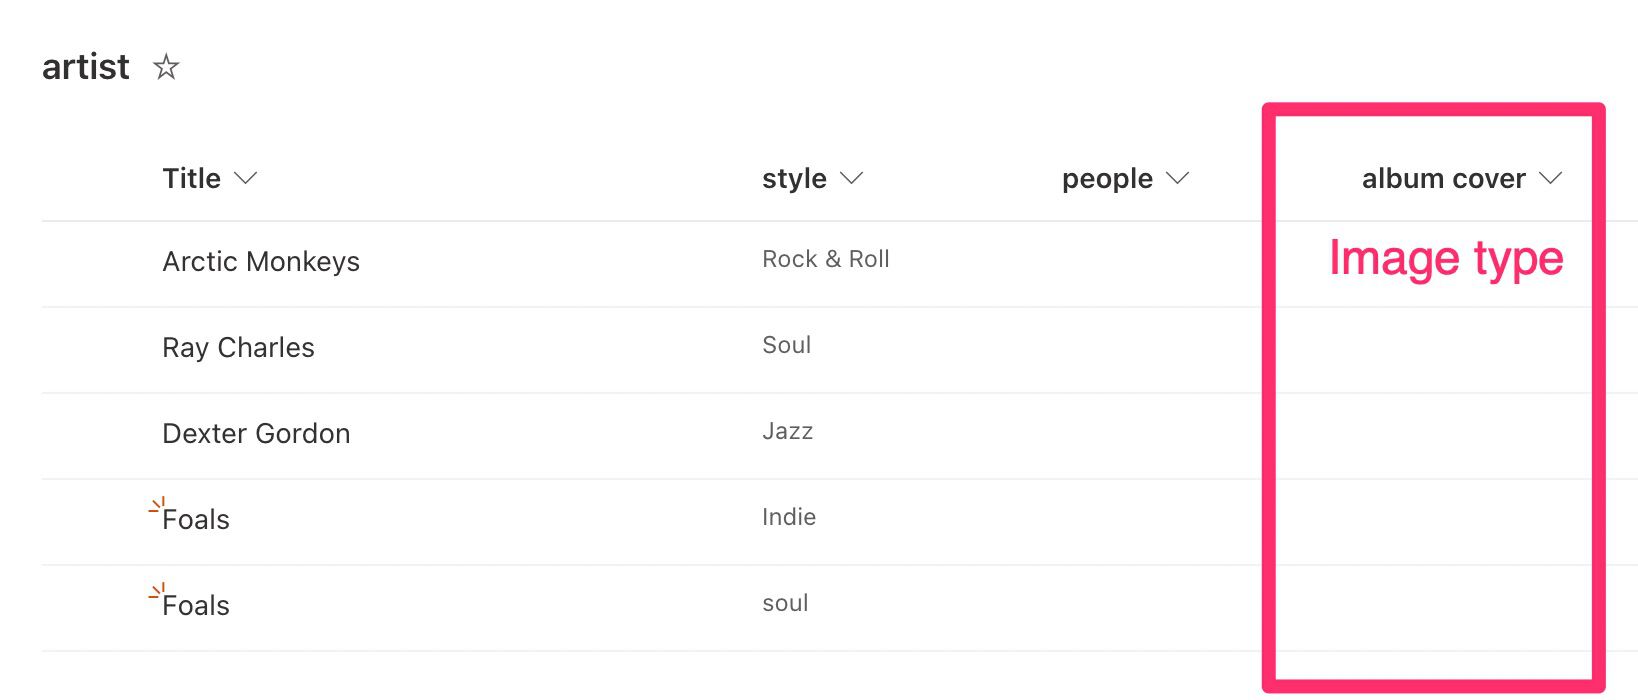
Here’s what we see on Power Automate’s side:
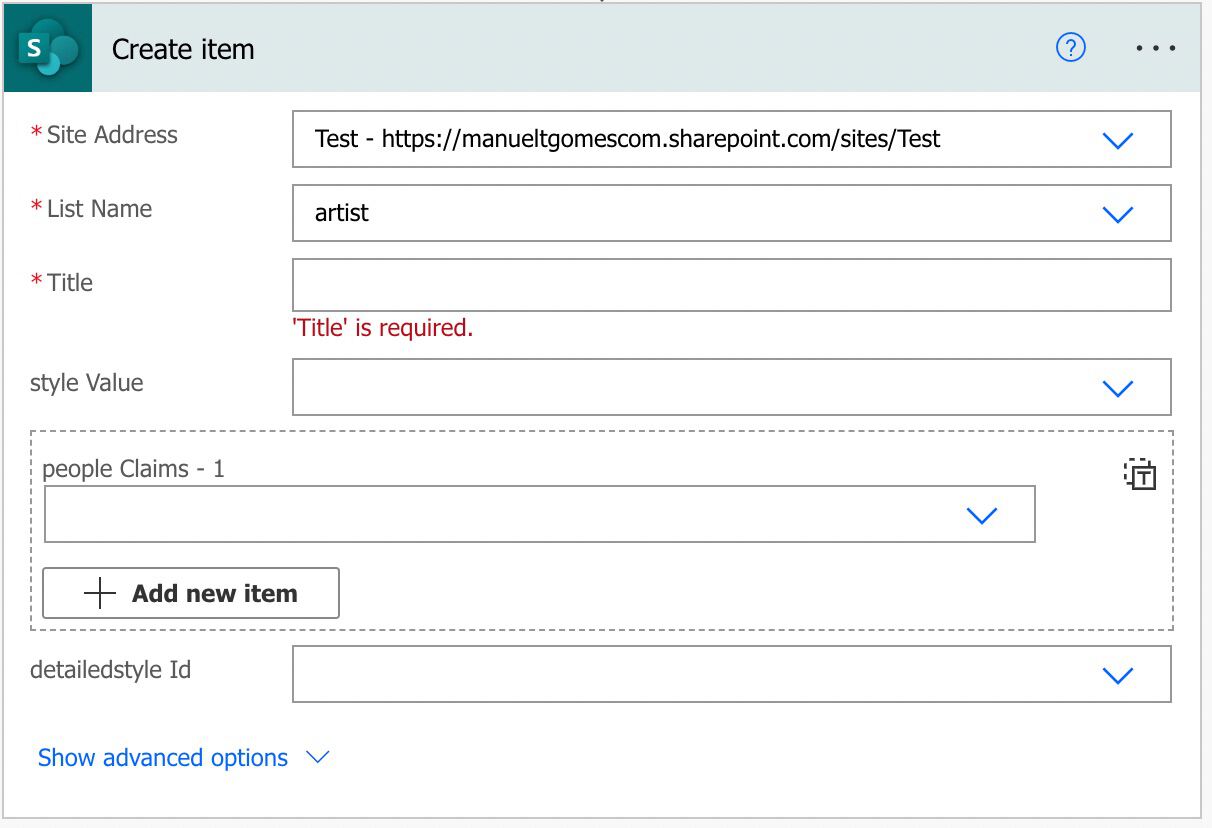
Another limitation is that the Flow will fail if the dates are not in the ISO format, like 2022-07-06T13:00:00Z (referring to July 6th, 2022, 1 pm). Dates are especially tricky to deal with in Power Automate, so be sure that the dates are in the correct formats if you’re getting them from somewhere else.
Finally, you can only insert one value each time. If you’re inserting many values, your Flow may take some time to finalize since you have to call SharePoint for each action run.
Non-intuitive behaviors
There is strange behavior in the “Choice” columns. To demonstrate it, here’s the list of options:
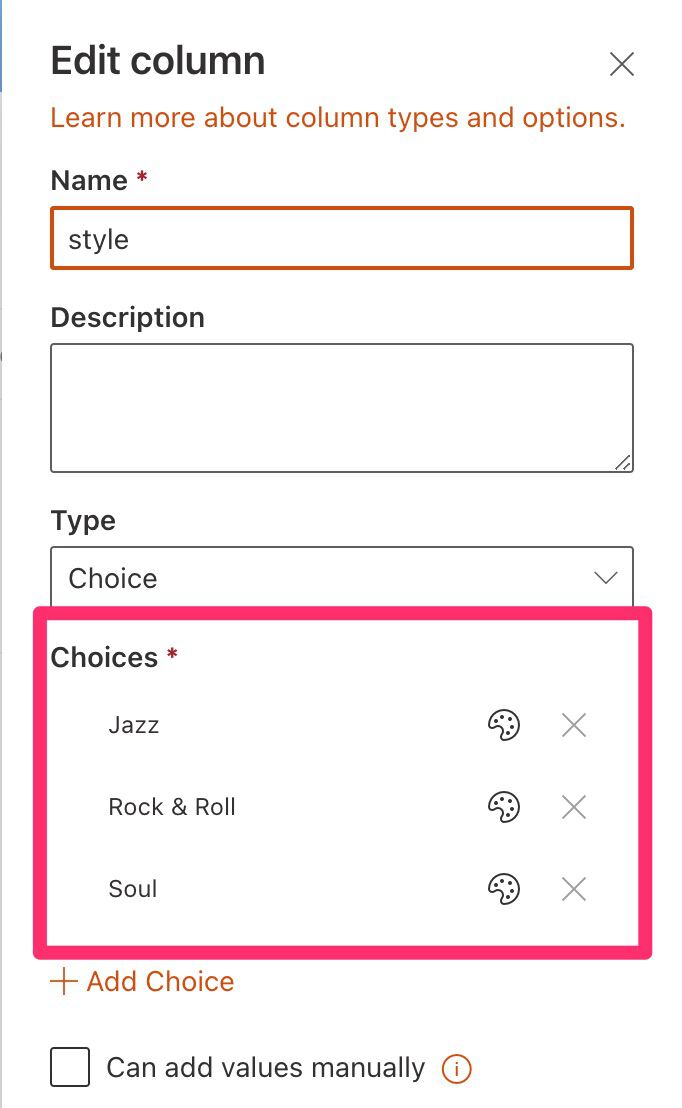
Now let’s add a custom option that doesn’t exist in the list of options,
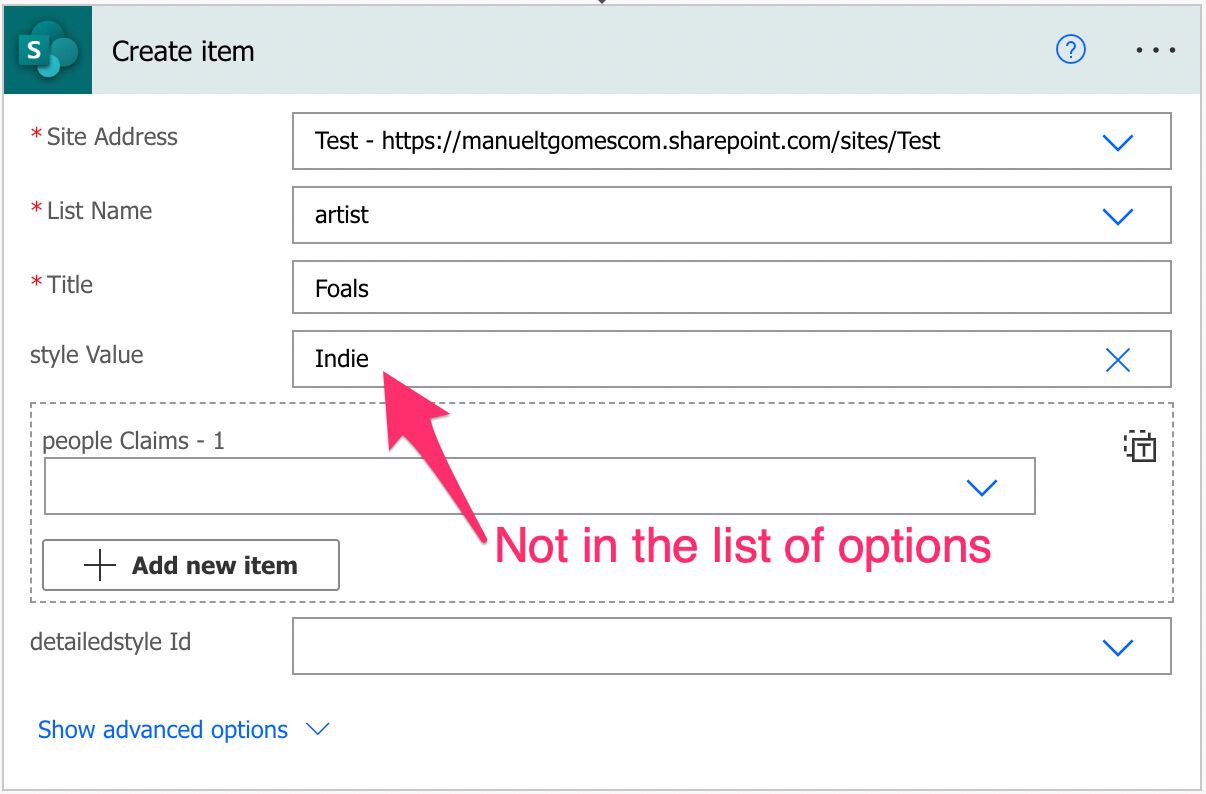
One would think that the Flow would fail, right? Mainly because the “Can add values manually” option is disabled. But here’s the final result:
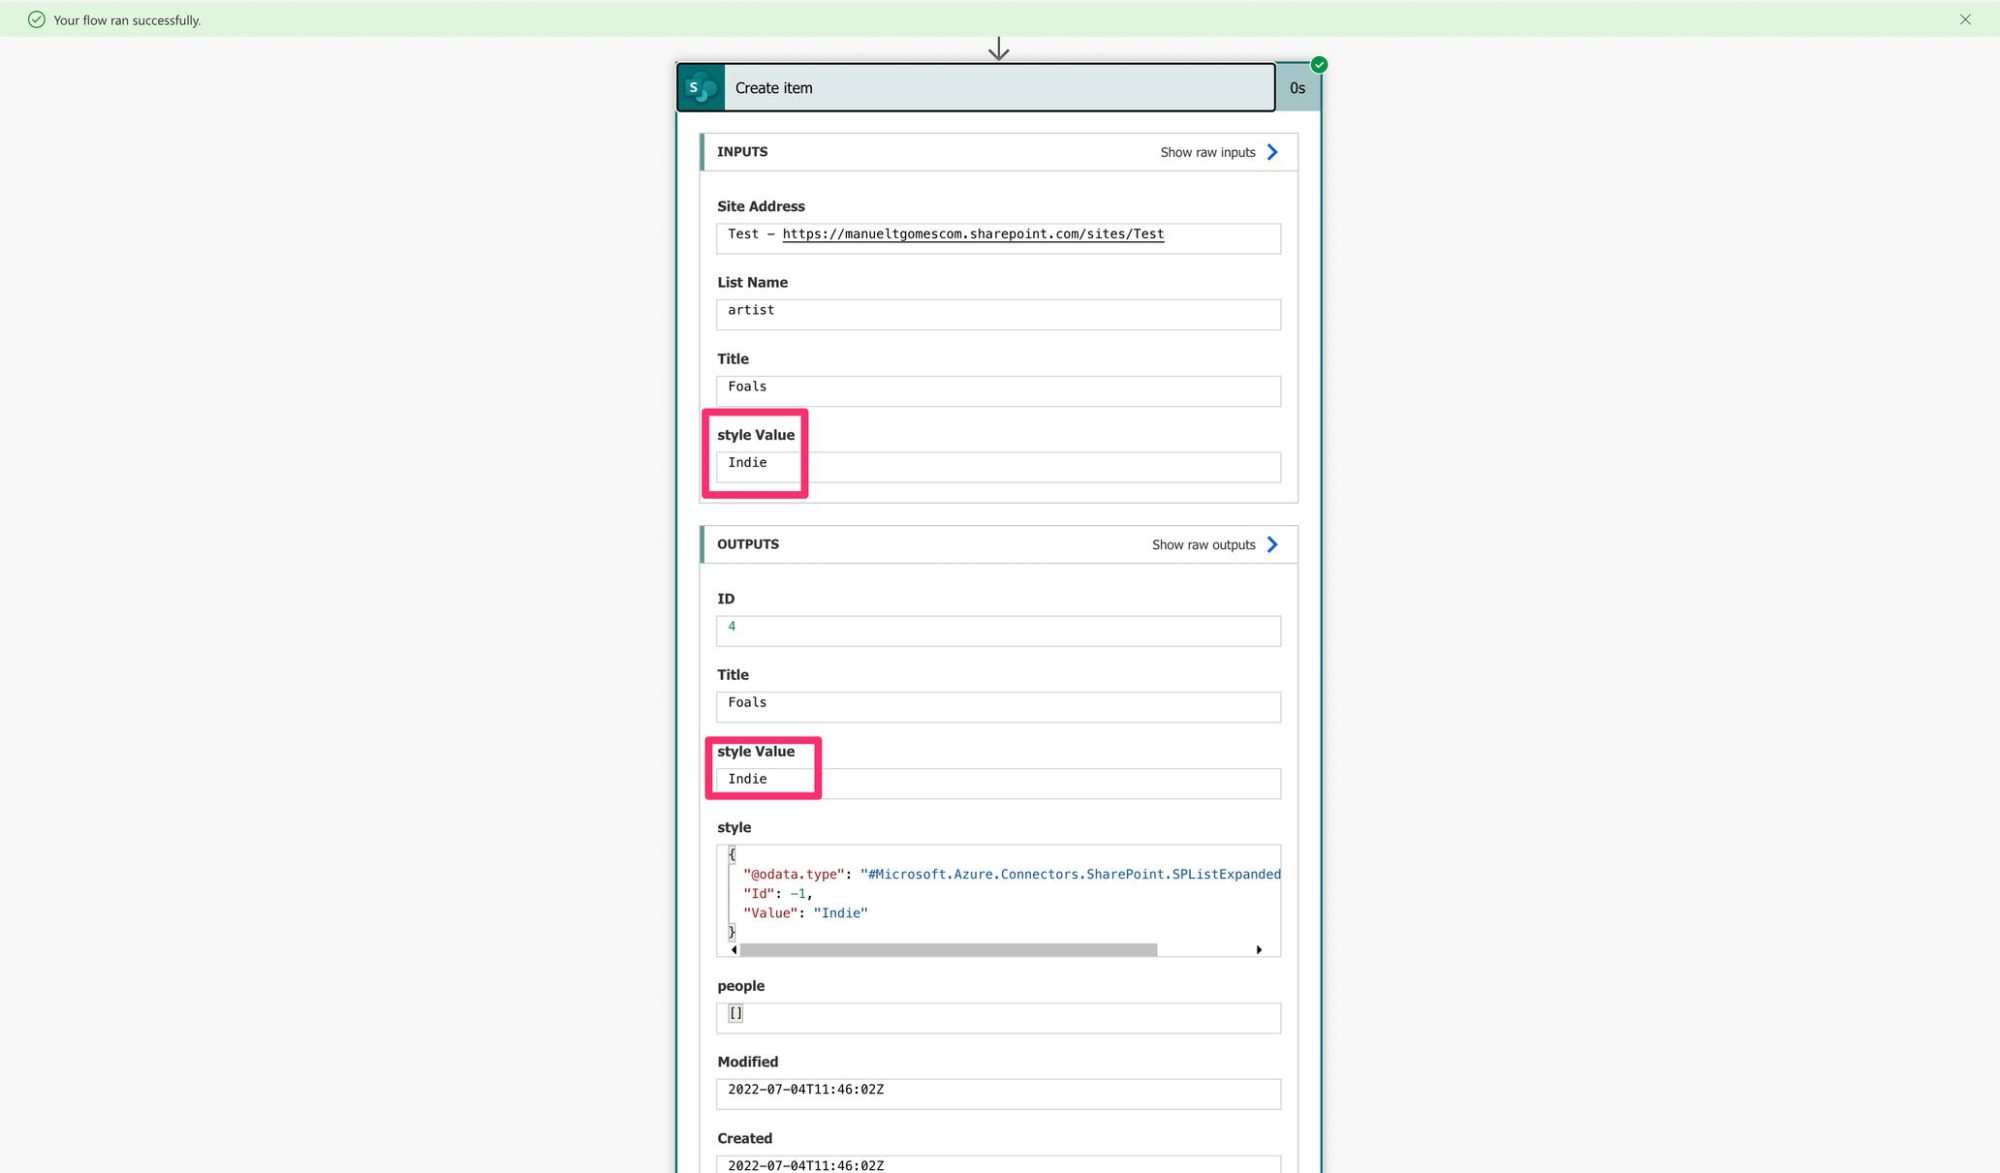
The Flow runs successfully, and here’s what we see in the list:
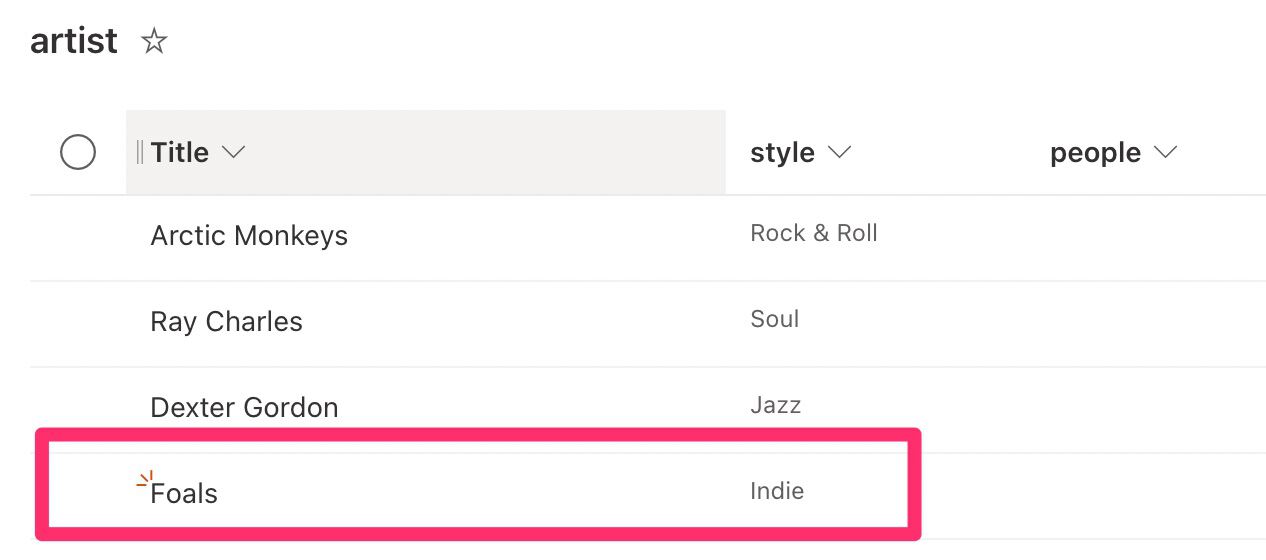
Please be careful with this, especially if you don’t see the value you’re inserting (if you have it in a variable, for example). You can insert invalid results into the list.
What about if the option is in a different case than the options in SharePoint’s list. Or with spaces. Let’s test it:
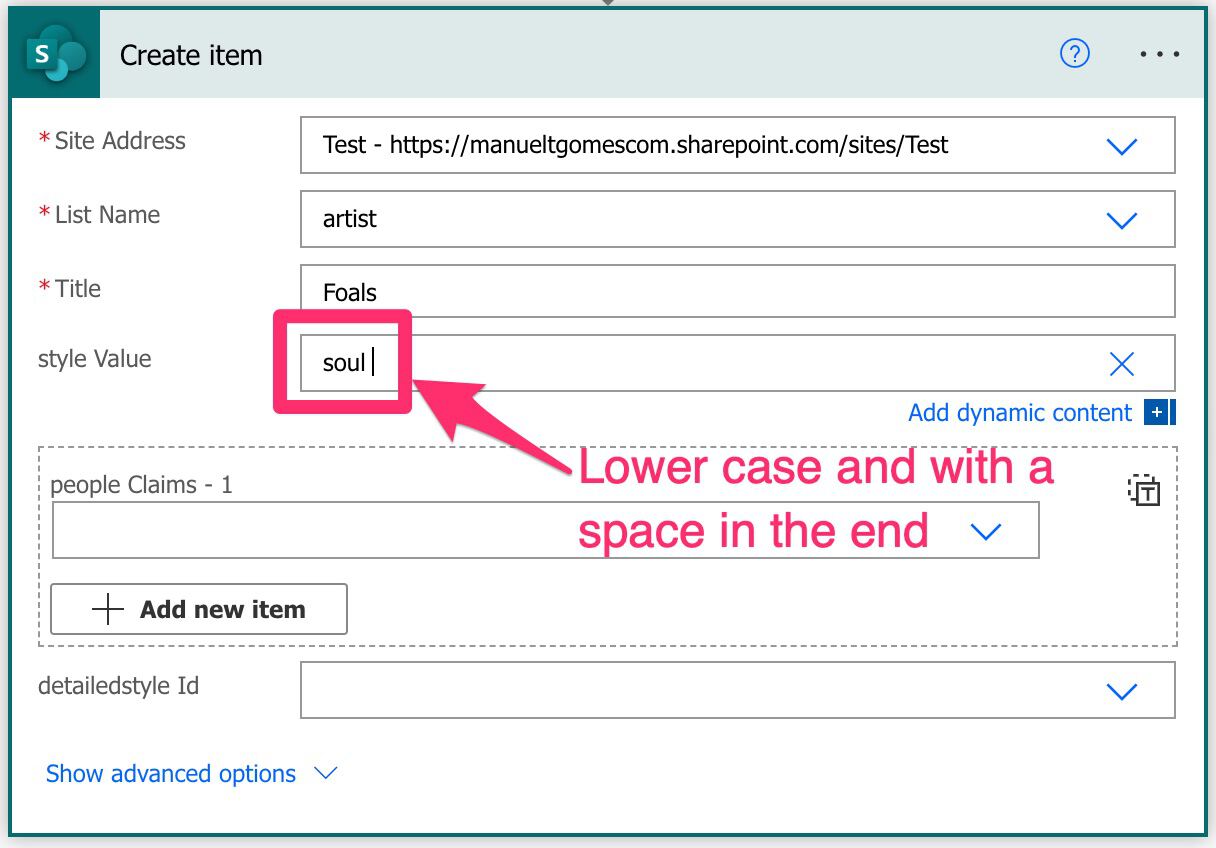
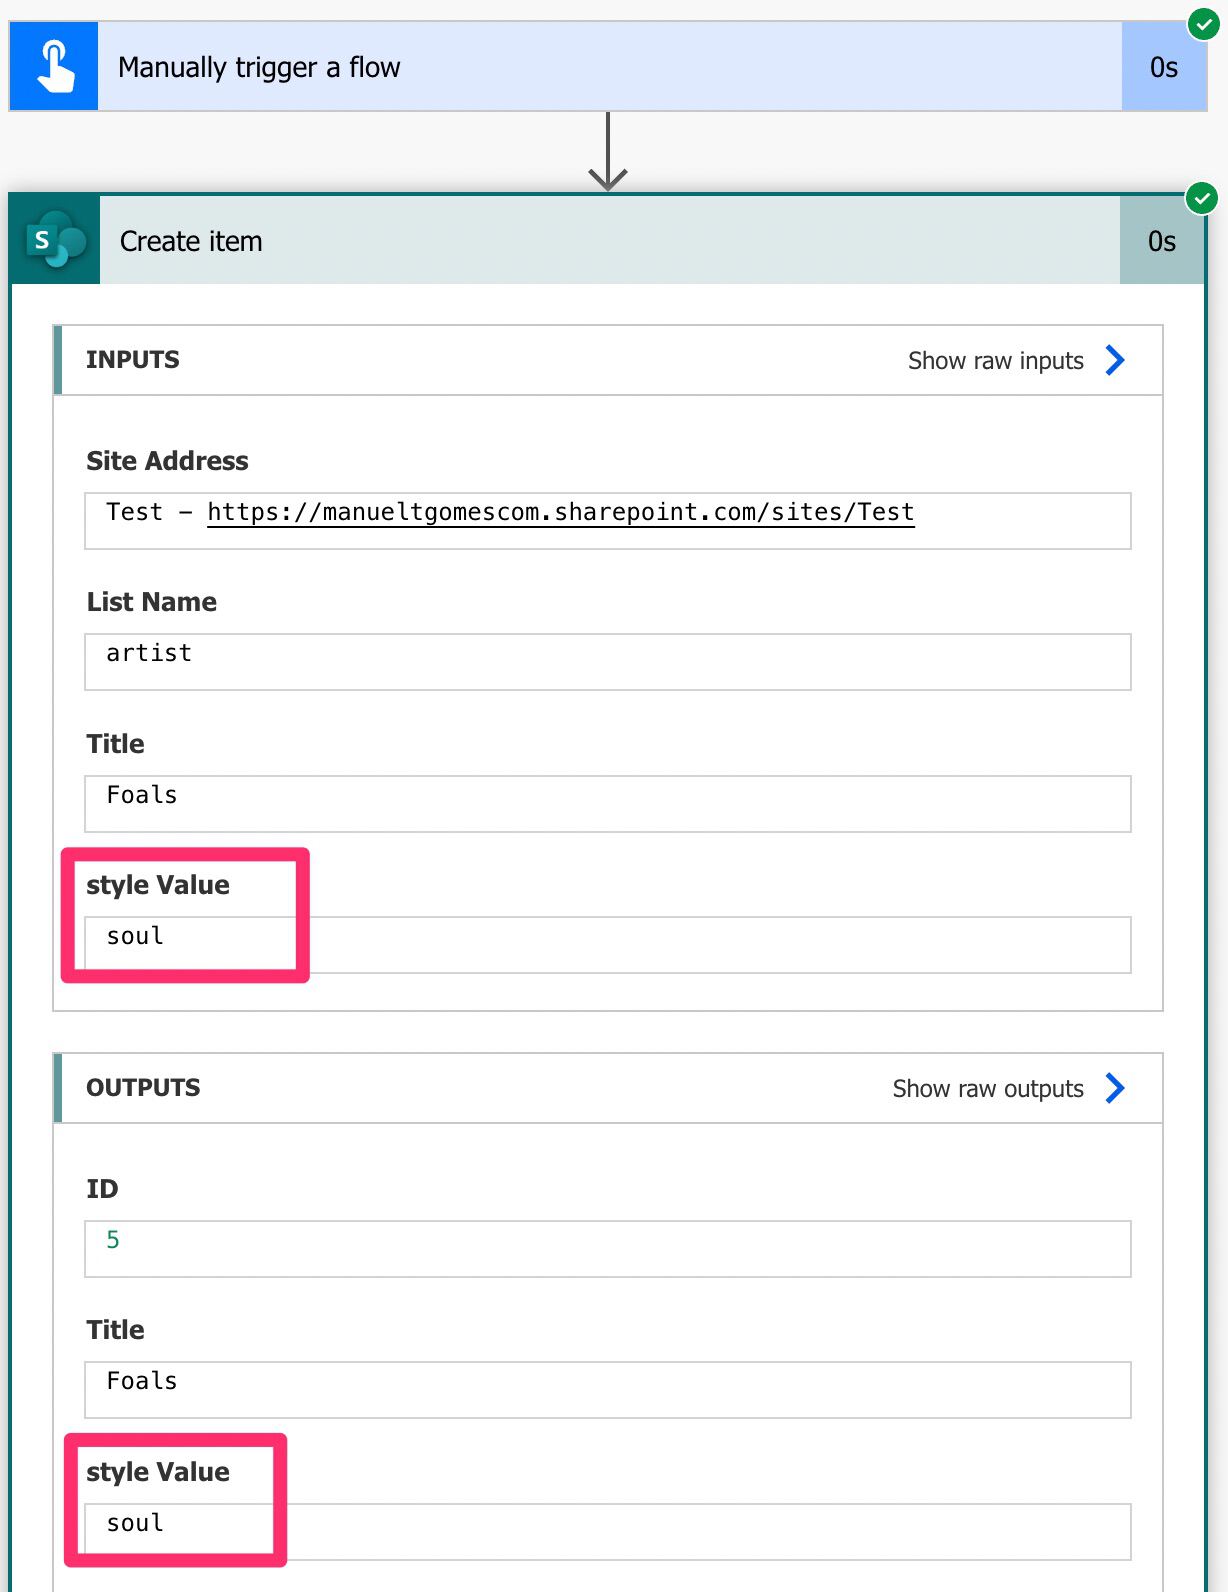
The Flow runs correctly.
Here’s what we see on SharePoint’s site.
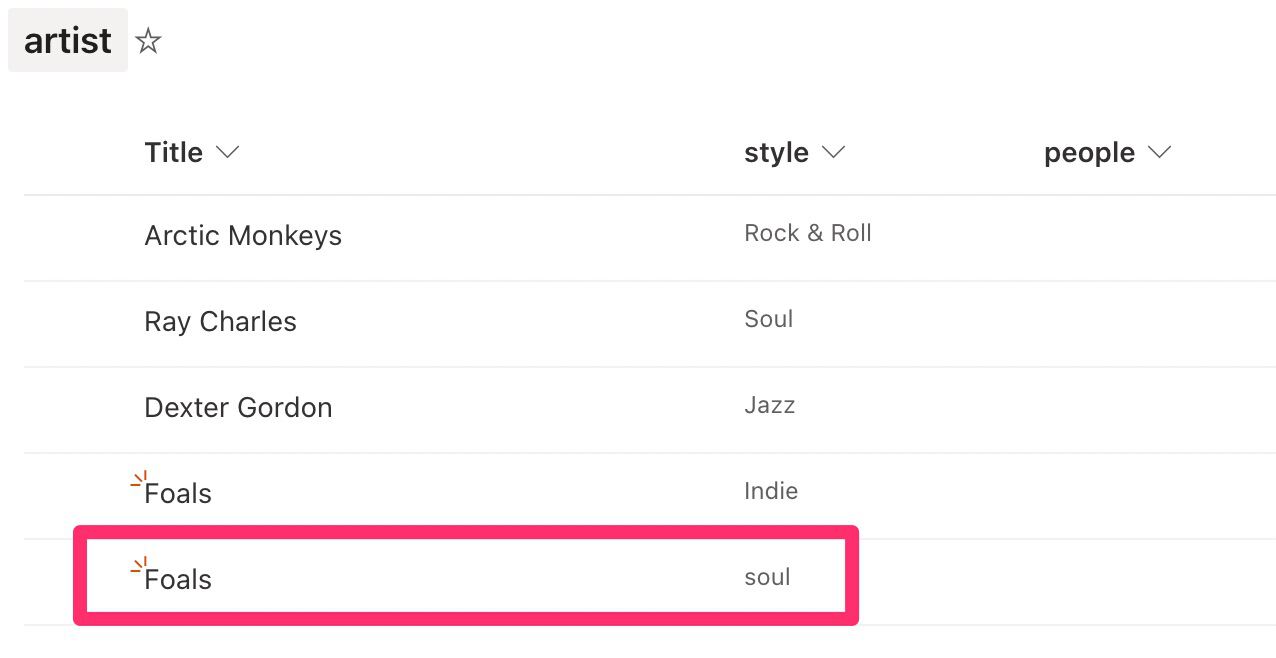
So be very careful with the “Choice” columns. The data may look the same, but if it’s not the same as the pre-defined options, you’ll get new values.
Recommendations
Here are some things to keep in mind.
Don’t do custom values in choice columns.
As we’ve seen in the previous example, making a mistake and inserting invalid data into your lists is very easy. I would strongly advise you not to define custom values and pick them from the dropdown if you can.
Don’t fill in all the values.
If you don’t know what to insert data in one value, don’t add any field to it. You don’t need to add the “null” special value because SharePoint will know that if there’s no value, variable, formula, or anything in the field, then the value is empty.
The only exception is if the value is mandatory in SharePoint. If it is, you need to add a valid and not “null” value, so your Flow doesn’t fail.
Name it correctly
The name is super important since it’s the first clue on what is being done. Always build the name so that other people can understand what you are using without the need to open the action and check the details.
Always add a comment.
Adding a comment will also help avoid mistakes. Indicate what data you insert, for example, if it’s calculated and how. It’s essential to enable faster debugging when something goes wrong. Also, a few months from now, it’s an excellent way to remember why you’re inserting the data and the reasoning behind any specific action that you perform in the action.
Always deal with errors.
Have your Flow fail graciously and notify someone that something failed. It’s horrible to have failing Flows in Power Automate since they may go unlooked for a while or generate even worse errors. I have a template that you can use to help you make your Flow resistant to issues. You can check all details here.
Back to the Power Automate Action Reference.
Photo by Skye Studios on Unsplash


