 by
by Although Excel is known for being a standalone application, there’s a lot that we can do with Power Automate and tasks that we can automate. Today we’ll explore how to automate the update of rows in an Excel file by using the “Update a Row” action. This action works for files in SharePoint, Teams , or OneDrive for Business so let’s look at how to use it.
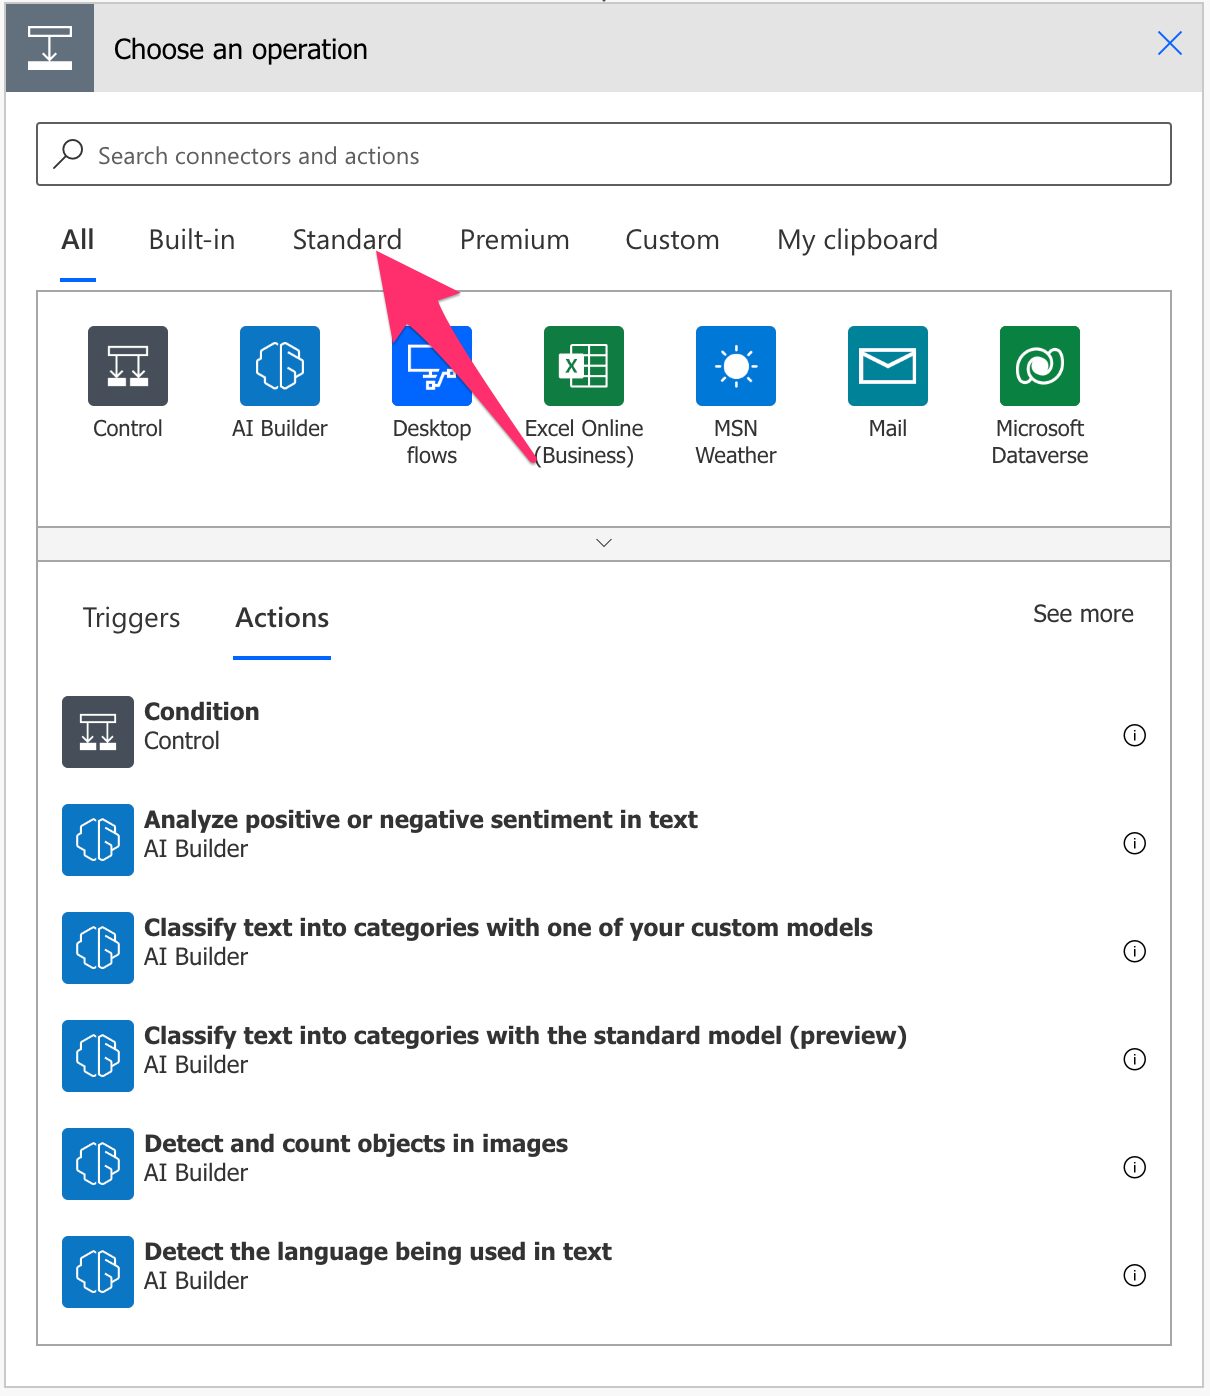
Where to find it?
You can find it under “Standard”.
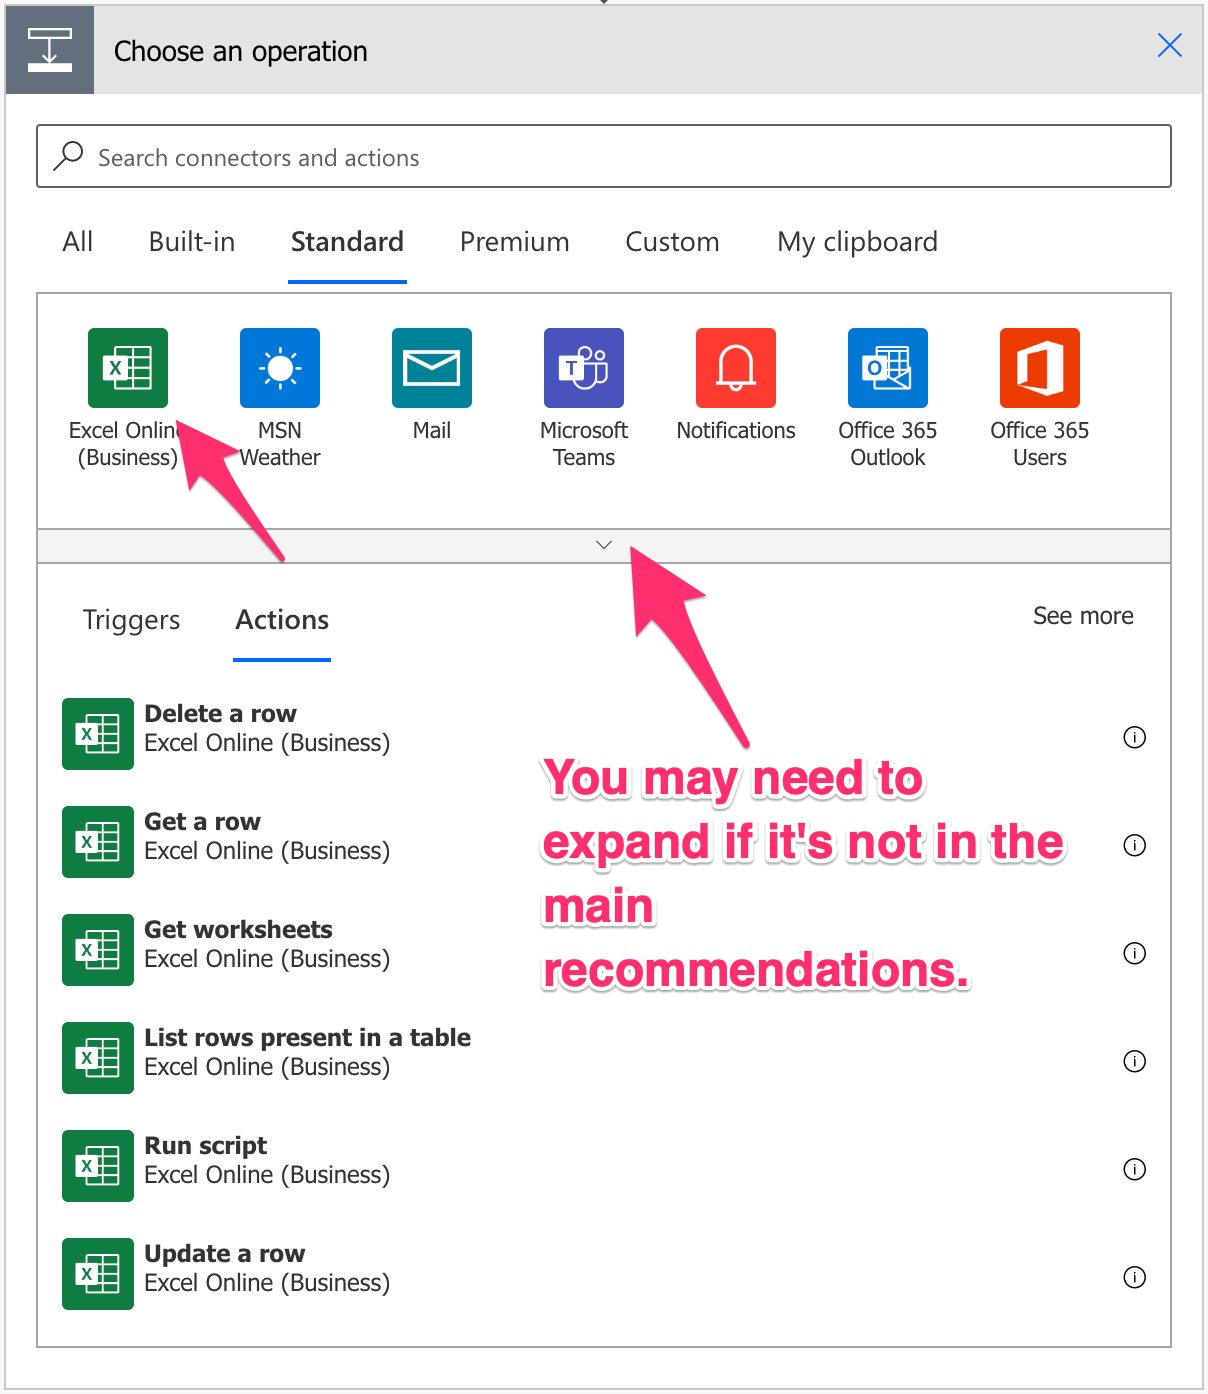
Pick “Excel Online”. You may see or need to expand the list depending on your suggestions.
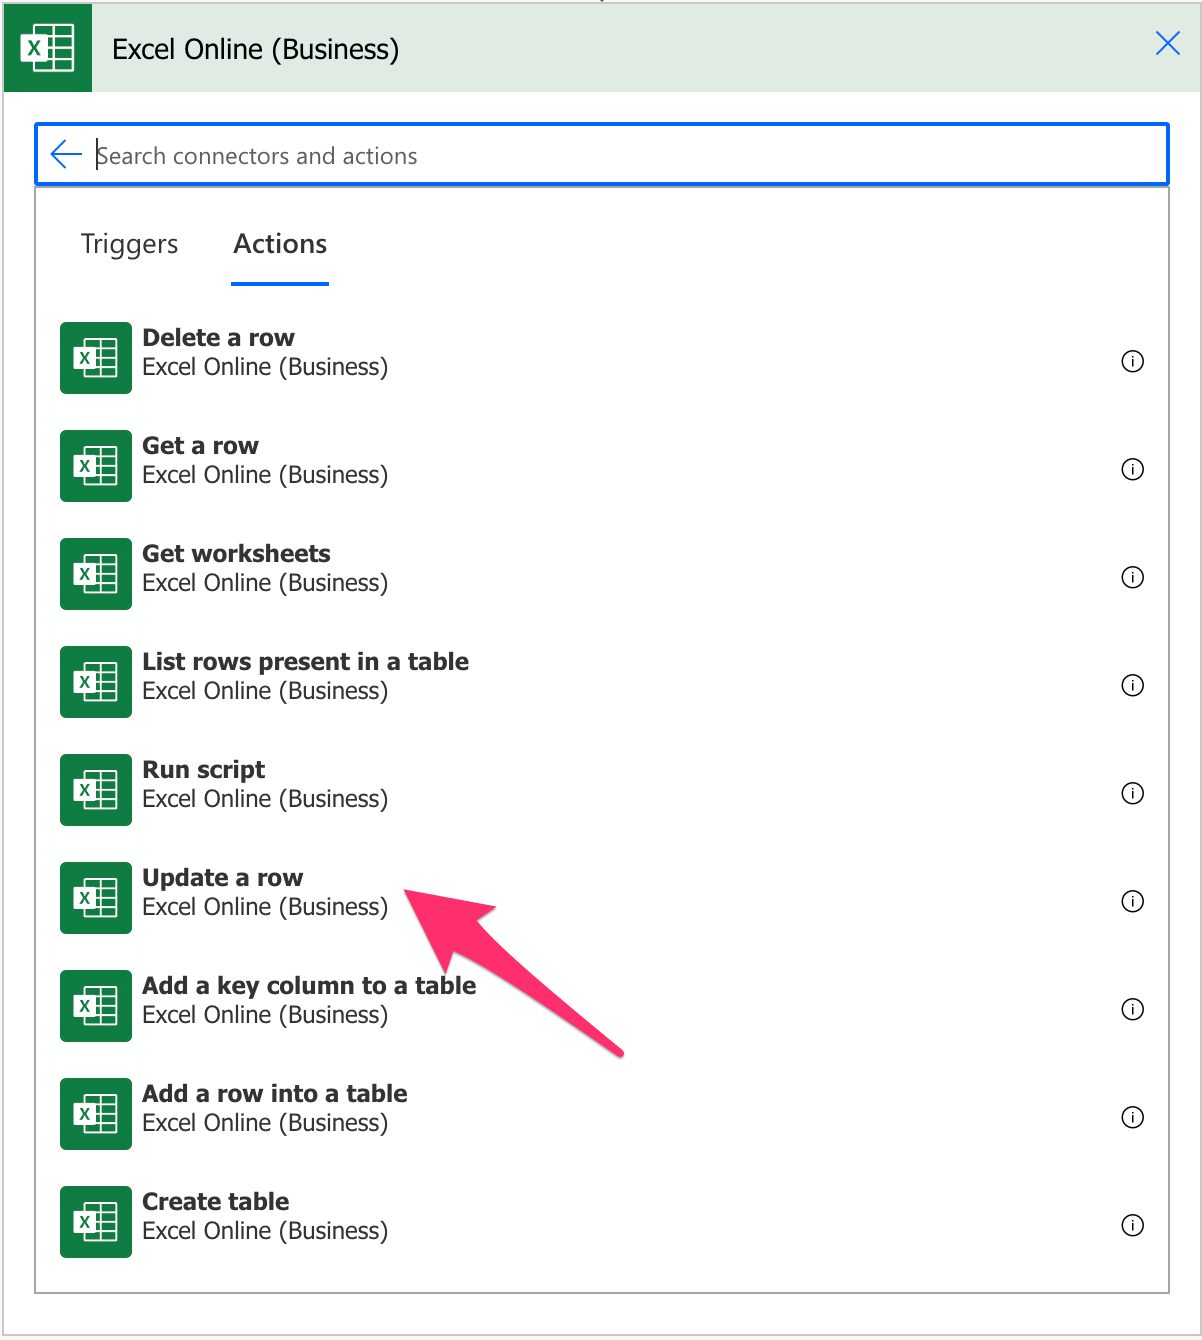
Select the “Update a Row” action:
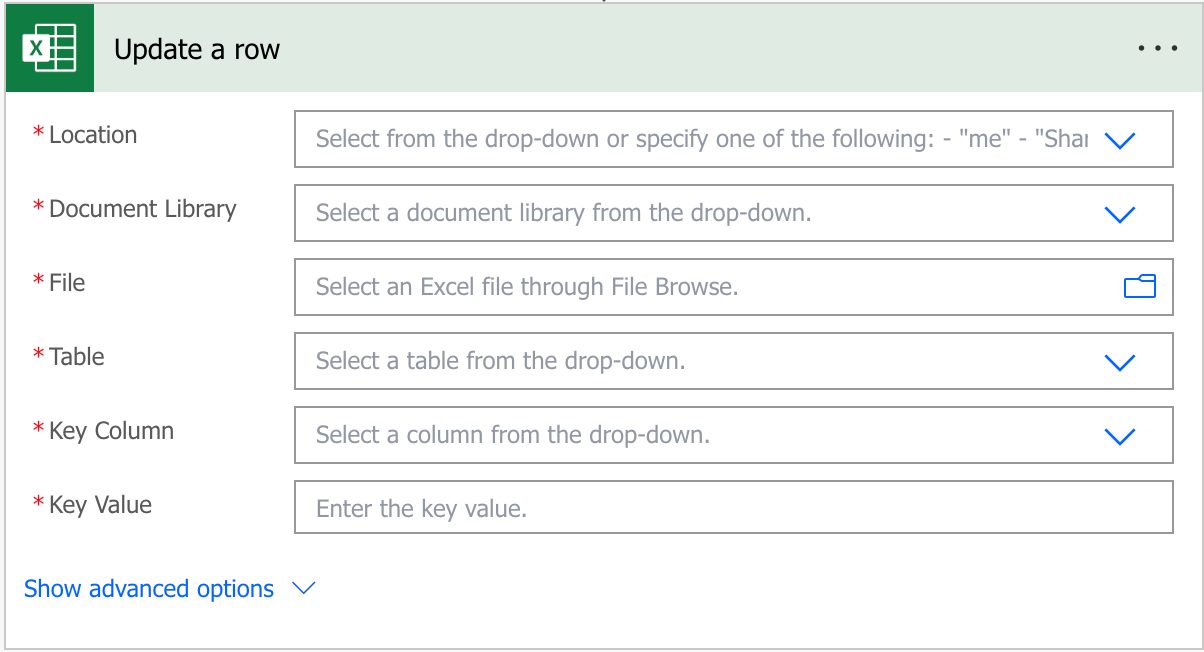
Here’s what it looks like.
Power Automate tends to save the most common actions in the main screen, so check there before going through the full hierarchy. Also, you can use the search to find it quickly.
Now that we know how to find it let’s understand how to use it.
Fields
You can find some fields to configure before using the “Update a row” action, so let’s look at them individually.
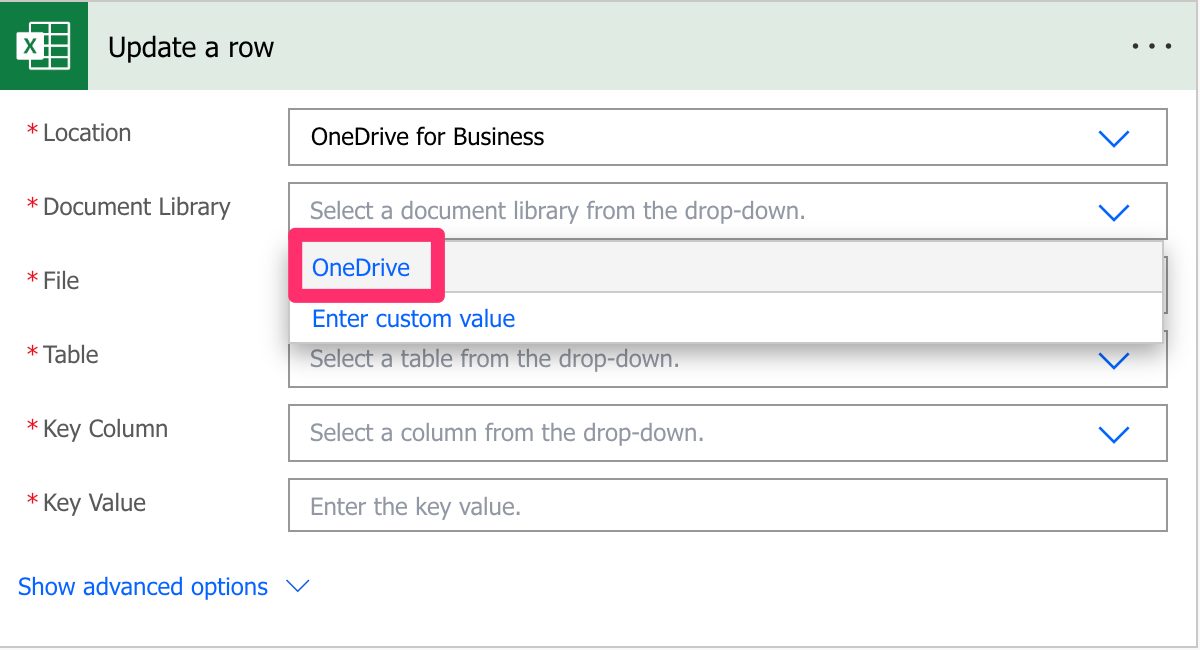
Location
As mentioned before, we can use SharePoint, Teams, or OneDrive For Business to find our Excel files. To do it, select the location where you want to find the data. For example, for OneDrive For Business:
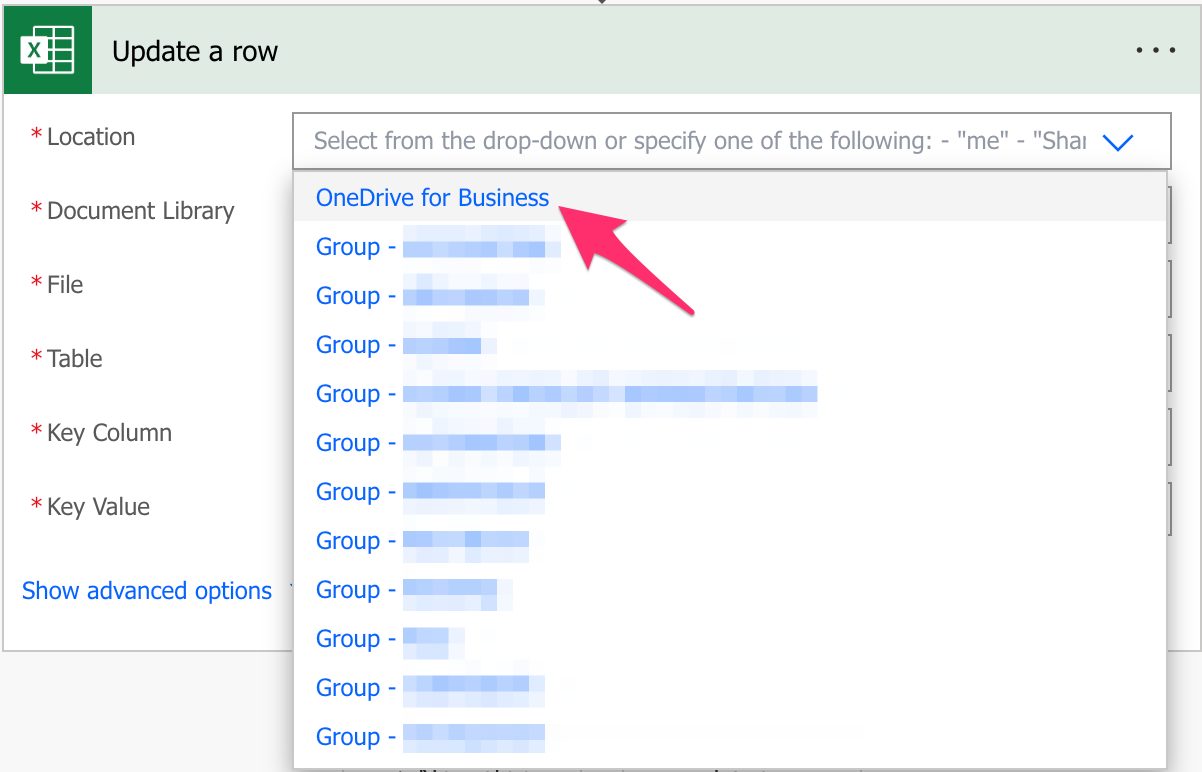
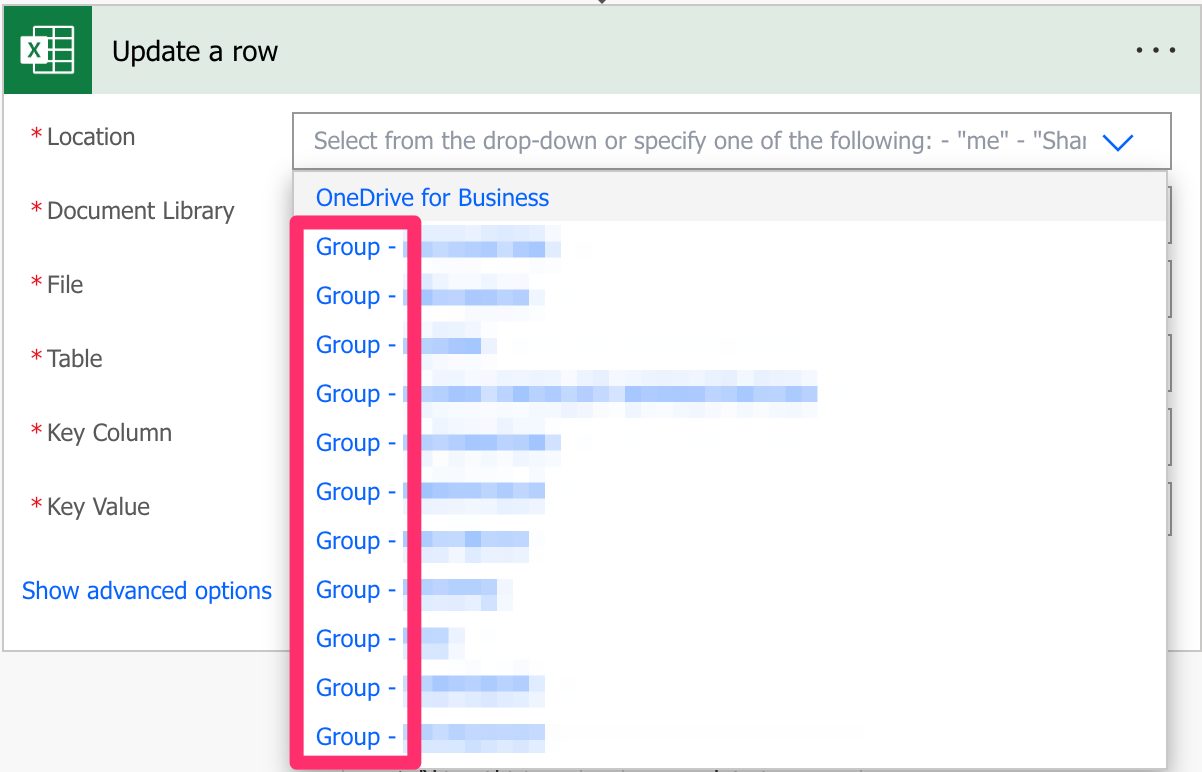
As you see above, you have a lot of “Groups” sites that are commonly Microsoft Teams sites.
If you’re looking for SharePoint sites, they are commonly displayed like this:
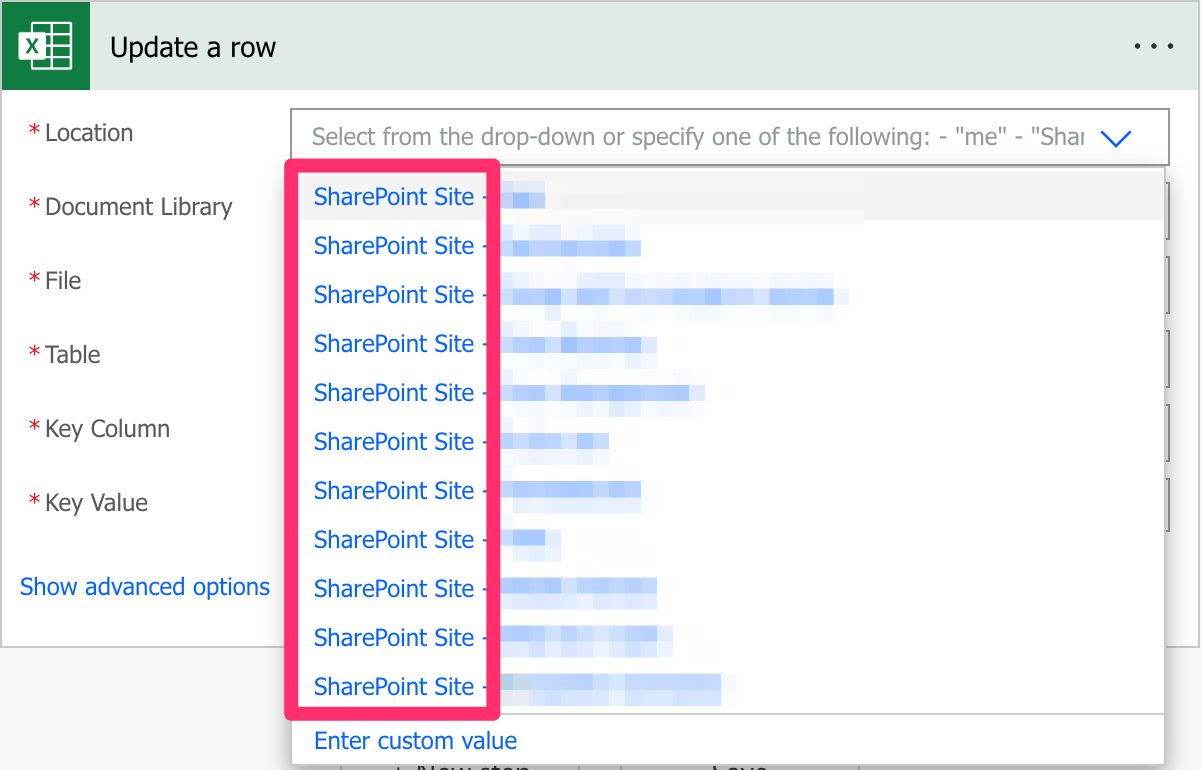
Since they all behave the same way, I’ll refer only to SharePoint sites from now on, but keep in mind that you can also use Microsoft Teams and OneDrive For Business. I’ll highlight the differences when appropriate.
Document Library
Since SharePoint sites can have multiple document libraries, we need to pick them from the list.
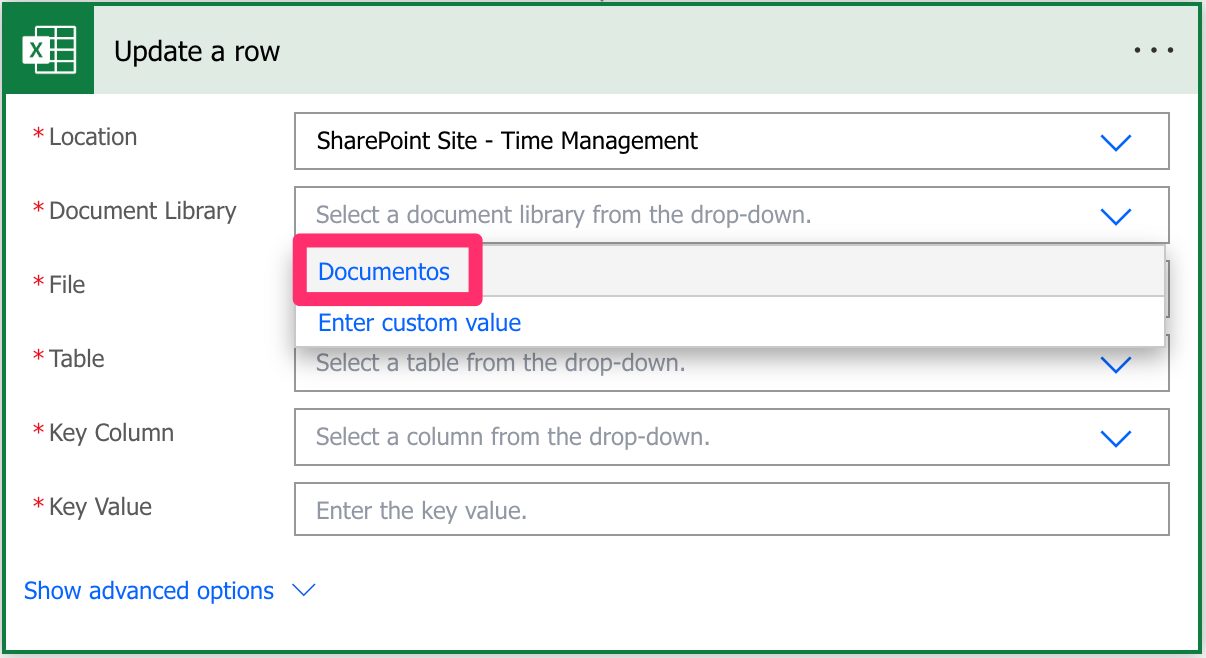
There’s always one created by default called “Documents” or something different depending on your language, but since it’s a mandatory field, you need to pick it; otherwise, you won’t be able to choose the file from the following field.
The same behavior occurs for OneDrive For Business, even if it’s not possible to create document libraries. Microsoft creates a document library that you can pick from the list.
File
Now that we have the locations defined, let’s look at a file. You can pick the file in the “File Browser”.
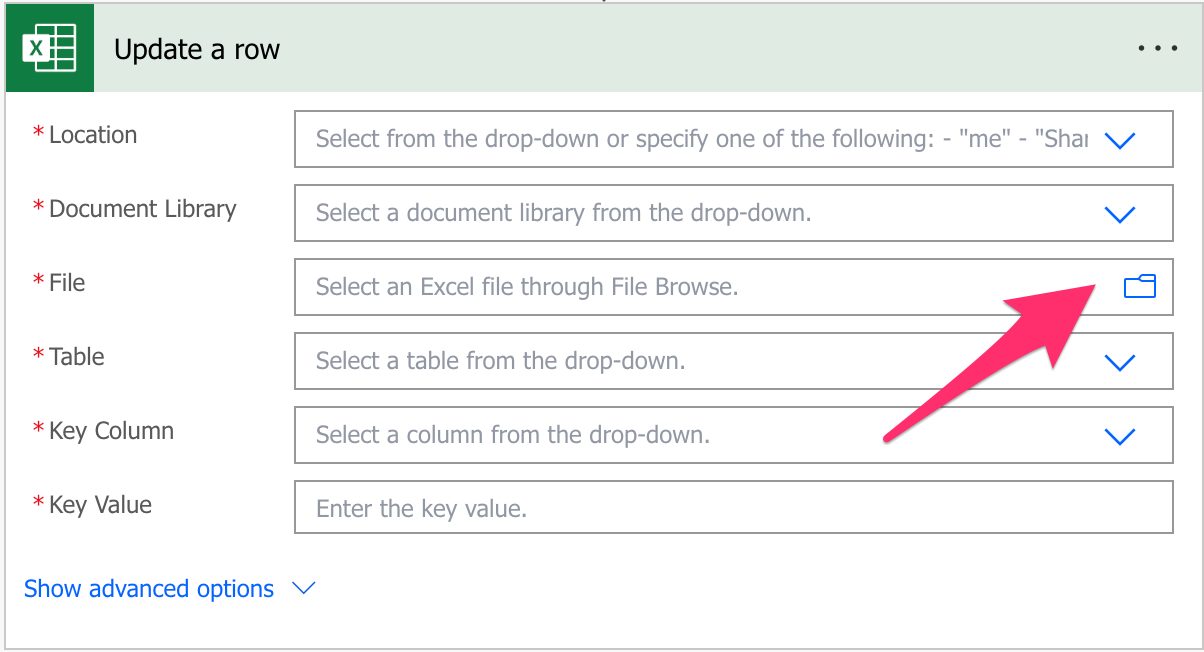
Or you can provide the path yourself, although I discourage this. Although you can do it, Power Automate sometimes returns strange errors related to the path, especially if the file has special characters. It’s always recommended that you can, of course, select the file directly in Power Automate’s UI.
Table
Power Automate requires the information inside an Excel table to access the data. To find the table, you can go to your Excel file, select a row and then check if you have a “Table Design” tab in the ribbon.
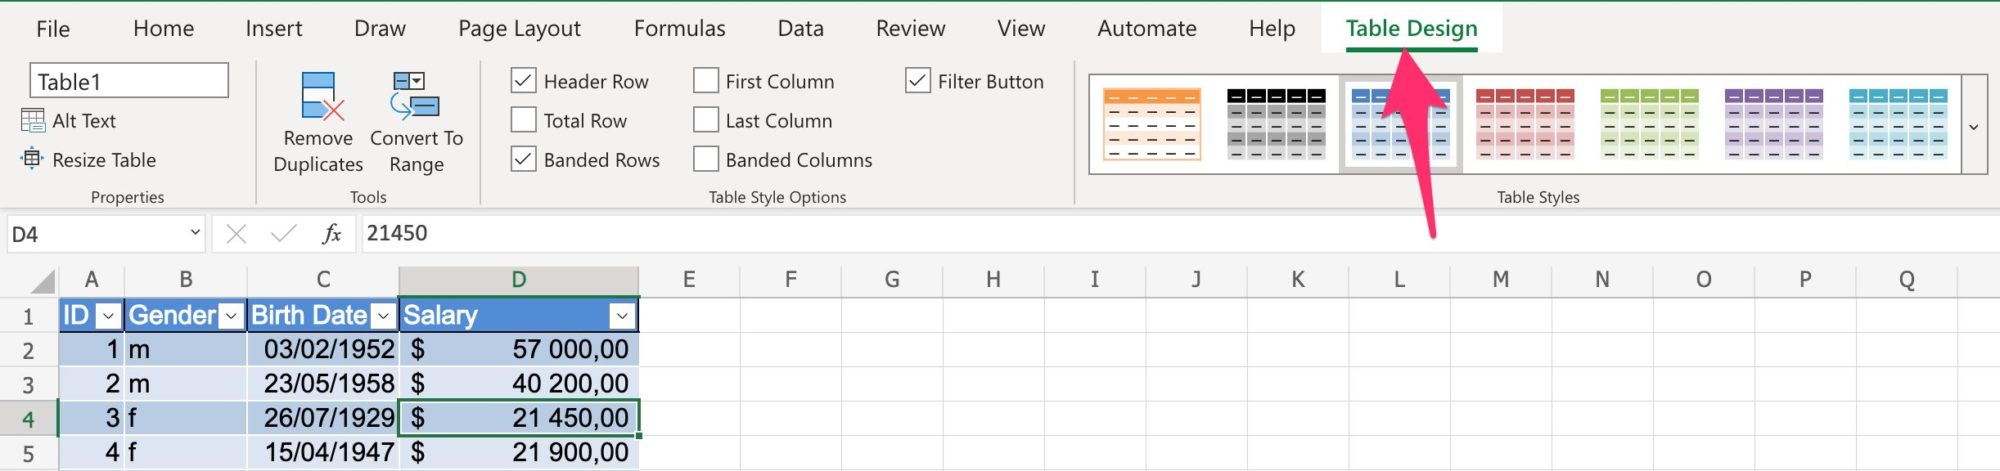
If you don’t, then chances are that you need to create a table in Excel before you can continue. Select the table in the dropdown.
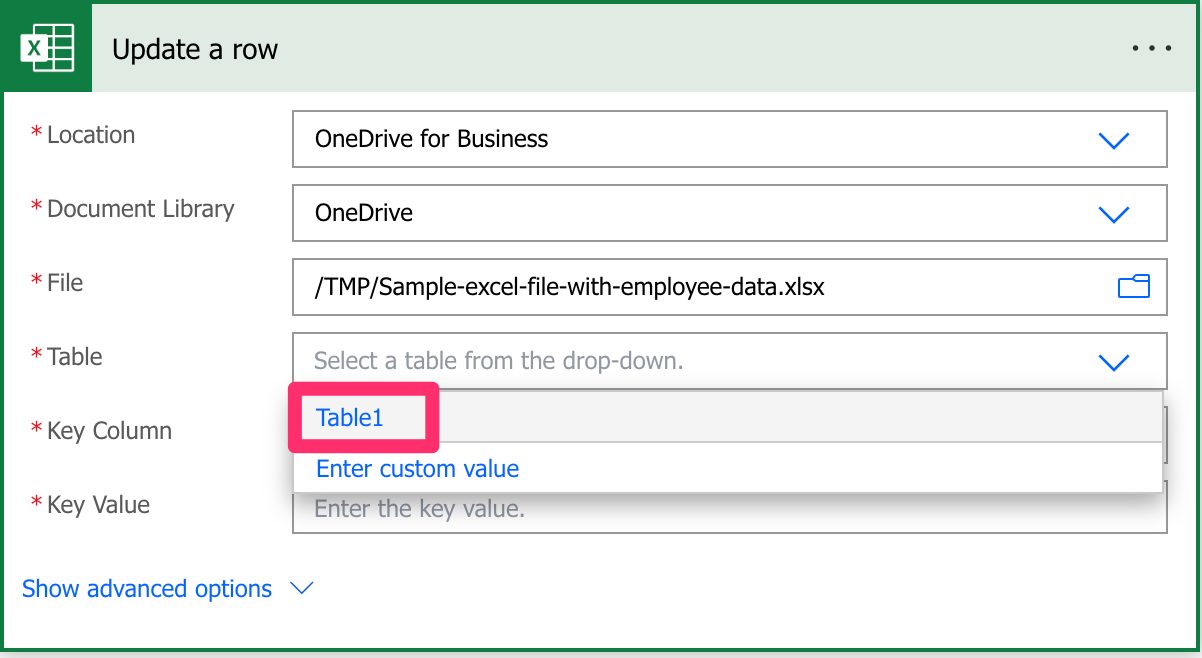
The Excel file can have multiple tables, so it’s essential to define the one you want to manipulate the data. Finally, you can provide the table’s name as a “dynamic field,” but to ensure that your Flows always work, I recommend picking it from the dropdown.
Key Column
Now that we have a file, we need to tell Power Automate how to identify the row we want to update. Since there could be multiple tables in Excel, Microsoft required a key column that identifies the row we want to update inside the defined table. If you don’t have one, you can use the “Add a key column to a table” action that will do it for you.
Since we provided the path before, Power Automate checks the file and gives us a list of the columns in the provided table.
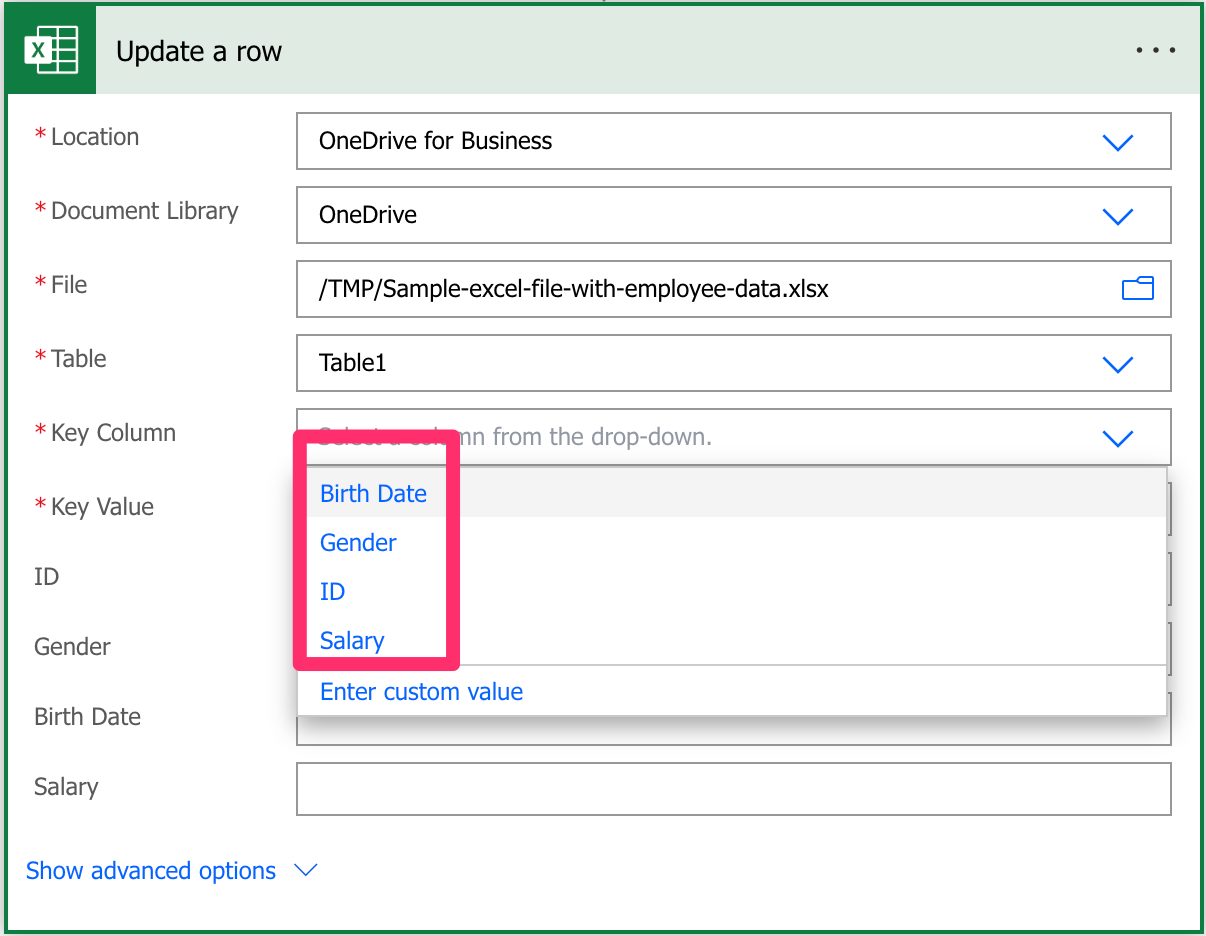
Notice that once we defined those fields, Power Automate added in the background additional fields for us to add information. This is only possible because we are not dynamically providing any of the fields, allowing Power Automate to access the file, get the columns, and add them as fields.
Please be aware that if you dynamically define the path, table, or file, you need to provide the “key column” name since Power Automate won’t find the list of columns before the Flow runs.
In case you don’t know what “Key Columns” are, I have an article here that explains them in a lot of detail.
Key Value
Finally, we need a key value that identifies the row we want to update from the table. Notice that we’re updating the item by providing an identifier, not the row number, since the same row can be inside multiple tables. The key value needs to be unique within the “key column” and should be a number.
Usage
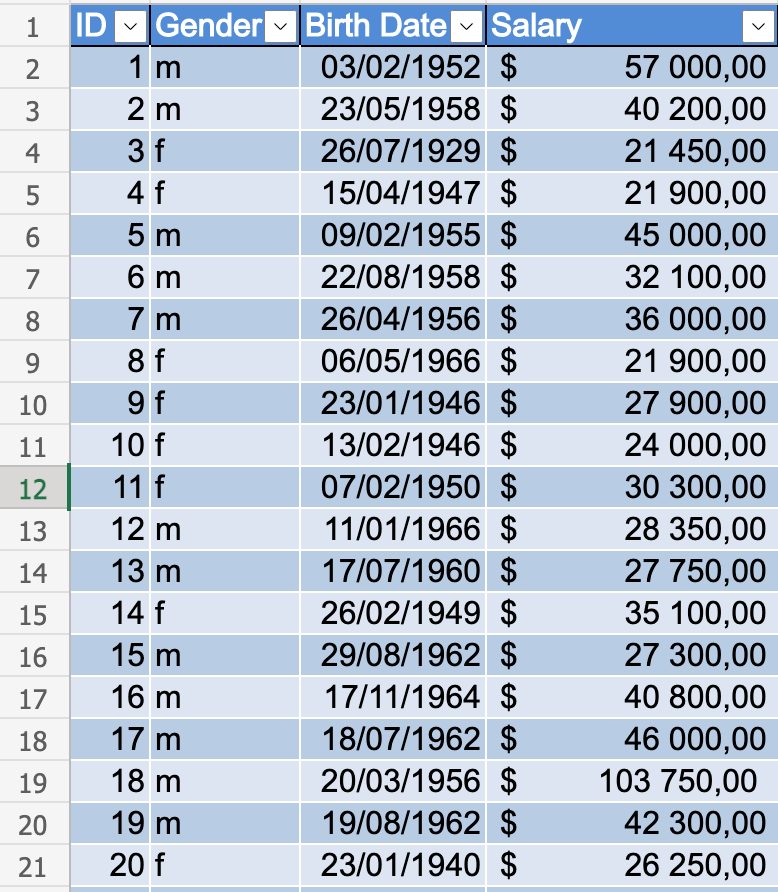
Let’s look at a test file with anonymous employee information.
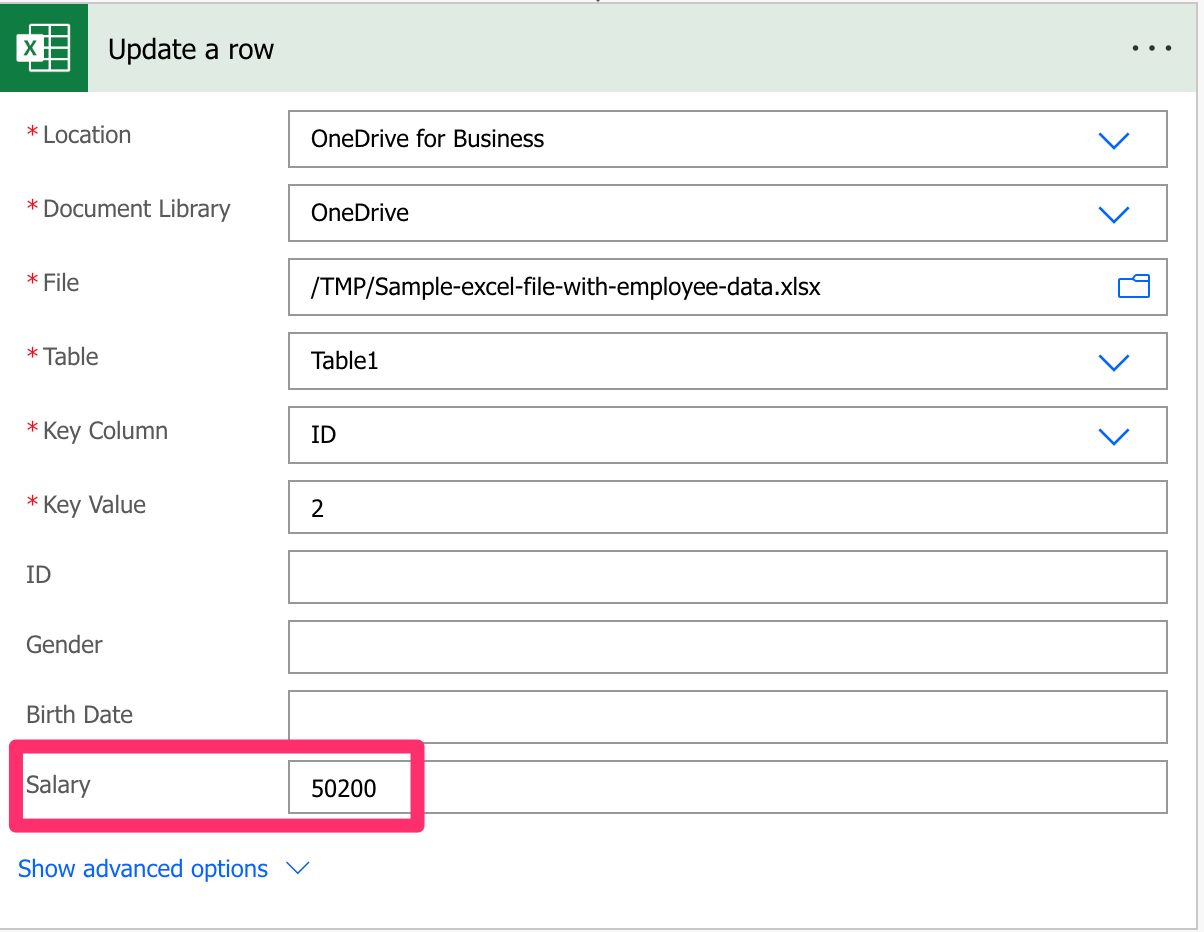
Let’s say we want to promote a person and update their salary to another value. Here’s what it looks like:
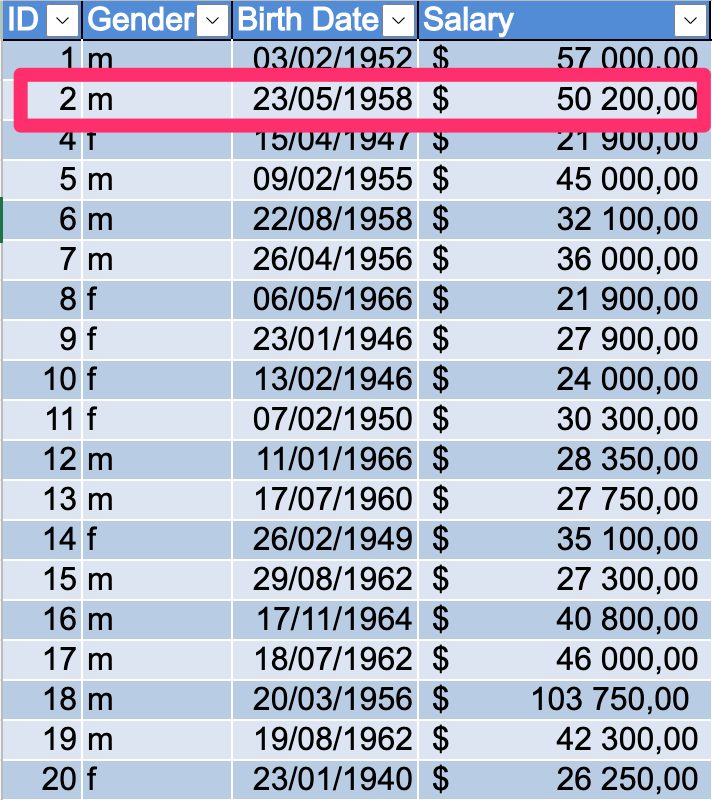
After we run, here’s what the Excel looks like:
Be careful to ensure that you have proper error handling, especially after this action, since the action will fail if the ID cannot be found with an exception like this:
No row was found with Id '3'.
Advanced Properties
As you can see, there are also advanced properties that we can take advantage of. When you toggle it, you get an additional field as follows:
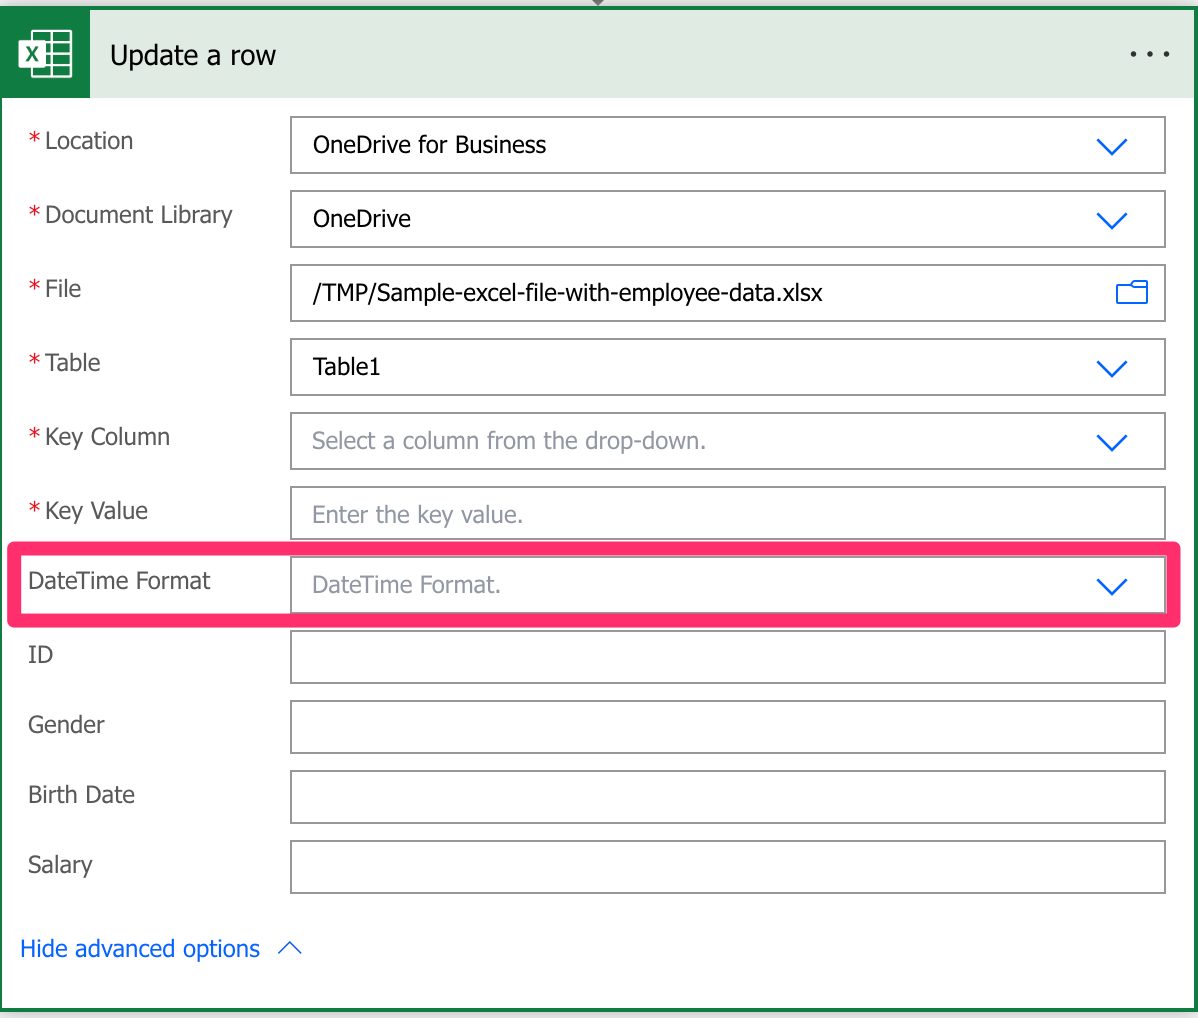
This field will define, for the dates fields, how the date should be provided. Remember that Excel internally stores the dates in a numeric format, even if it’s presented to you differently. So Power Automate enables us to define the format of the data with two options:
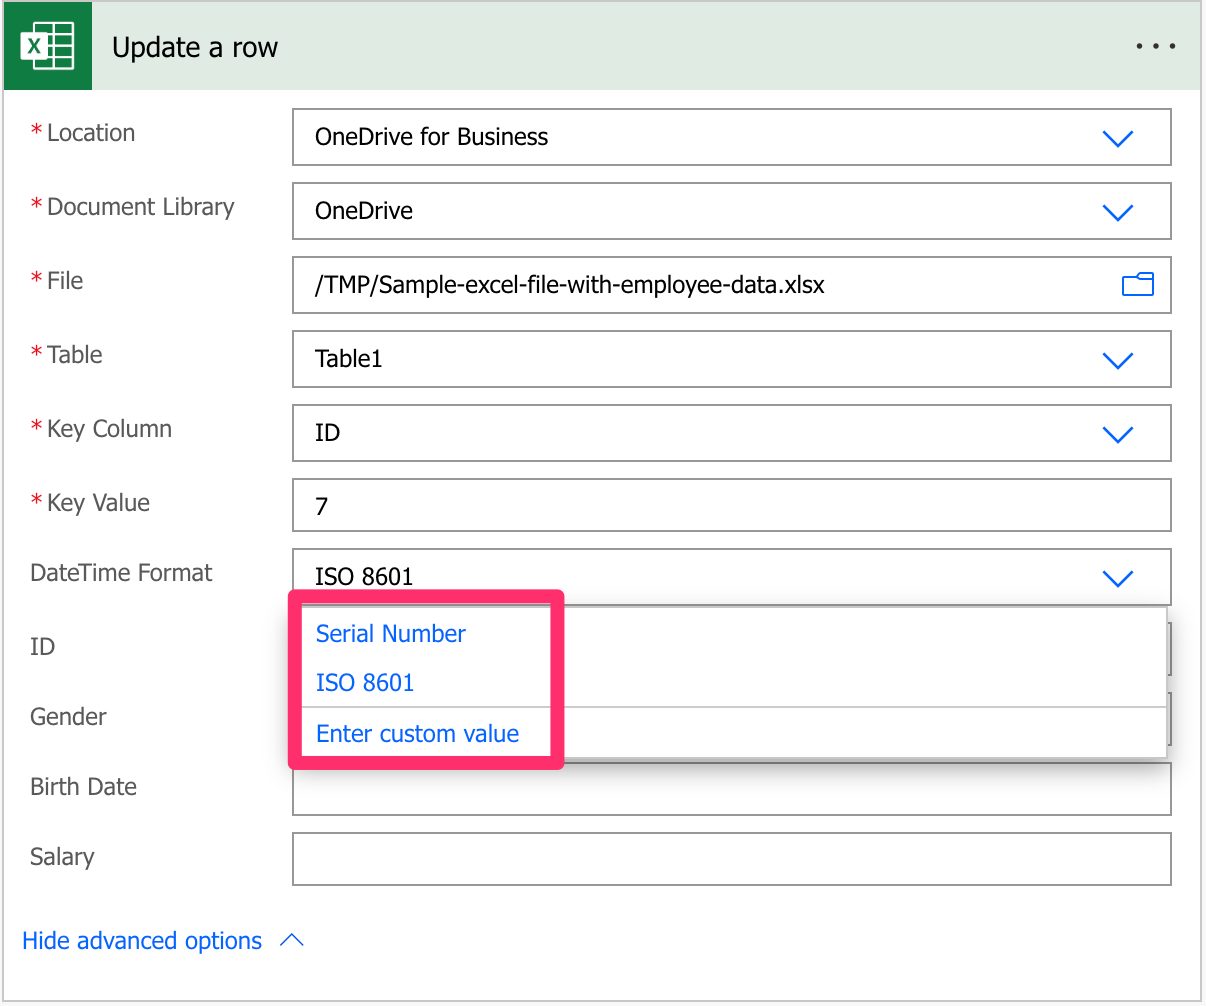
The “Serial Number” is the “native” way that Excel stores the date, meaning that if you want to provide a date, you need to provide a number. With “ISO 8601” you give a date that makes more sense to us but in a fixed format. Functions in Power Automate , like the utcNow() function, return the date already in that format. Still, if you have a date in a string, you can use the formatDateTime function to format it correctly.
Non-intuitive behaviors
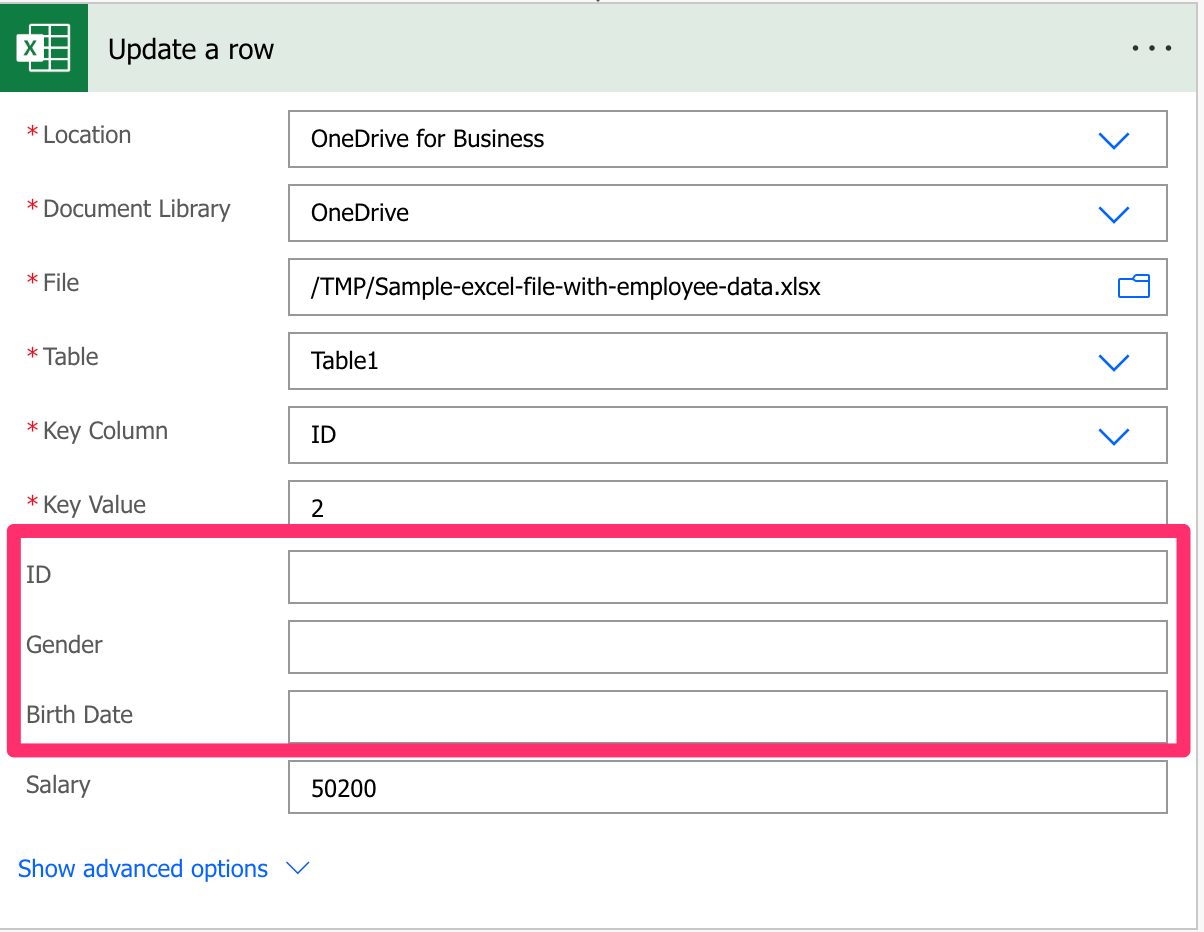
If you leave the values empty, it doesn’t mean you want to delete the values in Excel for that column. It means that you don’t want to make changes to that field. Notice the example above where I only filled in the “Salary” field since that was the only one I wanted to update.
If you want to remove the value from a column, please use the “null” special value that will signal to Power Automate that the information should be removed from the selected item.
Limitations
It could have been a temporary problem, but I got a lot of issues with some key column names, like “identifier”, for example. If you’re having issues with Flow returning strange error messages, consider changing to something like “Key Column”.
At this point should not be considered a limitation anymore, the “Update a row” action will only support Excel Workbook (xlsx) files, so you need to convert your Excel file before you can use the action.
Recommendations
Here are some things to keep in mind.
Name it correctly
In this case, the name is super important to provide the context of what we’re updating. Always build the name so that other people can understand what you are using without opening the action and checking the details.
Always add a comment
Adding a comment will also help avoid mistakes since we can indicate why that row is updated in Excel. Also, if you’re adding any elements dynamically, it’s a good practice to explain how the values are obtained. Indicate where the path comes from, for example, if it’s calculated and how. It’s essential to enable faster debugging when something goes wrong.
Always deal with errors
Have your Flow fail graciously and notify someone that something failed. It’s horrible to have failing Flows in Power Automate since they may go unlooked-for a while or generate even worse errors. I have a template that you can use to help you make your Flow resistant to issues. You can check all details here. Remember that if the “Key Value” doesn’t exist in the “Key Column,” the action will return an error, so it’s essential to have a parallel branch that catches these cases.
Back to the Power Automate Action Reference.
Photo by Peter Herrmann on Unsplash


What if the key value I need is not a number?
Good afternoon Everyone, I also have the same problem, when I have a key value that I want to update in more than 1 row for 2 or 3column, but only 1 column at the top is updated, how to solve this problem.
I want to update a row if the key value is 1, the status becomes OK.
For my current problem, when I update only rows in 1 column, not all columns that have key value 1.
Thank you.
Example
Key Status
1 OK
2 NG
1 OK