
Did you know you can trigger Flows for files directly in SharePoint? Let’s say that you have a contract that you want to send for approval. You need to generate a link to the file or attach it to an email, send it to the people who need to approve it, receive notifications, and merge changes. Or you press a button and let Power Automate do the work for you by using SharePoint “For a selected file” trigger that catches these requests.
Let’s see how to use it.
Where to find it?
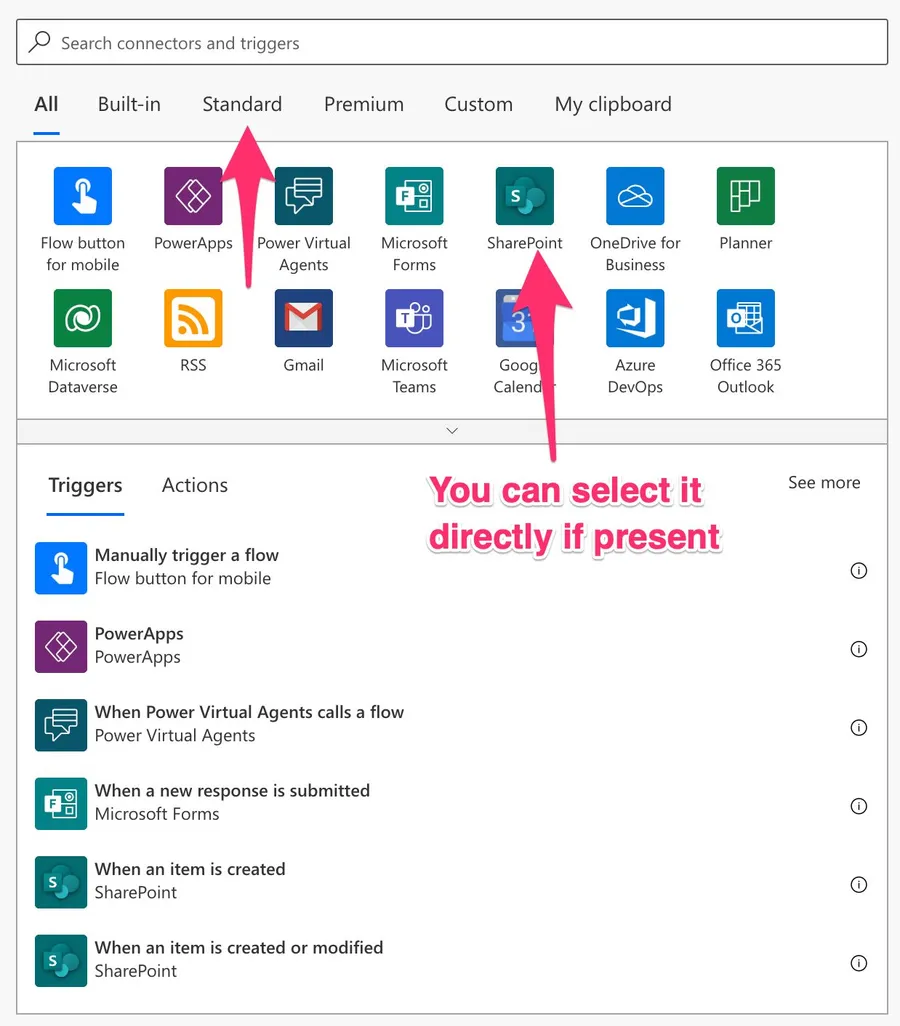
To find it, you can search for SharePoint “For a selected file” trigger or select “Standard”:
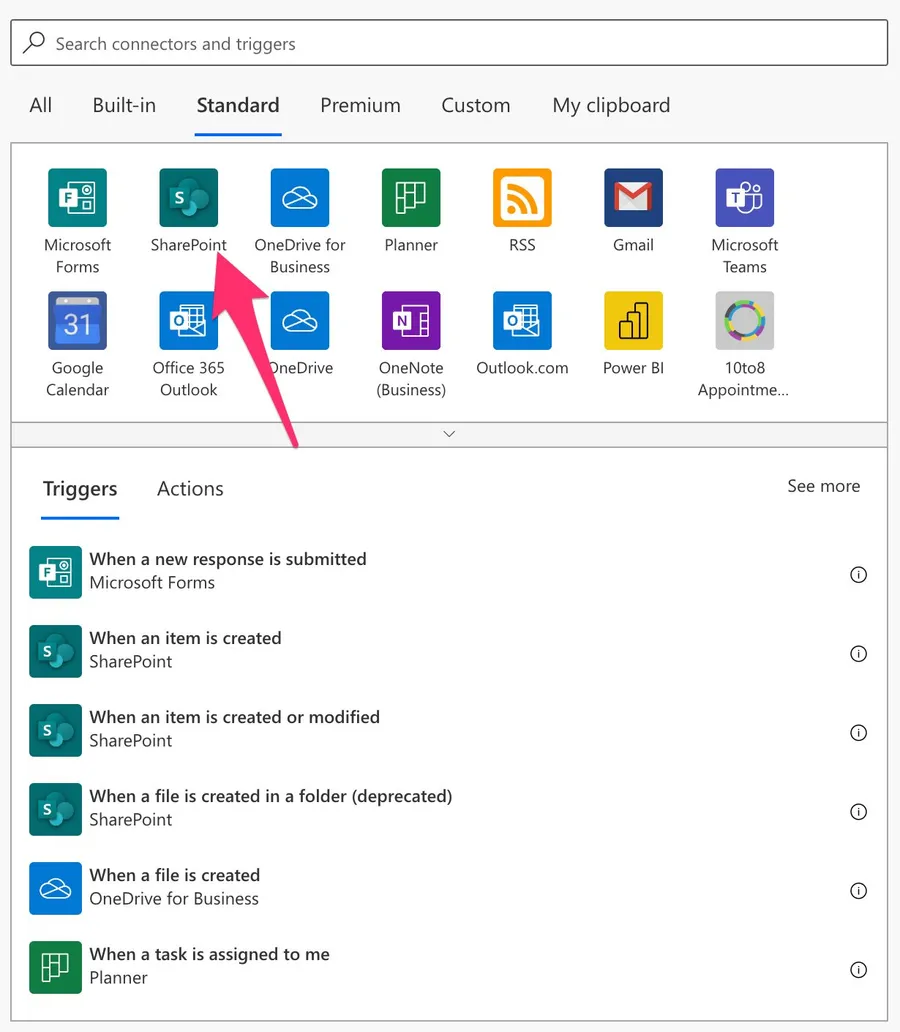
Select “SharePoint”:
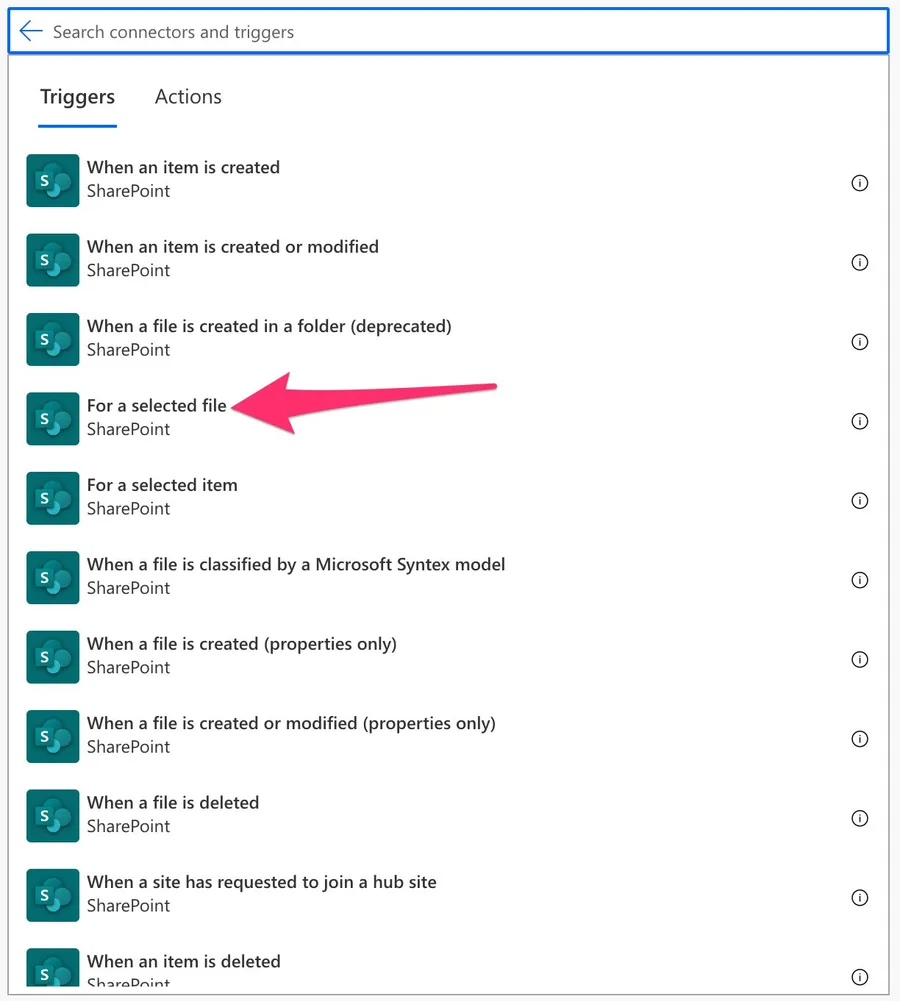
Pick “For a selected file” trigger:
Here’s what it looks like.
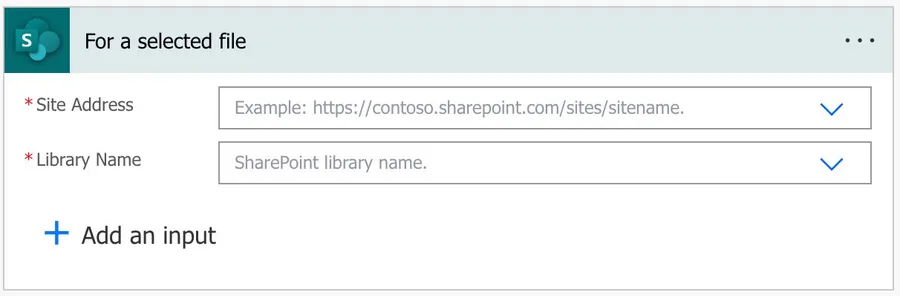
Let’s see the fields that we need to configure.
Fields
There are a few fields to configure so that you can take advantage of them.
Site address
We need a place to search for changes, so we need to configure the site address. There’s no way to select “all sites,” but this is a broad search parameter since a site could already have a lot of activity. If you want more sites, you need to replicate the trigger to consider all the sites you need.
Library Name
Within sites, there are multiple libraries, so we need to indicate what library we want. As before, we cannot have an “all libraries” filter, so if you have a lot of libraries, you need to duplicate the trigger for all of them.
Usage
Now that we have the site and library name configured, let’s see how to use it. First, let’s create a Flow with a trigger named “Approve Contract” (the name will be important later).

Now that we have a Flow with SharePoint “For a selected” trigger, let’s go to the SharePoint document library and see how to trigger the automation.
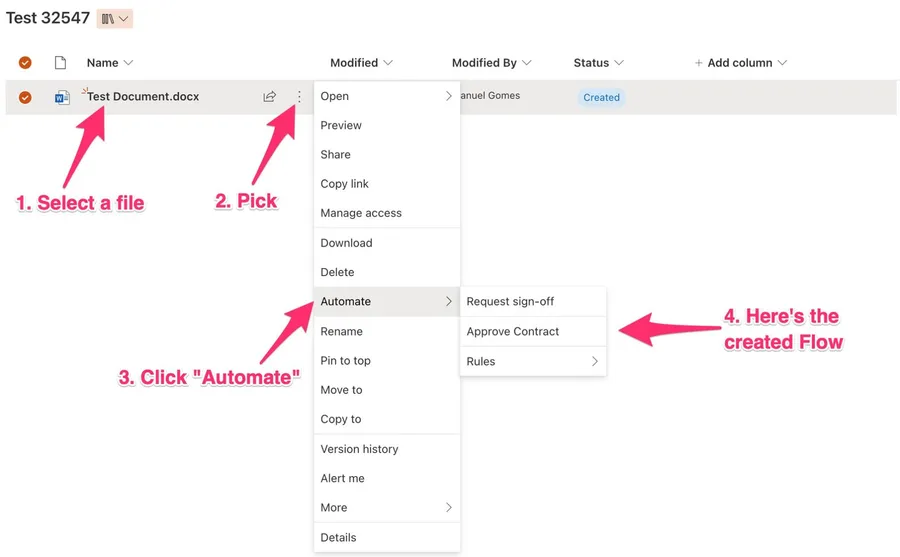
SharePoint did all the work in the backend, and it’s already displaying the Flow for us to run. No configuration is needed on the SharePoint side.
When you run, if it’s the first time, you may need to configure/confirm the connections.
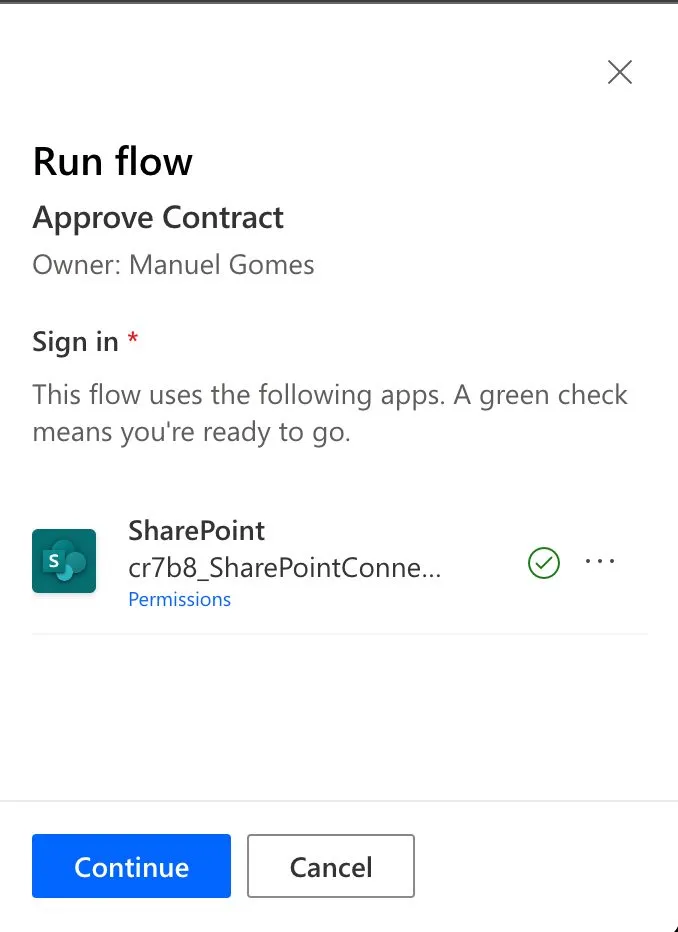
After this, the Flow will trigger on Power Automate.
Outputs
The trigger returns a lot of information in a JSON format, although the conversion from JSON is done automatically for you. Here’s an example:
{
    "headers": {
        ...
    },
    "body": {
        "entity": {
            "ID": 4,
            "itemUrl": "https://manueltgomescom.sharepoint.com/sites/Test/_layouts/15/Doc.aspx?sourcedoc=%7B5f82b4aa-827d-4c7d-b607-963b0542e7f7%7D&action=edit&uid=%3c139851-251a-4ee0-907f-24dcfd5c29c1%7D&ListItemId=4&ListId=%ed455c5b-349d-4c44-bc20-ec45ce49c417%7D&odsp=1&env=prod",
            "fileName": "Test Document.docx",
            "FileId": "4"
        }
    }
}
Notice that we only got the information about the file, not the file itself. Other triggers like SharePoint’s “When a file is created (properties only)” trigger, for example, will return the file metadata that we can use, but the SharePoint “For a selected file” will return the item ID. We can then use that ID and use the “Get File Metadata Action” action to get the file metadata for the file to parse.
Limitations
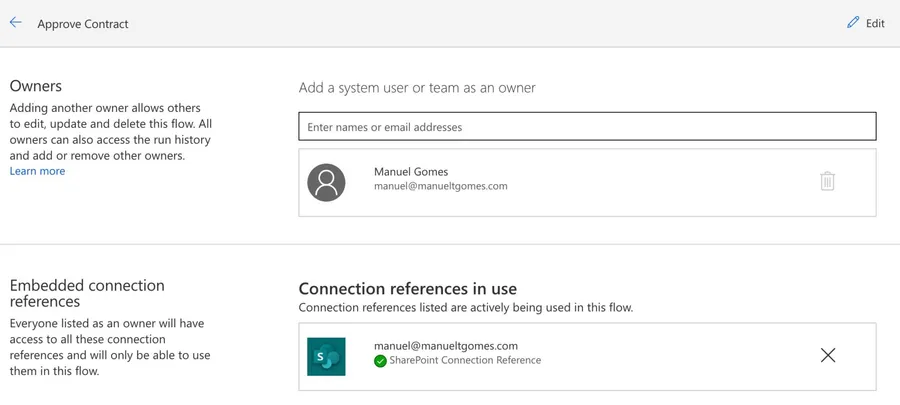
If you build the Flows in the “My Flows” section, only you will see them in SharePoint. This is not a limitation per se, but it’s something that you should be aware of. If you want other users to see the Flow, you need to share it with them like this:

Add the names or emails:
The Flow will not show in their SharePoint document library.
Recommendations
Here are some things to keep in mind.
Don’t use this for synchronization
I see many questions regarding synchronization between SharePoint document libraries, and SharePoint “For a selected file“ trigger is an excellent target to catch files that need replication. But I would strongly advise you not to do it. Synchronization of files is an amazingly complex topic in computer science, and we are all super when something doesn’t synchronize properly. If the trigger fails, data will be out of sync, and Power Automate won’t rerun it. If the data is changed on the destination folder, you already have a problem that will only worsen over time.
Name it correctly
The name is super important since we need to provide context for what we will do with the file. Keeping the name “For a selected file” won’t give any helpful context. Always build the name so that other people can understand what you are using without opening the action and checking the details.
Additional contracts to the name
Since you’ll be seeing the flow’s name in SharePoint, and it’s your only clue as to what it will do to the selected item, it’s essential o keep the names as straightforward as possible.
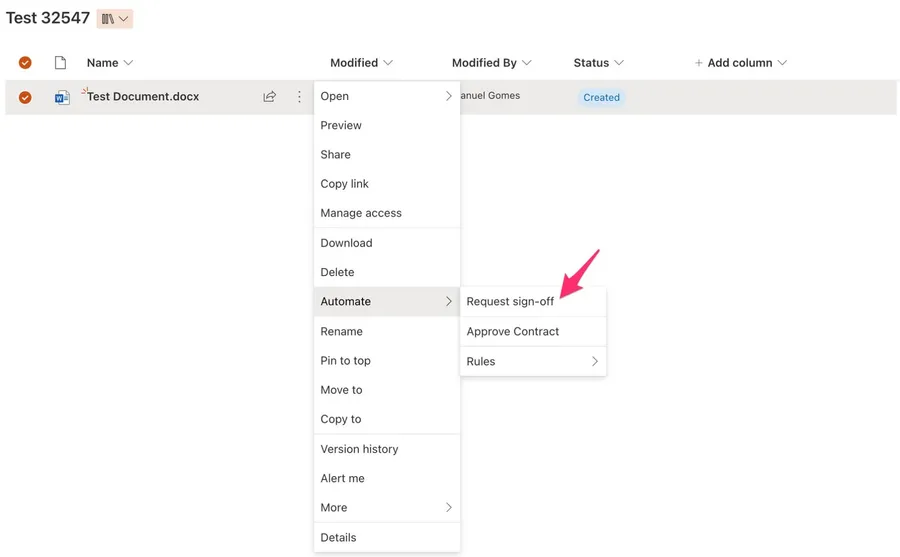
In this example, “Request sign-off” is not clear enough. Request sign-off of what? What will happen? Name it so that, even with only a few characters, people will know what happens when they trigger the automation.
Finally, this is the only exception to not using environment clues like “PROD” in the name. Space in SharePoint is limited; if the name is too long, it may be truncated.
Always add a comment
Adding a comment will also help avoid mistakes. Indicate what you’re expecting, why the Flow should be triggered, and what the data will be used. It’s essential to add comments when limiting the trigger with some custom rulessince these are not prominent in the UI, and people may get confused as to why the Flow doesn’t trigger when it’s simply a rule preventing it from doing so. It’s essential to enable faster debugging when something goes wrong.
Finally, let people know why you’re choosing the parameters you configured. For example, why do you select that folder if you have a folder defined? It may make sense now, but not in a few months.
An automated trigger is better than a scheduled one
Sometimes people are tempted to use scheduled triggers that pool the resources once in a while. This way, they can control when the information is fetched and save many Power Automate "triggers" if their quota is low. However, even if it isn't, it may be more efficient to do batch tasks than once by one. I understand, and in some cases, I can agree, but it brings a lot of difficulties in the process. For example, you may need to keep track of what changed from the last run until this one so that some things may get lost. Also, you're forcing something to happen periodically, even if there's no data.
I always recommend using these "automatic" triggers instead, where they trigger one by one, but only when there's data, so you're always sure you get something to do. Also, debugging triggers that parse a single data point instead of multiple simultaneously is much easier. If something fails on one, then you can fix the Flow and repeat the process. But while parsing multiple ones, things can get a lot harder.
Back to the Power Automate Trigger Reference.
Photo by Brienne Hong on Unsplash


Hi Manuel! Do we have a way to restrict the flow to a specific folder under a library? Or all the files in that library can see the flow we build? Thanks in advance
Can you do this with multiple files? Meaning in the screenshot that you showed where you are right clicking on the file and selecting "power automate"; can you select two or more files instead of one? I tried it on my end and you can't.
Great Share! @Manuel T. Gomes