
Power Automate has excellent support for Office 365 Outlook actions like the “Get email” action. This action does exactly what you would expect. It gets an email and lets you use its properties. But it has other features worth noting, so today, we’ll explore how to use it efficiently.
Where to find it?
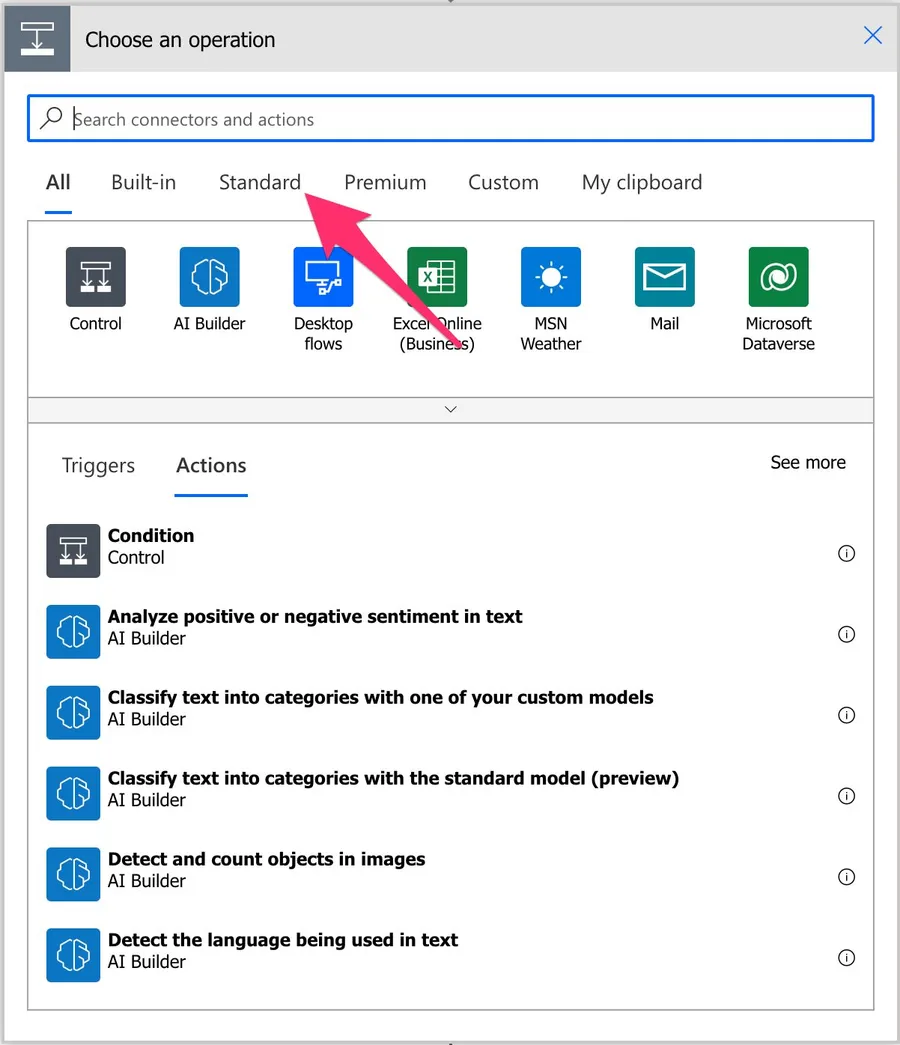
To find it, you need to go to “Standard”:
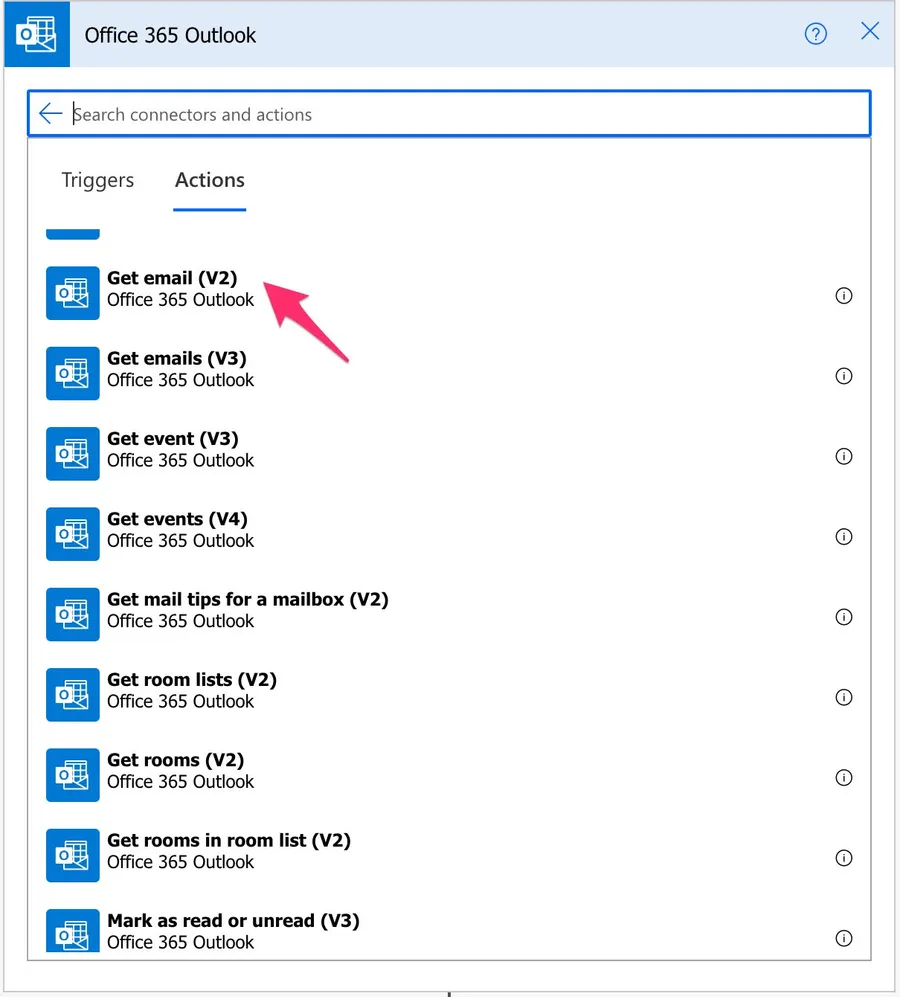
Find “Office 365 Outlook” (you may need to expand it to find it)

Pick the “Get email” action.
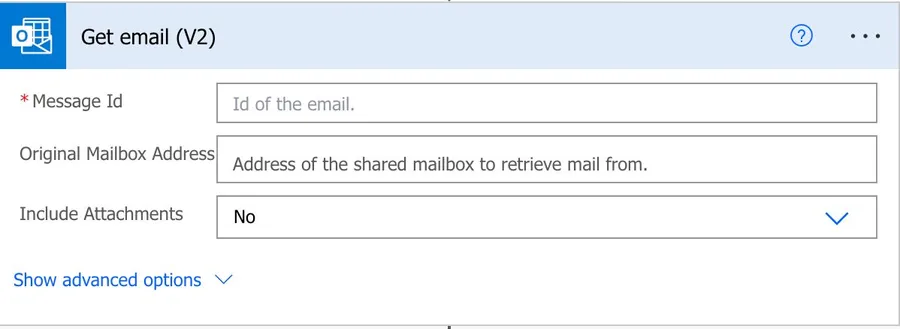
Here’s what it looks like.
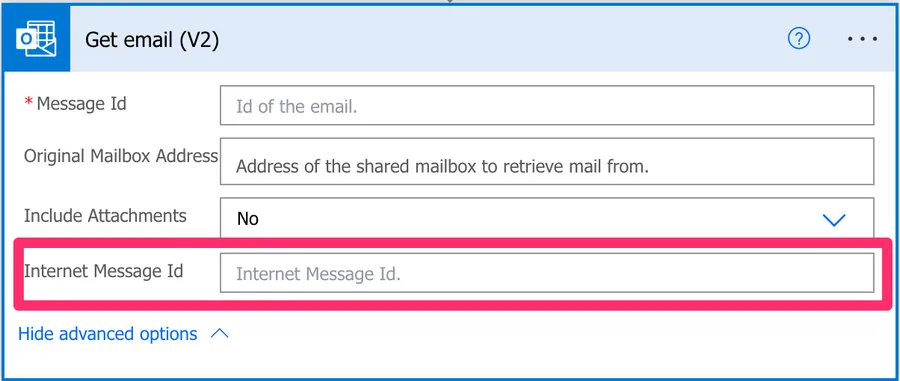
You also have advanced options that you can explore. Here’s how to expose them:
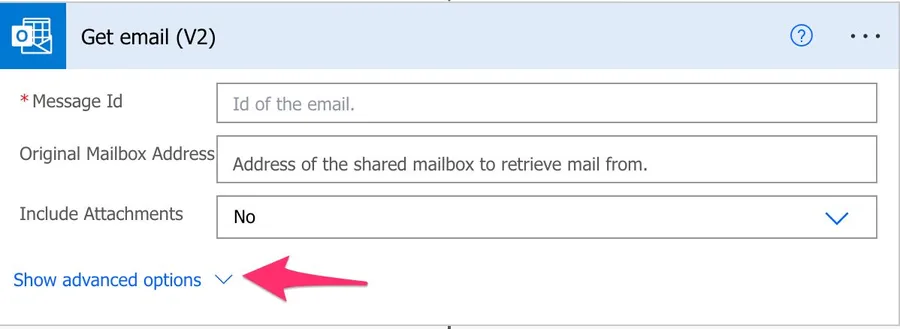
Here’s what they look like.
Now that we know how to find it let’s understand how to use it, but first, let’s explore the fields.
Fields
Before using the action, we need to configure some fields, so let’s explore them in detail.
Message ID
The message ID is something that you need to fetch from somewhere. It’s not something deterministic that you can calculate, so another action or trigger usually provides it. For example, if you have the trigger “When a new email arrives”, you’ll automatically get the ID you can use to get the email. This goes for any action that deals with emails, like the “Delete Email” action.
The “Get email” action won’t be able to get your email without this, and it will fail if you can’t find an email with that ID.
Another important note is that the ID is independent of where the email is. You don’t have a different ID if the email is moved from the inbox to another folder, for example, so you can consider that the ID follows the email in your mailbox.
Finally, some actions return “Conversation Id” or even “ID”. Don’t be confused because these are different than the ones we want to get the email. So be sure always to use the “Message ID” when getting an email.
Original Mailbox Address
You don’t need to fill in this field unless you want to access an email in another, like a shared mailbox. The default folder list will always be your inbox in your mailbox.
Include Attachments
Since attachments can be big, to make your Flow run faster, Power Automate only returns attachments if you want them. It will make things faster since the trigger will get less information from the server, and Power Automate will have less information to parse.
Internet Message Id
The “Internet Message Id” is the identifier of the email generated by the “sending” system. It’s different than the “Conversation Id” or “Message Id” because these are generated by the “receiving” email system. If you know, for some reason, the email’s “Internet Message Id” and want to filter by it, then you can do it using this field.
Usage
It’s pretty simple how to do it. You provide the “Message Id” of the email you want to get, and Power Automate will return the email and its details, depending on the parameters chosen previously.
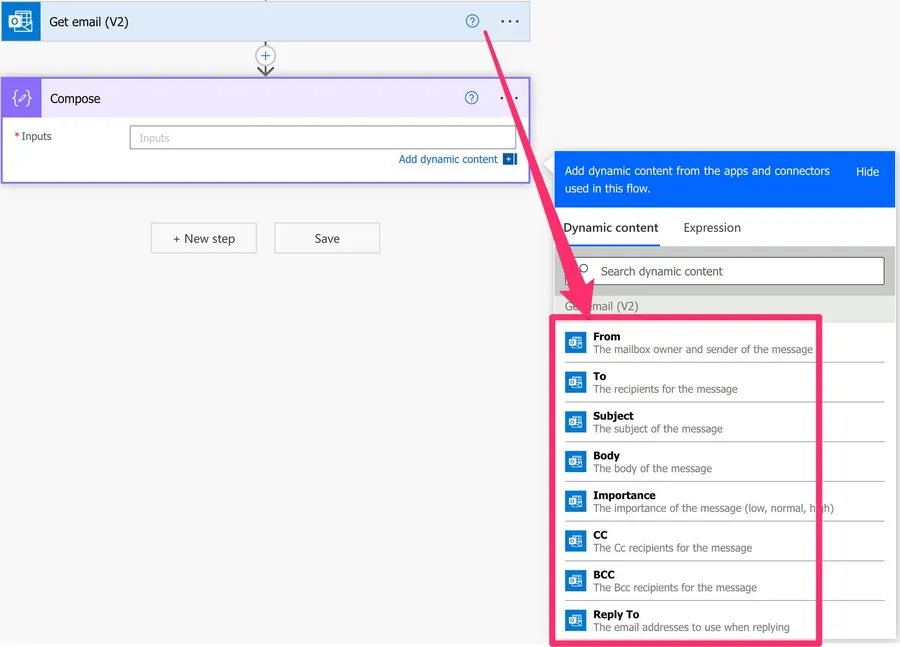
Since we’re only getting one email, you don’t need to use the “Apply to Each” action and can access the properties directly. Here’s how to access the properties using a “Compose” action.
You need, however, to use an “Apply to Each” action if you’re accusing the attachments property since they may be more than 1 in the email.
Non-intuitive behaviors
If you receive an email with attachments, Power Automate will always get the email with the “Get email” action with the attachments regardless of the value you select on the “Include Attachments” field. The only difference with choosing “Yes” is that you’ll get the contents of the files as well as all the other information. For example:
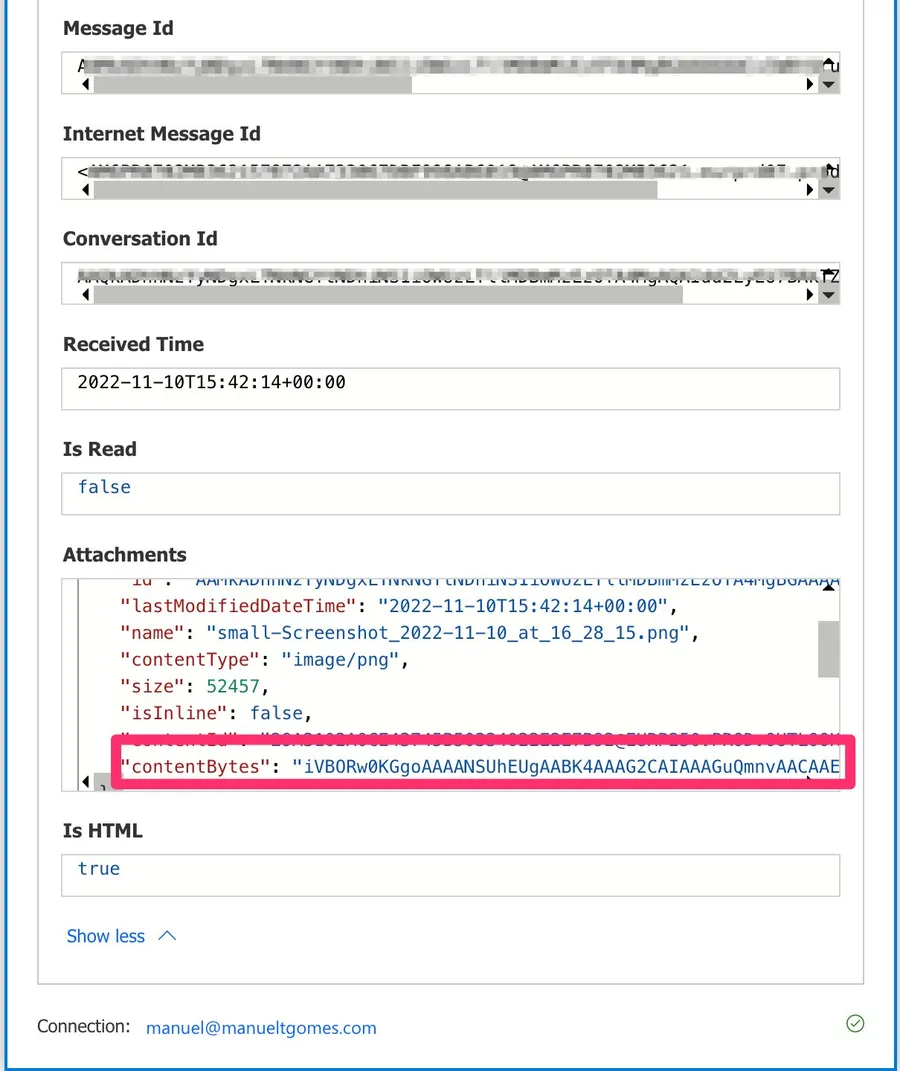
By default, the “Include Attachments” is defined as “No” so if you do not see the file’s contents, enable it and re-run your Flows and they will be returned.
Limitations
You need to have permission to access a shared mailbox before you can get the email. You won’t be able to configure any permission in the “Get email” action since they are configured centrally, so consult with your administrator if there’s something wrong. A good rule is if you can see the shared mailbox in your desktop version of Outlook, then you have permission. This is not a limitation but generates some issues when trying to use this action.
Recommendations
Here are some things to keep in mind.
Name it correctly
The name is super important in this case since we’re getting a defined email, meaning that if we include only the “Get email” title, we would not have any context on why we’re getting the email. Always build the name so that other people can understand what you are using without opening the action and checking the details.
Always add a comment
Adding a comment will also help avoid mistakes. Indicate why you’re getting that email or selected to get all attachments with the “Include Attachments” example. That information is essential to enable faster debugging when something goes wrong.
Always deal with errors
Have your Flow fail graciously and notify someone that something failed. It’s horrible to have failing Flows in Power Automate since they may go unlooked-for a while or generate even worse errors. I have a template that you can use to help you make your Flow resistant to issues. You can check all details here.
Back to the Power Automate Action Reference.
Photo by charlesdeluvio on Unsplash


Hi Manuel, Thank you for this detailed article, that I was found it when I research more information about "Get Message" and the "Message ID". You mention that "the ID is independent of where the email is. You don’t have a different ID if the email is moved from the inbox to another folder" but when testing a simple flow that is triggered when a message arrives in the inbox, then "Get Email", "Move Email" then finally "Get Moved Email" on the "Move Email" action will generate a new "Message ID". So, if the last action "Get Email" after move is not using the Message ID from the Move action but Triggered Message ID, the flow will fail. So the question I have: Is there a way to have an single ID that follow the message all over the user mailbox and is not affected by the "move" actions?
Hi Manuel Thank you very much for this detailed article. The requirement is to automatically store an email as a SharePoint list item when it is received. Additionally, any replies or forwarded emails should be tracked and recorded in the same SharePoint list item. However, during this process, the email title might change (e.g., annotations may be added), which could result in the ConversationId changing as well. Currently, I am using Power Automate’s trigger. What should I use to identify the original email reliably?